
I wanted to show a little bit of variety in my Artisan
entries so I decided to share a vintage card with some coloring. This is what I
came up with.
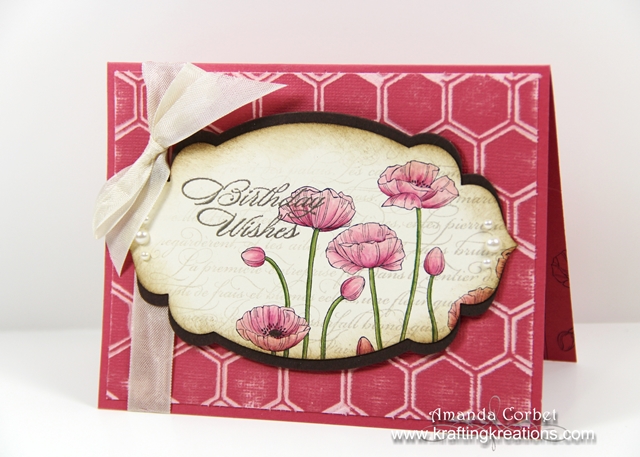
- Stamps: En Francais, Pleasant Poppies, Bring on the Cake
- Card Stock: Primrose Petals, Primrose Petals Core’dinations, Very Vanilla,
- Ink: Sahara Sand, Soft Suede, Black Stazon, Versamark
- Markers: Primrose Petals, Raspberry Ripple, Gumball Green, Lucky Limeade, Pink Pirouette, Early Espresso, Blender Pen
- Accessories: Stamping Sponges, Apothecary Accents Framelits, Honeycomb embossing folder, Stampin’ Sanding Block, Stampin’ Dimensionals, Very Vanilla Seam Binding Ribbon, Pearls, craft knife
I started off with a 5-1/2” x 8-1/2” piece of Primrose
Petals card stock and scored it at 4-1/4”. Next I cut a piece of Primrose
Petals Core’dinations card stock 4” x 5-1/4”. I ran this layer through the Big
Shot in the Honeycomb embossing folder and used the Stampin’ Sanding Block to
sand off the raised texture pretty well. I adhered this layer onto the card
front.
Next I cut a piece of Very Vanilla card stock and Early
Espresso card stock 3-1/2” x 5-1/2”. I ran both of these through the Big Shot
with the Apothecary Accents framelit.

On the Very Vanilla label I stamped the En Francais
Background stamp by inking up half the stamp diagonally with Sahara Sand ink
then used a Stampin’ Sponge to sponge off some of the color on the edge of the
inked portion. I stamped this onto the label. This technique makes the text
fade off at an angle. It really is a lovely effect.
I stamped the Pleasant Poppies image onto the card stock
in Early Espresso ink. Then I used my markers to color in the flowers. For the
greeting I stamped the image from Bring on the Cake onto the left side of the
label in Versamark ink, poured on some Pewter embossing powder, tapped off the
excess, and heated it with my Heat Tool. Finally I sponged some Soft Suede ink
around the entire label.
I used Paper Snips to cut the Early Espresso label in
half length-wise from point to point then adhered each half behind the Very
Vanilla label to create a mat. I used the Paper Snips again to trim the points
that extended past the Very Vanilla label. I added three Pearls onto each end
of the label and adhered the label onto the center of the card front with
Stampin’ Dimensionals.

This wasn’t quite enough yet so I used my craft knife to
cut a slit in the fold of the card just large enough for my Very Vanilla Seam
Binding ribbon to slide through. I tied the ribbon into a bow and trimmed the
ribbon ends.
So very vintage and pretty! This would have been a
perfect birthday card for my sister. I might have to re-create it sometime
before October.
