Showing posts with label Holiday Decor. Show all posts

Tuesday, March 29, 2016

Simple Spring Canvas

Whenever I'm in my craft room painting I always find myself working on at least three different projects at once. I will work on one and get to a point where I have to let the paint dry so I will start on another and get to a point where the paint has to dry, and it goes on. Sometimes I clean or sort or organize during this drying time, but other times I end up with my craft island covered in paint projects all in various stages of progress. I guess I'm just impatient and don't like having to wait...

This last weekend I was finishing up some projects to post to DecoArt's projects page and while those were drying I worked on this fun little spring canvas. Since it was Easter weekend I wanted to embrace the vibrant colors and some fun flowers for spring. 

This is not a sponsored post, however, I have received paint products from DecoArt for previous projects that I used to create this project. I also absolutely love working with DecoArt paints and choose to use them exclusively for my decorative painting projects regardless of whether or not I buy them or DecoArt sends them to me. 


I started off with a 5 x 7 canvas board that I painted with streaks of Citron Green, Snow White , and Purple Pizzaz Americana Acrylic paint with a 1/2" flat brush. To get these streaks of color to blend you want to work quickly while the paint is still wet. 


After the streak of vibrant color dried completely I used DecoArt Media Fluid Acrylics in Titanium White and Medium Grey Value 6 with a round brush to paint the daisy petals. I painted the petals first in just Titamium White and then went back with a mix of Titanium White and Medium Grey Value 6 to add very light grey shadows onto the petals. Then this was allowed to dry while I worked on another project. 


For the flower centers I used a 3/4" circle paper punch on a scrap of cardstock to use as a stencil. Then I used a stipple brush with Hansa Yellow Light to fill in the center of the flower. For the shadows around the edges of the flower center I stippled Transparent Yellow Iron Oxide and Burnt Sienna just around the edges of the circle stencil. Then the flower stems were added with a combination of Green Gold and Viridian Green Hue for the shadows. 


Once the paint was dry I sealed the canvas with a coat of Satin Varnish. I used my Silhouette to cut a bunny from some Silver Glimmer Paper and glued it onto the canvas then gave the canvas another coat of Satin Varnish to seal in all the glitter. 

Finally I needed a way to hang the canvas so I used my Crop-A-Dile to punch two holes in the top corners which I threaded some white lace ribbon through and tied it into a bow. 


This simple and sweet little canvas ended up making a lovely Easter gift for my best friend.

What do you like to do while you're waiting for paint to dry?


Monday, February 9, 2015

Fun Valentine's Decor

I have another sweet little Valentine's decor project to share with you today. I saw this version on Pinterest and thought it was so absolutely adorable that I just HAD to make one! I wanted to just stick with using what I had on hand already so mine is a little different. 

Heart Jar Candle Holder

Do you love decorating your home for all sorts of holidays? I really like to dress up my mantle as the seasons and holidays change. But I realized this year that I don't have any Valentine's Day decorations. None. At all. So I got started fixing that. Last week I made a burlap heart banner and today I have two more fun yet easy projects to share with you. First off, a heart jar candle holder. These are all over Pinterest and they look so cute so I thought I would try my hand at making one.


Friday, February 6, 2015

Burlap Valentine's Banner

I decided on an impulse that I wanted to make a pretty heart banner for my mantle so I can have some Valentine's Day decor. If you want to get one for yourself or see how it's made then keep on reading!

Friday, December 20, 2013

DIY Let it SNOW Sign

Dress up your home for winter with this adorable snow inspired sign! 


~ Supplies ~
Don't be afraid to try this project. It is so easy! Since we're going for a vintage distressed look you don't have to worry about each step being perfect. 

1. Start off by sanding your 1 x 4 with the 80 grit sand paper just to smooth out the top, corners, and sides. Then paint a coat of Charcoal Gray on the top. It is actually a very nice dark brown. Allow that to dry for about 15 minutes or so. 

2. Layout the following on your Silhouette software and cut some vinyl. It doesn't matter what color you use because we are just using it as a template. For the "Let it" I used the font ALS Script and made it 2-1/2" tall x 7" wide. For the "SNOW" I used the font Algerian and made it 2-1/2" tall x 9-3/4" wide. Weed out the bits of vinyl you don't want and use transfer paper to pick up your vinyl. Once it's on the transfer paper I cut my words and snowflake clusters apart so I could add each one separately. 

3. Now that your Charcoal Gray layer is dry add the "Let it" closer to the top left of the board. Coat the top with a layer of Decou-Page. This will prevent any seepage of color from the next layer of paint. 


4. After the Decou-Page is dry add a layer of Deep Midnight Blue paint over the top and all four sides. Allow this layer to dry.
 

5. Apply the "SNOW" vinyl closer to the bottom right of the board. Paint on another layer of Decou-Page on the top. 


6. Once the Decou-Page is dry paint on a layer of Whispering Turquoise just on the top. Allow to dry. 


7. Apply the snowflake clusters in both corners and coat the top with a layer of Decou-Page Now apply two coats of Cool White allowing the paint to dry between coats. 


The thing I love about acrylic paint is that it only takes about 15-20 minutes for the paint to dry so you don't have to wait very long between coats. When your waiting for a layer to dry is a great time to straighten up or organize a little bit of your craft room while your waiting for it to dry. Or to work on another project between coats. 

8. Now take a needle tool and start pulling up your vinyl layers starting with your snowflake clusters, "SNOW", and finally "Let it". The layers of Decou-Page between each coat of paint prevented the paint layers from seeping 


9. Now take your sand paper and sand the edges until you like how it looks. On mine you can see some of each layer of paint and even some of the pine below. I love it! Then coat with one final layer of Decou-Page on the top and sides just to seal everything in. Right after you finish applying the Decou-Page sprinkle on some ultra fine glitter just lightly over the whole thing. Allow to dry completely. 


10. Take a paper towel or Swiffer sweeper wipe to brush off the excess glitter. 


Crafting Tip: Keep a box of the Swiffer sweeper refills next to your craft area. They are great for               cleaning up glitter! 

11. Screw two eye hooks in the top of the board. You can just screw these in by hand or use some pliers to get it screwed in all the way. If you're having a little bit of trouble getting the eye screws started just take a hammer and tap it a couple times to get the threads to grip the wood. 


12. Cut a piece of 20 gauge craft wire 32" long. Bend up one end about 2 inches from the end of the wire. Add a small handful of clear beads onto the wire then bend up the other end about 2 inches from the end of the wire. Now take the wire and twist it around your finger to create a few decorative loops in the wire. Make sure to let a few beads slide into the loop. Add a loop in the center of the wire to hang your sign from. 


13. Insert the wire ends into the eye hook, then twist the short end of the wire around the wire. Use pliers to pinch the end of the wire close to the wire so you don't get scratched by it. 


Now simply hang up your lovely sign and enjoy! 


This sign was really easy to make even though it requires a few steps. I worked on it across a few evenings and I am so happy with how it came out! Don't you just love it when a project turns out almost exactly how you saw it in your head? 

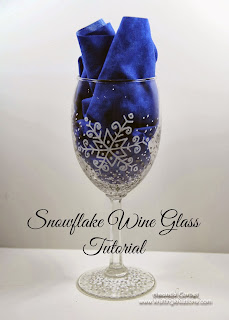
I hope you've enjoyed this fun tutorial and get a chance to make one of these for yourself! If you would like to check out some other snowflake inspired projects like my Snowflake Gift Box and Snowflake Wine Glass Tutorial just click on the pictures and it will take you to the post! 

Snowflake Wine Glass Tutorial
Snowflake Gift Box Tutorial

Monday, December 5, 2011

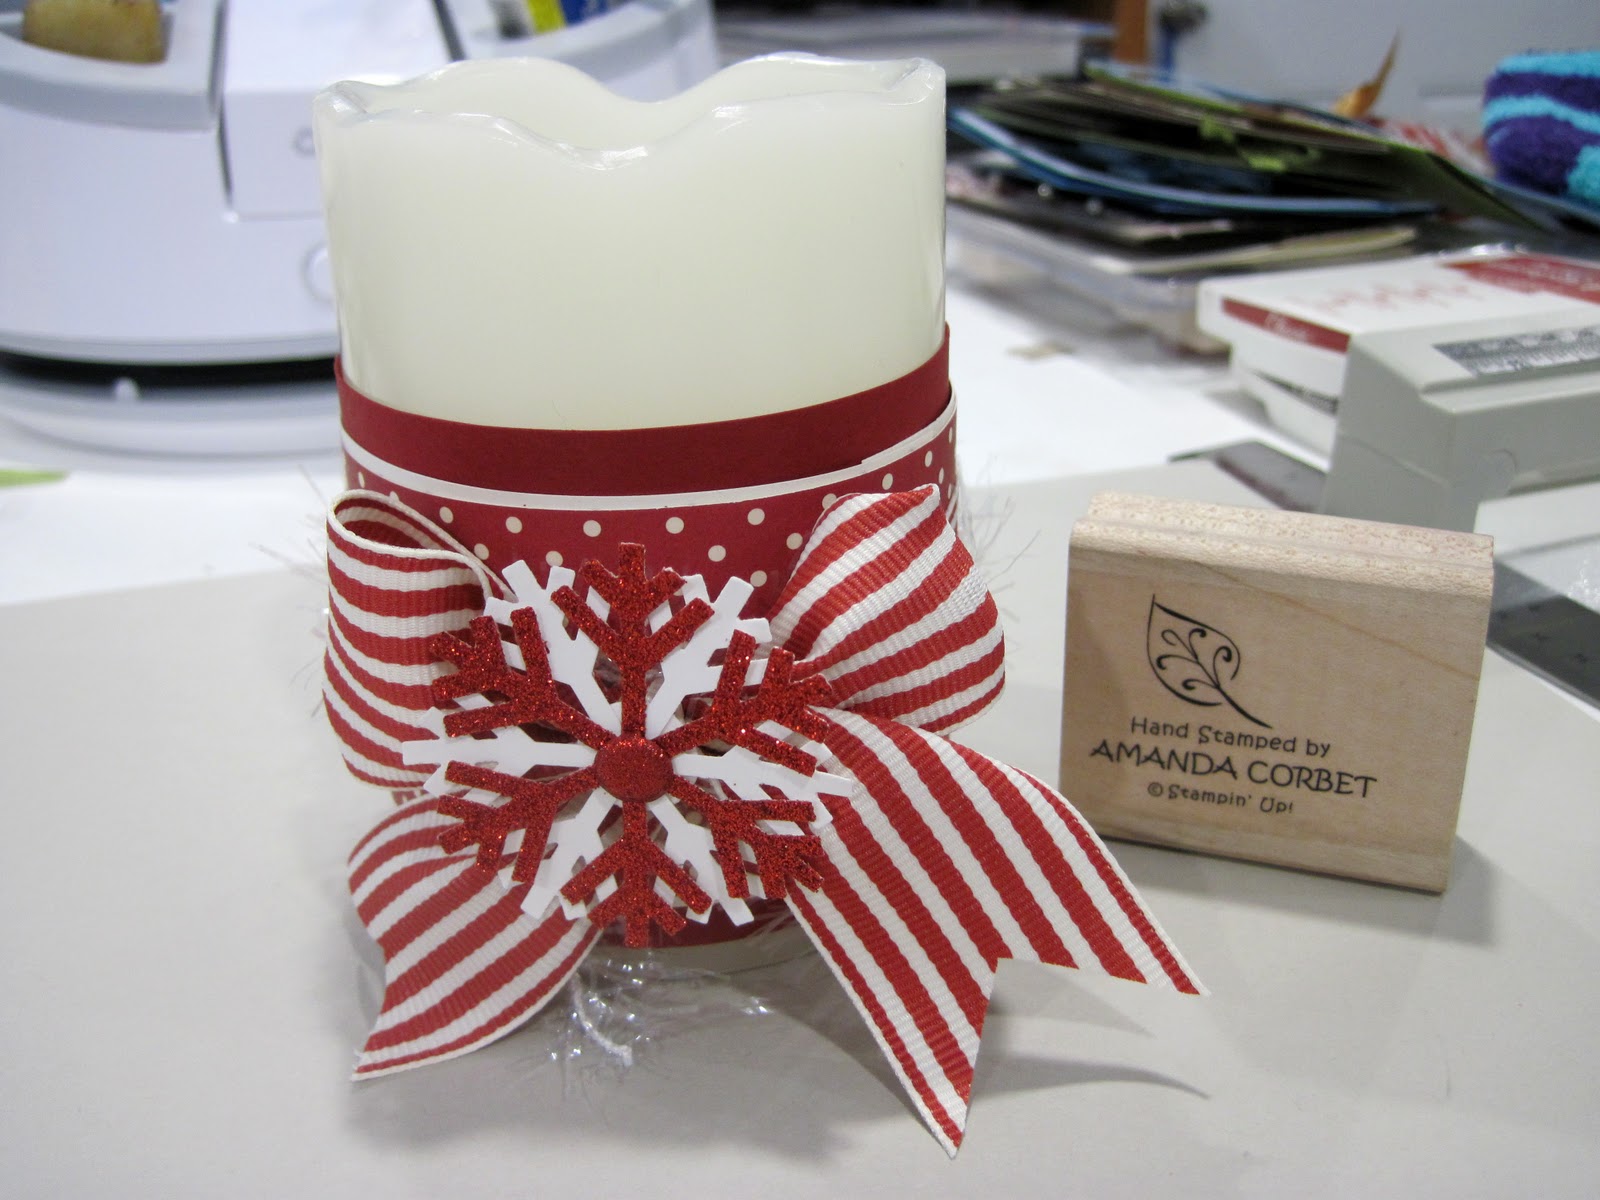
Candy Cane Candle

This is the fifth project that I sent in for the 12 Days of Christmas Swap! I seem to be a little stuck on the candy cane theme this year.


Stamps: None
Card Stock: Very Vanilla, Cherry Cobbler
DSP: Jolly Holiday (retired), Real Red Glimmer Paper
Ink: None
Accessories: 1-1/4" Real Red grosgrain ribbon (retired), Tinsel Trim (retired), Glimmer Brad, Snowflake Punch, Sticky Strip, Paper Snips, Mini Glue Dots, Paper Piercer, Mat Pack


I picked up a few battery powered electric candles to decorate. The cards stock and DSP aren't adhered to the candle, I couldn't manage to get anything to stick well, so it is just a tight fitting sleeve on the cande. The Cherry Cobbler cardsock was cut at 2-1/2" x 9-3/4". Sticky Strip was added to the end of the card stock the card stock was tightly wrapped around the candle and the Sticky Strip end was adhered down. I just repeated this step with a 2" x 9-3/4" piece of Very Vanilla card stock, then again with a 1-7/8" x 9-3/4" piece of Jolly Holiday DSP.

A piece of 1-1/4" Real Red striped grosgrain ribbon was wrapped around the candle and tied into a bow. Clear Tinsel Trim was wrapped around the candle and tied into a knot. Then one snowflake was punched from Very Vanilla cardstock and one was punched from Cherry Cobbler cardstock with the Snowflake punch. The Paper Piercer and Mat Pack were used to pierce a hole in the center of the snowflakes, a red Glimmer Brad was added and this was adhered to the bow with several Mini Glue Dots.

So now the candles are all decorated and pretty and hopefully brightening up two ladies' holiday decor!

Thanks for stopping by!

Friday, December 2, 2011

Glass Christmas Ornaments

Here is the gift for Day 2 of the 12 Days of Christmas! I found these great oval shaped bevled glass ornaments at an antique store in Parkville, Missouri. They were really cheap and I just knew they would make fabulous ornaments.

So here they are:

Front of the first one: 

Back of the first one:  

Front of the second one: 

 Back of the second one:
Stamps: All Holidays (retired), Bells & Boughs, Dasher
Cardstock: Very Vanilla
DSP: Deck the Halls DSP (retired)
Ink: Real Red, Crumb Cake, Chocolate Chip, Versamark
Markers: Versamarker
Accessories: 5/8" Chocolate Chip Grosgrain Ribbon, Dazzling Details, Crystal Effects, Paper Snips, craft knife, pencil, Gold Embossing Powder, Ovals die, Stampin' Sponge, Heat Tool

A tutorial for these will be coming soon! I have to get more of these beveled glass ornaments first! But in the mean time here is how I did it.

To add the embossed Dasher first clean the beveled side of your ornament with rubbing alcohol. Then ink up Dasher in Versamark ink and stamp it onto the glass. Press down really well. Pour your embossing powder over the stamped image, tap off the excess, and heat it with the heat tool. It will take a long time to emboss the image because you have to wait for the glass to heat up. Now if your Dasher image didn't come out perfect then use a Versamarker to color in the spots that need more embossing powder, pour the powder on, tap off the excess, and heat the image again with the heat tool. Now this is important...THE GLASS WILL BE VERY HOT, DO NOT TOUCH IT, JUST LEAVE IT WHERE IT IS AND LET IT COOL FOR A GOOD 15 MINUTES.

          Note: You have to stamp and emboss your image before you adhere the DSP to the back of the ornament. If you try to emboss the image after the DSP is adhered to the back of the ornament the heat will cause the glue to un-attach from the glass. The reason I know.....well....lets just say I started out with three ornaments but only finished with two.

After the ornament cooled I placed the beveled glass ornament on top of the DSP that I wanted to use and traced around it with a circle. Then I cut around the pencil line leaving about 1/4" extra DSP around the pencil line. I cleaned the flat side of the glass ornament with rubbing alcohol. After the alcohol dried I liberally applied Crystal Effects to the entire ornament. You will need to just about cover the ornament with Crystal Effects. Then I placed the ornament onto the DSP and pressed the glass onto the paper and wiggled it a little to remove any air bubbles. Allow this to dry overnight.

Trim the extra paper off around the ornament with Paper Snips and cut the paper out of the hole with a craft knife. I then cut out an oval from a scrap of Very Vanilla cardstock and stamped it with the image from Bells & Boughs in Crumb Cake ink. The greeting from All Holidays was stamped in Real Red ink. I heat set the ink with my Heat Tool and adhered the oval to the backside of the DSP with Anywhere Glue Stick. I applied Dazzling Details around the edge of my oval and allowed it to dry completely. Then I completely covered the back of the ornament with Crystal Effects to seal in the paper. Just add some ribbon to hang the ornament with and you're done!

Thanks for stopping by!


Saturday, November 12, 2011

Lattice Ornament


Tis the season to craft for Christmas fa la la la la, la la la la.......

Last week I saw THIS fabulous tutorial over on Splitcoast Stampers. I knew I just HAD to make this! However, I don't have that particular non SU die and I wanted to make something similar using SU materials. So here is what I came up with.


Here is what you will need to create this beauty:
Cardstock: Textured Whisper White
Ink: Marina Mist
Acessories: Lattice Die, Brayer, Tombow Multi-Purpose Adhesive, Mini Glue Dots, 1/8" Marina Mist Taffeta Ribbon, Dazzling Details, shimmer mist (Shimmer Paint + rubbing alcohol in a misting bottle), Sticky Strip, Bone Folder

 1. Cut your textured Whisper White cardstock into 4" x 4" pieces. You will need 18 of these. Two 12 x 12 sheets work perfectly. I do suggest only using textured cardstock or designer series paper. For this technique to work properly you need a paper that is more flexible than standard cardstock. The textured cardstock worked fabulously so that is what I highly recommend.

2. Brayer one side of the cardstock with Marina Mist ink. If you brayer on the back side of the textured cardstock you will get a more even coverage like the one on the right below. If you brayer on the front of the textured cardstock you will get one like the one of the left where you can see white spots from the texture. Either works, it is just a matter of preference.


3. Run all 18 pieces of cardstock through the Big Shot on the Lattice Die. This is the perfect project for when your Big Shot is feeling neglected because by the time you've cut out all 18 of these babies you will have spent some quality time cranking the Big Shot.


4. Fold the lattice pieces in half as shown below.

Imporant note: The color that you want to be primarily seen is the one that needs to be on the inside of the fold. The color that you want peeking out needs to be on the outside of the fold.

I wanted the white to be the primary color that shows so I folded my lattice pieces with the white on the inside and used a bone folder to get a nice crisp fold.


5. Add a teeny tiny spot of Tombow Multi-Purpose Adhesive in the locations shown with the black circles. It is very important to put the glue in the correct location on each layer!  Fold the lattice over and press down in the spots where the glue is. Hold it there for 10 seconds or so and then continue on to the next step.


6. Here you have the same lattice that you glue together above. Apply more teeny tiny spots of glue in the locations shown below with the black circles.


7. Place a second lattice on top of the first one lining it up as best you can. Put glue in the locations shown below with the black circles. It is the same three locations that you used above in step 5. Fold the bottom section up and press down in the locations where the glue is for about 10 seconds.  


8. Now you have two lattices folded in half stacked on top of one another. Set this stack of 2 aside and repeat steps 5 - 8 on the remaining lattices. You will now have 9 stacks of two lattices all glued and ready to go.


9. Take one stack of two and place glue in the locations shown below with the black circles. Line up another stack of two on top and press down in the locations where the glue is for about 10 seconds or so. Repeat until you have all of your lattices glued up in one tall stack.


10. Place sticky strip in the locations shown below. I ran out of my 1/4" wide SU sticky strip and used an 1/8" wide from another brand. Either one will work. You just want sticky strip in all the locations where the folds of the lattice are stacked together.


11. I fanned out my layers a bit and just left it set for about 20 minutes or so just to let the glue completely dry before forming the ornament. When you form the ornament you are going to be pulling on those glue joints to create the shape and you want the glue really dry before pulling too hard.


12. Cut a 20" piece of 1/8" Marina Mist Taffeta Ribbon and adhere it to the sticky strip in the middle so that the ribbon is folded in half and will create a loop for the ornament to hang on. Using a Hobby Blade fold a Mini Glue Dot in half and place a mini glue dot in the four locations shown below with the black circles.  


 13. Pull one side of the lattice around to meet the other side and pinch down really well where the glue dots are. This will form your ornament and hold it closed.


Now I'm a bit insane and think that anything on the tree should sparkle. So I sprayed my ornament with my shimmer mist which is just four drops of shimmer paint mixed with rubbing alcohol in a travel size hair spray bottle. This gives the ornament a subtle sparkle, but I wanted it MORE sparkly! So I used some Dazzling Details and spread it on all of the little pointy petals in the middle and the sections where the blue is showing at the top and bottom. So most all of the blue sections that you see are sparkly!


I would say that all in all this puppy probably took about 2 hours to make. Granted that is counting about 30 minutes just spreading on the Dazzling Details. But you end up with a pretty ornament. Below is one that I made using Holly Berry Bouquet DSP. I think it is pretty, but the pattern makes it so you can't see as much of the lattice detail as easily.

I personally prefer the simpler white and blue one. But whatever your taste I hope you get a chance to try one of these. It really isn't too hard, you just have to pay attention to where you're putting the glue.


Thanks for stopping by!


Monday, October 31, 2011

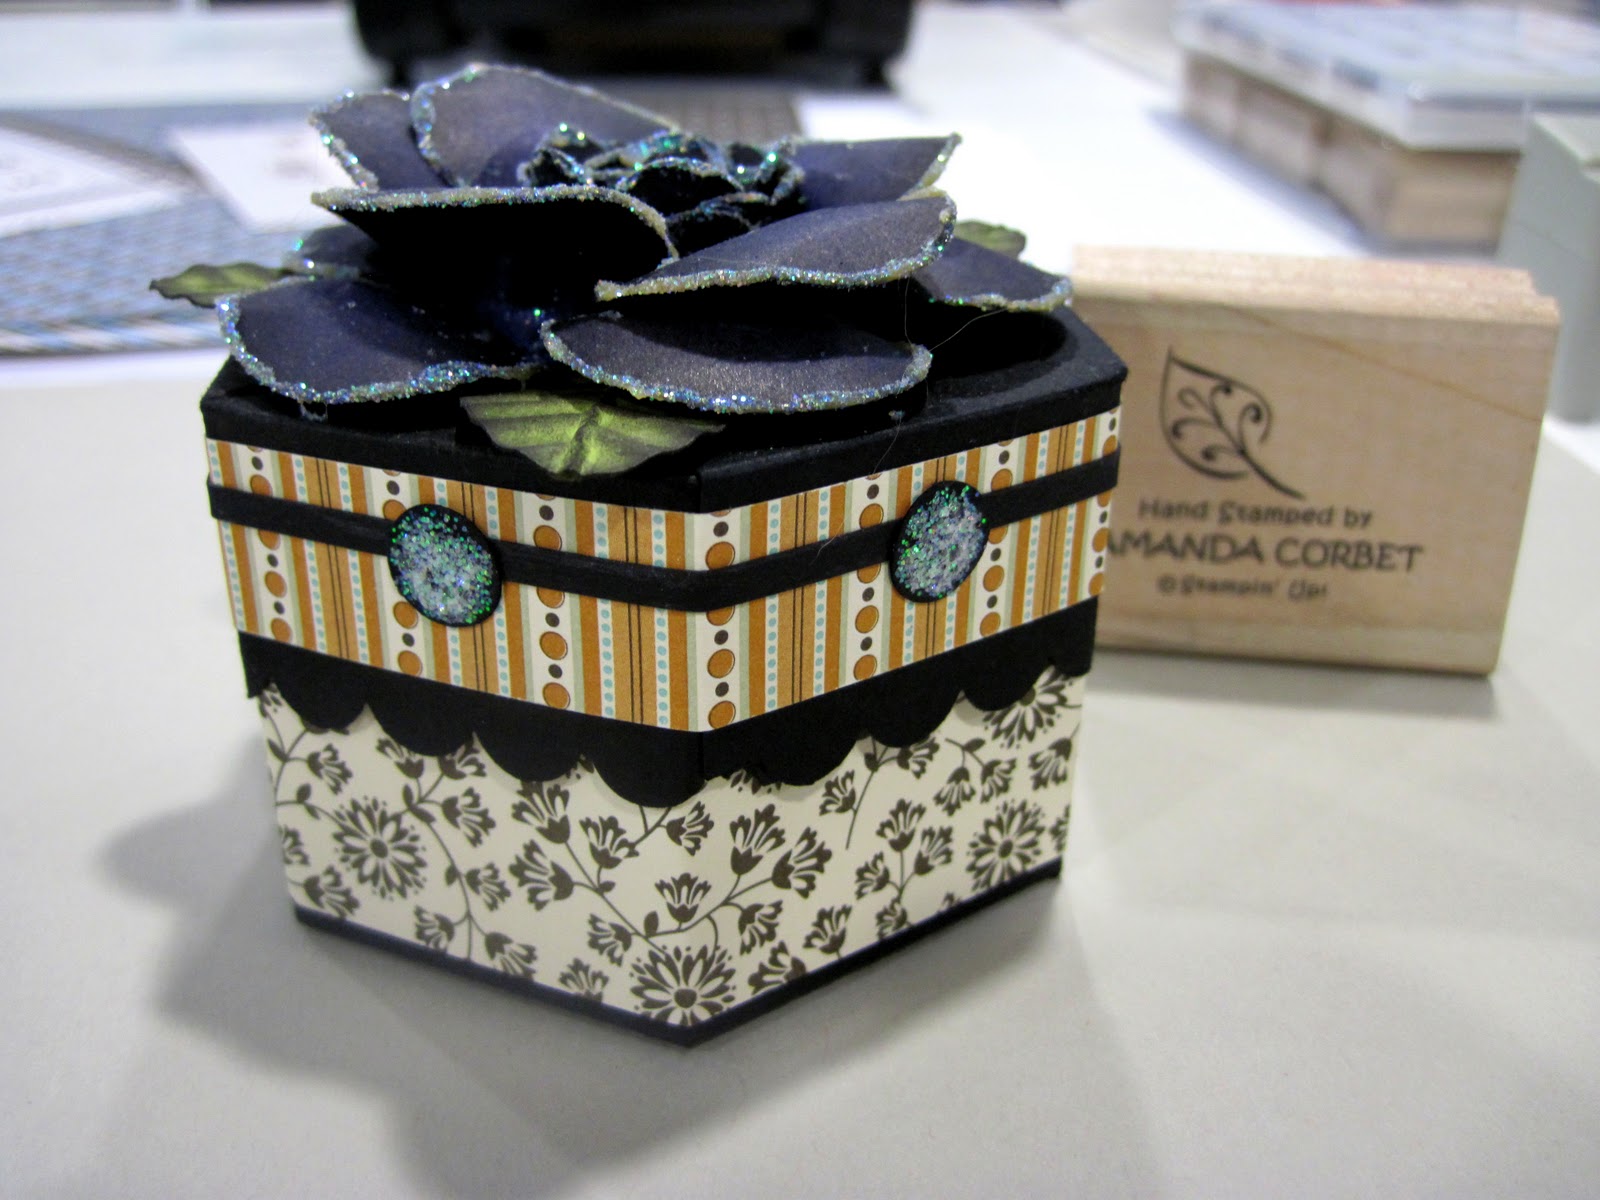
Black Rose Box

I was playing around with a fabulous Milk Carton Box tutorial that was created by Sunghee at Creativity In Progress. I will have the links to both of the tutorials that I used on this project at the end of the post.


Cardstock: Basic Black, Concord Crush, Lucky Limeade
DSP: Spice Cake
Ink: Basic Black, Early Espresso
Accessories: Mini Milk Carton Die, Owl Punch, 1 ¾” x 7/8” Oval Punch, Crimper, Tombow Multi-Purpose Adhesive, Dazzling Diamonds, Dazzling Details, Mini Glue Dots, Stampin’ Sponge, Scallop Edge Border Punch, 2 3/8” Scalloped Circle Punch, Paper Snips, Sticky Strip

Anyway… I made this little black milk carton box out of Basic Black cardstock just to try out the tutorial and it was sitting there on my work table. I just had to decorate it, so I decided to make a Halloween themed gift box. I wrapped the box bottom with a strip of Spice Cake DSP. Then I wrapped the top of the box with another pattern from the Spice Cake DSP.

I had another one of those 1/8” strips of cardstock on my table so I adhered that to the box top. The width was a little uneven where the strip ends met, so that meant I had to use something to cover the seam, which also means adding one to the center of all six sides. So I punched out six circles from Basic Black cardstock using the largest circle in the Owl Punch. I glued the circles on the sides of the lid and applied Dazzling Details to the circles to give them some sparkle.

For the rose I used Valita’s Owl Punch Rose tutorial. I used Concord Crush cardstock sponged with Basic Black ink for the flower petals. After the rose was completely formed I edged each petal and the center with Tombow Multi-Purpose Adhesive and then sprinkled Dazzling Diamonds glitter over the glue and tapped off the excess. The rose was set aside to dry while I created the leaves.

The leaves were made by punching Lucky Limeade cardstock three times with the 1 ¾” x 7/8” Oval Punch. The leaves were then folded in half and run through the crimper at an angle. Once you un-fold the cardstock you now have a leaf with veins! The leaves were sponged with Early Espresso ink and adhered underneath the rose. The rose was adhered to the box top with LOTS of Sticky Strip.


I LOVE, LOVE, LOVE how this black rose looks! Such a deep pretty purple with sparkles! Okay…so I’m really excited about this project. Anyway… here are the tutorials I used:

Mini Milk Carton Boxes by Sungee

Owl Punch Rose by Valita

Thanks for stopping by and I hope you’ve enjoyed all of my Halloween projects!