Saturday, December 29, 2012

Craft Project Central!

Best of Everything Box: 
Have you noticed how so many things look cuter when they are little? Here’s a quick and easy box and three different fun fold cards scaled down to 3” x 3”!  


This fabulous project was designed by Sharon

If you would like to subscribe to the December edition of Craft Project central and get 10 fabulous tutorials for just $10 then click HERE


Wednesday, December 26, 2012

Craft Project Central!

Bird House Box & Card: 

Christmas is over, but there are always special occasions when you have a little gift you want to give.  Make this simple, but elegant birdhouse style box for any type of small gift.  Fill it with sweets, or just put a gift card inside.  It will be a great little box that can be used over and over again.  The matching greeting card finishes off the set and is a great addition to the gift.  Great as a favor for parties or as a fun class project!


This fabulous project was created by Monika

If you would like to subscribe to the December edition of Craft Project central and get 10 fabulous tutorials for just $10 then click HERE


Sunday, December 23, 2012

Craft Project Central!

Desk Organization Set: 
This set is the kick-off to organizing your desk for the New Year! The acrylic calendar, pen and post-it set is a compact, but mighty little set-up for your desktop. And the set of twelve note cards and envelopes, with it’s coordinating stand-up box will be handy when you need to send off a quick thank you! The complete set will not only get you organized, but also be a great gift to give someone for the start of their New Year too!


This wonderful project was designed by Julie

If you would like to subscribe to the December edition of Craft Project central and get 10 fabulous tutorials for just $10 then click HERE


Saturday, December 22, 2012

Greetings of the Season

This is a fun and simple card with a few pops of color and sparkle! It’s a lot of punching, but the end result is really fun!


  • Stamps: Greetings of the Season, Bold Snowflake
  • Card Stock: Sahara Sand, Very Vanilla, Gumball Green
  • Ink: Illuminate Versamark, Gumball Green
  • Accessories: 1-1/4” Scalloped Circle Punch, 1” Circle Punch, Merry Minis Punch Pack, Stampin’ Dimensionals, Champagne Glimmer Paper, Red Glimmer Paper, Silver Glimmer Paper, 2-Way Glue Pen


I started on this card by cutting a piece of Sahara Sand card stock 5-1/2” x 8-1/2” and scored it at 4-1/4”. Next I cut a piece of Very Vanilla card stock 3-5/8” x 4-7/8”. First I stamped the greeting from Greetings of the Season onto the bottom left hand corner of the card stock in Gumball Green ink. Then I stamped the Bold Snowflake onto the card stock in Illuminate Versamark ink. The Illuminate ink adds a nice subtle sparkly image to the background. I adhered this piece onto a 3-3/4” x 5” piece of Gumball Green card stock then adhered it onto the card front.


I cut a piece of Sahara Sand card stock 3/4” x 4-7/8” and adhered it into the center of the Very Vanilla panel.  Next I used the 1-1/4” Scalloped Circle punch three times on a scrap of Gumball Green card stock. I used the 1” Circle punch three times on a scrap of Very Vanilla card stock. I adhered the Very Vanilla circles onto the Gumball Green Scalloped Circles with 2-Way Glue Pen. I used the Merry Minis Punch Pack to put one image from each of the colors of Glimmer Paper and adhered the punched image in the center of the vanilla circle with 2-Way Glue Pen. I adhered each of the circles onto the strip in the center of the card front with a Stampin’ Dimensionals.


What do you think? Sparkly enough? 


Friday, December 21, 2012

Wonky Christmas Tree

I wanted to do a fun and whimsical Christmas card too. I was inspired by THIS card created by Helene at Stamp 2 LeNotte. Take a look at my version.


  • Stamps: More Merry Messages
  • DSP: Festival of Prints DSP Stack, Silver Glimmer Paper
  • Card Stock: Pool Party, Real Red, Whisper White, Early Espresso
  • Ink: Real Red
  • Accessories: Wood Grain embossing folder, Merry Minis Punch Pack, Pennant Builder Punch, Stampin’ Dimensionals, Apothecary Accents Framelits, 2-Way Glue Pen


For this one I started off with a 5-1/2” x 8-1/2” piece of Pool Party card stock and scored it at 4-1/4”. Next I cut a piece of 3-3/4” x 5-1/4” and ran it through the Big Shot in the Woodgrain embossing folder. I adhered this onto the card front. Then I cut a piece of Silver Glimmer Paper 1/4” x 5-1/4” and adhered it right next to the textured Pool party card stock.


Now for the panel with the tree… I started off by adhereing a 1-1/4” x 4-1/2” piece of Whisper White card stock onto a 1-3/8” x 4-5/8” piece of Real Red card stock. Then I cut a piece of Early Espresso card stock 1/4” x 1” and adhered it onto the very bottom of the Whisper White panel. I used the Pennant Builder punch to punch out five straight triangles from five different patterns of Festival of Prints DSP and used 2-Way Glue Pen to adhere one on top of another with each one at a slightly different angle. Then I used the star punch from the Merry Minis Punch Pack to punch a star out of Silver Glimmer Paper. I adhered the star onto the top of the three. I adhered this panel onto the card front with a couple Stampin’ Dimensionals.


Next I stamped the greeting from More Merry Messages onto a scrap of Whisper White card stock in Real Red ink. I cut out the greeting with the Apothecary Accents label and adhered the label onto the card front with a couple Stampin’ Dimensionals.

That’s it! It’s pretty simple and I just love how cute it is! What do you think? 


Craft Project Central!

Cardinal Luminary & Card: 

This pretty little luminary would make a great gift for anyone on your Christmas list!  The coordinating card adds just the right touch to finish off this fun project.  The set doesn’t need to be just for Christmas either, make it for any special winter occasion.  Makes a fun class project as well!


This gorgeous project was created by Laurie

If you would like to subscribe to the December edition of Craft Project central and get 10 fabulous tutorials for just $10 then click HERE


Stack of Christmas Presents

For the December Make and Take it was all about Christmas! I held the class closer to the beginning of the month to try not to interfere with too many holiday parties and plans. So here is the first one, a tall stack of pretty wrapped presents! I was inspired by THIS card created by Angie over at Chic 'n Scratch. Now here is my version. 


  • Stamps: Snowflake Soiree, Teeny Tiny Wishes
  • DSP: Be of Good Cheer
  • Ink: Cherry Cobbler
  • Accessories: Scallop Edge Border Punch, Gumball Green Stitched Satin Ribbon, Paper Snips, Champagne Glimmer Paper, Stampin’ Dimensionals, Glue Dots, SNAIL Adhesive, 2-Way Glue Pen

I started off with a piece of Cherry Cobbler card stock cut at 5-1/2” x 8-1/2” and scored at 4-1/4”. I stamped the card front with the image from Snowflake Soiree in Cherry Cobbler ink to create a background pattern.

The presents are basically a stack of rectangles adhered behind one another with a smaller rectangle at the top for the “lid” of the box. The bottom box is a 1-3/4” x 3” piece of DSP. For the lid I used a 3/4” x 3” piece of Gumball Green card stock and punched one edge with the Scallop Edge Border Punch and adhere the scalloped trim onto the top of the DSP with 2-Way Glue Pen. For the middle present I cut a 2” x 2” piece of DSP and 1/4” x 2” piece of Champagne Glimmer Paper. I adhered the bottom of this present behind the very top of the bottom present.

For the smallest present I cut a 1-1/2” x 2” piece of DSP and a 1/4” x 1-1/2” piece of Very Vanilla card stock. I adhered the bottom of this present behind the very top of the middle present. Next I cut a piece of Gumball Green Stitched Satin Ribbon about 1-1/2” longer than the height of the presents. I used SNAIL Adhesive to adhere the ribbon ends onto the backside of the presents. I adhered the stack of presents onto the card front with a few Stampin’ Dimensionals.


I stamped the greeting from Teeny Tiny Wishes onto a 1/2” x 3” piece of Very Vanilla card stock in Cherry Cobbler ink. I used Paper Snips to trim one end into a dove-tail and adhered the other end of the tag under the ribbon at the top of the stack of presents. Finally I tied a bow in Gumball Green Stitched Satin ribbon and adhered it onto the top of the stack of presents with a Glue Dot.

Simple and fun! I would love to receive a stack of presents like these, how about you? 


Wednesday, December 19, 2012

Neutral Christmas Snowflakes

It’s time to share with you the cards from the November Make and Take. Here is the first one, and my favorite. Take a look:


  • Stamps: Snowflake Soiree, En Francais, Greetings of the Season
  • Card Stock: Crumb Cake, Soft Suede, Very Vanilla
  • Ink: Crumb Cake, Soft Suede, Versamark
  • Accessories: Scallop Edge Punch, Crumb Cake Taffeta Ribbon, Early Espresso Embossing Powder, Heat Tool, Embossing Buddy, Dazzling Details

I started off by cutting a piece of Crumb Cake card stock 4-1/4” x 11” and scored it at 5-1/2”. Next I cut a piece of Very Vanilla card stock 3-1/2” x 5”. I stamped the En Francais background stamp onto the card stock in Crumb Cake ink. Next I stamped the snowflakes from Snowflake Soiree in Soft Suede ink. To get the lighter snowflakes ink up the stamp, stamp it onto scrap paper, and then stamp on your card stock. This gives a lighter image in the same color.

Next I stamped the greeting from Greetings of the Season onto the bottom of the Very Vanilla card stock in Versamark ink. I covered the stamped image with Early Espresso embossing powder, tapped off the excess, and heated it with the heat tool.


Then I cut a piece of Soft Suede card stock 4” x 5” and punched one of the long sides with the Scallop Edge Border punch. I adhered the stamped Very Vanilla card stock onto the Soft Suede card stock then wrapped a piece of Crumb Cake taffeta ribbon around the panel and tied it into a bow. This panel was adhered onto the card front. Finally, just to add some sparkle, I added some Dazzling Details onto the largest top right snowflake.


What do you think? I just love the neutral colors and the little bit of sparkle together! 


Tuesday, December 18, 2012

Blue Christmas

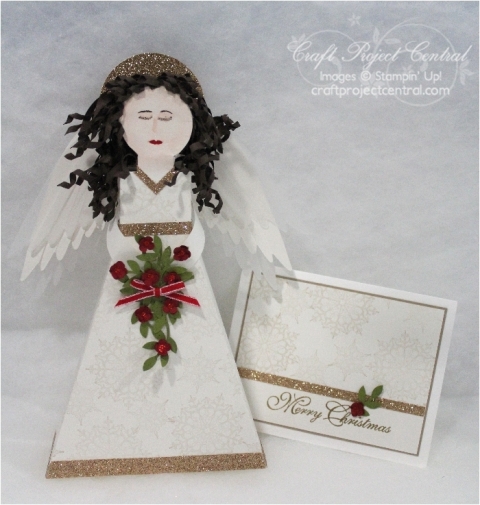
Good morning! Today I have the second card from the November Make and Take to share with you! This one is another snowflake Christmas card, but non-traditional colors.


  • Stamps: More Merry Messages, Ornament Keepsakes
  • Card Stock: Whisper White, Basic Black, Baja Breeze, Shimmery White, Basic Grey
  • Ink: Basic Black, Versamark
  • Accessories: Snow Flurry Die, Brights Glimmer Brads, Paper Piercer, Stampin’ Pierce Mat, Lacy Brocade embossing folder, Scallop Trim Border punch, Whisper White organza ribbon, Dazzling Details, Stampin’ Dimensionals, White embossing powder, Embossing Buddy, Heat Tool


This card takes a lot of layers, but it’s super hard to do. I started off with a piece of Whisper White card stock cut at 5-1/2” x 8-1/2” and scored it at 4-1/4”. Next I cut a piece of Baja Breeze card stock 3-3/4” x 5” and ran it through the Big Shot in the Lacy Brocade embossing folder. I adhered this onto a 4” x 5-1/4” piece of Basic Black card stock, then adhered this layer onto the card front.


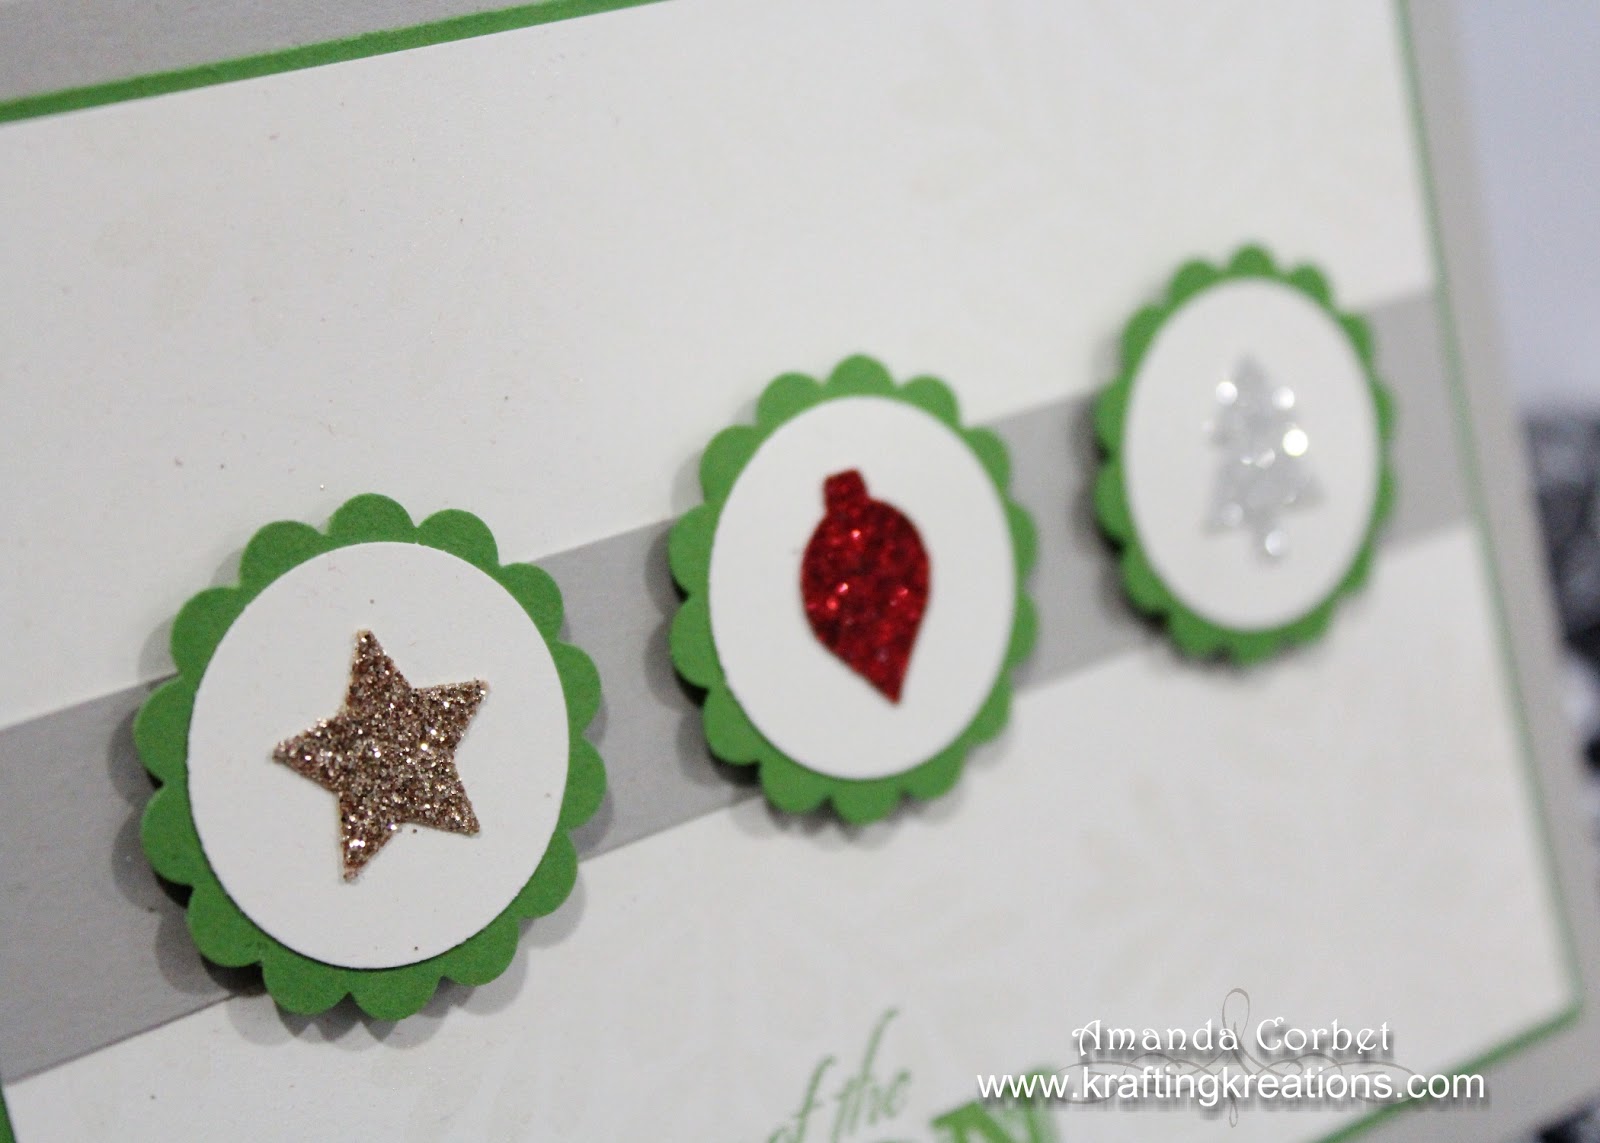
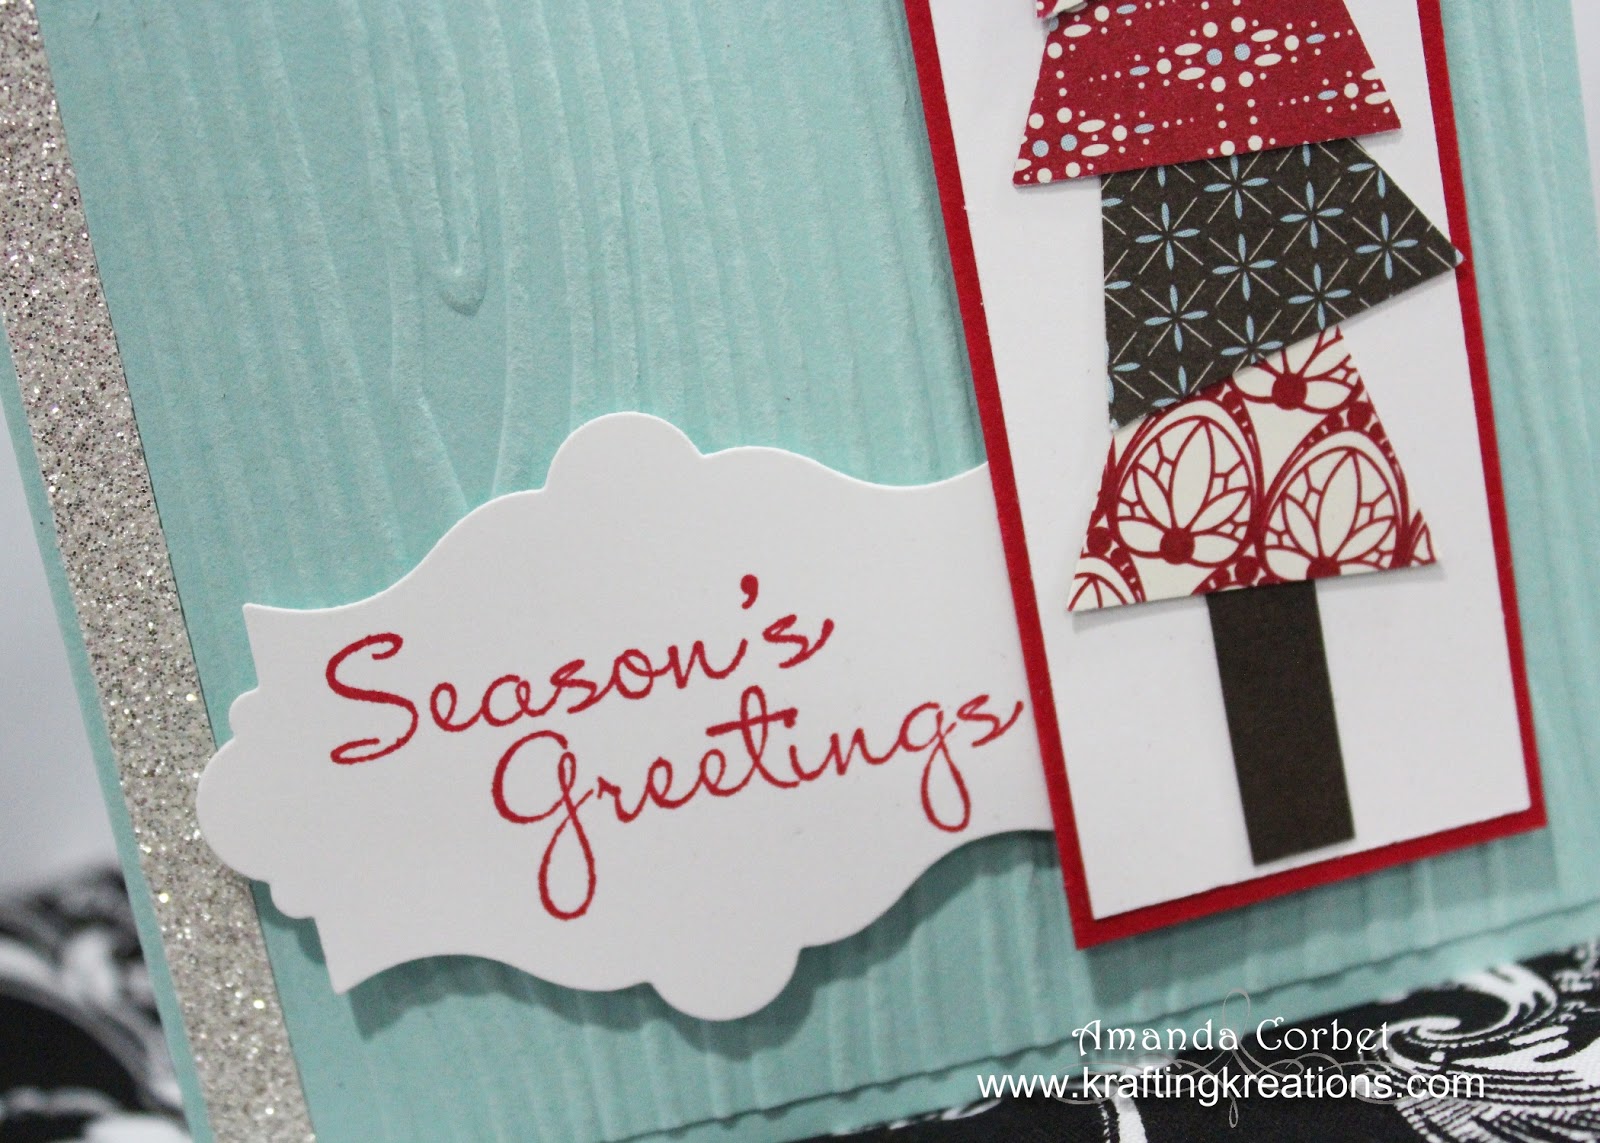
Next I cut a piece of Basic Grey card stock 2” x 4”. I stamped the two ornament images from Ornament Keepsakes onto the strip in Basic Black ink. I cut a piece of Basic Black card stock 2-1/2” x 4” and punched one long edge with the Scallop Trim Border punch. Next I stamped the greeting from More Merry Messages onto the bottom of the Basic Grey card stock in Versamark ink. I covered the stamped image with White embossing powder, tapped off the excess and heated it with my Heat Tool. I adhered the stamped Basic Grey card stock onto the Basic Black card stock then adhered the panel onto the card front. I wrapped the card front with a piece of Whisper White Organza ribbon and tied it into a knot.


Now for the snowflake! I cut a piece of Shimmery White card stock 5” x 5-1/2”. I ran this through the Big Shot on the Snow Flurry die to cut out the three snowflakes. I layered the snowflakes together and pierced a hole in the center with my Paper Piercer and Stampin’ Pierce mat then added a Glimmer Brad to hold the snowflakes together. I adhered the snowflake onto the card front with a Stampin’ Dimensional and added some Dazzling Details onto the snowflake for some extra sparkle. 

What do you think?

Craft Project Central!

Contemporary Christmas Trees & Card: 
Can a project be both contemporary and vintage at the same time?  If not, well I couldn't decide if this project was contemporary or vintage, so I’ll let you make the choice!  Either way, these beautiful, yet fun and easy trees make great holiday decor and also make great gifts for friends and neighbors.  And if you want to get in one more holiday class before the end of the year, they make a fun holiday class project!


This fabulous holiday project was designed by Heidi

If you would like to subscribe to the December edition of Craft Project central and get 10 fabulous tutorials for just $10 then click HERE


Monday, December 17, 2012

Silver Snowflakes

Here is a very wintry Christmas card! I created this for sketch SCCSC125.


  • Stamps: Serene Snowflakes, More Merry Messages
  • Card Stock: Sahara Sand, Basic Black, Whisper White, Vellum
  • Ink: Versamark
  • Accessories: Pewter embossing powder, Silver Brads, Stampin’ Dimensionals, Heat Tool, Snow Burst embossing folder (retired), Paper Piercer, Stampin’ Pierce Mat


Here is the sketch challenge that was created by Susie Nelson! 


I had the embossed vellum pieces lying around from my Winter Lantern project. I just stamped the vellum with the snowflakes from Serene Snowflakes in Versamark, covered the stamped image with Pewter embossing powder, and heated it with the Heat Tool until it was shiny.


To start off I cut a piece of Sahara Sand card stock 5-1/2” x 8-1/2” and scored it at 4-1/4”. This card was a bit of a puzzle, so for the panels I started off with the panel on the left. I cut a piece of Whisper White card stock 1-7/8” x 3-5/8” and adhered it onto a 2” x 3-3/4” piece of Basic Black card stock. I cut the piece of embossed Vellum down to 1-7/8” x 3-5/8”. Then I placed the vellum on top of the Whisper White portion of the panel, lined it up, and pierced a hole in each of the corners with my Paper Piercer and Stampin’ Pierce Mat. Then I inserted a Silver Brad into each of the holes. This holds the vellum down in place without showing any adhesive. I adhered this panel onto the left side of the card front with Stampin’ Dimensionals.

Next up was the greeting panel. I cut a piece of Basic Black card stock 1-1/4” x 2-3/4”. I stamped the greeting from More Merry Messages onto the Basic Black card stock in Versamark ink, covered the stamped image with Pewter embossing powder, and heated it with my heat tool. I adhered this onto a 1-3/8” x 2-7/8” piece of Whisper White card stock. Then I adhered this onto the card front making sure to line up the top of the panel with the top of the left panel and spaced it evenly from the outside edge of the Sahara Sand card base.


For the bottom right corner panel I cut a piece of Whisper White card stock 1-1/4” x 2-1/8” and adhered it onto a 1-3/8” x 2-1/4” piece of Basic Black card stock. I cut the remaining vellum down to 1-1/4” x 2-1/8” and placed it on top of the Whisper White portion of the panel, lined it up, and pierced a hole in each of the corners with my Paper Piercer and Stampin’ Pierce Mat. Then I added a Silver Brad into each of the holes. I adhered this panel onto the card front with Stampin’ Dimensionals being very careful to keep it straight with the edge of the panel on the left.

For the final panel, the bottom middle one, I cut a piece of Whisper White card stock 1-1/4” x 2-1/8”. I thought it would be fun to add some texture on this one so I ran it through the Big Shot in the Snow Burst embossing folder and adhered it onto a 1-3/8” x 2-1/4” piece of Basic Black card stock. I adhered this final panel onto the card front with Stampin’ Dimensionals.


So after a lot of thinking and a lot of math I ended up with this awesome, neutral, Christmas card! It is definitely going to someone special! But, to make it easier for you I provided the measurements. Also, the order that you adhere the panels in place makes it easier to end up with everything evenly spaced, so I recommend following the steps in order if you give this card a try.

So what do you think? 


Saturday, December 15, 2012

Craft Project Central!

Christmas Petal Cone Treat Boxes: 
Are you looking for an extra special way to package your small Christmas gifts and treats?  These three Christmas treat boxes are exactly what you need.  They’re perfect for jewelry, candy, little toys and any other small gift.  All three boxes are made with the Petal Cone Bigz die and various punches.  Have fun wrapping your presents this year!  This would also make a great Christmas class.


This adorable project was created by Christy

If you would like to subscribe to the December edition of Craft Project central and get 10 fabulous tutorials for just $10 then click HERE


Friday, December 14, 2012

Christmas Friday Mashup 89

 It’s Friday again! Christmas is getting closer. It’s right around the corner now. So I thought I would crank out one last Christmas card for this Friday Mashup challenge! I still have several older Christmas cards to show you, but that is for later.


  • Stamps: Everything Eleanor, Seasons Greetings, Scentsational Season
  • DSP: Be of Good Cheer DSP, Champagne Glimmer Paper
  • Card Stock: Crumb Cake, Very Vanilla
  • Ink: Versamark, Gumball Green, Garden Green
  • Accessories: Iridescent Ice embossing powder, Holiday Collection Framelits, Paper Snips, Cherry Cobbler Dazzling Details, Stampin’ Dimensionals, Heat Tool


image © Stampin' Up!
So here is the "Mashup" Challenge:
  1. Make a project using" Heat Embossing".
  2. Or Make a project that has a "Clean And Simple Layout".
  3. Or "Mash it Up" and create a "CAS project using Heat Embossing".

I started off with a piece of Crumb Cake card stock cut at 4-1/4” x 11” and scored at 5-1/2”. I stamped the swirl from Everything Eleanor all over the card front in Versamark ink, covered the stamped images with Iridescent Ice embossing powder and heated it with my Heat Tool. Next I adhered a scrap piece of Be of Good Cheer DSP onto the right side of the card front and adhered a 1/4” x 4-1/4” piece of Champagne Glimmer Paper right next to the DSP.


I already had some die cut trees sitting around in my scrap bowl from another project so I just inked up the coordinating stamp from Scentsational Season first with Gumball Green ink and then touched just the edges of the stamp into the Garden Green ink pad before stamping.

I took a scrap of Very Vanilla card stock that was about 1” x 3-1/2” and stamped the greeting from Greetings of the Season onto the strip in Gumball Green ink. I used Paper Snips to cut a dove-tail in one end of the strip. Then I ran the card stock across my bone folder to give it some shape. I adhered the banner behind the tree, then I adhered it onto the card front with a couple Stampin’ Dimensionals.


Super quick and easy! Now I’m off to wrap some more presents and finish up my Christmas cards!


Thursday, December 13, 2012

Craft Project Central!

It's time for me to share with you my project for the December edition of Craft Project Central! Take a look! 

Angel Gift Box and Card: 

Are you looking for a pretty and unique any to present a gift or treat this holiday season?  This beautiful little Angel Gift Box is sure to impress!  She truly sparkles and shines while concealing your gift inside and adding to your holiday decor!  


This sparkling gift set was designed by me! I also have some Blog Candy that I'm giving away! Just leave a comment on this post before Noon on December 20th and you will be entered to win a FREE subscription to the December edition of Craft Project Central! 

If you would like to subscribe to the December edition of Craft Project central and get 10 fabulous tutorials for just $10 then click HERE


Wednesday, December 12, 2012

Craft Project Central!

First Edition Snowman and Ornament: 

Create this cute little vintage snowman and ornament with First Edition Designer Series Paper!  The snowman will be a nice addition to your home decor and would also make a great gift along with the coordinating ornament!  They pair are fun and easy project to make.  Make a great holiday class or project that the kids could help make too!


This adorable project was designed by Carrie

If you would like to subscribe to the December edition of Craft Project central and get 10 fabulous tutorials for just $10 then click HERE


Dare to... Deck the Halls

This is the fourth and final Dare to DIY challenge. I thought it would be the perfect time to share with you the lovely ornaments that my guests made at the Ornament Keepsakes class!

It was a small class, but it worked out great. Everyone had a fabulous time making their ornaments!


Mom made two as gifts for the two ladies she works with. Sorry for the poor lighting.


Gabrielle, Caroline, Kelly, and Jessica each made one for themselves. Purple/Silver and Blue/Silver seemed to be the popular color combos! 


Here are two others that I made previously for a swap.


And finally here is mine on the Christmas tree, and the tree. 


I’m sharing this at the Dare to DIY party hosted by Decor and the Dog, Maybe Matilda, Newly Woodwards, and Two Twenty One!