I'm going out of my usual post genre today. But I have a really yummy recipe to share with you. First, a little back story...
My husband is a peanut butter fanatic. He absolutely loves anything peanut butter flavored and Reeces Peanut Butter Cups are his favorite. Well before his last birthday I hunted high and low for a peanut butter cake recipe to make for his birthday cake.
When I buy him peanut butter ice cream he prefers the kind with vanilla ice cream rather than chocolate. At this point you're probably thinking I'm putting way too much thought into this... Well all the cake recipes I could find were based off of a chocolate cake with peanut butter. So after hours with little success I decided I will just whip up my own peanut butter cake recipe and for the frosting I modified the Cloud Frosting recipe that I had used before. So this is what I ended up with!
1/2 cup melted butter
4 eggs
1-1/4 cups milk
1 package peanut butter morsels
Mix peanut butter chips with cake mix. Add wet ingredients and stir to combine. Bake at 350°F
(9" x 13" pan 29-34 minutes; two 8" round pans 29-34 minutes; cupcakes 18-23 minutes). Make sure you test the cake with a toothpick to see if it comes out clean. If the toothpick is clean the cake is done, if it comes out with batter on it then bake in five minute increments testing each time until the cake is done. Allow cake to cool completely before frosting.
While your cake is cooling unwrap what seems like a million peanut butter cups and chop them up into tiny pieces. I used a whole bag of the miniature peanut butter cups.
Peanut Butter Frosting
1 package cream cheese, straight from the refrigerator
1 cup powdered sugar
1 pint heavy whipping cream
3/4 cup creamy peanut butter
1/2 cup milk
1 teaspoon vanilla
1 package mini Reeces Peanut Butter Cups, chopped
Combine cream cheese, vanilla, and powdered sugar in a mixer bowl. Add 1 pint whipping cream. Mix together on a slow speed until combined. Stop to scrape down the sides of the bowl frequently. Once the ingredients are combined turn the mixer up to high and beat the frosting until stiff peaks form. You're basically making a delicious whipped cream cheese frosting.
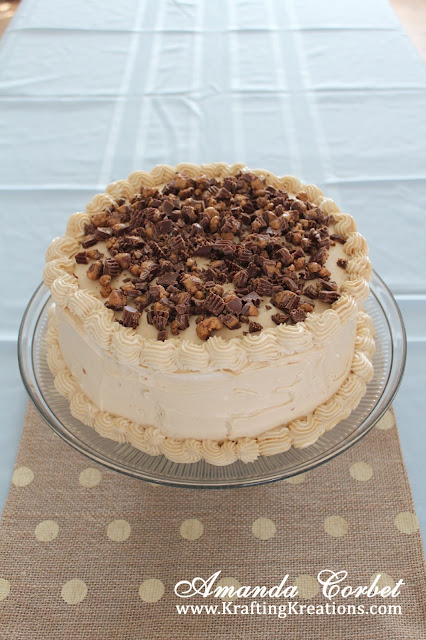
While your frosting is mixing away, combine the peanut butter and milk in a separate bowl. Once the whipped frosting is finished gently fold in the peanut butter mix until completely combined with the whipped frosting. Spread the frosting on your cake and top with chopped peanut butter cups.
I've never been good at frosting cakes, so I wasn't really going for pretty, I was more going for getting it on the cake. I had a bunch of frosting left over so I decided to add some edging. I just put the frosting in a piping bag with a large star tip and attempted to make the little swirls around the edge of the cake. It ended up kinda wonky, but it still tasted good. If you're piping this frosting you need to work fast. Your hands will heat up the cream cheese frosting and it can get kinda messy. If you have to, stop for a bit and put the cake and the piping bag in the fridge for 20 minutes or so before continuing.
Keep the cake in the refrigerator until you're ready to serve.
My husband is a peanut butter fanatic. He absolutely loves anything peanut butter flavored and Reeces Peanut Butter Cups are his favorite. Well before his last birthday I hunted high and low for a peanut butter cake recipe to make for his birthday cake.
When I buy him peanut butter ice cream he prefers the kind with vanilla ice cream rather than chocolate. At this point you're probably thinking I'm putting way too much thought into this... Well all the cake recipes I could find were based off of a chocolate cake with peanut butter. So after hours with little success I decided I will just whip up my own peanut butter cake recipe and for the frosting I modified the Cloud Frosting recipe that I had used before. So this is what I ended up with!
The Cake
1 Box yellow cake mix1/2 cup melted butter
4 eggs
1-1/4 cups milk
1 package peanut butter morsels
Mix peanut butter chips with cake mix. Add wet ingredients and stir to combine. Bake at 350°F
(9" x 13" pan 29-34 minutes; two 8" round pans 29-34 minutes; cupcakes 18-23 minutes). Make sure you test the cake with a toothpick to see if it comes out clean. If the toothpick is clean the cake is done, if it comes out with batter on it then bake in five minute increments testing each time until the cake is done. Allow cake to cool completely before frosting.
While your cake is cooling unwrap what seems like a million peanut butter cups and chop them up into tiny pieces. I used a whole bag of the miniature peanut butter cups.
Peanut Butter Frosting
1 package cream cheese, straight from the refrigerator
1 cup powdered sugar
1 pint heavy whipping cream
3/4 cup creamy peanut butter
1/2 cup milk
1 teaspoon vanilla
1 package mini Reeces Peanut Butter Cups, chopped
Combine cream cheese, vanilla, and powdered sugar in a mixer bowl. Add 1 pint whipping cream. Mix together on a slow speed until combined. Stop to scrape down the sides of the bowl frequently. Once the ingredients are combined turn the mixer up to high and beat the frosting until stiff peaks form. You're basically making a delicious whipped cream cheese frosting.
While your frosting is mixing away, combine the peanut butter and milk in a separate bowl. Once the whipped frosting is finished gently fold in the peanut butter mix until completely combined with the whipped frosting. Spread the frosting on your cake and top with chopped peanut butter cups.
I've never been good at frosting cakes, so I wasn't really going for pretty, I was more going for getting it on the cake. I had a bunch of frosting left over so I decided to add some edging. I just put the frosting in a piping bag with a large star tip and attempted to make the little swirls around the edge of the cake. It ended up kinda wonky, but it still tasted good. If you're piping this frosting you need to work fast. Your hands will heat up the cream cheese frosting and it can get kinda messy. If you have to, stop for a bit and put the cake and the piping bag in the fridge for 20 minutes or so before continuing.
Keep the cake in the refrigerator until you're ready to serve.
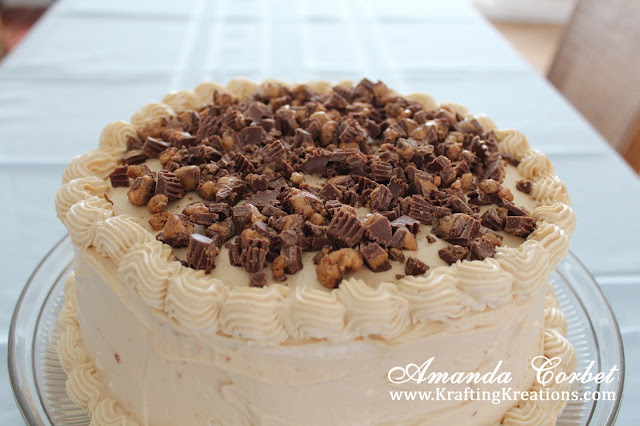
Since this cake was destined for a birthday part I couldn't get a picture of a slice of cake. Bad food blogger.... One more photo just because I was having fun with the camera...
This cake is rich, creamy, and delicious but not overpowering with it's peanut butter goodness. I'm not a huge fan of peanut butter but I really enjoyed this cake. So did the rest of the family. I've made this cake twice since my hub's birthday and each time there isn't much left to save for later. Enjoy!
Linking up to these parties.


