Showing posts with label Home Decor. Show all posts

Tuesday, February 4, 2020

Hand Painted Tile Dresser Redo

I guess I never got around to posting this. I don't remember when I actually finished it. Apparently at least 3 years ago before my daughter was born. I still love it though! It serves as my nightstand and shoe storage right now.

I no longer do projects for DecoArt. Apparently I wasn't good enough at staging Pinterest worthy photos. So now I just make projects for myself or gifts for family and friends and I am perfectly fine with that.

From original post written about 3-4 years ago: 
Last fall I had picked up a small dresser that was placed on the curb. I was looking for something small to go in what I had hoped to turn into a guest room. Right now the guest room is on hold so the dresser just sat there getting no attention. Here you can see this sweet little dresser in all it's untouched glory. Straight from the curb where it was destined to end up in a landfill. 

A couple months went by and my little dresser just sat there feeling unloved when DecoArt posted a project to paint a piece of furniture with some interest other than the typical chalky finish. So finally the project of redoing this little dresser was moved to the front and it was going to get it's much deserved love. 

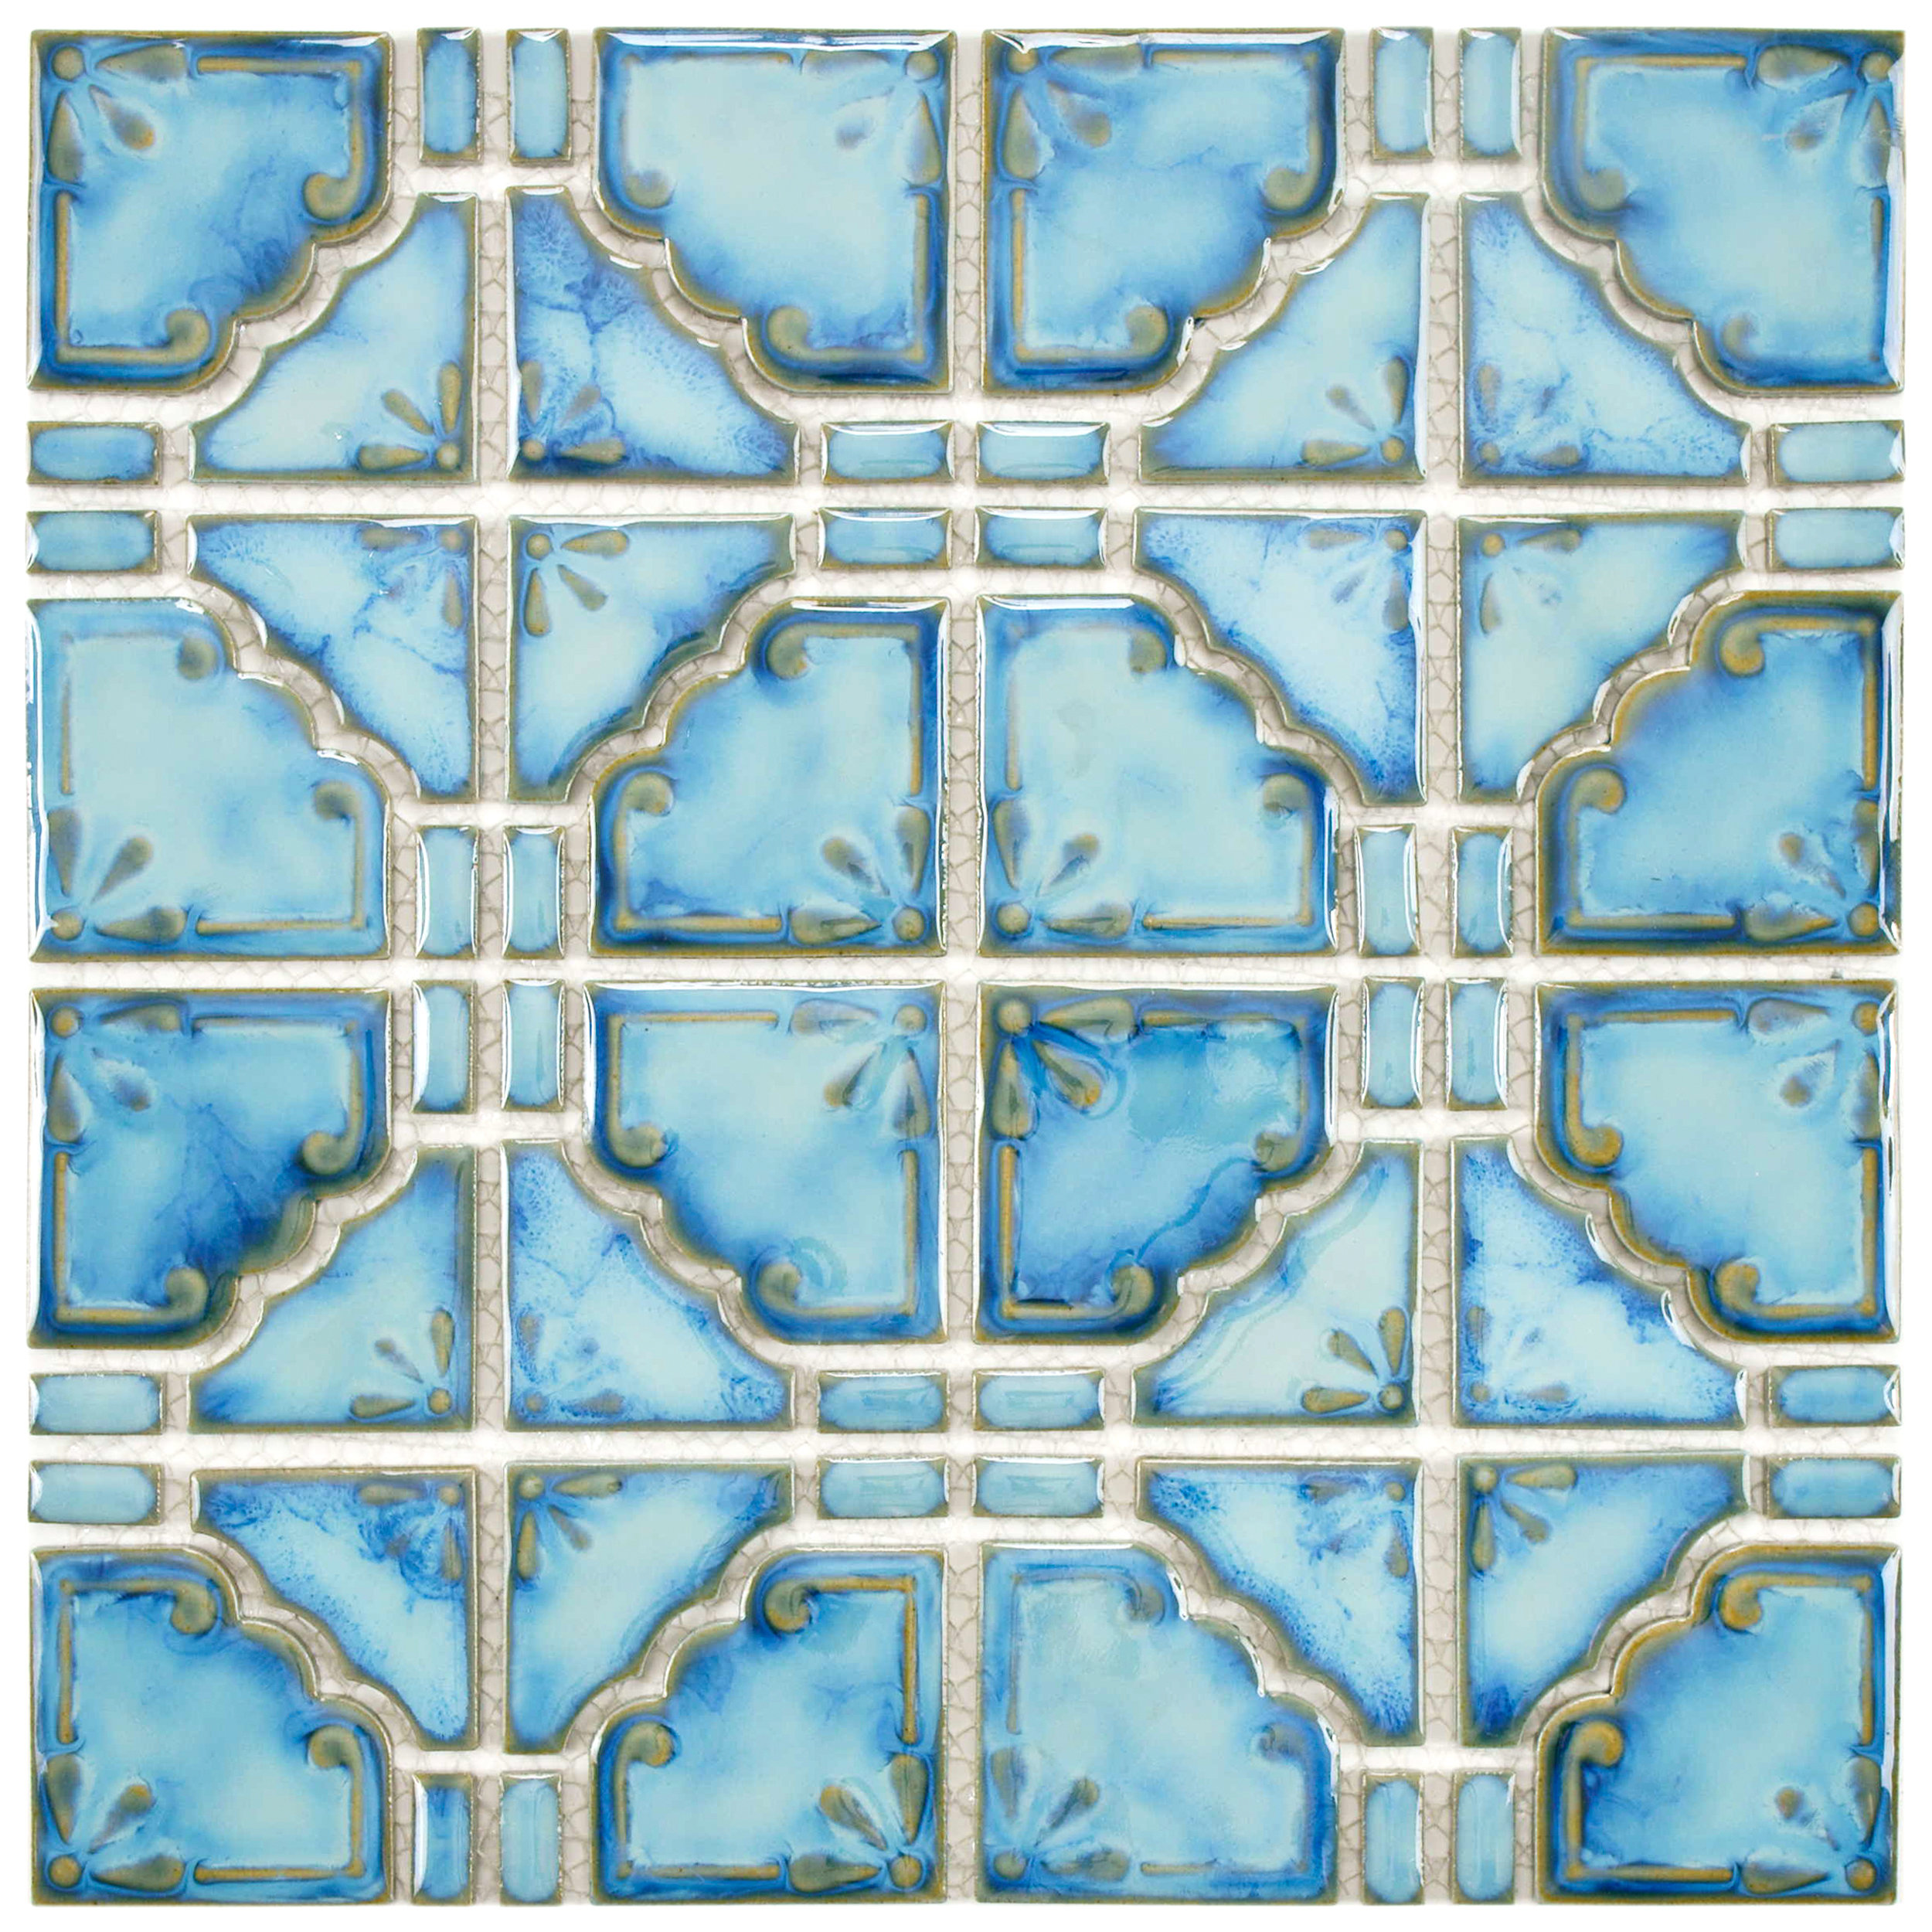
I decided I wanted to paint the drawer fronts in mosaic tile pattern so off I went searching the internet for some mosaic tile inspiration. I was found this pattern of tile from Wayfair and knew it was just the perfect thing!. So I drew up a similar pattern and adjusted the scale of the tile shape to fit my dresser drawer fronts. I couldn't quite match the soft blue of the tile with the paint I had on hand, but I really love the combination of the vibrant turquoise and cobalt blue that I already had. 


For all the painting instructions and tile pattern template you can check out the project tutorial over at DecoArt. 

The original hardware on the dresser was removed and received several coats of a gold enamel spray paint. The top was too rough to salvage so I covered it with three 1 x 8 boards that were cut to length, stained, and screwed to the top of the dresser from the underside. 


Even the inside of the drawers received some love with Chalky Finish paint in Serene and some decoupaged scrapbook paper for the bottoms of the drawers. 


Tuesday, March 29, 2016

Simple Spring Canvas

Whenever I'm in my craft room painting I always find myself working on at least three different projects at once. I will work on one and get to a point where I have to let the paint dry so I will start on another and get to a point where the paint has to dry, and it goes on. Sometimes I clean or sort or organize during this drying time, but other times I end up with my craft island covered in paint projects all in various stages of progress. I guess I'm just impatient and don't like having to wait...

This last weekend I was finishing up some projects to post to DecoArt's projects page and while those were drying I worked on this fun little spring canvas. Since it was Easter weekend I wanted to embrace the vibrant colors and some fun flowers for spring. 

This is not a sponsored post, however, I have received paint products from DecoArt for previous projects that I used to create this project. I also absolutely love working with DecoArt paints and choose to use them exclusively for my decorative painting projects regardless of whether or not I buy them or DecoArt sends them to me. 


I started off with a 5 x 7 canvas board that I painted with streaks of Citron Green, Snow White , and Purple Pizzaz Americana Acrylic paint with a 1/2" flat brush. To get these streaks of color to blend you want to work quickly while the paint is still wet. 


After the streak of vibrant color dried completely I used DecoArt Media Fluid Acrylics in Titanium White and Medium Grey Value 6 with a round brush to paint the daisy petals. I painted the petals first in just Titamium White and then went back with a mix of Titanium White and Medium Grey Value 6 to add very light grey shadows onto the petals. Then this was allowed to dry while I worked on another project. 


For the flower centers I used a 3/4" circle paper punch on a scrap of cardstock to use as a stencil. Then I used a stipple brush with Hansa Yellow Light to fill in the center of the flower. For the shadows around the edges of the flower center I stippled Transparent Yellow Iron Oxide and Burnt Sienna just around the edges of the circle stencil. Then the flower stems were added with a combination of Green Gold and Viridian Green Hue for the shadows. 


Once the paint was dry I sealed the canvas with a coat of Satin Varnish. I used my Silhouette to cut a bunny from some Silver Glimmer Paper and glued it onto the canvas then gave the canvas another coat of Satin Varnish to seal in all the glitter. 

Finally I needed a way to hang the canvas so I used my Crop-A-Dile to punch two holes in the top corners which I threaded some white lace ribbon through and tied it into a bow. 


This simple and sweet little canvas ended up making a lovely Easter gift for my best friend.

What do you like to do while you're waiting for paint to dry?


Monday, January 25, 2016

DIY Home Decor Projects

Looking for some fun and easy home decor projects to brighten up that winter gloominess?

Some of my projects were recently posted on DecoArt's projects page so I wanted to share them here with you. Just click through the links for a complete tutorial on how to make the project.

This one will be listed in my Etsy shop soon! 

This one will be listed in my Etsy shop soon! 

Want to order one just like it? Just contact me and I will be happy to make a custom order for you!


Friday, January 15, 2016

Hand Painted Signs now in the Shop!

I've had an Etsy store set up for quite some time now, but I haven't been great about actually listing the items I make. So I'm working away this year to actually get my store stocked up. So yesterday I added my stock of hand painted signs and mixed media canvases into my little shop window on the internet.

If you want to take a gander at my wares just click HERE.


Friday, February 6, 2015

Burlap Valentine's Banner

I decided on an impulse that I wanted to make a pretty heart banner for my mantle so I can have some Valentine's Day decor. If you want to get one for yourself or see how it's made then keep on reading!

Tuesday, December 30, 2014

DIY Ruler Growth Chart

I'm back!!!! It's been a while since I've done a post on a project. But now that the holidays are over it's time to share all those Christmas presents that I spent all of December working on. My brother-in-law and his wife had a beautiful baby boy this past July. Since I don't get to spend a bunch of time with the new mom due to work schedules and such I really didn't know what to give her for Christmas. So I went stalking through her Pinterest boards and came across a pin of a giant ruler growth chart. It was so absolutely awesome and adorable! So I knew I had to make one for them.

The funny part was, I showed my husband and he asked "why would you want that?". Then I had to explain to him the purpose of a growth chart. I thought everyone knew what a growth chart was. Although my parents just marked it on a corner of the wall in the house. But this one is better because you can take it off the wall and move it with you without having to re-do the marks!

I started of by searching Pinterest and then Googled DIY Ruler Growth Chart and came across this tutorial at Wilder Do's. After getting lost on their blog oohing and ahhing over various projects I called it a day. It's such a huge relief to know what you're going to make. So I followed the tutorial and laid out the marks and numbers on a 1 x 8 that was 7 feet tall. I started off with the 6" mark and worked my way up.  

For the number templates I simply cut out some Times New Roman numbers that were 3" tall and cut out some stencils from card stock. I used the card stock stencils to trace the numbers onto the board. Then I used my wood burning tool with a chisel tip to outline everything. After much trial and error I found out that my soldering iron gets much hotter than the wood burning tool and that worked better and faster for filling in the lines and numbers. I know... I could have just painted on the lines and the numbers, but I really liked the color and texture that the wood burning added.


After everything was burned in I coated it with three coats of Minwax Polyshades in Pecan with a satin finish. I was running out of time so the fact that it was stain and polyurethane all in one step made it the go to product.  


Then it was just a matter of letting it cure completely and wrap it up. I even wrapped up the hanging hardware with it, so there is no excuse for not getting it hung up. 

Thank you April from Wilker Do's for showing me how to make this awesome project! I will definitely be pinning and building some of the other projects you've shared! 

Linking up to these parties. 

Monday, July 21, 2014

Floral Wall Art

For a simple gift I re-purposed this four panel frame by popping in some pieces of Whisper White card stock that I stamped with images from Peaceful Petals and Sweetbriar Rose in Momento Ink. Then I simple colored in the images with a variety of Blendabilites markers. 


  • Stamps: Peaceful Petals, Sweetbrier Rose, Everything Eleanor, Perfect Pennants
  • Ink: Momento Black, Versamark
  • Blendabilites Markers: Daffodil Delight, Coastal Cabana, Wisteria Wonder, Old Olive
  • Accessories: Iridescent Ice embossing powder, Gold embossing powder, uni-ball Signo Gel Pen, Rhinestones


On one panel I added this fabulous greeting from Perfect Pennants in gold embossing powder. Each panel was stamped with the large beautiful swirl from Everything Eleanor in Versamark ink and embossined in Irridescent Ice embossing powder.


In the Sweetbriar Rose flower centers I added some white dots with my uni-ball Signo Gel Pen.


This was such a fun and simple project. I just taped the card stock to the backside of the mat and popped it into the frame and it was done! Did I mention I just LOVE the new Blendabilities markers???

What have you been using your new Blendabilites on? 


Monday, July 14, 2014

Dressed Up Desk Organizer DIY

I scored this fabulous desk organizer at a flea market recently and wanted to dress it up a bit. The dark faux wood was just not doing it for me. So I took some Krylon Gloss White spray paint and went to town. I didn't get a before picture of it, but it is exactly like this one that I found on Etsy. But I managed to snag mine for just $5. 


It has some great leaf detail on the front that looks like carved wood. Such a fun pattern and texture as long as you can see past that ugly faux wood coloring it originally had. 


So after cleaning it up with some soap and water and letting it dry I sprayed several coats of Krylon Gloss White spray paint until it was nice and covered. I think it was four or five thin coats. 


I took some retired designer series paper and cut it down to 3" long, then cut it to the width of each of the sections in the organizer. A little bit of DecoArt Decou-Page did the trick to glue down the patterned paper. Then I coated the entire thing with about four coats of a Krylon gloss sealer. 


Now it just sits pretty holding lots of my tools on my work table! I love being able to give new life to things that might otherwise end up in the landfill. 


Have you been working on any upcycling lately? Or DIYing any garage sale finds? 


Wednesday, July 2, 2014

DIY Upcycled Sewing Desk

My upcycled super cute and functional garage sale sewing desk is finally done!

For the last several years this is where I have been sewing when I do sew. It's just a cheap plastic folding table with a set of plastic drawers to hold some of my fabric hoard stash. This nice large table also ends up as a catch all that requires 20 minutes of shifting stuff around so I can sew. It also had the tendency to bounce up and down if you started sewing too fast.


A few weeks ago I scored this old sewing desk from a yard sale for only $10. It was sturdy, didn't wobble at all, but needed quite a bit of love. If  you follow me on Instagram you may have already seen some of my in process photos, but in case you didn't here they are! This is what it looked like right after I brought it home. I love the shape, size, and details, but boy it definitely needed some love and sand paper.


It had house wire wrapped through the holes for drawer pulls! Um... I guess it works, but not for me.


So I took it all apart and sanded everything down then filled the holes in the drawer fronts with some wood putty. After the wood putty dried I sanded them again and added just one hole in the center for the drawer pulls I wanted.


Then I got to painting. It seemed like it took FOREVER to get this all painted! I think it took me about three weeks from start to finish. Remember, I work full time so I really only had a little bit of time in the evenings to work on this. But I was so excited to see it complete.


Here it is with the desk portion all nice and white. It took two coats of primer and two coats of Behr Ultra Pure White. This is when I started to really get excited.


And this is what my craft room looked like for three weeks while trying to get this finished. Yikes! What a mess! With very little room to walk around everything too...


Are you ready to see what it looks like now? After what seems like 5000 coats of paint.... here it is!


Here is the materials rundown.
Behr Ultra Pure White


Behr Iconic Sky (drawer fronts). Such a pretty shade of light aqua.


Behr Deep Blue Sea (inside/sides of drawers) to add a fun pop of color. Here you can see my magnetic bowl with my pins that I picked up from the hardware store in a set of magnets. I gave the rest of the kit to my husband. I just wanted the little magnetic bowl. Also a pretty green bowl to hold those thread ends that you clip off as well as other random trash while working away.


I just can't get over how much storage this sweet little desk has in it! I can fit all of my sewing essentials with plenty of extra room.


There is even one large drawer on the bottom right that I have tossed all my fabric scraps in. 


These adorable drawer pulls from HomeDepot.com (this is not a paid advertisement. I just love 'em!)


The white paint was left over from another project and the two shades of blue I bought to re-paint my craft room and I just haven't done it yet. So you could kind of say it's left over from that right??? I'm going with that route.


It is just paint, and it will wear naturally, and I'm totally okay with that. I love how much storage I have now instead of just those three little plastic drawers.


You can't have a great DIY project post without a before and after.....


Now I can't wait to start sewing more!

Linking up to these parties.