Monday, June 29, 2015

DecoArt Butterfly Mixed Media Canvas

Hello! Today I have a mixed media canvas that I am really excited about sharing with you. I really do LOVE how it turned out. It really takes guts to start putting color onto that terrifyingly blank canvas and turn it into something you love. Now I would like to share real quick that this is a post sponsored by DecoArt. However, I really do love using their products and reach for them every time I paint regardless. 


In this project we are exploring using some of the fabulous products from DecoArt's Media Line. But enough jabbering on and on, lets take a look at what you'll need to complete this project. 

SUPPLIES

Americana Stencils
·         Brocade & Berry Borders

DecoArt Media Fluid Acrylics
·         Carbon Black
·         Quinacridone Violet
·         Phthalo Green-Blue
·         Green Gold
·         Cobalt Blue Hue
·         Cobalt Teal Hue
·         Phthalo Blue
·         Dioxazine Purple
·         Phthalo Turquoise
·         Titanium White

Glamour Dust Glitter Paint
·         Purple Princess

DecoArt Media Specialty Products
·         Matte Medium
·         Tinting Base
·         White Modeling Paste
·         Black Modeling Paste
·         Liquid Glass
·         White Gesso

Americana Multi-Surface Satin Paint
·         Silver Metallic

Other supplies
12” x 12” Stretched canvas
Brushes: 3/4” flat, #3 round, #2 round, #6 flat
Scissors
Palate knife
Plastic container or paint palate
12” x 12” Dazzling Diamonds Glimmer Paper or white glitter paper
E-cutter with SGV file – 3D Cutout butterfly for Silhouette
Egg carton
Hot glue gun
Wooden tag
Metallic gold baker’s twine
Gold buttons

INSTRUCTIONS

These Media Fluid Acrylics really do have a lot of pigment in them and even a tiny drop packs a serious punch. Don't put very much paint on your palate because it stretches much further than you think! Mix a couple drops of each of the following colors with a little dab of Matte Medium: Quinacridone Violet, Cobalt Blue Hue, Cobalt Teal Hue, Phthalo Turquoise. Brush streaks of these colors onto your canvas as desired. 

Now, what does the Matte Medium do you ask? Well it takes the beautiful color from the bottle and turns it into a transparent version of that paint where it is completely opaque. 


Add some darker shadows with some Dioxazine Purple and Phthalo Blue straight from the bottle.


Use Carbon Black to paint the sides of the canvas.


While painting the sides of the canvas you will inevitably get some of the black on the top of your canvas. Or maybe I'm just a messy painter... To make this look more intentional and to add shadows around your piece dry brush Carbon Black around the edges of your canvas taking care to make sure that it is not perfectly even all the way around. After all, what shadow is perfectly straight? 


Use the Brocade & Berry Borders stencil with a palate knife and Black Modeling Paste to add the two filigree shapes onto the left side of the canvas. I have the canvas turned here to make it easier to work on.


After you have spread Black Modeling Paste over the stenciled area carefully lift up the stencil and wash the stencil off.


With a clean stencil and palate knife use White Modeling Paste to add the berry borders in the corner.


After you have spread White Modeling Paste over the stenciled area carefully lift up the stencil and wash the stencil off. Allow your modeling paste to dry completely before continuing. This will take approximately 1.5 hours depending upon how thick you applied it. My husband seemed to think he needed dinner for some strange reason, so I actually let my canvas sit overnight until I had a chance to work on it again. 


Mix a single drop of Carbon Black paint with a little dab of Matte Medium, again, a little bit goes a long way. Now grab a piece of bubble wrap and resist the urge to pop all the bubbles, you need them! Brush the paint onto a piece of bubble wrap, then press the bubble wrap paint side down onto the canvas. This adds some fun irregular dots onto your canvas background. 


Repeat to add bubble dots in two other areas of the canvas. If you press the bubble wrap onto the canvas twice before refilling with paint you will get lighter bubbles.


Use Green Gold and Phthalo Green-Blue to paint in the leaves. I loaded my #3 round brush first with Green Gold and then dipped just the tip of the brush in Phthalo Green-Blue. This allows the colors to mix and blend while you are painting the leaves and stems. Now dab a generous amount of Glamour Dust Glitter Paint in Princess Purple onto the berries.


Use the 3/4” flat brush to apply Titanium White streaks onto the canvas to add some contrast and more interest into the background.


Add dots of Liquid Glass onto the canvas. It dries crystal clear and looks like dew drops or rain drops on your background.


Now for the flowers. Take a recycled paper egg carton and cut off the flap and the lid. Paint both sides of the egg carton with White Gesso. Now take scissors and cut apart the egg cups. You need two cups and one pyramid shape piece (from between the cups) to make one flower.


Trim off the higher sides of the cups to make them close to an even height. Then cut down from the top of the cup in all four corners. Use scissors to cut around the top of each side of the cup to look more like a petal.


Spread the sides of the cup that will be on the bottom of the flower out wide.


Here is what your assembled flower would look like with two cups and one center pyramid shape making up the layers of petals.


Mix a little bit of Quinacridone Violet paint with Tinting Base. What is Tinting Base? Well it allows you to make a lighter yet opaUse the #6 flat brush to paint the inside and the outside of the flower layers. You do not need to paint the bottoms.


Now mix a little bit of Quinacridone Violet with Matte Medium. Dab the transparent mixture onto each petal starting at the base and working not quite all the way to the top. You want the bottom of the petals to be darker than the tops. Repeat to paint both the inside and outside of each petal.


Use a hot glue gun to glue together the flower layers. Add a gold button into the center of each flower to cover up the glue.


Use hot glue to glue the flowers onto the bottom right hand corner of the canvas. 


Use your E-cutter with your butterfly cut file of choice to cut out six butterflies of various sizes from the white glitter paper. Fold the wings of the butterflies together to make it look like they are lifting off the canvas. Mix a single drop of Cobalt Teal Hue paint with some Matte Medium and brush a thin layer of color onto the butterflies. Mix some Quinacridone Violet with Matte Medium and paint the centers of the butterflies with the paint getting lighter as it reaches the edges of the wings. Arrange the butterflies as desired and use hot glue to glue them in place.


Thin down some Titanium White paint with a little bit of water and paint your wooden tag. Take some of the Cobalt Teal Hue and Quinacridone Violet that has been mixed with Matte Medium that you used on the butterflies. Add streaks of color onto the tag. Take a 24” long piece of metallic gold baker’s twine and wrap it around the tag several times then tie the ends of the twine into a bow. Use a permanent marker or pen to write the following quote onto the tag: 

“Your wings already exist. All you have to do is Fly”

Hot glue the tag onto the canvas and hot glue three gold buttons onto the canvas.


Now display your canvas where you can see it regularly and smile at your beautiful piece of art! 


Friday, June 19, 2015

Living in a Fixer Upper House

I don't mean the ever popular show on HGTV, that I happen to love by the way, I mean living in my own 1950's house that needs lots of fixing to be considered "done". Although I would gladly welcome Chip and Joanna to redo my house any time they want to head north, but back to the point...
I haven't shared many pictures of my house because it has been in a constant state of construction the entire 9 years that we've lived there and to date there are only two rooms that could be considered finished. Not decorated, just finished.


So I am going to step deep into the world of DIY and share with you a project that has gone on for 3 years. Yep. 3 whole years. Lets take a look at what we started with. This is our sunroom. This one room with nine lovely windows is one of the main reasons we bought this house in the first place. When we bought the house my family helped paint every room a nice shade of beige. At that point I didn't really care about the color and just wanted fresh paint up on the walls. Some of those rooms were some seriously funky colors. But in the last 9 years I have grown very tired of the boring beige.


We also had crappy carpet that even after shampooing still smelled kinda funky. I decided to rip out the carpet and do something with the floors. I was tired of cleaning carpet. Then the hubs decides why don't we just go ahead and redo the room while we're at it. So we get new sheet rock up on the walls and ceiling then before we even have all the joints taped the roof started leaking.


This portion of the house was an addition that wasn't necessarily done right. The roof of the main house is in a T shape and the flat roof of the sunroom is in the inside corner of one side of the T. This makes getting the roof sealed up very difficult. But after one try of fixing it our selves, and two tries with a professional roofer the roof is now water tight. Yay! So, the roof issues combined with lack of money and lack of motivation/laziness has led us to about a month ago. Here is what we had to deal with...


The room was pretty much unusable so it became a dumping ground for everything. I spent a day sorting through and clearing out all the stuff and we got to work patching the insulation and sheet rock where we had the leaking issue, sprayed knock down for some texture (and to hide some imperfections), and it was ready for paint. I knew I wanted a dusty blue color so I bought the three samples you see below and put them up on the wall.


I showed my husband the three colors I had selected to choose from, and his response.... they all look the same! Ha, such a guy. So I picked the darkest of the three  which is Dolphin Blue from Behr. Two coats of paint on the walls and two coats of white on the ceilings, some trim around the windows, and here we are.


Now you know the saga of the sunroom redo as it stands. Come back next week to see my design plans for the room. 


Monday, June 8, 2015

An Extra Special Mother's Day Card

My brother-in-law sent me a message a few days before Mother's Day asking if I could make his wife a card with a specific quote on it. I could have gone the easy route and just typed up the quote, printed it out, and used it on a card front; but I wanted to make her something extra special.


I assure you, this is not a sponsored post. I just wanted to share some of the things I love so you will see a few links to items you can purchase below. I will not and have not received any compensation from the sites linked below. 

I've been trying to learn how to do calligraphy after finding the blog The Postman's Knock. Lindsay has the most wonderful and inspiring posts that make it seem like you really can learn calligraphy. So I purchased the Kaitlin Style Premium Calligraphy Worksheet Set. Now I haven't had a chance to practice that much before attempting to do this card. 
  

Now that I look back through the photos I realize I forgot to cross a T. Oops...


I started out by cutting a piece of Watercolor paper down to the size I wanted. Then I used a pencil and ruler to create guidelines for my attempted calligraphy. I practiced writing the quote several times on regular paper with a pencil before trying it on the watercolor paper. Then I went to work on the watercolor paper holding my breath all the while. Once the ink was completely dry I erased my pencil marks. 

Then I sketched some flowers in pencil and used my Grumbacher watercolor paint to create the background and add color to the flowers. 


Once the watercolor was dry I added some stitching detail around the edges. I glued the watercolor paper onto a slightly larger piece of Soft Sky cardstock. I wrapped the card front with some Silver Baker's Twine and tied it into a bow before using Stampin' Dimensionals to adhere the panel onto the Blackberry Bliss card front. 


A few rhinestones in each of the top corners were the finishing touch on the front. 


For the inside I glued the watercolor paper onto the same size Soft Sky cardstock as before and glued that panel inside the card. I use the small heart punch to add a single Silver Glimmer Paper heart to the end of the quote. 

On the other flap inside the card I glued in a piece of Whisper White cardstock so there was space to write a message. 


To finish it all up I used my Envelope Punch Board with a sheet of DSP to make a custom envelope. To hold the flap of the envelope closed I just wrapped some retired Bashful Blue stain ribbon around the envelope and tied it into a bow. The bow was embellished with some linen thread and a white heart button.


I really had a lot of fun working on this project and trying to use some new mediums and techniques. Although my calligraphy was pretty rough on this project it gives me the fuel to keep on practicing to get better. After all, you are learning a whole new way to write so that does take time and lots of practice. 

What mediums or new forms of crafting have you been trying out lately? 


Wednesday, May 27, 2015

Peanut Butter Cake

I'm going out of my usual post genre today. But I have a really yummy recipe to share with you. First, a little back story...

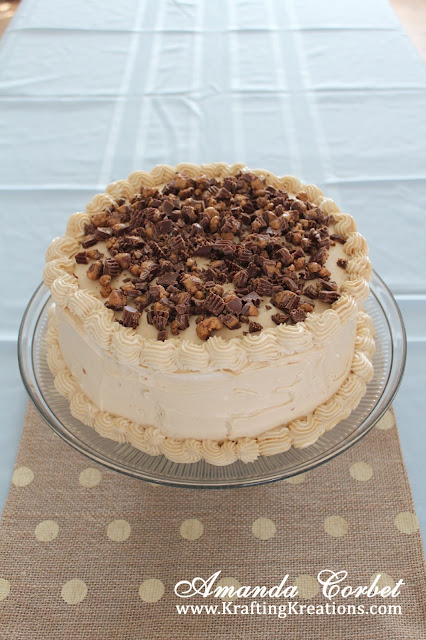
Easy Peanut Butter Cake

My husband is a peanut butter fanatic. He absolutely loves anything peanut butter flavored and Reeces Peanut Butter Cups are his favorite. Well before his last birthday I hunted high and low for a peanut butter cake recipe to make for his birthday cake.

When I buy him peanut butter ice cream he prefers the kind with vanilla ice cream rather than chocolate. At this point you're probably thinking I'm putting way too much thought into this... Well all the cake recipes I could find were based off of a chocolate cake with peanut butter. So after hours with little success I decided I will just whip up my own peanut butter cake recipe and for the frosting I modified the Cloud Frosting recipe that I had used before. So this is what I ended up with!

Easy Peanut Butter Cake

The Cake
1 Box yellow cake mix
1/2 cup melted butter
4 eggs
1-1/4 cups milk
1 package peanut butter morsels

Mix peanut butter chips with cake mix. Add wet ingredients and stir to combine. Bake at 350°F 
(9" x 13" pan 29-34 minutes; two 8" round pans 29-34 minutes; cupcakes 18-23 minutes). Make sure you test the cake with a toothpick to see if it comes out clean. If the toothpick is clean the cake is done, if it comes out with batter on it then bake in five minute increments testing each time until the cake is done. Allow cake to cool completely before frosting. 

While your cake is cooling unwrap what seems like a million peanut butter cups and chop them up into tiny pieces. I used a whole bag of the miniature peanut butter cups. 


Peanut Butter Frosting
1 package cream cheese, straight from the refrigerator
1 cup powdered sugar
1 pint heavy whipping cream
3/4 cup creamy peanut butter
1/2 cup milk
1 teaspoon vanilla
1 package mini Reeces Peanut Butter Cups, chopped

Combine cream cheese, vanilla, and powdered sugar in a mixer bowl. Add 1 pint whipping cream. Mix together on a slow speed until combined. Stop to scrape down the sides of the bowl frequently. Once the ingredients are combined turn the mixer up to high and beat the frosting until stiff peaks form. You're basically making a delicious whipped cream cheese frosting. 

While your frosting is mixing away, combine the peanut butter and milk in a separate bowl. Once the whipped frosting is finished gently fold in the peanut butter mix until completely combined with the whipped frosting. Spread the frosting on your cake and top with chopped peanut butter cups. 


Easy Peanut Butter Cake

I've never been good at frosting cakes, so I wasn't really going for pretty, I was more going for getting it on the cake. I had a bunch of frosting left over so I decided to add some edging. I just put the frosting in a piping bag with a large star tip and attempted to make the little swirls around the edge of the cake. It ended up kinda wonky, but it still tasted good. If you're piping this frosting you need to work fast. Your hands will heat up the cream cheese frosting and it can get kinda messy. If you have to, stop for a bit and put the cake and the piping bag in the fridge for 20 minutes or so before continuing.

Keep the cake in the refrigerator until you're ready to serve. 


Easy Peanut Butter Cake

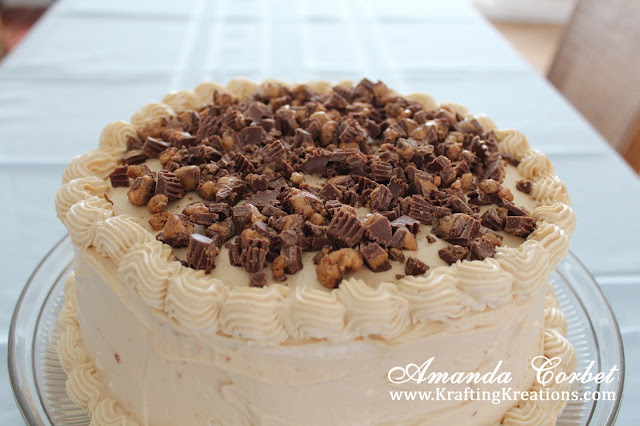
Since this cake was destined for a birthday part I couldn't get a picture of a slice of cake. Bad food blogger.... One more photo just because I was having fun with the camera...

Easy Peanut Butter Cake

This cake is rich, creamy, and delicious but not overpowering with it's peanut butter goodness. I'm not a huge fan of peanut butter but I really enjoyed this cake. So did the rest of the family. I've made this cake twice since my hub's birthday and each time there isn't much left to save for later. Enjoy! 

Linking up to these parties.