Sunday, April 29, 2012

Craft Project Central!

Father's Day Book and Gift Card Holder:
This handmade book is sure to melt the heart of any father who receives it.  Each page features loving thoughts by the child or children about their dad, like; I know my dad loves me when… Each page also has room for photos that will bring back special memories for dad.  And just to make sure that dad feels extra special, give him a gift card to his favorite place.  When it’s given in this matching gift card holder, he will know just how special he is on his special day!


This great project was designed by Carrie! If you have a chance please stop by Carrie's blog and leave her a comment on her project. 

If you would like to subscribe to the April edition of Craft Project Central and get 10 wonderful tutorials for just $10.00 then click HERE

Thanks for stopping by! 

Friday, April 27, 2012

Craft Project Central!

Summer Smooches Note Cards and Gift Box:
This set of pretty Note Cards and matching Gift Box makes a darling gift for just about anyone, and features a belly band for a fun twist!  The box is deep enough to hold several note cards and envelopes.  Make several sets and give them away and be sure to keep one for yourself!


This wonderful project was designed by Laurie! If you have a chance please stop by Laurie's blog and leave her a comment on her project! 

If you would like to subscribe to the April edition of Craft Project Central and get 10 great tutorials for just $10.00 then click HERE

Thanks for stopping by! 


Wednesday, April 25, 2012

Jewelry Set and Gift Box

Okay, I have one last Christmas present from last year to share with you. This is a red and pewter necklace and earrings set that I made. The jewelry supplies for this project came from Wal-Mart. The jewelry selection at my local store recently has had some very nice things. I combined red glass beads with pewter chain to create a three strand necklace and added the beautiful heart pendant. The earrings were just some more red beads and chain.


Here it is all packaged up ready to go. This was being sent overseas so I wanted to try to make sure that it remained untangled and looking pretty during shipping. So I used some wire and a scrap piece of thin cardboard I had lying around to attach the necklace and earrings to. I just punched holes in the cardboard and used scrap pieces of wire as twist ties on the back to hold everything in place.


This is the box I made to package the jewelry set in. I used some retired glittery polka dot DSP with Cherry Cobbler, Night of Navy, and Naturals White card stock to make the box. I tied a large bow around the box in 1-1/4" Night of Navy Striped Grosgrain ribbon. Then I cut a long length of Cherry Cobbler baker's twine and tied it around the center of the bow. I inserted the baker's twine threads through a button, added on three mini jingle bells, and then tied the baker's twine into a knot, then into a little bow.  


Then I cut a long length of Cherry Cobbler baker's twine and tied it around the center of the bow. I inserted the baker's twine threads through a button, added on three mini jingle bells, and then tied the baker's twine into a knot, then into a little bow.


The box and jewelry set turned out just how I wanted them to look! I really hope the recipient liked it!

Thanks for stopping by!

Tuesday, April 24, 2012

Craft Project Central!

Tea Box Gift Set and Card: 
This Tea Box is perfect for Mother’s Day (which is only three weeks away!), as a teacher appreciation gift (school will be out soon too!), for tea drinkers or for anyone that you want to give a pretty little gift to!  Makes for a fun class project too!


This wonderful project was designed by Heidi! If you have a chance please stop by Heidi's blog and leave her a comment on her project! 


If you would like to subscribe to the April edition of Craft Project Central just click HERE! You'll get 10 great tutorials for only $10.00!


Thanks for stopping by! 

Saturday, April 21, 2012

Tool Box Gift Card Holder and Card!

Once again a designer dropped out at the last minute for April, so Jacque asked me if I could create a second project. I was happy to...and this is what I came up with! 

Tool Box Gift Card Holder and Card

Do you need the perfect box to give a gift card to a guy who works with tools? What about this Tool Box Gift Card Holder and Card? The tool box is complete with a working latch and tool tray. Inside there is a slot to insert that gift card and even room to maybe add some sweet treats or some small tools! The card is designed to look like a workshop pegboard with all the tools organized and hung. What guy wouldn’t love to get a gift card and a small gift in this cute little tool box? 


This is the bonus project for April so if you would like to get this tutorial just do one of the following:

  • Subscribe to two or more months in a row
  • Put the CPC badge on your blog
  • Refer a friend and let CPC know when they subscribe


If you would like to subscribe to the April edition of Craft Project Central just click HERE! You will get 10 fantastic tutorials for just $10!

Thanks for stopping by! 

Thursday, April 19, 2012

Ultimate Blog Party 2012!

Susan and Janice over at 5 Minutes for Mom are hosting the Ultimate Blog Party 2012. There is a chance to win one of many, many prizes! All you have to do to join the party is write a post about your blog and about yourself. Not to mention you can browse through loads of links to other blogs with a variety of categories.

So if you would like to join the party head on over to 5 Minutes for Mom and sign up for their party. But you better hurry, the party ends on April 20th!

The best way to describe me is I love to craft. It doesn't really matter what kind of craft. I just like to make things. One of the sayings that I found on Pinterest, which will eventually be a project for some wall art in my craft room is "I just want to make beautiful things...even if nobody else cares". You can find the link to my Pinterest pin HERE.

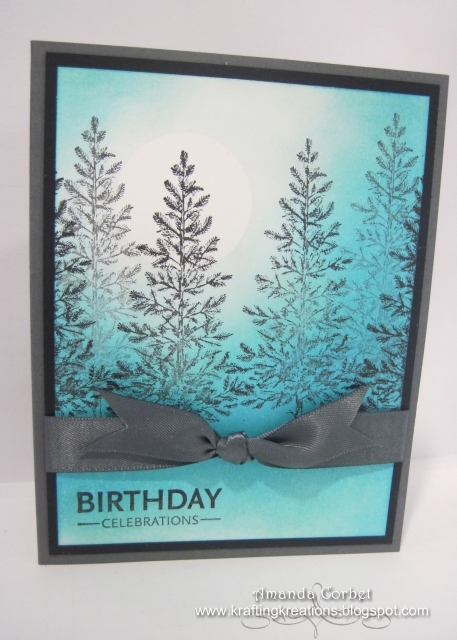
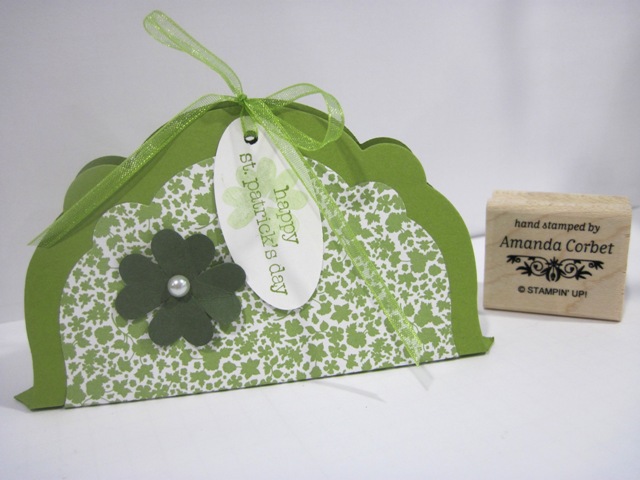
I enjoy a variety of crafts including but not limited to; card making, scrapbooking, jewelry making, cross stitch, stained glass, fused glass, sewing, crochet, and mosaic. I am working on learning how to knit and how to quilt. My craft room is a constant work in progress as I find better or different ways to store my ridiculous collection of crafting supplies. I also sell Stampin' Up products and use them almost exclusively in my paper crafts.


During the work day I'm a designer at a local manufacturing company. I really feel that my job has helped me think about things differently so I can properly plan and execute my projects. Not that all of my projects are a success, but at least I thought it through before starting, right?

I have been happily married for 6-1/2 years to my wonderful husband Bill. We live in a 1950's home that is one big DIY project in itself. So between working, chores, and working on the house I wish I had more time to spend in my craft room to create more beautiful things to share with you. The picture above is from 2009 on our first cruise on the Disney Magic. We love going on the Disney Cruise vacations, and will be taking our third Disney Cruise vacation in about 5 weeks on the Disney Fantasy!

My blog started out and continues to be a place for me to share the things I've made and some info about how I made them so if someone else happens to want to create the same project than maybe I've helped them out a little bit. Bloging is a bit of work but I like to share what I've made with the world. Sometimes I'm not sure if anyone is reading it, but it's like my crafting journal so I just keep on posting my creations. That is all I can think of right now. If you have any random questions for me I would be happy to answer! Just leave them in the comments!

Thanks for stopping by!   

Winter Trees Card

Today I have a treat for you! I actually made a "real" video tutorial. The first one I did was just on the computer for MDS, but this one is a real video. I'm really excited to hear what you think. Any video tutorial tips that you experts have learned would be much appreciated. I've learned several things just making this one video and now I know some things that I will change for my next one. Anyway this is the card that I'm going to show you how to make in the video. It was one of the cards from the April Make and Take.


  • Stamps: Lovely as a Tree, Upsy Daisy
  • Card Stock: Basic Grey, Basic Black, Whisper White
  • Ink: Pool Party, Tempting Turquoise, Basic Black
  • Accessories: 1-3/8" Circle Punch, Post-It Note, Stampin' Sponge, 5/8" Basic Grey Satin Ribbon


What do you think? Good enough for a beginner? This card was inspired by THIS card that I found on Pinterest! 

Thanks for stopping by! 

Wednesday, April 18, 2012

Enchanting Easter Bunny

Hello again! I have another card from the Spring/Easter Make and Take. This is the second one we made. I saw a card on Karen Squire's blog that I knew I just HAD to make because it was just so darn cute! So here it is: 


  • Stamps: Everybunny
  • Card Stock: Calypso Coral, Pool Party, Very Vanilla
  • DSP: Everyday Enchantment
  • Ink: Black Stazon, Soft Suede, Pool Party, Calypso Coral, Sahara Sand
  • Accessories: Blender Pen, Labels Framelits, Edgelits, 1-3/4" x 7/8" Oval Punch, Modern Label Punch, 2" x 1-3/8" Oval Punch, Stampin' Dimensionals, Calypso Coral Organza Ribbon, Everyday Enchantment Brads, Stampin' Sponge, Paper Piercer, Mat Pack

I started off with a piece of Calypso Coral card stock cut 5-1/2" x 8-1/2" and scored at 4-1/4". Then I sponged Soft Suede ink around the top, bottom, and fold sides of the card front. Next I cut a piece of Everyday Enchantment DSP 4" x 5-1/4". I ran it through the Big Shot with the curvy Edgelit to cut one edge. Then I sponged around all four sides with Soft Suede ink and adhered the DSP onto the card front.

Now that the DSP is glued onto the card front I cut the edge of the card front with the curvy Edgelit. I find it's easiest to get the shapes lined up if the shorter layer is already glued into place. Then I sponged the now curvy edge of the Calypso Coral card stock with Soft Suede ink.

Next I stamped the adorable bunny in the egg from Everybunny onto Very Vanilla card stock in Black Stazon ink and punched out the bunny with the 2" x 1-3/8" Oval Punch. To color in the bunny I used the Blender Pen with Sahara Sand, Pool Party, and Calypso Coral ink pads. To do this, squeeze the center of the ink pad while it is closed, then open up the ink pad half-way and use the blender pen to pick up the ink off the lid of the ink pad and apply it to your image. By coloring this way you get a very soft watercolor look to your image. After I was done coloring I sponged around the edges of the oval with Soft Suede ink.


Then I cut a piece of Pool Party card stock 2" x 2-1/2" and ran it through the Big Shot with the smallest Labels Framelit. I also cut a piece of Calypso Coral card stock 2-1/2" x 3" and ran it through the Big Shot with the second-smallest Labels Framelit. Then I sponged the edges on both labels. The Calypso Coral label was adhered directly onto the top of the card front. The Pool Party label was adhered behind the bunny oval and was adhered on top of the Calypso Coral label with Stampin' Dimensionals.

Now for the greeting. I stamped the greeting from Everybunny onto a scrap of Very Vanilla card stock in Calypso Coral ink and punched it out with the 1-3/4" x 7/8" Oval punch and sponged around the edges with Soft Suede ink. I then used the Modern Label punch on a scrap of Calypso Coral card stock and adhered the modern label behind the greeting oval. In this picture the modern label was not sponged like everything else. I didn't notice it at the time, but later I took it off, sponged the edges and put it back on and it looks much better! The greeting was adhered onto the bottom of the card front with Stampin' Dimensionals.


Now I just wanted to add the pretty Calypso Coral ribbon. So I tied a bow in the pretty Organza Ribbon and trimmed the ends. I used the Paper Piercer and Mat Pack to pierce a hole in the card front just under the Framelit labels. I spread the prongs on an Everyday Enchantment brad and placed the knot of the bow between the prongs. Then I closed the prongs just enough to get them through the hole and spread the prongs on the inside of the card front.

This card definitely took more time than some of the others, but it was just too cute to resist. Thank you Karen for the inspiration! You can find Karen Squires card HERE.

Thanks for stopping by! 

Crochet Ruffle Scarf

This is a scarf that I crocheted for my Aunt for Christmas. I finished it in September I think. It was right when the leaves on the tree in my back yard were bright red and pretty, so I took the scarf outside and draped it on a recently broken branch to take the photo. 


I used THIS pattern with Caron Simply soft yarn. I believe it was Pistachio, Vanilla, and Chocolate yarn that I used. I crocheted all three strands of yarn together with one really large crochet hook. I also added a couple more rows that what the pattern called for. Then I edged it in three strands of just the Chocolate with a single crochet all the way around. 


It's a really fun scarf pattern because when you put it on it automatically spirals around itself. It's also really quick and easy to whip up in no time!

Thanks for stopping by!

Craft Project Central!

Twitterpated Card Set and Tote: 

Give this pretty greeting card set to someone who loves to send out cards!  Tucked into the tote are five different beautiful cards decorated with designer series paper, Dazzling Diamonds glitter and pretty pearls!  The set makes a great gift for teachers and co-workers and would make a beautiful Mother’s Day gift too! 


This wonderful project was designed by Kim! If you have a chance please pop over to Kim's blog and leave her a comment on her project. 

To subscribe to the April edition of Craft Project Central just click HERE! You will get 10 fantastic tutorials for just $10! 

Thanks for stopping by! 

Tuesday, April 17, 2012

Who Loves Pink

Back in March when I was making samples for the March Make and Take I goofed. I forgot to include at least one Easter themed project. So to correct that mistake I held a special Spring and Easter class. Well here is the first card from that class. Although it's not for Easter it is a bright and simple card that reminds me of spring. Take a look: 


  • Stamps: Simply Soft, Teeny Tiny Wishes
  • Card Stock: Pretty in Pink, Whisper White, Melon Mambo
  • DSP: Melon Mambo 
  • Ink: Black Stazon, Melon Mambo
  • Accessories: Tasteful Trim Die, Perfect Details Texturez Plate, Word Window Punch, Itty Bitty Shapes Punch Pack, Rhinestones, Stampin' Dimensionals, Pretty in Pink Marker, Lucky Limeade Marker, Two Way Glue Pen


To start off I cut a piece of Pretty in Pink card stock 5-1/2" x 8-1/2" and scored it at 4-1/4". Then I cut a piece of Whisper White card stock 3" x 4" and ran it through the Big Shot on the Perfect Details Texturez Plate. I adhered this onto the top of the card front. Next I cut a piece of Melon Mambo striped DSP 2-1/4" x 4" and adhered it onto the bottom of the card front. To finish off the seam where the Whisper White card stock and DSP meet I cut a piece of Pretty in Pink card stock 1/2" x 4" and ran it through the Big Shot on the Tasteful Trim die to cut out the ric-rac. I adhered the ric-rac onto the card with a Two-Way Glue Pen.

Now for the flowers. I cut a piece of Whisper White card stock 1-7/8" x 3-1/8" and then stamped the flower from Simply Soft onto the card stock in Black Stazon ink. I wanted to continue the pink theme with the card so I colored in the flowers with the Pretty in Pink marker. The leaves and stem were then colored in with the Lucky Limeade marker. I cut a piece of Melon Mambo card stock 2" x 3-1/4" and adhered my flower panel on top of it. Then I adhered this panel onto the left side of the card front with Stampin' Dimensionals.


Now I just had to figure out what to use for a sentiment. I didn't want to just stamp on the DSP because it can be difficult to read on certain colors. So I opted for my go-to set. I stamped the greeting from Teeny Tiny Wishes onto a scrap of Whisper White card stock in Melon Mambo ink. Then I punched out the greeting with the Word Window punch and adhered the label onto the bottom of the card front with the Two-Way Glue Pen.

To dress up the greeting label a little bit I punched out one small flower from Pretty in Pink card stock and another from Melon Mambo card stock using the small flower punch that comes in the Itty Bitty Shapes Punch Pack. I glued the flowers together and onto the left side of the label and added a single small rhinestone into the center just to add a little bit of sparkle.

That's it! This mostly monochromatic card turned out wonderful! Since I used the simple "thinking of you" for my greeting it will make a great card for a variety of occasions! What do you think?

Thanks for stopping by! 

Sunday, April 15, 2012

Craft Project Central!

Mixed Bunch Flower Pot and Card: 


Here’s a fun green project just in time for Spring!  Recycle a can into a pretty pot holding a bouquet of flowers created using the Mixed Bunch stamp set.  The whimsical pennant leaves stamped with inspiring words are the perfect accent.  Make the matching double-pocket card, with a matching bookmark and tag, and give to someone creative in your life, or make it for your own craft studio!


This beautiful project was designed by Lynn! If you have a chance please stop by Lynn's blog and leave her a comment on her project!


If you would like to subscribe to the April edition of Craft Project Central just click HERE. You will get 10 fantastic tutorials for just $10.00! 


Thanks for stopping by! 

Friday, April 13, 2012

Spring Basket and Card and Blog Candy!

Here is my tutorial for the April edition of Craft Project Central!

Spring Basket and Card: 


Who wouldn’t love this pretty Spring basket filled with a special treat and presented with the matching card.  The set makes a great teacher, co-worker, or neighbor gift.  Project includes instructions to make the pretty basket, flowers, paper bow and matching card!  This is one that you’ll make over and over for a variety of different occasions!


If you would like to subscribe to the April edition of Craft Project Central just click HERE. You will get 10 fantastic tutorials for just $10.00! 


Now for the candy....Just enter a comment on this post before noon on April 20th and you will entered to win a FREE April subscription to Craft Project Central! 


Thanks for stopping by! 

Wednesday, April 11, 2012

Stained Glass Cabinet Christmas Present

I still have a couple of Christmas gifts that I made last year that I haven't posted. Well here is one of them. This one I hadn't posted yet because I was hoping to get a better picture of it, but this one will do. The bottom is kind of blocked by the computer monitor that was on the desk. The desk and computer monitor have since moved so they no longer block the panel. When I get a better picture I'll update this post. 

This gift was for my Dad. He had been asking for over a year to have something to hide his electrical panel that is in plain view in the family room. So after a lot of thinking I came up with the idea of building a cabinet to hang over the box with a door, so the electrical panel could still be easily accessed. Then I thought it would be really cool to have a stained glass panel inside the door back lit with a couple of lights mounted on the inside of the cabinet! 


My hubby built the beautiful cabinet in his wood shop while I worked on the stained glass panel. The design is my own original creation too! It took MANY hours of cutting, grinding, foiling, and soldering. But it was so worth it! Just seeing the look on Dad's face, and everyone else's, made the hours of work worth it. 

The glass I used for this project is....
  • Wissmach Mystic Light Amber with Brown and White Wispy
  • Kokomo Almond Opalume
  • Spectrum Light Amber and White Wispy
  • Spectrum Brown/Gold Streaky Granite
  • Kokomo Medium Amber Cathedral
  • Spectrum Pale Amber and White Whispy

I purchased all of my glass, copper foil, and solder from Delphi Glass. They always ship really fast, have a wide variety of options for all kinds of glass work, and I've never received a broken piece of glass because they pack it really well! 

Let me know if you would like a copy of my pattern and I will be happy to send you a PDF format that you can scale to whatever size you need! 

Dad was totally surprised Christmas morning! Which is really hard to do. My hubby even ran the wiring for a switch so the light can be turned on when you enter the room. I just love soft glow behind the neutral colored glass and all the texture! 

Thanks for stopping by! 

Tuesday, April 10, 2012

Craft Project Central!

Summer Smooches Buckle Tote and Card Set: 


Do you need a quick little gift to give to someone just to let them know you appreciate them?  Create this cute little buckle tote and card set, and make their day!  The tote and cards are made with the brand new Summer Smooches Designer Series Paper, Bright Blossoms stamp set and more!  The cards are perfect for just about any occasion and the project includes instructions for making matches envelopes as well!  The set is a great gift for teachers, co-workers, you name it, and would make a great class project too!!


This great project was designed by Christy! If you have a chance please stop by her blog and leave Christy a comment on her project. 


If you would like to subscribe to the April edition of Craft Project Central just click HERE. You will get 10 fantastic tutorials for just $10.00! 


Thanks for stopping by! 

Monday, April 9, 2012

Happy Easter!

Okay, I know yesterday was Easter. I hope you all had a fabulous holiday weekend! I made this card yesterday for my Mom. I used the sketch challenge SCCSC114 on Stampin' Connection to start with. I knew I wanted to use the adorable Easter bunny egg balloon image from Everybunny because it is just so darn cute! Take a look at my card: 


  • Stamps: Everybunny, Teeny Tiny Wishes, French Filigree
  • Card Stock: Wisteria Wonder, Pool Party, Whisper White
  • DSP: Daffodil Delight DSP
  • Ink: Stazon, Wisteria Wonder, Pool Party, Daffodil Delight, Lucky Limeade, Sahara Sand
  • Accessories: Scallop Edge Border punch, Blender Pen, Stampin' Dimensionals, Dazzling Details, Daffodil Delight Seam Binding ribbon.
Here is the sketch that was created by yours truly: 


I started off by cutting a piece of Wisteria Wonder card stock 5-1/2" x 8-1/2" and scoring it at 4-1/4". Then I inked up the French Filigree background stamp with Wisteria Wonder ink and stamped it onto the card front. Next I cut a piece of Whisper White card stock 4" x 2-3/4". I punched one of the 4" long sides with the Scallop Edge Border punch. Then I cut a piece of Daffodil Delight polka dot DSP 2-1/4" x 3-7/8". I adhered the DSP onto the punched Whisper White card stock and adhered this panel onto the bottom of the card front.

Next I cut a piece of Whisper White card stock 2" x 3-3/4". I stamped the image from Everybunny onto the card stock in Black Stazon ink. I used my Blender Pen with my ink pads to color in the images. To do this squeeze the center of the ink pad while the pad is closed, then open the pad up half way and use the Blender Pen to pick the ink up off the lid of the ink pad.

I used Sahara Sand for the bunny; Lucky Limeade for the basket; Pool Party for the egg; Wisteria Wonder for the stripes on the egg; and Daffodil Delight for the polka dots, ribbon on the basket, and the flowers. Then I stamped the greeting from Teeny Tiny Wishes in Wisteria Wonder ink. I adhered the colored panel onto a 2-1/4" x 4" piece of Pool Party card stock then tied some Daffodil Delight Seam Binding ribbon into a bow around the panel.


I adhered the panel onto the card front with Stampin' Dimensionals and added some Dazzling Details to the stripes and dots on the egg just to add a little bit of sparkle! I really love the combination of colors on this card. These aren't colors that I would normally pair together, but I love how it turned out! What fun projects did you make for Easter?

Thanks for stopping by! 

Saturday, April 7, 2012

Craft Project Central!

Spring Softie Friends: 

These Big Shot Softie Friends are easy to make and oh-so-cute! Every piece of each of the Softies is due cut using the Big Shot and a variety of dies. Any child would love to have a Softie Friend to play with! They would also make great gifts for a baby shower! Once you make one Softie and see how easy they are to make, you’ll want to make a bunch more!

This cute project was designed by Carrie! If you have a chance please hop on over to Carrie's BLOG and leave her a comment on her project! 

If you would like to subscribe to the April edition of Craft Project Central just click HERE! You will get 10 tutorials for just $10.00!

Thursday, April 5, 2012

Lucky Label Candy Holder

Good morning everyone! Today I have to share with you the 3D project that we made at the March Make and Take. Since the Make and Take was right before St. Patrick's day we made this cute little candy holder with a St. Patrick's day theme. You could easily change it up for any theme that you need though! Take a look: 


  • Stamps: Create a Cupcake, Teeny Tiny Wishes
  • Card Stock: Lucky Limeade, Whisper White, Always Artichoke
  • DSP: Twitterpated
  • Ink: Certainly Celery, Lucky Limeade
  • Accessories: Labels Framelits, Simply Scored, Crop-A-Dile, Lucky Limeade Organza ribbon (Everyday Enchantment pack from SAB), Small Heart punch, Pearls, 1-3/4" x 7/8" Oval punch


I think you'll be surprised how quick and easy this cutie is to put together! First I cut a piece of Lucky Limeade card stock 5-1/2" x 6-1/2" and ran it through the Big Shot with the largest Label Framelit. Then I cut a piece of Twitterpated DSP 4" x 5" and ran it through the Big Shot with the second largest Label Framelit. Now take your Lucky Limeade label and line up the points on the label with a groove on your Simply Scored. Score the label 1/4" on either side of the point on the label.

Tip: I frequently use my Simply Scored for weird angle scores that require you to line it up in a single groove. That is difficult to see on your Simply Scored because the score grooves are so close together. So to resolve this I simply took a fine point permanent marker and colored in the 6" groove. This makes the groove easier to see when I need to line up the points of the label or something similar. 

Next I adhered the DSP label onto the scored Lucky Limeade label and folded on the score lines. Now it's time to work on the tag. On a scrap piece of Whisper White card stock I stamped the heart from Create a Cupcake in Certainly Celery ink. To get the lighter hearts I actually inked up the heart stamp, stamped the image onto a scrap of copy paper, then stamped it onto the Whisper White card stock. I just repeated this three more times and stamped the hearts so that the points look like they're joined to form a four leaf clover.

Then I stamped the greeting from Teeny Tiny Wishes in Lucky Limeade ink on top of the clover. The greeting was punched out with the 1-3/4" x 7/8" Oval punch. I used the small hole of the Crop-A-Dile to punch a hole in the end of the oval tag, and at the top of both sides of the label. Then I just inserted a piece of Lucky Limeade Organza ribbon and tied it into a bow.


As cute as it was it was missing something. So I got out my Small Heart punch and a scrap of Always Artichoke card stock. I punched out four hearts and adhered them onto the front of the candy holder so that it looks like a four leaf clover. Then to finish it off I added a pearl into the center! Inside are two Smarties packages. This would also work for Tootsie Rolls, chap stick, or just about anything that you can get to fit.

What a cute way to present a little something for someone! These would make great party favors too! What fun things have you been using your Labels Framelits for?

Thanks for stopping by!

Wednesday, April 4, 2012

Blog Candy Winner!

It's time to draw a winner for the free March subscription of Craft Project Central! The drawing was on THIS post.

Drum roll please .......................................................................................................................


And the winner is......Shari! 

Here is her comment:
So pretty I don't know where you get the ideas from. Shari showell@shaw.ca


Thank you everyone for entering! Keep your eye out, later in the month when I post my project there will be a drawing for a free April subscription! 


Thanks for stopping by! 


Craft Project Central!

Baby Carriage and Card:


Are you looking for a unique baby shower gift or baby shower favor?  Make this super cute baby carriage shaped gift box and you have the perfect gift card box or goodie box to use as darling favors!  Use the cute matching card as baby shower invitations, announcements, welcome baby cards, or thank you cards!  After the celebrating is over, the lucky mom-to-be will want to hold onto the baby carriage and use it as a little keepsake box. 


This adorable project was designed by Monika! If you have a chance please hop on over to Monika's BLOG and leave her a comment on her project!

If you would like to subscribe to the April edition of Craft Project Central just click HERE! You will get 10 great tutorials for just $10.00!


Tuesday, April 3, 2012

Mixed Bunch Layers

Hello everyone! Today I have another card from the March Make and Take to share with you! This one uses a technique that I've seen all over the internet using the Blossom Punch. Take a look: 


  • Stamps: Curly Cute
  • Card Stock: Crumb Cake, Cherry Cobbler, Daffodil Delight, Whisper White, Not Quite Navy
  • DSP: Twitterpated
  • Ink: Not Quite Navy
  • Accessories: Brights Designer Buttons, 1/8" Daffodil Delight Taffeta Ribbon, Blossom Punch, Boho Blossom Punch, Paper Snips, Stampin' Dimensionals, Elegant Lines embossing folder, Corner Rounder punch

To start off I cut a piece of Crumb Cake card stock 5-1/2" x 8-1/2" and scored it at 4-1/4". I punched all four corners of the card with the Corner Rounder punch. Next I cut a piece of Twitterpated DSP 3" x 3" and adhered it onto the top section of the card front. 

Then I cut a piece of Whisper White card stock 3" x 3" and ran it through the Big Shot in the Elegant Lines embossing folder. The now textured Whisper White card stock was adhered onto a 3-1/4" x 3-1/4" piece of Cherry Cobbler card stock. Next I used the Blossom punch to punch out the flower in the card stock. It is possible to punch through two layers of card stock with this punch, just place the punch on the table up-side down, align your card stock, and punch down hard. 

I adhered this punched panel on top of the DSP with Stampin' Dimensionals. This way you see the pattern of the DSP inside the punch, but you can also see the definite shadow that the raised punched layer creates! Totally awesome! Now I couldn't leave the center of the flower naked and boring, so I used my Boho Blossoms punch on a scrap of Not Quite Navy card stock to punch out the largest flower. I curled the petals a little bit with my bone folder and adhered the flower into the center of the punched flower. 

Then I cut a short length of 1/8" Daffodil Delight Taffeta ribbon and inserted it through the holes of a blue button from the Brights Designer Buttons. I tied the ribbon into a knot, trimmed the ends with Paper Snips, then adhered the button on top of the Not Quite Navy flower with a Stampin' Dimensional. Now the center of the flower isn't so naked any more and we've got a fun color combination going on here. So I just continued the color combo for the greeting.


The greeting from Curly Cute was stamped in Not Quite Navy ink onto a 7/8" x 4" strip of Whisper White card stock. I adhered the stamped greeting strip onto a 1" x 4" strip of Daffodil Delight card stock. Then I used my Paper Snips to cut a dove-tail in one end of the greeting strip. I adhered the greeting strip onto the bottom of the card front and it was done!


The raised punched layer is such a fun technique to use (not sure what it's called). I bet it would look fabulous with just about any shape! The only thing I wish I had done differently would be to use a background stamp on the Crumb Cake card front. But I still like it, and so did the ladies at the Make and Take! What do you think? Have you been using this technique lately too?

Thanks for stopping by!

Summer Smooches!

It's that time of year again! We're getting closer to the end of another Stampin' Up Catalog year. Soon we will be able to see what products are retiring and seeing sneak peaks of what is to come in the new catalog. Well you can get in on some of the products from the new catalog too! April 1st-30th you can order select products from the new catalog!


Note: The Summer Smooches Designer Fabric Brads and Decor Stencil are exclusive to this offer. They will not be available after April 30th! So hurry up and get them while you can! 

Click HERE to shop the wonderful new products in the Summer Smooches collection!

Thanks for stopping by!

Monday, April 2, 2012

Craft Project Central!

Are you ready for another month of fabulous tutorials from Craft Project Central! I can't believe it's already April, but it is! Here is the first tutorial for April!

Flower Pot Box and Card: 

Welcome to Craft Project Central for April!  Spring is here and we’ve got some great Spring projects for you this month!!  To start off this Flower Pot Box is perfect for Mother’s Day or any special occasion.  The Flower Pot Box would make a great favor for showers or other spring parties!  Pair it up with the coordinating card and you have a cheery combo sure to put a smile on anyone’s face!  This project is also a quick and easy class, club, or camp project!


This adorable project was designed by Laurie! If you have a chance please hop on over to Laurie's BLOG and leave her a comment on her project! 

If you would like to subscribe to the April edition of Craft Project Central click HERE! You will get 10 fantastic tutorials for three dimensional projects all for just $10.00! 


Thanks for stopping by!