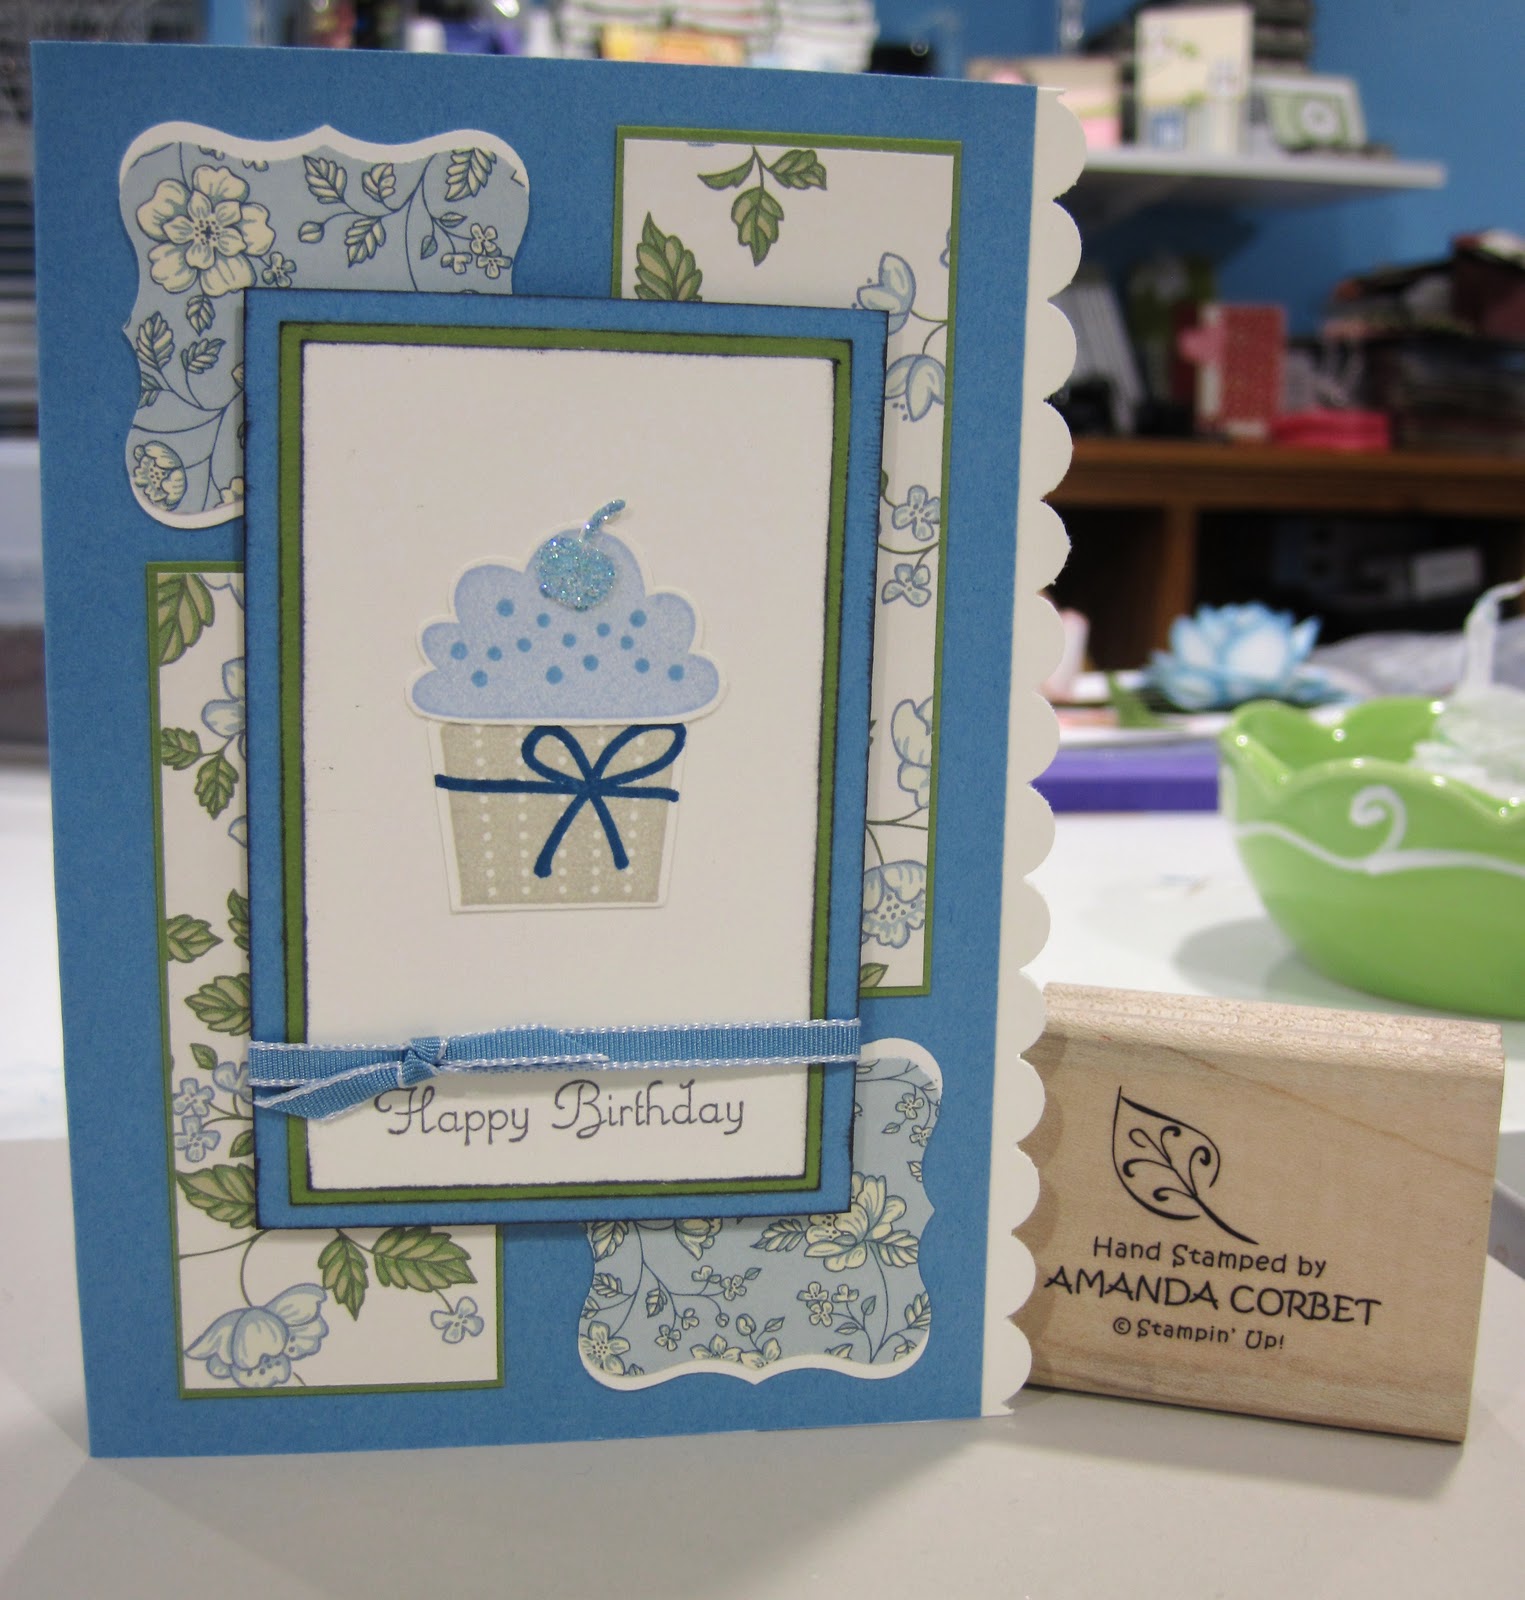
Monday, February 28, 2011

Love cupcakes?


Come and join me for a cupcake class featuring the Create A Cupcake stamp set and the Build A Cupcake Punch!

Friday, April 1st, 2011
7:00 PM – 9:00 PM
My home: 1304 Lawrence Ave, Leavenworth KS


What you will get:

Create A Cupcake stamp set, your choice of clear mount or wood mount
Build A Cupcake punch
6 sheets (one of each pattern) Springtime Designer Series Paper
6” x 12” sheet of Real Red Glimmer paper
Approximately 5 yards of Rose Red Seam Binding ribbon
One package Basic Pearl Jewel Accents
Your choice of one Sale-A-Bration product

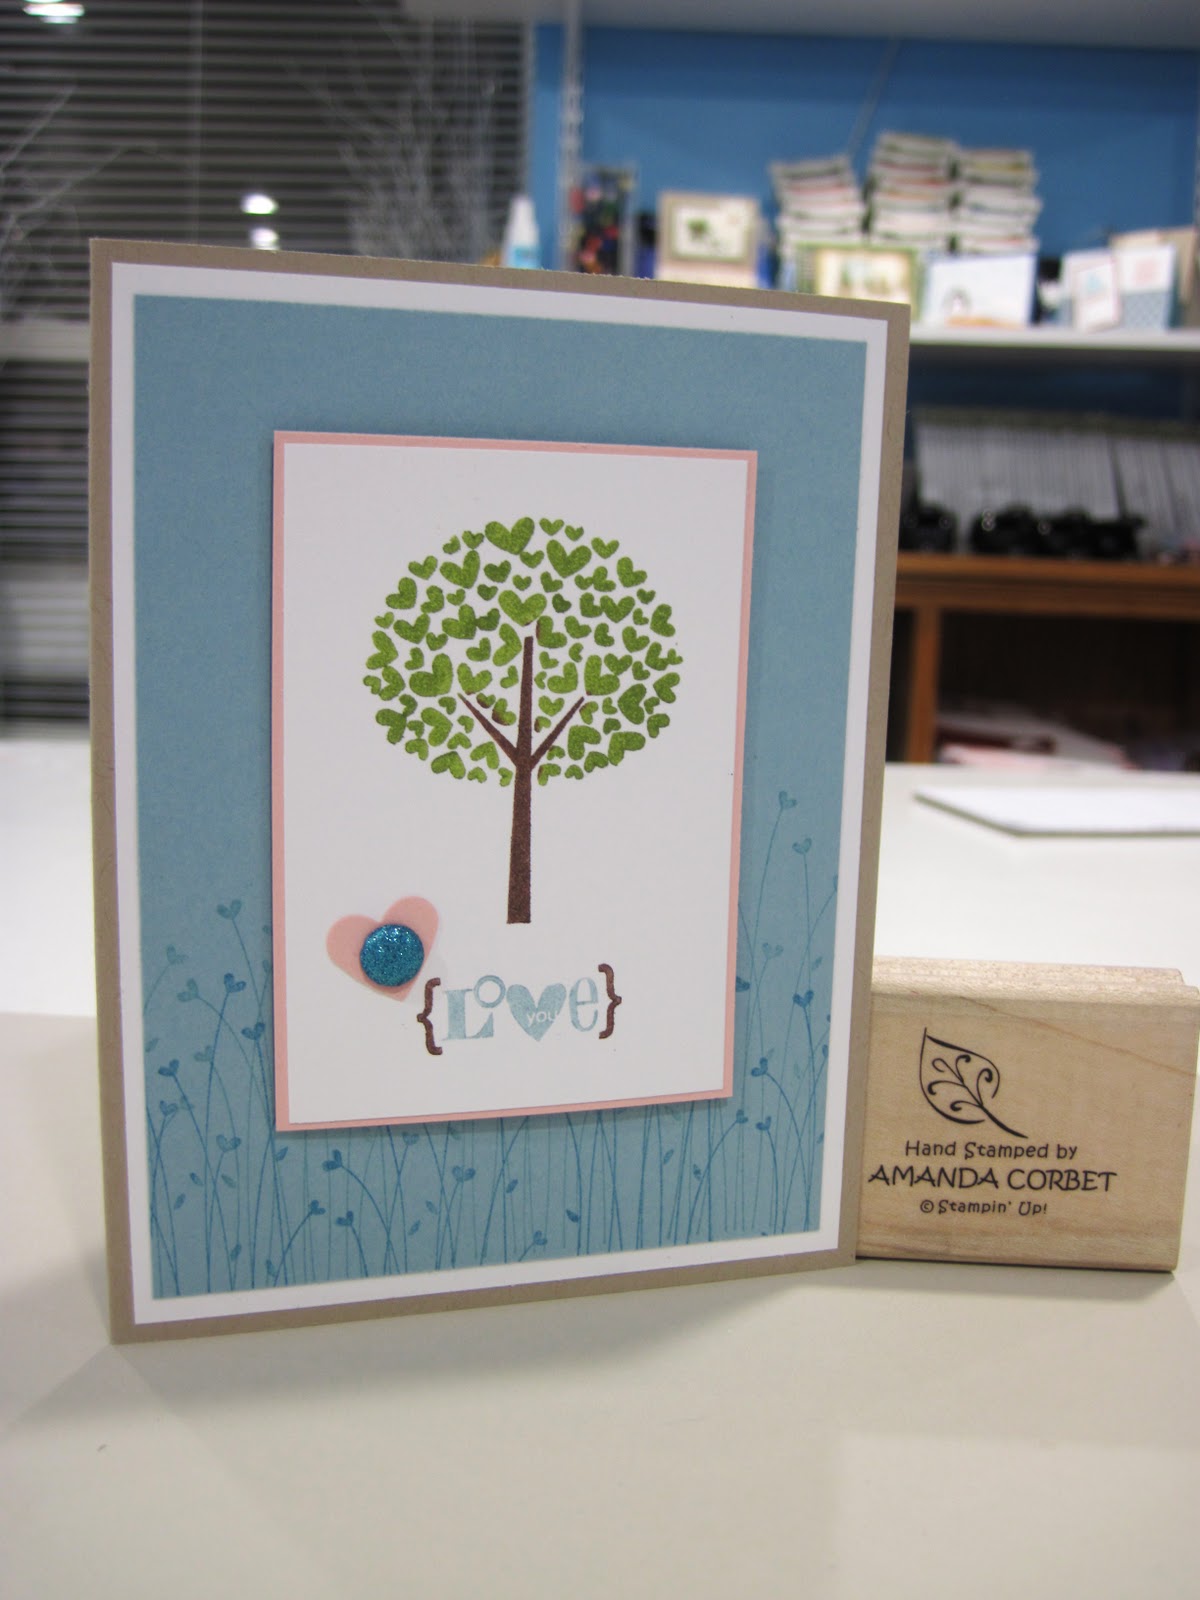
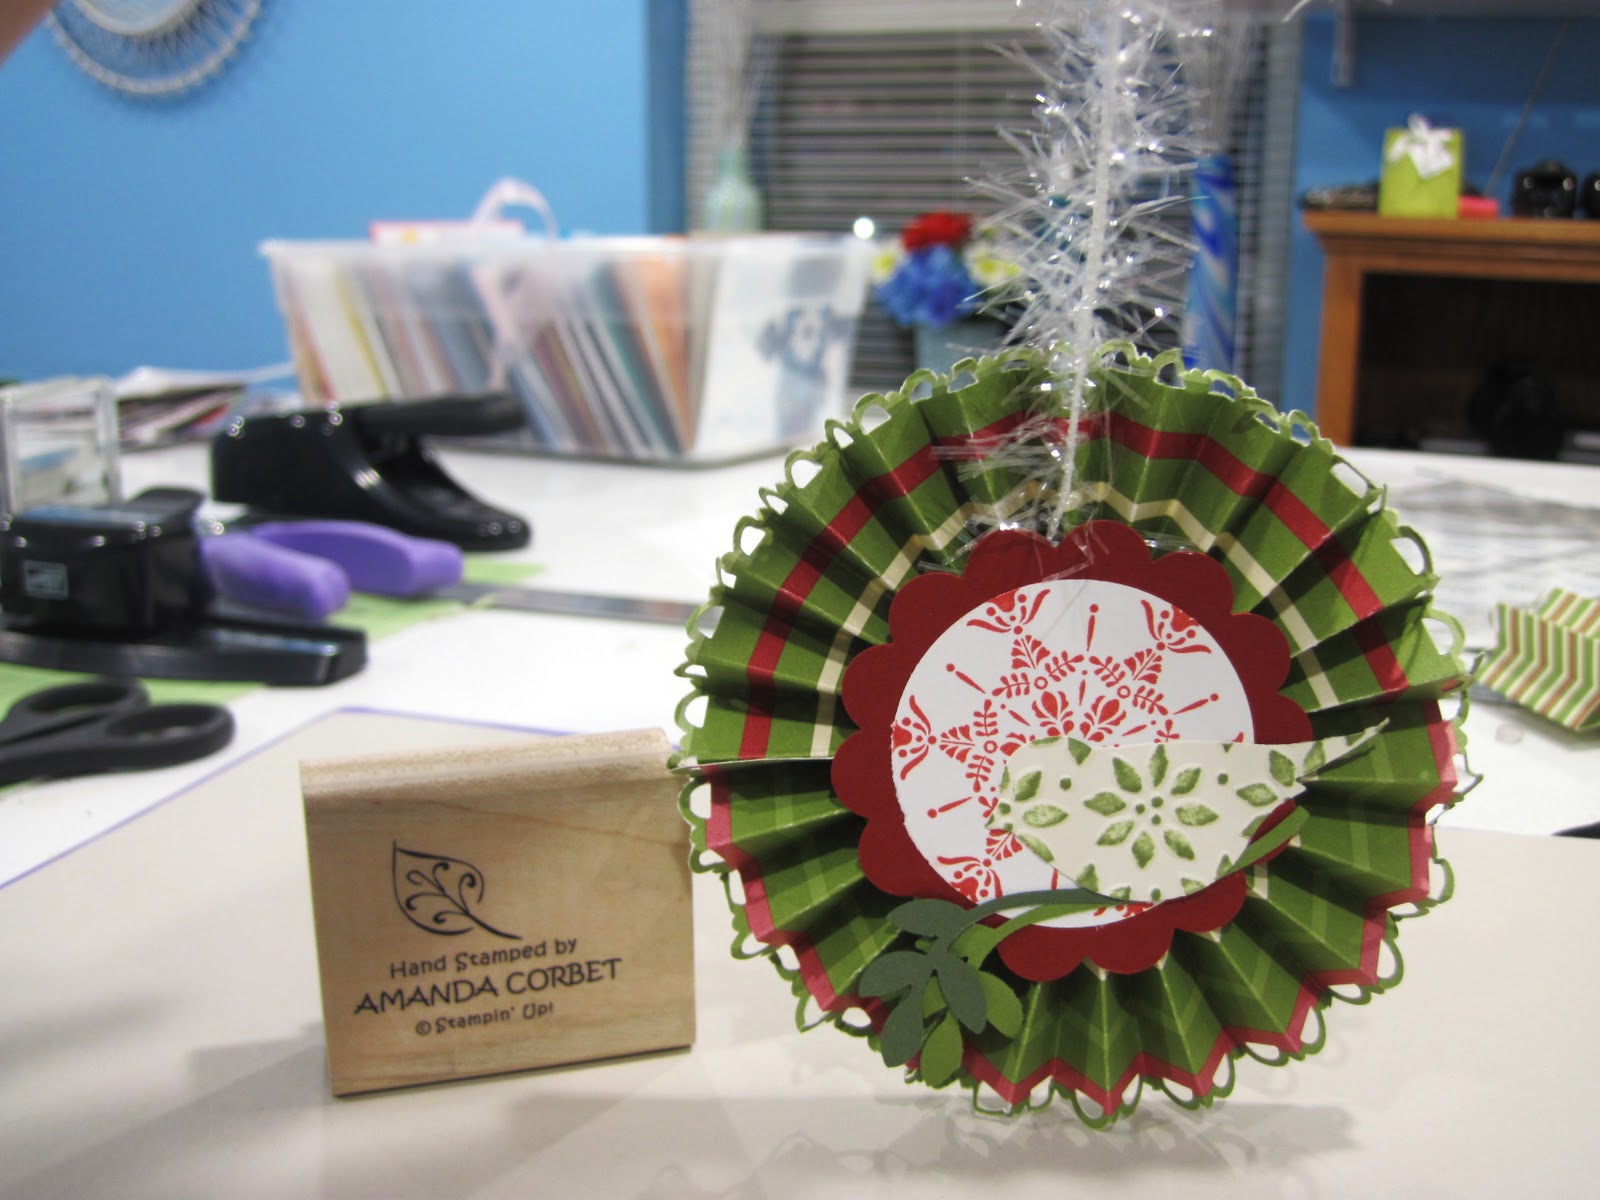
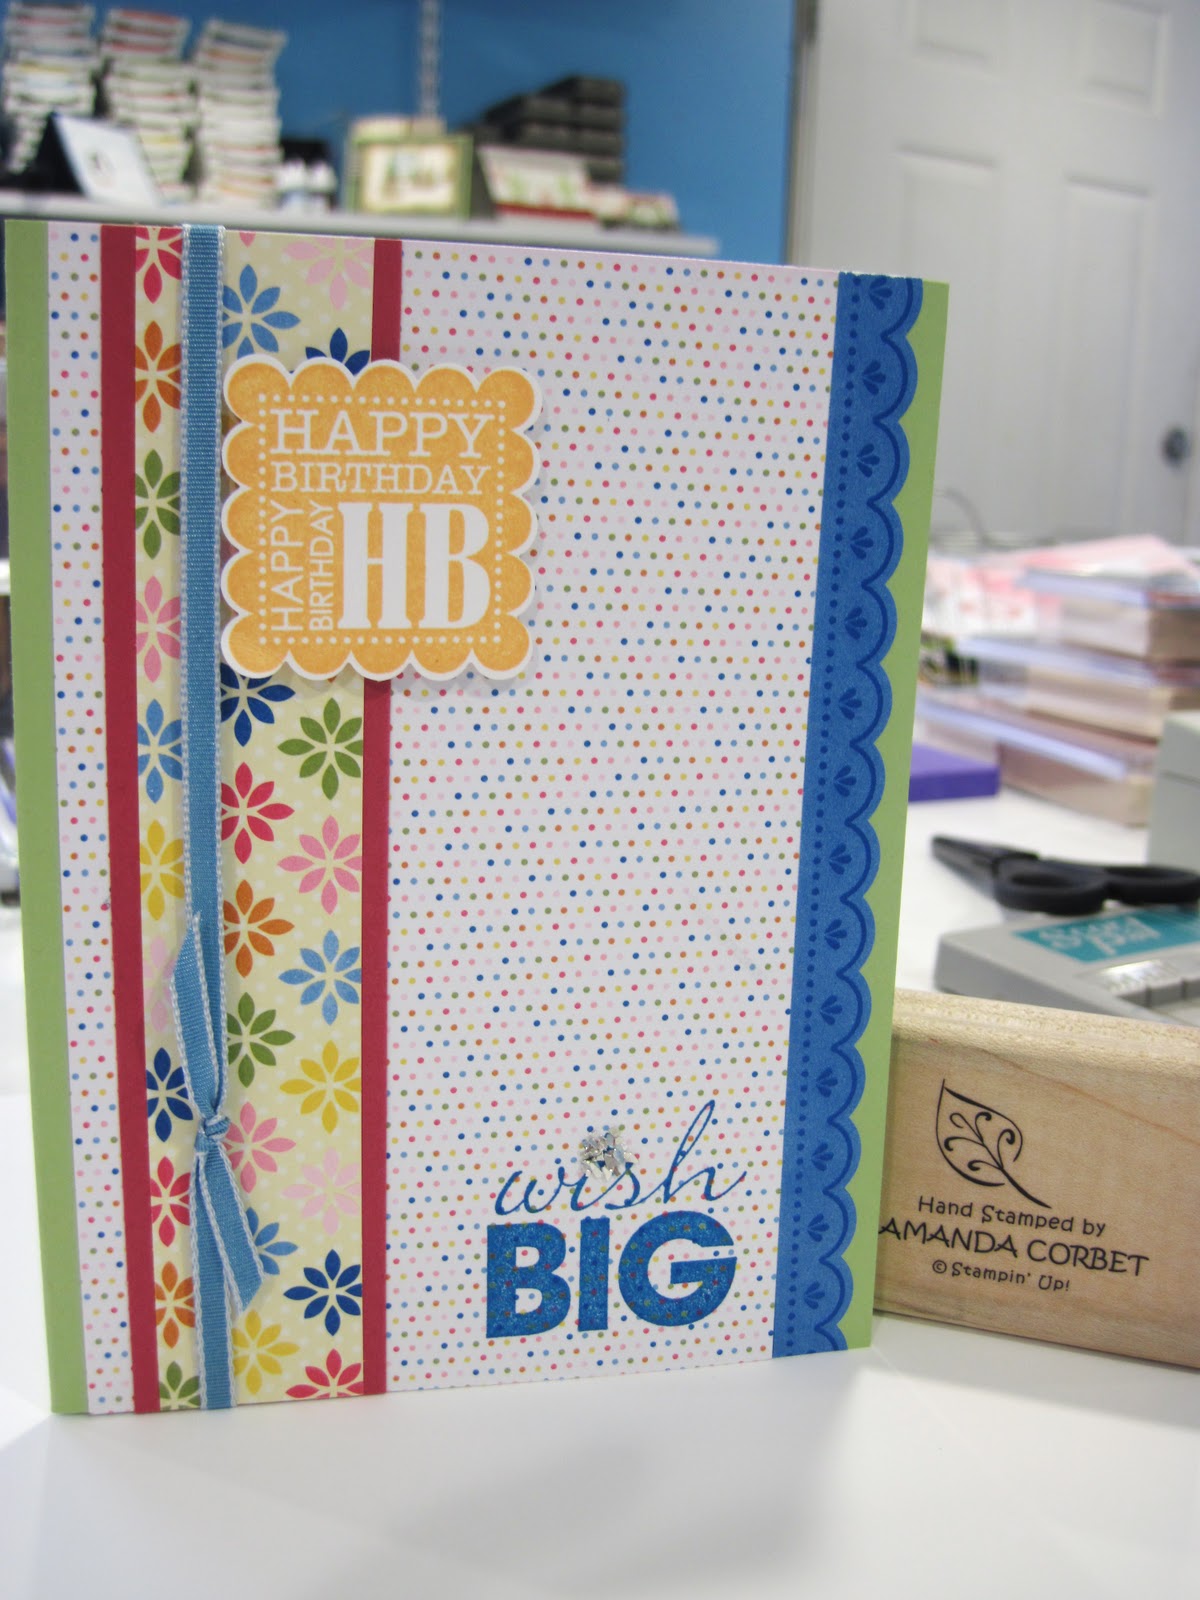
During the class you will make 6 cards with YOUR stamp set and YOUR punch. The supplies such as paper and ribbon that are left over from making your cards is yours to take home! As a bonus cupcakes will be served as treats!
Clear Mount Class price $56.00 (Optional: Add a clear block for $11.95 more)
Wood Mount Class price $62.00
You must PRE-PAY for this class absolutely no later than March 18th. I need time to order the supplies, and get your stamp sets mounted before the class.

If you would like to come just to make the cards, not buy the package, then you will need to either bring your own stamp set and punch, or find someone who will share their stamp set or punch with you then the cost will be $15.00 which also needs to be pre-paid by March 18th.

You can pay via PayPal by clicking HERE and using the drop down list and Add To Cart button. Or you can pay with check or cash in person.
Amanda Corbet e-mail: amanda.c09@hotmail.com phone: (913)683-0979

Owl's Soiree Birthday Card


Here is the sketch challenge for this week. And for the first time in several weeks it’s actually on Monday. Now I kinda cheated on this one. I drew the sketch based off of a card that I had already made, but I did create a new one that also follows the sketch. Anyway here is the sketch:


And here is my card:


Stamps: Teeny Tiny Wishes
Cardstock: Basic Grey, Early Espresso, Whisper White
DSP: Elegant Soiree Designer Series Paper
Ink: Marina Mist, Early Espresso
Cardstock Scraps: Basic Grey, Old Olive, Whisper White, Sahara Sand, Basic Black, Marina Mist, Very Vanilla
Accessories: Top Note Die, Paper Snips, Two-Step Owl Punch, Two-Step Bird Punch, Word Window Punch, Final Press Textured Impressions Die, Silver Brads, 5/8” Marina Mist Grosgrain Ribbon, Stampin’ Dimensionals, Stampin’ Sponge, Needle Tool, Mat Pack

The card base is 5 ½” x 8 ½” Basic Grey cardstock scored at 4 ¼”. The card front was run through the Big Shot in the Final Press Textured Impressions Die. Next a piece of Whisper White cardstock was cut at 4” x 5”. The designer series paper was cut into five 1” x 4” pieces and adhered to the Whisper White cardstock starting from the center and working outward. This DSP layer was run through the Big Shot with the Top Note die, then Paper Snips were used to trim around the edge on the little dash marks that the die created.

A piece of Early Espresso cardstock was cut at 4” x 5” and also run through the Big Shot with the Top Note die. The trimmed DSP top note was adhered to the Early Espresso top note. A piece of 5/8” Marina Mist Grosgrain ribbon was wrapped around the front of the top note and adhered to the back.

The greeting from Teeny Tiny Wishes was stamped in Marina Mist ink on a scrap of Very Vanilla cardstock. This was punched out with the Word Window punch and the edges were sponged with Early Espresso ink. Now the greeting was placed on top of the ribbon and the Needle Tool and Mat Pack were used to pierce a hole through each end of the greeting cardstock. A silver brad was added in each of the holes.

The owl was punched from Basic Grey, DSP, Sahara Sand, Whisper White, Marina Mist, and Basic Black cardstock. The pieces were adhered together with the Two-Way Glue Pen. Two leaves were punched from Old Olive cardstock and were adhered to the card front with the Two-Way Glue Pen. A Stampin’ Dimensional was used to adhere the owl to the top note. The top note was adhered to the card front with more Stampin’ Dimensionals.

That’s it! The quilted top note look is really easy to do. I hope you will give it a try. Come back tomorrow to see the other card I made yesterday for the sketch!

If you are a Stampin’ Up Demonstrator you can find the sketch challenge on Stampin’ Connection HERE. If you are not a Stampin’ Up Demonstrator I would still love to see what you create with this sketch. Please post a link to your card in the comments section of this post.

I hope everyone has a wonderful Monday! Have fun stamping!

Sunday, February 27, 2011

Spring is coming...

I hope. I'm really ready to see some green instead of just white everywhere. So since I'm wishing for spring to come here is an Easter card created with the sketch challenge for this week.

Stamps: Easter Blooms
Cardstock: Pink Pirouette, Whisper White, Pretty in Pink
DSP: Springtime Designer Series Paper
Ink: Daffodil Delight, Early Espresso, Versamark
Accessories: Scallop Edge Border Punch, Scalloped Square Punch, Gold Embossing Powder, Markers: Pink Pirouette, Crumb Cake, Daffodil Delight, Pretty in Pink.

The card base is 5 1/2" x 8" Pink Pirouette cardstock scored at 4 1/4". The 4" half of the cardstock will be the card front. A piece of Whisper White cardstock was cut at 2 1/4" x 3 1/2" and one edge was punched with the Scallop Edge Border punch. This scalloped cardstock was adhered behind the edge of the card front so all you can see are the white scallops.

Two pieces of Springtime DSP was cut to 1 1/4" x 3 1/4" and each piece was adhered to a 1 3/8" x 3 3/8" piece of Whisper White cardstock. One of these DSP layers was adhered in the bottom left hand corner of the card front and the other was adhered in the upper right hand corner of the card front.

The image from Easter Blooms was stamped in Daffodil Delight ink on Whisper White cardstock twice. Each of these stamped images were punched out with the Scalloped Square punch. One was adhered in the upper left hand corner of the card front and the other was adhered in the bottom right hand corner of the card front.

A piece of Whisper White cardstock was cut at 2 1/4" x 3 1/2". The flowering branch from Easter Blooms was stamped in Early Espresso ink then heat set with the Heat Tool to prevent the ink from running. The branches were colored in with the Crumb Cake marker and the flowers were colored in with Pink Pirouette, Pretty in Pink, and Daffodil Delight markers.

The greeting was stamped in Versamark on the bottom of the stamped Whisper White cardstock. Gold Embossing Powder was added and melted with the Heat Tool. The stamped and embossed cardstock was adhered to a piece of Pretty in Pink cardstock cut at 2 3/8" x 3 5/8". A piece of Whisper White Organza ribbon was tied into a bow around the panel just above the greeting. Stampin' Dimensionals were used to adhere the panel to the card front.

Everyone have a wonderful Sunday! Stay warm and have fun stamping!

Saturday, February 26, 2011

Birthday Sketch

Here is the Monday sketch challenge…on Saturday. I’ve had these cards completed for a while, but I didn’t get a chance to post them. I’ve been very busy keeping up with work, chores, and school so please forgive me for my irregular posting. I have a bunch of wonderful projects to show you, if only I could find the time to post them all. The sketch challenge this week was created by Susie Nelson. Here is the sketch:


And here is my card:

Stamps: Create A Cupcake

Cardstock: Marina Mist, Whisper White, Old Olive
DSP: Springtime Designer Series Paper
Ink: Marina Mist, Not Quite Navy, Bashful Blue, Crumb Cake, Basic Grey
Accessories: Build A Cupcake Punch, Dazzling Diamonds glitter, Tombow Multi-Purpose Adhesive, 1/8” Marina Mist Taffeta ribbon, Stampin’ Dimensionals, Curly Label Punch, Paper Snips, Scallop Edge Border Punch.

The card base is Marina Mist cardstock cut at 5 ½” x 8” and scored at 4 ¼”. The 4” portion of the cardstock will be your card front. I cut two pieces of Springtime DSP to 1 1/4" x 3 1/4" and adhered them each to a piece of Old Olive cardstock cut at 1 3/8" x 3 3/8". These two panels were adhered to the card front in the bottom left and upper right corners of the card front. A piece of Whisper White cardstock was cut at 1 1/2" x 5 1/2" and punched on one long side with the Scallop Edge Border Punch. This was adhered behind the card front along the opening edge so all you can see are the white scallops on the left side of the card front.

Another pattern of Springtime DSP was cut with the Curly Label punch twice to get two patterned curly labels. Also two curly labels were punched from Whisper White cardstock. The Whisper White curly labels were cut in half length-wise. The points that were in the middle of the side are snipped off and the two halves of the curly label are adhered behind the DSP curly label to create a mat. This was done on both DSP curly labels. The layered curly labels were adhered to the card front in the upper left and lower right hand corners.

A piece of Whisper White cardstock was cut at 2" x 3 1/4", a piece of Old Olive cardstock was cut at 2 1/8" x 3 3/8", a piece of Marina Mist cardstock was cut at 2 3/8" x 3 5/8", and the edges were run across the Basic Grey ink pad to add a little color to the edges. The three layers were adhered together. The greeting was stamped in Basic Grey ink on the bottom portion of the Whisper White cardstock and a piece of 1/8” Marina Mist Taffeta ribbon was tied around the layered panel and into a knot.
The cupcake bottom was stamped in Crumb Cake ink on a scrap of Whisper White cardstock then the bow was stamped in Not Quite Navy ink on top of the cupcake bottom. The cupcake top was stamped in Bashful Blue and the sprinkles were stamped in Marina Mist on the same Whisper White scrap. The two cupcake pieces were punched out with the Build A Cupcake punch and adhered to the Whisper White panel.

A cherry was stamped in Marina Mist ink on a scrap of Whisper White cardstock and punched out. Tombow Multi-Purpose Adhesive was spread across the entire cherry and Dazzling Diamonds glitter was added to make the blue cherry sparkly. After the adhesive dried the cherry was adhered to the top of the cupcake. Then the cupcake layered panel was adhered to the card front with Stampin’ Dimensionals.
This sketch was a little difficult to start out with, but I had a lot of fun deciding what things to use. I had so much fun making this card that I made a second card with this sketch. That one I will post later, so come back to see it!

If you are a Stampin’ Up Demonstrator you can find the sketch challenge thread here. If you are not a Stampin’ Up Demonstrator I would still love to see your creations. Please post a link to your card in the comments section of this post! Have fun stamping!

Wednesday, February 16, 2011

Monday Sketch Challenge, On Wednesday!

Sorry for the delay on the Monday Sketch Challenge. I haven’t had much of a chance to get my posts ready for you. With a full time job, my online class, chores, preparing for the February Make and Take…its just been crazy around here. This week’s sketch was created by Liz Goldhawk.


And here is my card:


Stamps: Teeny Tiny Wishes
Cardstock: Daffodil Delight, Whisper White
DSP: Greenhouse Gala, Blueberry Crisp
Ink: Old Olive, Early Espresso
Accessories: Word Window Punch, Square Lattice Textured Impressions Die, Silver Brads, Needle Tool, Mat Pack.

The card base is Daffodil Delight cardstock cut at 5 ½” x 8 ½”, and scored at 4 ¼”. Next a piece of Whisper White cardstock was cut at 3 ¾” x 5”. Three pieces of Greenhouse Gala DSP were cut at 1 ½” x 1 ¾”, 1” x 2 ½”, 1” x 2”. Two pieces of Blueberry Crisp DSP were cut at 1” x 1”, 1 ½” x 1 ½”. These pieces of DSP were adhered at various angles on top of the Whisper White cardstock with paper sticking out beyond the edges on both sides. This entire pieces was then run through the Big Shot in the Square Lattice Textured Impressions Die.

The edges were sponged with Old Olive ink and this was adhered to the Daffodil Delight card base. The greeting from Teeny Tiny Wishes was stamped in Early Espresso ink on a scrap of Old Olive cardstock and punched out with the word window punch. This was adhered in the bottom right hand corner of the card on the “seam” of the Whisper White and Daffodil Delight cardstock. The Needle Tool and Mat Pack were used to pierce a hole in each end of the punched greeting and two silver brads were added.

I hope you’ve enjoyed my interpretation of the sketch! Thanks Liz for a wonderful sketch! If you are a Stampin’ Up Demonstrator you can find the sketch challenge on Stampin’ Connection here. If you are not a Stampin’ Up Demonstrator I would still LOVE to see your creations. Please post a link to your card in the comments section of this post! Thanks for stopping by and have fun stamping!

Monday, February 14, 2011

Just For You - January Make and Take 5

First I would like to wish everyone a very Happy Valentines Day! For the final January Make and Take project my guests made a simple candy bar wrapper.


Stamps: I (Heart) Hearts, Afterthoughts (hostess)
Cardstock: Melon Mambo, Pink Pirouette
DSP: Love Impressions
Ink: Chocolate Chip, Melon Mambo, Pretty in Pink
Accessories: Decorative Label Punch, Stampin’ Sponge

The Melon Mambo cardstock was cut at 4” x 5”. For a regular Hershey’s bar score along the 5” side at 1 ¼”, 1 ½”, 3 ¾”, and 4”. Fold on the score lines, wrap the cardstock around the candy bar and adhere the overlapping ends together. Make sure you use the regular Hershey’s bars for this. I accidentally grabbed the Hershey’s with almonds bars and they are a little bit smaller. The ladies just had to wrap the cardstock around the candy bar a little tighter and my score lines were useless. So…just be careful when picking up your candy bars.

A piece of Love Impressions cardstock was cut at 2” x 5 ¼” and adhered around the center of the cardstock and wrapped around the candy bar and the ends were adhered together.
The greeting from Afterthoughts (hostess set), was stamped in Melon Mambo ink on a scrap of Pink Pirouette cardstock. The smallest heart from I (heart) Hearts was stamped around the greeting as a background in Pretty in Pink ink. The greeting was punched out with the Decorative Label punch, edges sponged with Chocolate Chip ink, and then adhered to the center of the DSP around the candy bar.
That’s it! This is a super simple, yet really cute, way of presenting a bit of chocolate to that special some one. Thanks for stopping by! Come back tomorrow to see the masculine card that my brother received for his birthday!

Saturday, February 12, 2011

Love Tree - January Make and Take 4

Today I have for you the other Valentine card from the January Make and Take. This one is in more non-traditional colors. There is only a little pink. The ladies all thought it was adorable. Anyway…here it is


Stamps: Valentine Defined
Cardstock: Crumb Cake, Whisper White, Baja Breeze, Blushing Bride
Ink: Baja Breeze, Marina Mist
Accessories: Small Heart Punch, Glimmer Brad, Needle Tool, Mat Pack, Stampin’ Dimensionals, Markers: Baja Breeze, Chocolate Chip, Old Olive

The card base is Crumb Cake cardstock cut at 5 ½” x 8 ½” and scored at 4 ¼”. A piece of Baja Breeze cardstock was cut at 3 ¾” x 5”. The image of the little heart grasses from Valentine Defined were stamped across the bottom in Baja Breeze and Marina Mist ink. The stamped Baja Breeze cardstock was then adhered to a 4” x 5 ¼” piece of Whisper White cardstock. That was then adhered to the card front.

Next a piece of Whisper White cardstock was cut at 2 3/8” x 3 3/8”. The tree stamp was colored in with Old Olive and Chocolate Chip markers. After breathing on the stamp to re-moisten the ink the image was stamped towards the top of the Whisper White cardstock. The “love” stamp was colored in with Baja Breeze and Chocolate Chip ink, breathed on to re-moisten the ink, and then stamped at the bottom of the Whisper White cardstock. This stamped panel was adhered to a 2 ½” x 3 ½” piece of Blushing Bride cardstock.

The Small Heart Punch was used to punch a heart from a scrap of Blushing Bride cardstock. This was placed on the stamped tree panel near the greeting and the Needle Tool and Mat Pack were used to pierce a hole through the center of the heart and the other two layers of cardstock. A turquoise Glimmer Brad was added to hold the heart on and to give the card some sparkle. Stampin’ Dimensionals were added and this panel was adhered to the card front.

This card was pretty quick and easy to make and I hope you enjoyed seeing it! Thanks for stopping by! Come back tomorrow to see the 3D item from the January Make and Take! Have fun stamping!

Friday, February 11, 2011

Elegant Daisies - January Make and Take 3

It’s Friday! I’m so thankful that it is supposed to warm up this weekend. I’m tired of my car saying somewhere between -4 and 5 degrees every morning. But Sunday it’s supposed to be in the 50’s! It’ll be so nice not to have to put on a heavy coat before leaving the house again. This card was cased from a card by Julie Gearinger. You can find her card HERE.


Stamps: Upsy Daisy

Cardstock: Naturals White, Basic Black, River Rock, Whisper White
Ink: Early Espresso, Basic Black, Tangerine Tango, Cherry Cobbler
Accessories: Circle Scissors, Square Lattice Textured Impressions Die, Elegant Lines Textured Impressions Die, Top Note Die, 1 ¼” Early Espresso Striped Grosgrain ribbon, Stampin’ Sponge, Mini Glue Dots, Decorative Label Punch, Black Brads, Needle Tool, Mat Pack


The card base is Naturals White cardstock cut at 5 ½” x 8 ½” and scored at 4 ¼”. A piece of Basic Black cardstock was cut at 4” x 5 ¼” and adhered to the card front. A piece of River Rock cardstock was cut at 3 ¾” x 5” and run through the Big Shot in the Elegant Lines Textured Impressions Die and adhered to the card front. The original card had the greeting stamped in the upper right hand corner of the River Rock cardstock. Due to an accident where my sample fell into an ink pad I had to cover it with the Decorative Label.


A piece of Whisper White cardstock was cut at 4” x 5” and run through the Big Shot with the Top Note Die. The top note was cut in half length-wise and the top note half was run through the Big Shot in the Square Lattice Textured Impressions Die. This was adhered to the card front.


A 3” circle was cut from Whisper White cardstock with the Circle Scissor cutter. Stampin’ Sponges were used to add Tangerine Tango and then Cherry Cobbler ink ¾ the way around the circle. The daisies from Upsy Daisy were stamped on the sponged circle in Basic Black ink. Then the edges of the circle were lightly sponged with Early Espresso ink. This was adhered to the card front. A 6” piece of 1 ¼” Early Espresso Striped Grosgrain ribbon was tied into a knot, the ends trimmed, and adhered to the card front with a few Mini Glue Dots.


The sentiment was stamped in Early Espresso ink on a scrap of Whisper White cardstock. The sentiment was punched out with the Decorative Label punch. The Needle Tool and Mat Pack were used to pierce three holes in the top of the decorative label and three black brads were added. The sentiment label was adhered to the card front with Stampin’ Dimensionals.


Thanks for stopping by! Come back tomorrow to see the next card from the January Make and Take. Have fun stamping!

Thursday, February 10, 2011

Daffodil Flower - January Make and Take 2

Since there has been nothing but white snow covering the ground for several weeks now I’m in a more spring mood lately. I want spring to come and see all those beautiful flowers start to bloom and everything turning green again. And I want it to be warm…but until then I will continue creating things that are spring themed. Here is the second card from the January Make and Take featuring a large yellow flower and the new Blossom Petals XL punch! This card was inspired by a creation from Jessica Luther. You can see her card HERE.


Stamps: Build A Blossom, Birthday Bliss
Cardstock: Early Espresso, So Saffron, Pear Pizzaz, Daffodil Delight, Peach Parfait, Certainly Celery, Whisper White
Ink: Daffodil Delight, Peach Parfait, Old Olive
Accessories: Elegant Lines Textured Impressions die, Scallop Edge Border punch, Large Oval punch, Blossom Petals XL punch, Candy Cane Designer Buttons (Holiday Mini), 1/8” Peach Parfait Taffeta ribbon, Two-Way Glue Pen, Stampin’ Dimensionals, Mini Glue Dots


The card base is Early Espresso cardstock cut at 4 ¼” x 8 ½” and scored at 4 ¼”. I made the card this size so it will fit into a standard A2 size envelope. The next layer is So Saffron cardstock cut at 4 1/8” x 4 1/8”. This was run through the Big Shot in the Elegant Lines Textured Impressions die and adhered to the card front.


Then a piece of Whisper White cardstock was cut at 2 7/8” x 2 7/8” and adhered to a piece of Peach Parfait cardstock that was 3” x 3”. A piece of Pear Pizzaz cardstock was then cut at 1” x 3” and one side was punched with the Scallop Edge Border punch. This was adhered behind one side of the Peach Parfait square so all you see are the Pear Pizzaz scallops. This panel was adhered to the card front with Stampin’ Dimensioanls.


Then on a scrap of Daffodil Delight cardstock five flower petals were stamped in Daffodil Delight ink. These were punched out with the Blossom Petals XL punch. The leaves were stamped in Old Olive ink on a scrap of Certainly Celery cardstock and punched out with the Blossom Petals XL punch. The flower petals and leaves were adhered together with a Two-Way Glue Pen. Then the entire flower was adhered to the Whisper White square using lots of Glue Stick to hold it in place.


A piece of 1/8” Peach Parfait Taffeta ribbon was tied through the center of a large Candy Cane Designer Button and the button was adhered in the flower’s center with a few Glue Dots.


The greeting from Birthday Bliss was stamped on a scrap of Whisper White cardstock in Peach Parfait ink and punched out with the Large Oval punch. This was adhered to the card front with Glue Stick on the portion where it would be on top of the Whisper White square, and with a couple Stampin’ Dimensionals where it would be adhered to the textured So Saffron cardstock.


I really love this flower stamp set and punch that coordinate! The possible flower creations are endless! I will definitely be using these a lot while I wish for spring to start! Come back tomorrow to see the third card from the January Make and Take! A little hint…you will be seeing daisies with some sponging.


Thanks for stopping by and have fun stamping!

Wednesday, February 9, 2011

Masculine Valentine - January Make and Take 1

Since the next holiday is Valentines Day I wanted to have a couple Valentines cards for the ladies to make in January. But I didn’t want to just do shades of pink and red. I wanted something a little less traditional. And of course one of the valentines just HAD to be masculine. After all, everyone needs a card to give their significant other on Valentines Day. This card was cased from a card created by Andrea Walford. You can see the card I cased by clicking HERE.

Now here is the card that the ladies made at the January Make and Take:


Stamps: Valentine Defined

Cardstock: Basic Grey, Basic Black, Cherry Cobbler
DSP: Love Impressions
Ink: Basic Black
Accessories: Lg. Heart Punch, 5/8” Real Red Satin ribbon, Tasteful Trim die, Needle Tool, Mat Pack, Silver Brad, Stampin’ Dimensionals

The card base is Basic Grey cardstock cut at 4 ¼” x 11” and scored at 5 ½”. The top 2/3 of the card front were stamped with the heart lines image in Basic Black ink to create a background. A piece of Love Impressions DSP was cut at 2” x 4 ¼” and was adhered to a piece of Basic Black cardstock that was 2 1/8” x 4 ¼”. This was then adhered to the card front.

A piece of Cherry Cobbler cardstock was cut at 1” x 4 ¼” and was ran through the Big Shot in the Tasteful Trim die to get the large scalloped border. This was adhered just under the Basic Black/DSP layer on the card front.

The definition image from Valentine Defined was stamped in Basic Black ink on a scrap of Cherry Cobbler cardstock and punched out with the Large Heart punch. Then the Needle Tool and Mat Pack were used to pierce a hole in the heart and a silver brad was added for an accent. The heart punch was adhered to the card front with Stampin’ Dimensionals. Finally some 5/8” Real Red Satin ribbon was tied around the card front and into a knot.

This card was simple and pretty quick to make. I think just about any guy would appreciate receiving this valentine card. What do you think?

Thanks for stopping by my blog! Come back tomorrow to see the second card from the January Make and Take!

Tuesday, February 8, 2011

Accordion Ornament - December Make and Take 5

I knew for the 3D item for this Make and Take that I wanted to do an ornament. Then I saw this one createdby Debbie Henderson and thought it was perfect! Thanks for the wonderful instructions and idea Debbie.


Stamps: Northern Hearts
Cardstock: Cherry Cobbler, Whisper White, Very Vanilla, Old Olive, Always Artichoke
Ink: Real Red, Old Olive
DSP: Jolly Holiday
Accessories: 2 3/8” Scalloped Circle punch, 1 3/4” Circle punch, Scallop Trim Border punch, Two-Step Bird Punch, Sticky Strip, Clear Tinsel Trim.

You can find really great step-by-step instructions on Debbie’s blog HERE.

To finish off my ornament I punched a scalloped circle from Cherry Cobbler cardstock with the 2 3/8” Scalloped Circle punch. Then I stamped a snowflake from Northern Hearts in Real Red ink on a scrap of Whisper White cardstock and punched it out with the 1 3/4” Circle punch. This was adhered to the Cherry Cobbler scalloped circle.


Then I punched a bird from Very Vanilla cardstock with the Two-Step Bird Punch, ran it through the Big Shot in the Petals A Plenty Textured Impressions die. Then I used an Old Olive ink pad directly on the paper to ink the raised portions of the texture. A branch was punched from a scrap of Old Olive and Always Artichoke with the bird punch. The branches and bird were adhered to the ornament. That’s it!

Monday, February 7, 2011

Bright Birthday - Sketch Challenge 2

Here is the fun and bright birthday card that I created with this week’s sketch challenge. I hope you like it!

Stamps: Word Play, Punch Bunch
Cardstock: Pear Pizzaz, Melon Mambo, Whisper White
DSP: Ice Cream Parlor
Ink: Pacific Point, Peach Parfait
Accessories: Scallop Square punch, Tombow Multi-Purpose Adhesive, 1/8” Marina Mist Taffeta ribbon, Silver Glass Glitter, Stampin’ Dimensionals.

The card base is 5 ½” x 8 ½” Pear Pizzaz cardstock scored at 4 ¼”. A piece of Ice Cream Parlor DSP (Free with a $50 order through Sale-A-Bration) was cut at 3 ½” x 5 ½” and adhered to the card front. A piece of 1” x 5 ½” DSP was adhered to a 1 ¼” x 5 ½” of Melon Mambo cardstock. This was adhered to the card front.

The greeting from Word Play was stamped in Pacific Point ink on the bottom right hand corner of the DSP. Some Tombow Multi-Purpose adhesive was added to the star on the word “wish” and some Silver Glass Glitter was added. I cut the decorative strips off the embellishment sheet and trimmed off 5 ½”. Then I peeled up the blue scalloped edge and adhered it to the card front. This comes with the Ice Cream Parlor DSP and the embellishments are self adhesive, so you just have to stick it down. That’s it!

The happy birthday image from Punch Punch (Free with $50 order during SAB) was stamped in Peach Parfait ink on a scrap of Whisper White cardstock and punched out with the Scallop Square punch. This was adhered to the card front with Stampin’ Dimensionals. Some 1/8” Marina Mist Taffeta ribbon was tied around the card front and into a knot to finish off the card. This was a super quick card to make and the colors are so bright and fun. Thanks for stopping by! Come back tomorrow to see the ornament that we made at the December Make and Take! Have fun stamping!

Scenic Christmas - December Make and Take 4

Here is the final card from the December Make and Take. This card was CASED from Michelle Zindorf’s card that you can find here.

Stamps: Scenic Season, A Cardinal Christmas
Cardstock: Pear Pizzaz, Always Artichoke, Very Vanilla
Ink: Soft Suede, Bashful Blue, Basic Black
Accessories: Stampin’ Sponge, Gold Brads, Needle Tool, Mat Pack, Always Artichoke and Cherry Cobbler markers, Top Note Die, Curly Label Punch
The card base is Pear Pizzaz cardstock cut at 5 ½” x 8 ½” and scored at 4 ¼”. A piece of Always Artichoke cardstock was cut at 4 ¼” x 5 ½” and adhered to the card front. A piece of Very Vanilla cardstock was cut at 4 ¼” x 5 ½” and ran through the Big Shot with the Top Note die.
The trees from Scenic Season were inked with Soft Suede ink carefully avoiding the greeting (it is too long to fit on the top note). The trees were stamped onto the Very Vanilla top note. The edges of the stamped top note were sponged heavily with Soft Suede ink. The greeting from A Cardinal Christmas was stamped in Basic Black ink in the bottom right hand corner of the top note. A piece of 1 ¼” Striped Early Espresso Grosgrain ribbon was folded in half and the ends adhered together with Snail adhesive. This was placed under the top left corner of the top note and the Needle Tool and Mat Pack were used to pierce three holes in the top note and ribbon. Three gold brads were added through the top note and ribbon. This holds the ribbon on and adds something shiny to the card front. The top note was adhered to the card front.
On a scrap of Very Vanilla cardstock Bashful Blue ink was sponged on the top half. A portion of the Scenic Season tree stamp was colored in with Always Artichoke and Cherry Cobbler markers. Make sure when coloring the trees color down much further than you would think they need to be colored. I made the mistake of not coloring down far enough on my first try. I breathed on the stamp to re-moisten the ink and stamped the tree tops and cardinal onto my sponged Very Vanilla scrap. The tree tops and cardinal were then punched out with the Curly Label punch. The edges of the curly label were sponged with Soft Suede ink. The curly label was adhered to the card front with Stampin’ Dimensionals.
Thanks Michelle for the great card to case! The ladies at the Make and Take really loved it! Thanks for stopping by my blog! Come back later to see another card created with the sketch I posted earlier!

Monday Sketch Challenge

Happy Monday everyone! Today I have for you the weekly sketch challenge from Stampin’ Connection. When I went to my craft room to create a card for this sketch I couldn’t decide if I wanted to do a pretty and elegant card, or something bright and fun… so I did both! This morning I will share with you the more elegant card and this afternoon you can come back to see the fun and bright card.


Here is my card:

Stamps: Bring on the Cake, Thanks for Caring

Cardstock: Crumb Cake, Baja Breeze, Very Vanilla
DSP: Elegant Soiree
Ink: Early Espresso, Baja Breeze
Accessories: Scallop Edge Border punch, Scallop Square punch, Decorative Label punch, Stampin’ Dimensionals, Glimmer Brad, Versamarker, Needle Tool, Mat Pack, Baja Breeze Seam Binding ribbon

The card base is 5 ½” x 8 ½” Crumb Cake cardstock scored at 4 ¼” and the edges of the card front were sponged with Early Espresso ink. The large DSP panel was cut at 4” x 5 ½”. One side was punched with the Scallop Edge Border punch. The edges were sponged with Early Espresso ink and the DSP was adhered to the card front. Another piece of DSP was cut 1” x 5 ½”, edges sponged, and adhered to a piece of Baja Breeze cardstock cut at 1 ¼” x 5 ½” that was also sponged around the edges. This was adhered to the card front.

On a scrap of Baja Breeze cardstock the greeting from Bring on the Cake was stamped in Early Espresso ink. The greeting was punched out with the Decorative Label punch, the edges sponged, and adhered to the card front in the lower right corner.

The beautiful butterfly from Thanks for Caring was stamped in Baja Breeze ink on a scrap of Very Vanilla cardstock. The Versamarker was used to color in the butterfly wings. This just gives the wings a slightly darker color than the cardstock that it was stamped on. The butterfly was punched out with the Scallop Square punch and the edges were sponged with Early Espresso ink. The Needle Tool and Mat Pack were used to pierce a hole in the corner of the punched out butterfly and a Glimmer Brad was added for a little bit of sparkle. Stampin’ Dimensionals were used to adhere the punched out butterfly to the card front. Then a piece of Baja Breeze Seam Binding ribbon was added around the card front and tied into a knot. If you haven't seen this ribbon it is absolutely gorgeous!

If you are a Stampin’ Up Demonstrator you can find the sketch challenge thread here. If you are not a Stampin’ Up Demonstrator I would still love to see your creations. Please post a link to your card in the comments section of this post. Later today I will post the final card from the December Make and Take and the fun and bright sketch challenge card. So come back later to see more stamped craftiness!

Wednesday, February 2, 2011

Sparkly Santa - December Make and Take 3

For the third Make and Take card for December I knew I wanted to use Holiday Hoopla (item # 120450) becuase the Santa in it was just adorable! I love how you can mix and match all the little pieces though.

Here is the card we made!

Stamps: Holiday Hoopla, Tags Til Christmas, Simple Snowflake
Cardstock: Baja Breeze, Whisper White, Real Red
DSP: Candy Cane Christmas (retired)
Ink: Real Red, Baja Breeze, Black Stazon
Accessories: Blushing Bride and Sahara Sand Markers, Stampin' Dimensionals, Tombow Multi-Purpose Adhesive, Dazzling Diamonds Glitter

The card base is Baja Breeze cardstock cut at 5 1/2" x 8 1/2" and scored at 4 1/4". A piece of Whisper White cardstock was cut at 4" x 5 1/4". The Whisper White cardstock was stamped all over with the Simple Snowflake stamp in Baja Breeze ink to create a background. This was adhered to the card front. A piece of Candy Cane Christmas DSP (retired) was cut at 2" x 5 1/4" and adhered to the card front.

The Santa face from Holiday Hoopla was stamped in Black Stazon towards the bottom of a 2" x 3" piece of Whisper White cardstock. The triangle, for the hat, was stamped in Baja Breeze ink just above Santa's face. Some color was added to Santa's face with the Blushing Bride marker and shadows were added to his beard with the Sahara Sand marker. This panel was adhered to a piece of Cherry Cobbler cardstock cut at 2 1/8" x 3 1/8".

Some Tombow Multi-Purpose Adhesive was added all over the Baja Breeze hat and Dazzling Dimaonds glitter was added. After the glue dried for a few minutes the Santa panel was added to the card front with Stampin' Dimensionals. The greeting from Tags Till' Christmas (Holiday Mini) was stamped in Real Red ink in the upper right hand corner of the stamped Whisper White background.

I really LOVE how this card turned out and all of the ladies thought it was just adorble and fun! Thanks for stopping by! Come back tomorrow to see the last card from the December Make and Take! Have fun stamping!

Tuesday, February 1, 2011

Cute Penguin Card- December Make and Take 2

Here is the second card from the December Make and Take. This one is a little more cute! This card was inspired by this card created by Julie Davison.


Stamps: Snow Swirled
Cardstock: Night of Navy, Marina Mist, Whisper White
Ink: Marina Mist, Night of Navy,
Accessories: Two-Step Owl Punch, Needle Tool, Paper Snips, Two-Way Glue Pen, Tombow Multi-Purpose Adhesive, Dazzling Diamonds glitter, Stampin’ Dimensionals, Scraps of Basic Black, Peach Parfait, Whisper White.

The card base is Night of Navy cardstock cut at 5 ½” x 8 ½” and scored at 4 ¼”. The next panel is Marina Mist cardstock cut at 3 7/8” x 5 1/8”. A piece of Whisper White cardstock was cut at 3 5/8” x 4 7/8”. On the Whisper White cardstock I placed a post it note that was cut in a curvy line on the sticky part of the post it note. I sponged Marina Mist ink at the edge of the post it note with a Stampin’ Sponge and then moved the post it note to another area and sponged another snow mound. I kept moving and sponging until I had six or seven snow mounds in different positions all the way up the Whisper White cardstock.

The large snowflakes from Snow Swirled were stamped in Marina Mist ink by first stamping off on a scrap piece of paper before stamping onto the Whisper White cardstock. This gives a lighter image in the same color. The smaller snowflakes were stamped with Marina Mist ink by stamping normally. This way the smaller snowflakes stand out a little more on the card front than the lighter ones.

Then some Tombow Multi-Purpose adhesive was added across the top of the snow mound where I wanted the penguin to stand and some Dazzling Diamonds Glitter was added and this panel was set aside to dry. I like using the Tombow glue for adding glitter like this because it dries within a few minutes and you can continue working on your card.

Anyway… to make the penguin an owl body was stamped out of both Basic Black and Peach Parfait cardstock. The Basic Black owl body had the ears and feet cut off with paper snips. The Peach Parfait owl body was cut in half. You really only need the feet and a little cardstock to be able to glue it behind the black body. The penguin body was glued to the feet portion. The belly was punched from Whisper White cardstock and adhered to the penguin body.

A heart was punched from Peach Parfait cardstock and the top half snipped off with Paper Snips so all you have is the point. This is glued on for the beak of the penguin. The medium circles in the owl punch were punched from Whisper White cardstock for the large part of the eyes. The pupils were punched from Basic Black cardstock. All of the penguin pieces were adhered with the Two-Way Glue Pen and the Needle Tool was used to help position and adhere the eyes and the beak.

This adorable little penguin was adhered to the card front with a Stampin’ Dimensional. The greeting from Snow Swirled was stamped in Night of Navy ink and the card is done! This was such a fun and cute card to make!