Showing posts with label Painting. Show all posts

Tuesday, February 4, 2020

Hand Painted Tile Dresser Redo

I guess I never got around to posting this. I don't remember when I actually finished it. Apparently at least 3 years ago before my daughter was born. I still love it though! It serves as my nightstand and shoe storage right now.

I no longer do projects for DecoArt. Apparently I wasn't good enough at staging Pinterest worthy photos. So now I just make projects for myself or gifts for family and friends and I am perfectly fine with that.

From original post written about 3-4 years ago: 
Last fall I had picked up a small dresser that was placed on the curb. I was looking for something small to go in what I had hoped to turn into a guest room. Right now the guest room is on hold so the dresser just sat there getting no attention. Here you can see this sweet little dresser in all it's untouched glory. Straight from the curb where it was destined to end up in a landfill. 

A couple months went by and my little dresser just sat there feeling unloved when DecoArt posted a project to paint a piece of furniture with some interest other than the typical chalky finish. So finally the project of redoing this little dresser was moved to the front and it was going to get it's much deserved love. 

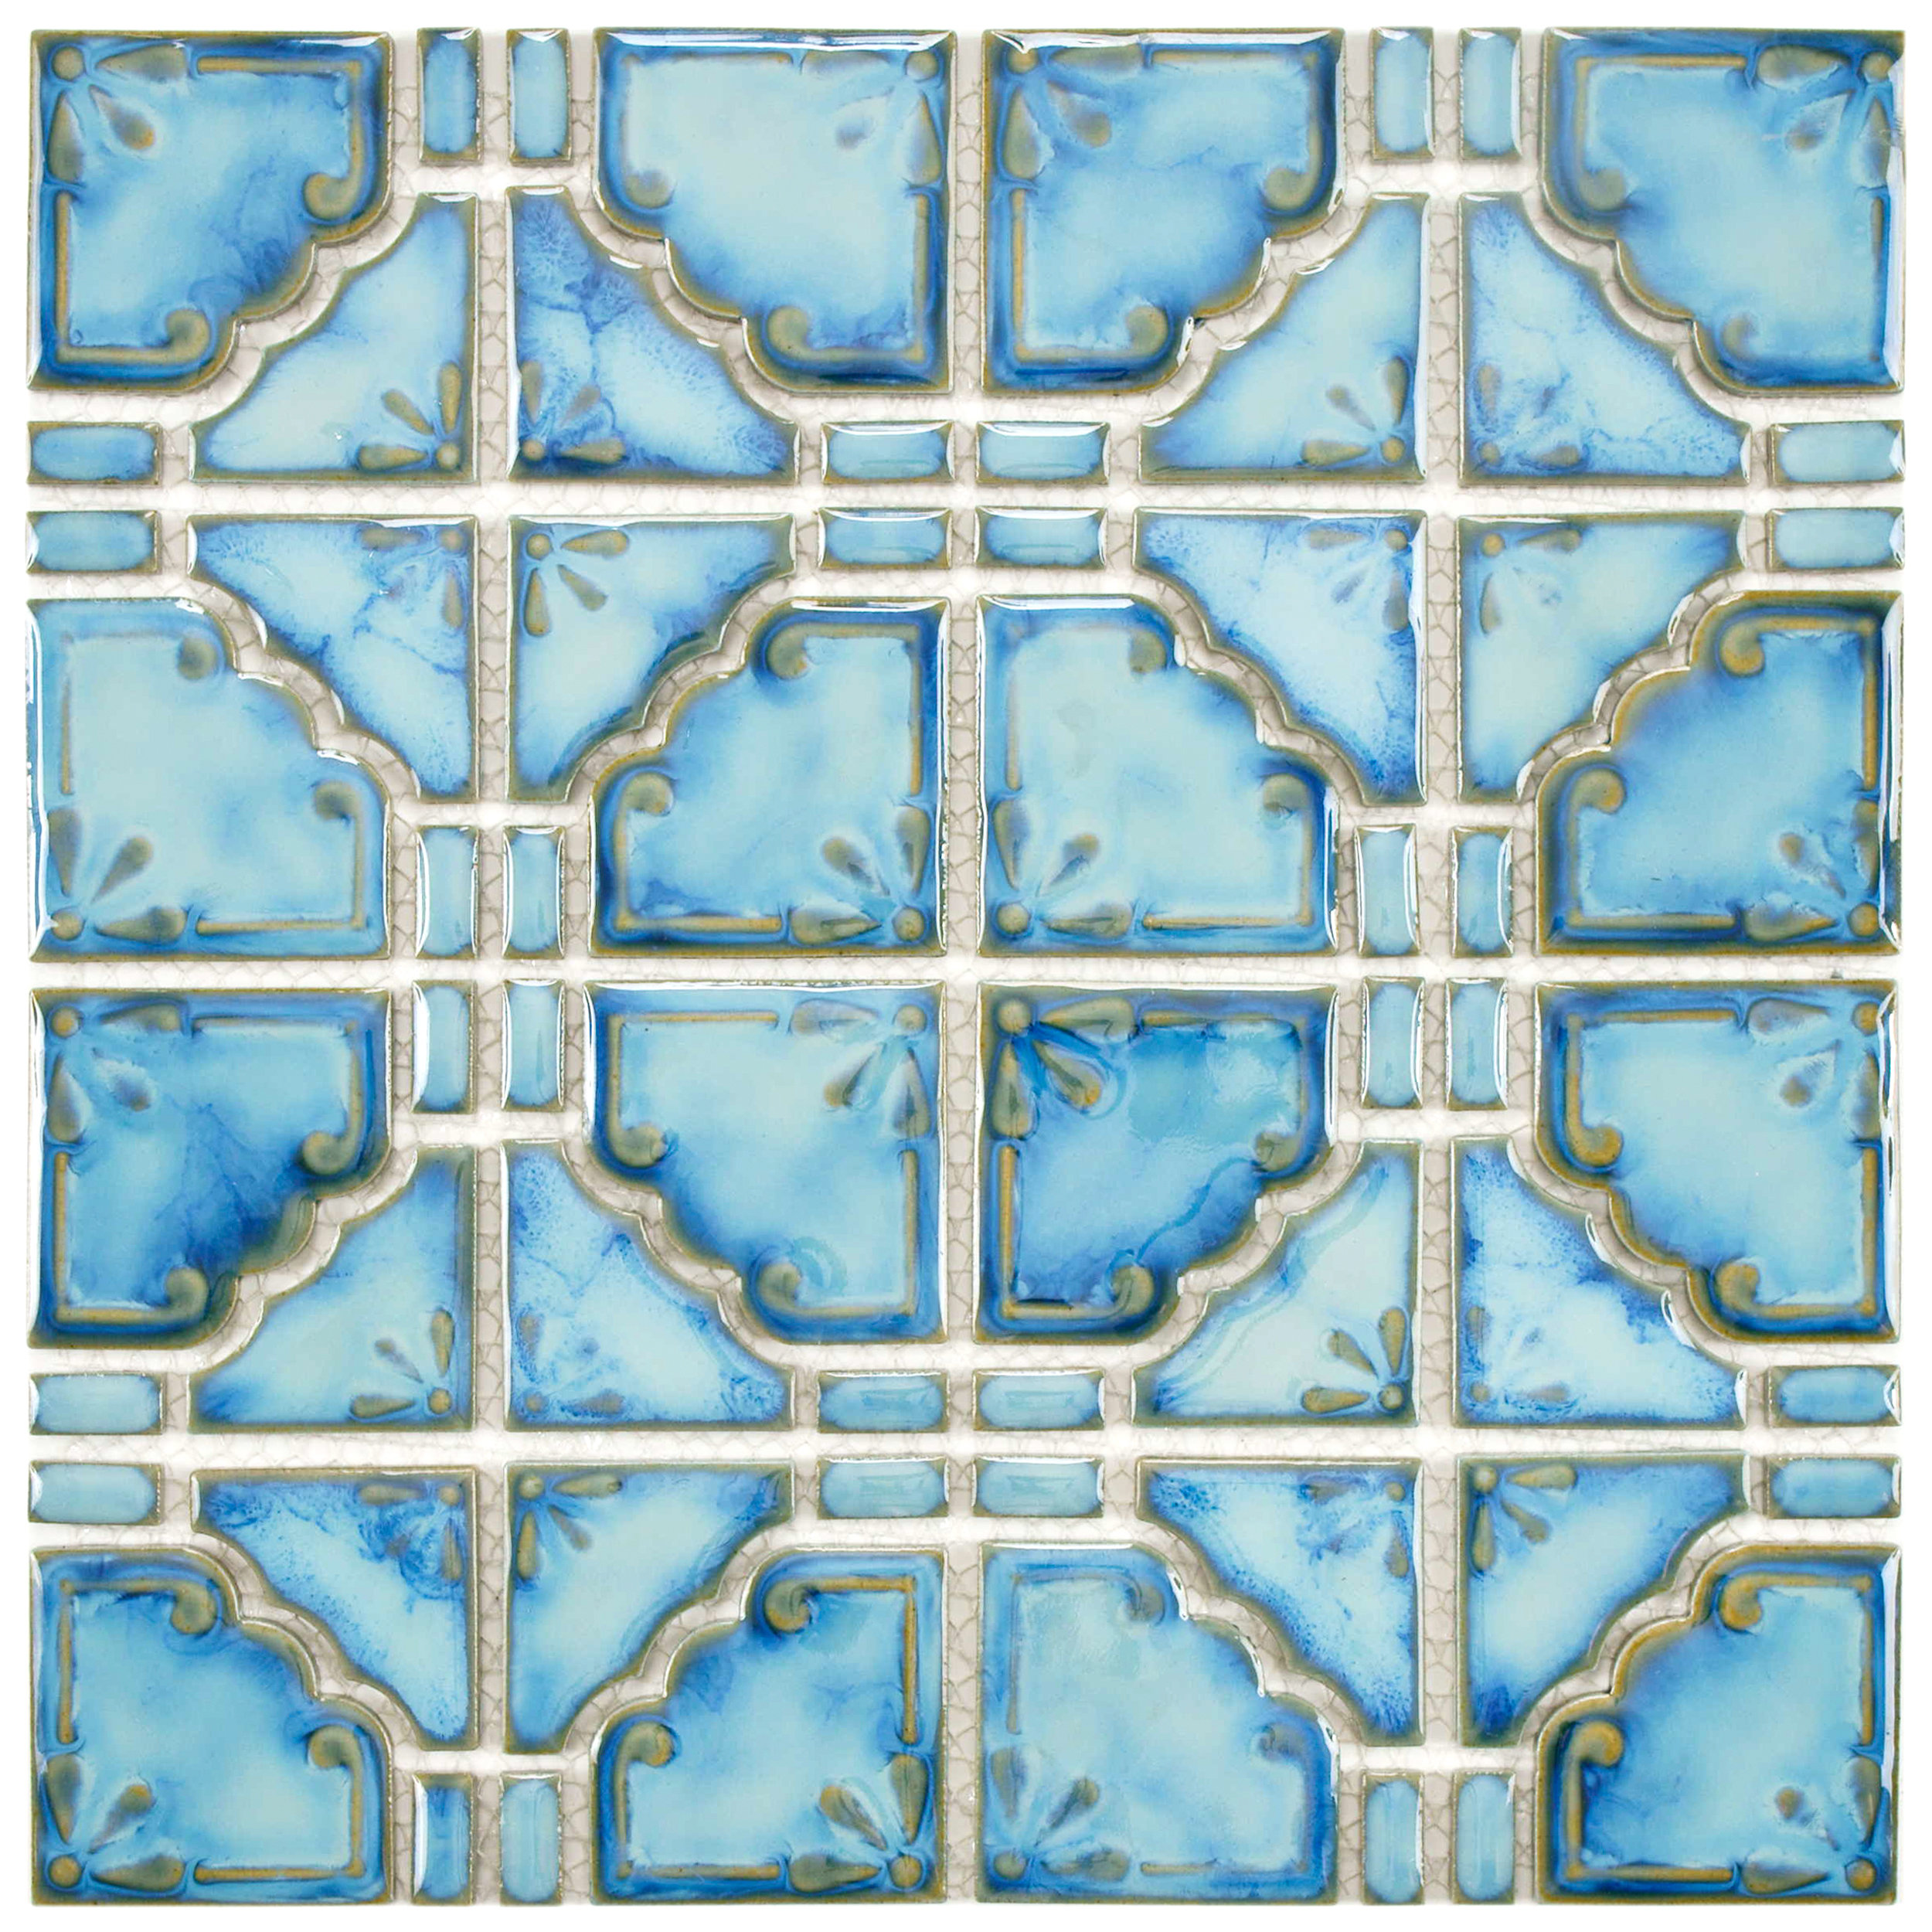
I decided I wanted to paint the drawer fronts in mosaic tile pattern so off I went searching the internet for some mosaic tile inspiration. I was found this pattern of tile from Wayfair and knew it was just the perfect thing!. So I drew up a similar pattern and adjusted the scale of the tile shape to fit my dresser drawer fronts. I couldn't quite match the soft blue of the tile with the paint I had on hand, but I really love the combination of the vibrant turquoise and cobalt blue that I already had. 


For all the painting instructions and tile pattern template you can check out the project tutorial over at DecoArt. 

The original hardware on the dresser was removed and received several coats of a gold enamel spray paint. The top was too rough to salvage so I covered it with three 1 x 8 boards that were cut to length, stained, and screwed to the top of the dresser from the underside. 


Even the inside of the drawers received some love with Chalky Finish paint in Serene and some decoupaged scrapbook paper for the bottoms of the drawers. 


Tuesday, March 29, 2016

Simple Spring Canvas

Whenever I'm in my craft room painting I always find myself working on at least three different projects at once. I will work on one and get to a point where I have to let the paint dry so I will start on another and get to a point where the paint has to dry, and it goes on. Sometimes I clean or sort or organize during this drying time, but other times I end up with my craft island covered in paint projects all in various stages of progress. I guess I'm just impatient and don't like having to wait...

This last weekend I was finishing up some projects to post to DecoArt's projects page and while those were drying I worked on this fun little spring canvas. Since it was Easter weekend I wanted to embrace the vibrant colors and some fun flowers for spring. 

This is not a sponsored post, however, I have received paint products from DecoArt for previous projects that I used to create this project. I also absolutely love working with DecoArt paints and choose to use them exclusively for my decorative painting projects regardless of whether or not I buy them or DecoArt sends them to me. 


I started off with a 5 x 7 canvas board that I painted with streaks of Citron Green, Snow White , and Purple Pizzaz Americana Acrylic paint with a 1/2" flat brush. To get these streaks of color to blend you want to work quickly while the paint is still wet. 


After the streak of vibrant color dried completely I used DecoArt Media Fluid Acrylics in Titanium White and Medium Grey Value 6 with a round brush to paint the daisy petals. I painted the petals first in just Titamium White and then went back with a mix of Titanium White and Medium Grey Value 6 to add very light grey shadows onto the petals. Then this was allowed to dry while I worked on another project. 


For the flower centers I used a 3/4" circle paper punch on a scrap of cardstock to use as a stencil. Then I used a stipple brush with Hansa Yellow Light to fill in the center of the flower. For the shadows around the edges of the flower center I stippled Transparent Yellow Iron Oxide and Burnt Sienna just around the edges of the circle stencil. Then the flower stems were added with a combination of Green Gold and Viridian Green Hue for the shadows. 


Once the paint was dry I sealed the canvas with a coat of Satin Varnish. I used my Silhouette to cut a bunny from some Silver Glimmer Paper and glued it onto the canvas then gave the canvas another coat of Satin Varnish to seal in all the glitter. 

Finally I needed a way to hang the canvas so I used my Crop-A-Dile to punch two holes in the top corners which I threaded some white lace ribbon through and tied it into a bow. 


This simple and sweet little canvas ended up making a lovely Easter gift for my best friend.

What do you like to do while you're waiting for paint to dry?


Monday, January 25, 2016

DIY Home Decor Projects

Looking for some fun and easy home decor projects to brighten up that winter gloominess?

Some of my projects were recently posted on DecoArt's projects page so I wanted to share them here with you. Just click through the links for a complete tutorial on how to make the project.

This one will be listed in my Etsy shop soon! 

This one will be listed in my Etsy shop soon! 

Want to order one just like it? Just contact me and I will be happy to make a custom order for you!


Monday, June 8, 2015

An Extra Special Mother's Day Card

My brother-in-law sent me a message a few days before Mother's Day asking if I could make his wife a card with a specific quote on it. I could have gone the easy route and just typed up the quote, printed it out, and used it on a card front; but I wanted to make her something extra special.


I assure you, this is not a sponsored post. I just wanted to share some of the things I love so you will see a few links to items you can purchase below. I will not and have not received any compensation from the sites linked below. 

I've been trying to learn how to do calligraphy after finding the blog The Postman's Knock. Lindsay has the most wonderful and inspiring posts that make it seem like you really can learn calligraphy. So I purchased the Kaitlin Style Premium Calligraphy Worksheet Set. Now I haven't had a chance to practice that much before attempting to do this card. 
  

Now that I look back through the photos I realize I forgot to cross a T. Oops...


I started out by cutting a piece of Watercolor paper down to the size I wanted. Then I used a pencil and ruler to create guidelines for my attempted calligraphy. I practiced writing the quote several times on regular paper with a pencil before trying it on the watercolor paper. Then I went to work on the watercolor paper holding my breath all the while. Once the ink was completely dry I erased my pencil marks. 

Then I sketched some flowers in pencil and used my Grumbacher watercolor paint to create the background and add color to the flowers. 


Once the watercolor was dry I added some stitching detail around the edges. I glued the watercolor paper onto a slightly larger piece of Soft Sky cardstock. I wrapped the card front with some Silver Baker's Twine and tied it into a bow before using Stampin' Dimensionals to adhere the panel onto the Blackberry Bliss card front. 


A few rhinestones in each of the top corners were the finishing touch on the front. 


For the inside I glued the watercolor paper onto the same size Soft Sky cardstock as before and glued that panel inside the card. I use the small heart punch to add a single Silver Glimmer Paper heart to the end of the quote. 

On the other flap inside the card I glued in a piece of Whisper White cardstock so there was space to write a message. 


To finish it all up I used my Envelope Punch Board with a sheet of DSP to make a custom envelope. To hold the flap of the envelope closed I just wrapped some retired Bashful Blue stain ribbon around the envelope and tied it into a bow. The bow was embellished with some linen thread and a white heart button.


I really had a lot of fun working on this project and trying to use some new mediums and techniques. Although my calligraphy was pretty rough on this project it gives me the fuel to keep on practicing to get better. After all, you are learning a whole new way to write so that does take time and lots of practice. 

What mediums or new forms of crafting have you been trying out lately? 


Wednesday, February 18, 2015

DIY Dot Wine Glasses

I'm here to share another Christmas gift today! This one was a set of hand painted wine glasses for my cousin. They were so incredibly easy to do! Seriously, you have to give it a try!


~ Supplies ~
  • Clear wine glasses 
  • DecoArt Crystal Gloss Enamels: Turquoise, Blue, White, Crystal Glitter
  • Pencil with a new eraser, paper craft stylus, rubbing alcohol, lint free cloth


This project is so easy that it in no way requires a tutorial. I picked up a package of four wine glasses from Walmart to make these. Super cheap and yet beautiful wine glasses are the result! 


So here is how it goes. Take your lint free cloth and use rubbing alcohol to clean off the wine glasses. You want to make sure that all the oils and such are off the surface. Pour some of your paint of each color onto a palette of some sort. Take your pencil eraser and dip it into the paint then press the eraser onto the glass. Repeat to add as many large dots of each color as you like.

Then take your paper crafting stylus and dip the ball end in the paint and touch it to the glass. Repeat to add as many small dots as you like.

Then just allow the paint to air dry for four days. Then place the glasses in a cold oven and heat it up to 275°F. Once at 275°F bake for 30 minutes. When your time goes off just shut the oven off. Do not remove the glasses. Just leave them in there and forget about them until the oven is completely cool.


You're done! Now just wrap them up and give them as a gift. Or keep them for yourself! If the paint is allowed to cure properly and baked per the instructions on the bottle you should have a dishwasher safe finish. I'm still chicken and wash them by hand though...

What do you think? 


Friday, January 16, 2015

Winter Gift Exchange

Last fall I once again participated in the Craftaholics Anonymous Gift Exchange. Basically you sign up, you are assigned an exchange partner, then you both make something and send it to the other person. Here is what I sent my exchange partner.


Here is a nice view of everything. 


 I made this lovely "JOY" banner for the holidays with some thin cardboard, DSP, a variety of dies, some Champagne Glimmer Paper, Gold Satin ribbon, and some gold baker's twine.


Each letter was accented with some Crumb Cake holly leaves and Cherry Cobbler Dazzling Details for the berries.  The sparkly gold baker's twine was a score from Pick Your Plum and looked really nice holding each letter of the banner together.


Next up I water colored this pretty picture. Not too bad if I do say so myself. After the water color paint was dry I doodled around the edges of the flowers and leaves. Then I spritzed the whole thing with some Vanilla Smooch Spritz to give it some sparkle.


The words "life doesn't have to be perfect to be wonderful" was stamped onto the water color paper and embossed in silver. The frame was another Pick Your Plum score and was gorgeous!


Next up, some earrings that are just like the Glam Earrings I made for my sister-in-law for Christmas. I really loved these and wish I would have kept them for myself...


Finally a wood slice ornament with a wood burned snowflake on one side and a stamped greeting on the other. 


All in all I think it was a pretty generous gift and were things that I would have like to receive myself. Unfortunately I did not get a gift in return from my exchange partner. But I had fun making these! Click HERE if you want to sign up to be notified when the next gift exchange party is. Click HERE to see a lot of the other gifts that were given and received. 


Monday, January 12, 2015

Tropical Flowers Painted Storage Box

I hope you are ready for an awesome project! I want to share with you how I changed a plain wooden box into a piece of art that will brighten up my desk space.

Before Christmas I'm on a run to Michaels to pick up supplies for some last minute gift projects and was browsing around the store when I saw this amazing oval shaped box and instantly thought that it would be perfect on my desk to hide all those pesky cords for cameras and phones and headphones. I'm trying to do what I can to make my home a little more organized but also throw in some pretty accents too. So I put the box and some paints into my cart and headed home. After all the craziness of Christmas was done I had some time to finally work on my plain wooden box.

It's cloudy, cold, and gloomy here in Kansas so I wanted to bring a little bit of bright tropical color into my desk space. So I took this plain but awesome wooden box and painted it up with some tropical looking flowers and some bright colors!


So are you ready to see the finished project??? I'm super excited about it! Here it is!


It's always nice when inspiration hits and a project comes out exactly how you saw it in your head. Now, lets get on to the how too part. Take a look below to see all the goodies that you need for this project. 

~ Supplies ~
  • Artminds Oval Wooden Box from Michaels
  • DecoArt Multi-Surface Satin Paints: Cottonball, Flamingo, Deep Turquoise, Chartreuse, Night Sky, Lemon Zest, Dark Scarlet, and Metallic Gold
  • DecoArt Media Satin Varnish
  • Painters Tape, Stylus, four wooden beads, hot glue gun, 5/8" angled paint brush, plastic container for a palette
I started off by painting two coats of Flamingo paint on the inside of the box for a fun and bright pop of color. 


Next up I painted two coats of Deep Turquoise on the outside and the rim of the box and lid. 


Now it's time to add some flowers. I put together a video for you so you can see how I painted all the flowers and leaves. It would have been way too difficult to try to describe it with text and it end up making sense to anyone other than me. 


After the flowers were all nice and dry I put two rows of painter's tape around the lid to leave about 1/4" line around the lid. Then I put another piece of painter's tape about 1/4" up from the bottom of the box. After the painter's tape was pressed into place real well I covered the stripes I wanted to paint with some DecoArt Media Satin Varnish. Why you ask? Well, no matter how well you think you have the tape pressed down there is always a little that bleeds underneath. If your first coat is a clear sealer then what bleeds underneath is clear and it seals up all those gaps to keep your color from seeping under the tape. That and if I didn't use the painter's tape I would have a really wavy line of gold rather than a nice straight line...


After the sealer dried I added four coats of Metallic Gold. I wanted to have a really solid gold stripe around the lid and the bottom of the box. Four coats seems like a lot, but it dries really quickly so I was able to put the second coat on the first line after finishing up the first coat of the bottom line. All in all it probably took about 20 minutes to apply all four coats then remove the painter's tape. I had a couple places where the gold still bled through the tape so I just touched that up real quick with more Dark Turquoise. 


As an afterthought I decided to grab some wooden beads from my stash and paint them with a few coats of the Metallic Gold paint. Then I just hot glued them onto the bottom of the box for some gilded feet.


Once all the painting was done I finished it up with a coat of the DecoArt Media Satin Varnish just to protect all my hard work. Now I'm ready to put it on my desk and fill it up with all those things I want to hide in my pretty box!


I am so very happy with how my flowers came out! (Squeal!) All in all the project only took about 3 hours total including drying time. This paint goes on so smooth and dries really fast so it makes it easy to start and finish a project the same day.


The pop of pink on the inside is just so much fun!


Now a look at the before and after...


Don't be afraid to pick up something that needs some love and use some paint to brighten up your space with fun colors and functional storage! Americana Multi-Surface paint is available in Michaels. Visit the DecoArt Multi-Surface website for more crafting ideas and inspiration. Did you know that you can use Americana Multi-Surface on glass and metal? Or use it to brighten up an organizer, or create a fun sign or canvas to hang in your home!

Disclaimer: This is a sponsored post. The project, photos, and opinions are entirely mine. 
Linking up to these parties.