Tuesday, November 30, 2010

Merry Wreath - Monday Sketch Challenge!

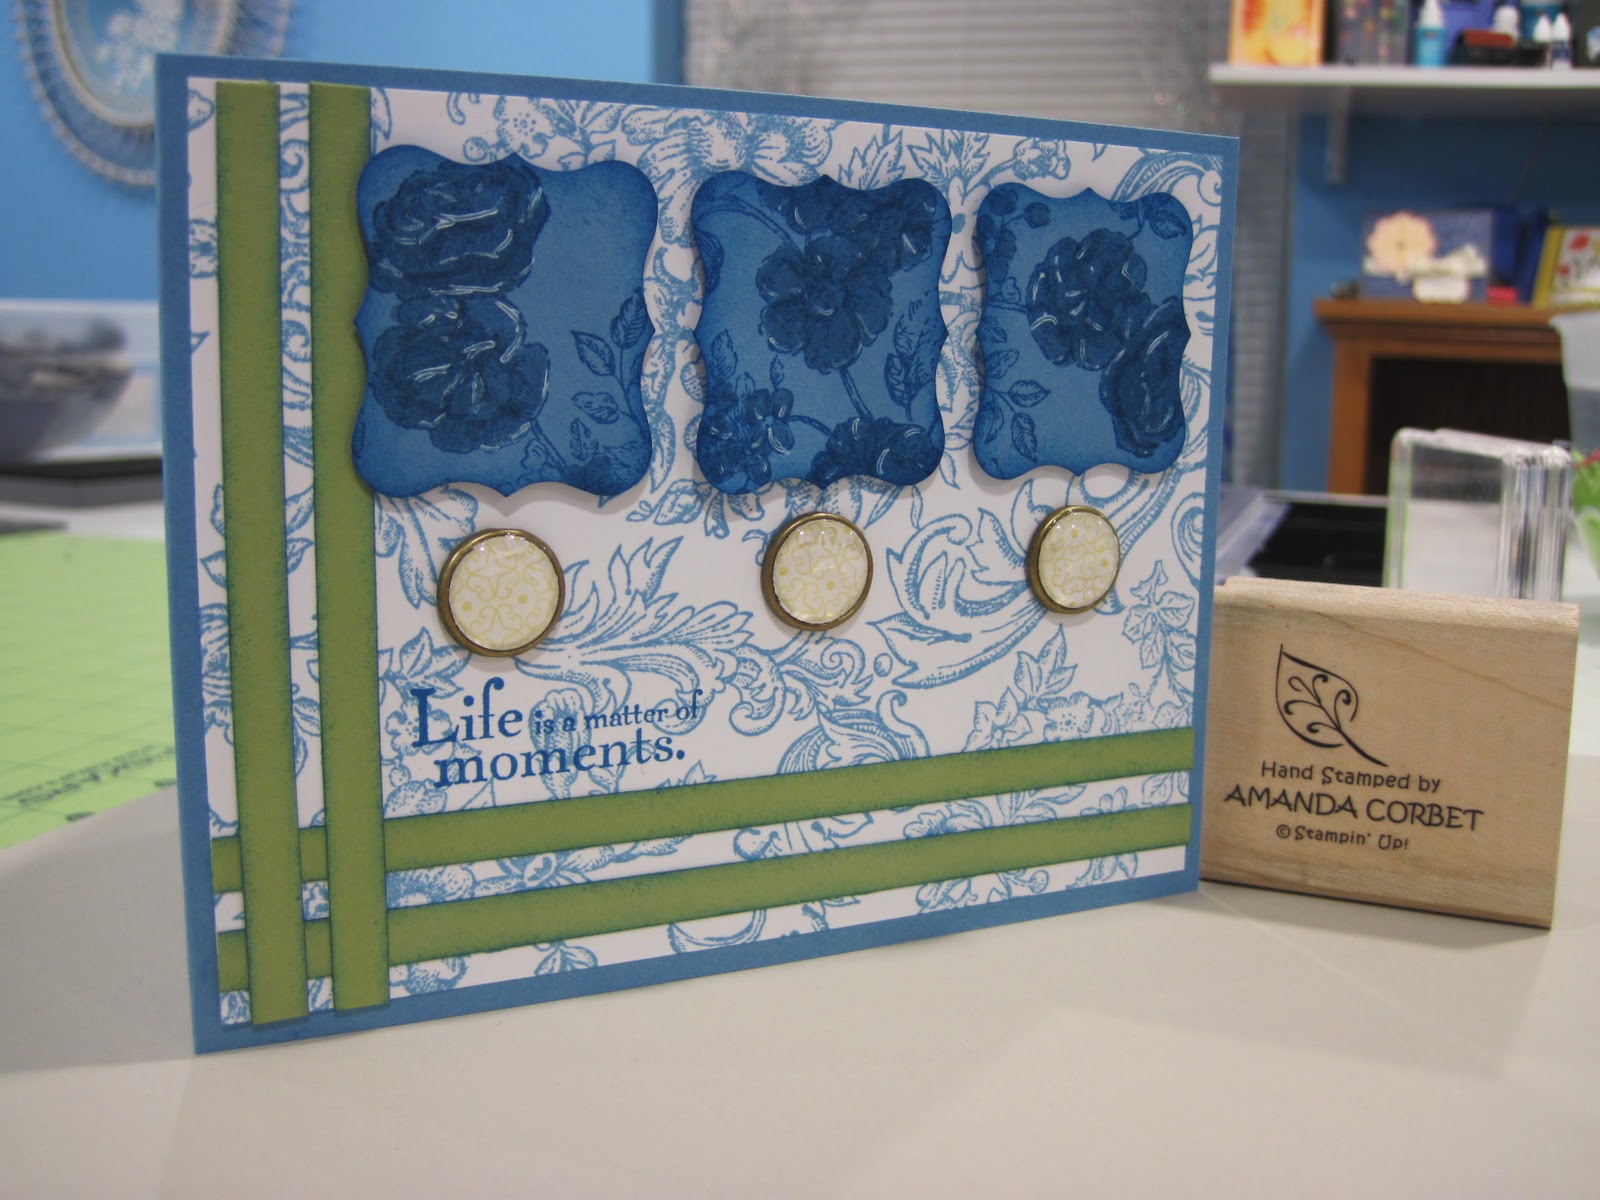
Monday Sketch Challenge on Tuesday...better late than never I guess. Sorry for the late post, but the sketch challenge wasn't posted until late last night. The sketch this week was provided by Susie Nelson. Take a look:


And here is my card:


Stamps: Northern Hearts, Christmas Greetings

Cardstock: Very Vanilla, Early Espresso, Old Olive
DSP: Jolly Holiday
Ink: Riding Hood Red, Versamark
Accessories: 1 ¾” Circle Punch, 2 3/8” Scalloped Circle Punch, Scallop Trim Border Punch, 1/8” Real Red Taffeta ribbon, Stampin’ Dimensionals, Shimmer Spray (Alcohol and Shimmer Paint), Gold embossing powder, heat gun, Two-Way Glue Pen, Mini Glue Dots, Markers: Cherry Cobbler, Old Olive, Always Artichoke.

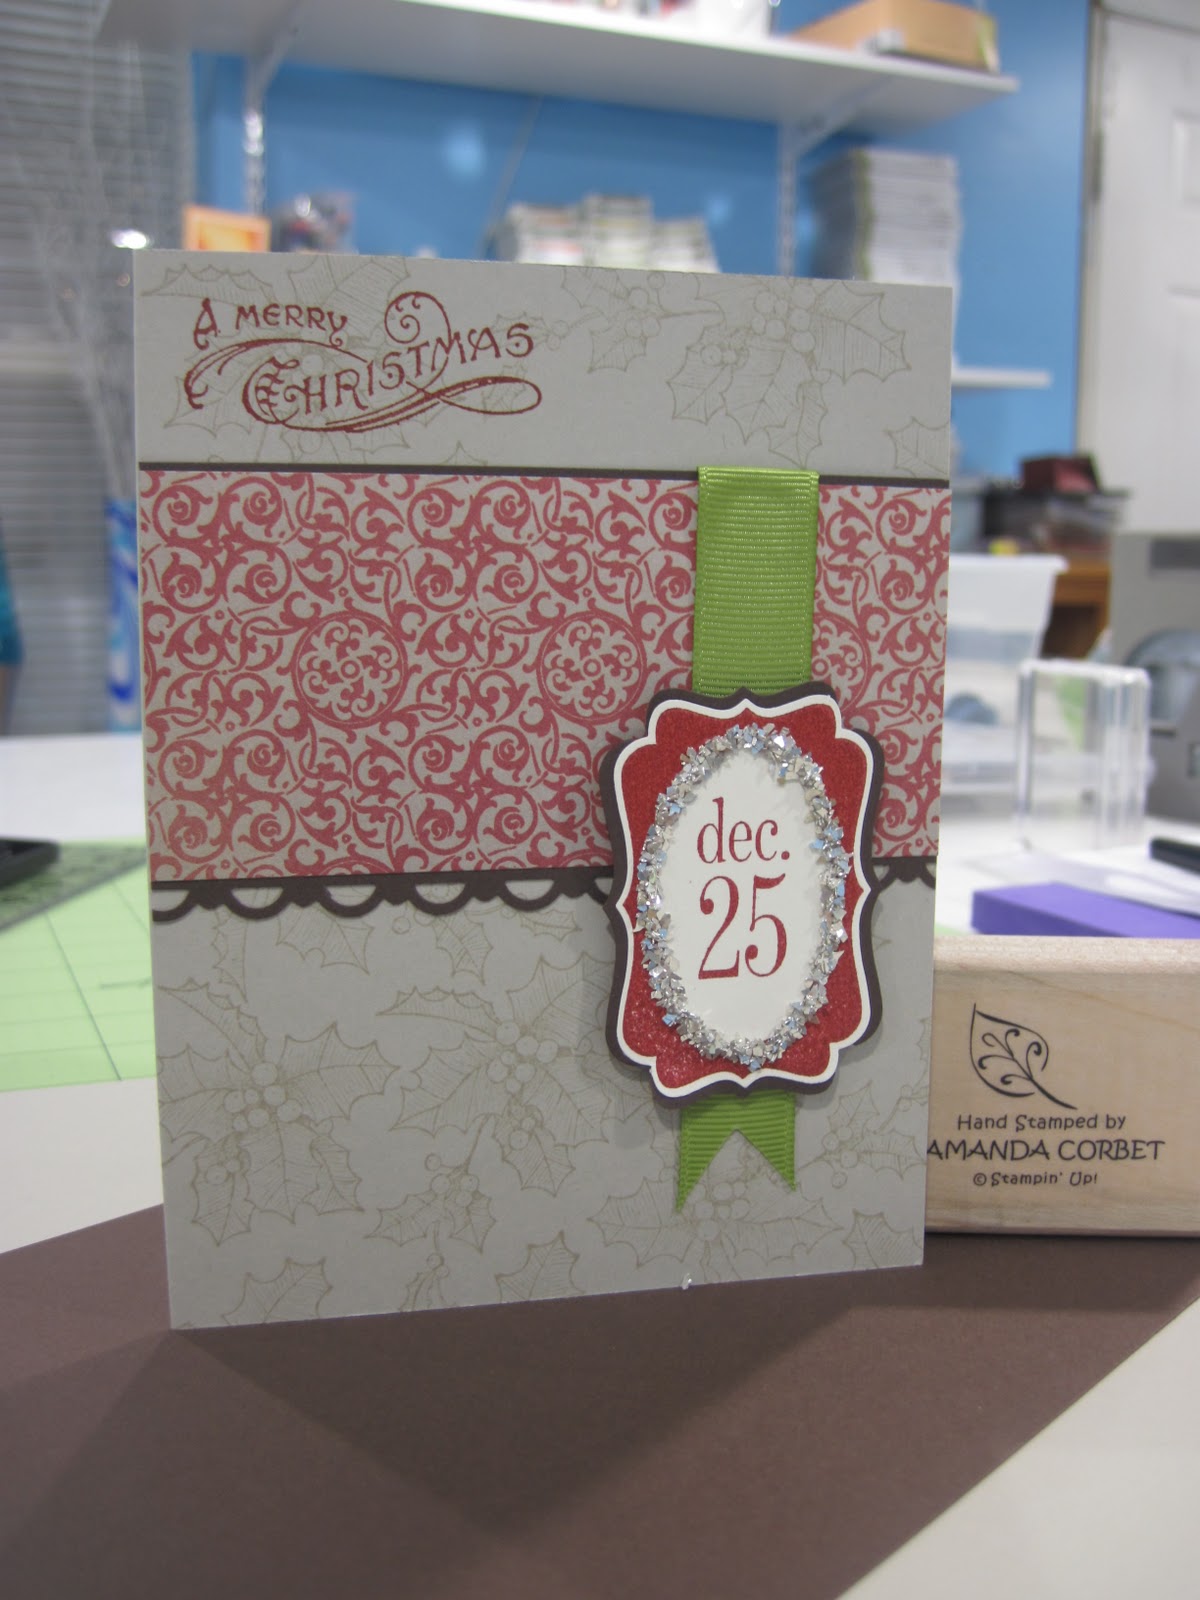
This is a different card size than what I normally make. The card base is 6 ¼” x 6” and scored at 3”. This leaves the card size at 3” x 6 ¼”. It is fun to play with different sized cards other than the standard A2 size. The background of my Very Vanilla card base was stamped with a snowflake from Northern Hearts (Level 1 hostess set in the Holiday Mini) in Riding Hood Red Ink. I then cut a strip of Jolly Holiday Designer Series Paper 1 ¼” x 6 ¼”. The greeting from Christmas Greetings was stamped in Versamark and heat embossed with gold embossing powder.

A piece of Early Espresso cardstock was cut at 1 5/8” x 6 ¼” and punched with the Scallop Trim Border Punch on just one long side. The DSP was adhered to the scalloped Early Espresso cardstock and these layers were then adhered to the card front.
I used the wreath from Northern Hearts and used the Old Olive, Always Artichoke, and Cherry Cobbler markers to color in the wreath. I then breathed on the stamp to re-moisten the ink and then stamped it on a scrap of Very Vanilla cardstock. This wreath was then punched out with the 2 3/8” Scalloped Circle punch.
On a scrap of Old Olive cardstock I punched the 1 ¾” Circle punch in the center of the scrap. Then I used the 2 3/8” to punch out the circle to create a scalloped frame. This was adhered around the stamped wreath with the Two-Way Glue Pen. I used a Mini Glue Dot to adhere a bow made with 1/8” Real Red Taffeta Ribbon to the top of the Old Olive frame. Then I used some shimmer spray (made by mixing rubbing alcohol with a little bit of Shimmer Paint) and sprayed the wreath/frame to add a subtle shimmer to it. This was adhered to the card front with Stampin’ Dimensionals.


I hope you’ve enjoyed my take on the sketch. If you are a Stampin’ Up Demonstrator you can find the link to the Sketch Challenge on Stampin’ Connection here. If you are not please post a link to your card in the comments section of this post. I would love to see what you create! Thanks Susie for such an interesting and fun sketch! Have fun stamping!

Monday, November 29, 2010

Happy Days - Nov. Make and Take 1

Good morning all!!! I hope everyone had a wonderful Thanksgiving weekend! I always enjoy the holiday season with all the food, friends, and family. This week I will FINALLY get to posting the Make and Take cards from November. I've been soooo busy trying to get some Christmas presents done that I haven't had a chance to post. Sorry for neglecting you! Later today I will post the Monday Sketch Challenge and my card. But for now I have for you November Make and Take 1. This card was inspired by Julie DiMatteo's card. Take a look:


Stamps: Apple Blossoms
Cardstock: Crumb Cake, Marina Mist
Ink: Whisper White Craft, Marina Mist
Accessories: Perfect Polka Dots Textured Impressions Die, 1/8" Marina Mist Taffeta Ribbon, Stampin' Dimensionals.

This card was super quick and easy and everyone loved it! The card base is 5 1/2" x 8 1/2" Crumb Cake cardstock that was scored at 4 1/4". The card front was textured in the Big Shot with the Perfect Polka Dots Textured Impressions Die. The image leaves from Apple Blossoms were stamped in Whisper White Craft Ink on a 2 5/8" x 2 5/8" piece of Crumb Cake cardstock. After the ink on the leaves dried the greeting was stamped in Marina Mist ink. This panel was adhered to a piece of Marina Mist cardstock that was cut at 3" x 4". Some Stampin' Dimensionals were added to the back of the panel and the panel was adhered to the card front. That's it! Can't get much simpler than that!

Come back later to see the Monday Sketch Challenge!!! Have fun stamping!!!!

Monday, November 22, 2010

Let it snow!

Good morning everyone! Sorry I've been missing in action this last week. It's been crazy busy getting ready for my Christmas Card Class. I'll post the cards that we made later this week and next week. Well... today is Monday. Hopefully everyone had a good weekend! Monday is Sketch Challenge day so here is the sketch created by Liz Goldhawk:


And here is my wintry card:

Stamps: Northern Hearts, Cardinal Christmas
Cardstock: Whisper White, Marina Mist, Night of Navy
Ink: Marina Mist, Night of Navy, Versamark
Accessories: Heat and Stick Powder, Dazzling Diamonds, Snowflake Die, Norther Flurries Die, Glimmer Brad, Silver Brads, Decorative Label Punch, Needle Tool, Mat Pack

Anyone who knows me knows that I absolutely LOVE snowflakes and anything sparkly. Well this card definitely shows that!

The card base is Whisper White cardstock cut at 5 1/2" x 8 1/2" and scored at 4 1/4". The background was stamped with the large and middle snowflake from Northern Hearts in Marina Mist ink. A 2" x 4 1/4" piece of Marina Mist cardstock was cut and stamped with snowflakes in Marina Mist ink. The Decorative Label punch was used to punch a label from Night of Navy cardstock. I cut the label in half with Paper Snips and adhered each half to the top and bottom of the Marina Mist strip. The Needle Tool and Mat Pack were used to punch holes near the points of the labels and Silver Brads were added.

I used the Big Shot to and used the Snowflake die to cut a piece of Night of Navy cardstock. I also used the Northern Flurries die to cut a small Whisper White snowflake. The Versamark pad was used to ink both snowflakes entirely then Heat and Stick powder was poured over them. After embossing with the heat gun to make the powder sticky Dazzling Diamonds glitter was added to both flakes. After heating again a few seconds to set the glitter the Needle Tool and Mat Pack was used to punch a hole through the center of both snowflakes and the card front. A glimmer brad was added to the center of the snowflakes to hold them on the card. The greeting from A Cardinal Christmas was stamped in Night of Navy ink in the bottom left corner of the card front.

You can find the discussion for the sketch challenge here. If you don't have access to Stampin' Connection please post a link to your card in the comments section of this post. I would love to see your cards. Have fun stamping everyone!

Monday, November 15, 2010

Christmas Ornaments

It's Monday again and I have another sketch challenge for you. Sorry I didn't have time to post this before heading off to work this morning, but here it is! Here is the sketch that I created for the sketch challenge SCCSC41 on Stampin' Connection:


And here is my card:


Stamps: Tree Trimmings, Christmas Greetings, Simple Snowflake
Cardstock: Old Olive, Early Espresso, Crumb Cake, Whisper White,
Ink: Crumb Cake, Cherry Cobbler, Old Olive, Early Espresso
Accessories: 1/8" Early Espresso Taffeta Ribbon, Northern Flurries Strip Die, Glimmer Brad, Needle Tool, Mat Pack

The card base is 4 1/4" x 11" Old Olive cardstock that has been scored at 5 1/2". The background was stamped with the Simple Snowflake in Old Olive ink. The greeting from Christmas Greetings was stamped in the lower right hand corner of the card in Early Espresso ink.

On a piece of Whisper White cardstock cut at 2 1/2" x 3 1/2" the ornaments were stamped in Cherry Cobbler, Crumb Cake, and Old Olive inks. The strings were stamped in Early Espresso ink. A piece of 1/8" Early Espresso Taffeta ribbon was wrapped around the panel and tied into a knot. This panel was then adhered to a piece of Crumb Cake cardstock cut at 2 5/8" x 3 5/8". Then a piece of Early Espresso cardstock that was also 2 5/8" x 3 5/8" was adhered behind the ornament panel slightly offset to the bottom right. This was adhered to the card front.

I ran a scrap of Whisper White cardstock through the Big Shot in the Northern Flurries Strip Die. I absolutely LOVE this die! You get so many nice looking snowflakes just from one pass through the Big Shot. I picked out one of the die cut snowflakes and used the Needle Tool and Mat Pack to punch a hole in the snowflake and card front. The snowflake was added to the card front with a gold Glimmer Brad in the center.

That's it! This really was a fast card to put together. I hope you have fun with the sketch challenge. If you are a Stampin' Up Demonstrator you can find the link to the sketch challenge on Stampin Connection here. If you are not a Stampin' Up Demonstrator I would still love to see your creations. Please post a link to your card in the comments section of this post. Have fun stamping!

Wednesday, November 10, 2010

Deer Love - Casing Zindorf

I know I haven't kept up with the regular schedule of posts, but I'm rushing like crazy this week trying to get everything ready for the Make and Take and the Christmas Card Class, and various volunteer work to do. Busy busy busy time of year! I will not have a scrapbook page for you today. Hopefully I will get the chance to create one for you later this week.

What I do have for you today is a CASE of a Michelle Zindorf card. If you haven't heard of Michelle she does the most beautiful sponged scenes and true works of art. She instructs several brayer workshops all across the country where you can learn her fabulous techniques. If you're like me and live too far away to go to one of her workshops you can see tutorials that she posts online frequently. You can go to her website by clicking here. If you click on the Tutorials botton on the top of the page this will take you to a list of over 300, that's right 300! tutorials that show you how to make her beautiful creations.

Well here is the card I made:

Stamps: Dasher, Lovely As A Tree
Cardstock: Whisper White, Baja Breeze,
Ink: Baja Breeze, Soft Suede, Basic Black
Accessories: Whisper White Organza ribbon, Folk Art Flowers Decor Elements stencil, Stampin' Sponge, Needle Tool, Glimmer Brads, Northern Flurries Strip Die, Dazzling Diamonds, Crystal Effects, Basic Black Marker, Soft Suede Marker, Brayer, Stampin' Dimensional, Post It Note, acetate, Paper Snips

You can find Michelle's tutorial for Deer Love - Tutorial #369 by clicking here.

I followed Michelle's tutorial completely. The only changes I  made were: I used the Folk Art Flowers Decor Elements Stencil because that is the only one I currently have, I used Glimmer brads instead of Antique Brads and put them in a different location, I used Whisper White Organza ribbon instead of grosgrain ribbon, and I add a snowflake to the wintry scene. Here is a closeup of my snowflake.


I really wanted to make this sparkly and shiny and wanted to find a way to put glitter inside the openings of the snowflake. First I cut the snowflake from the Northern Flurries Strip Die from Whisper White cardstock. Then I sponged on some Frost White Shimmer Paint over the entire flake. After that dried I adhered the snowflake to a scrap of acetate with the Two-Way Glue Pen.

Then I filled the spaces in the snowflake with Crystal Effects and added Dazzling Diamonds glitter. After that dried I covered the entire flake in a coat of Crystal Effects to make the entire thing shiny. After that layer dried overnight I trimmed the acetate around the flake with my paper snips and adhered the shimmery snowflake to the card front with a Stampin' Dimensional.

I hope you take a chance to look through some of Michelle's tutorials because you really can create some beautiful works of art , especially with her telling you exactly how to do it!

Tuesday, November 9, 2010

Glimmery Christmas

Okay today I have for you my card for the SCCSC40 sketch challenge on Stampin' Connection. To see the sketch you can find yesterday's post here.


Stamps: Tags Till Christmas
Cardstock: Crumb Cake, Old Olive, Cherry Cobbler, Very Vanilla
DSP: Jolly Holiday DSP
Ink: Old Olive, Cherry Cobbler, Chocolate Chip
Accessories: Scallop Edge Border Punch, Ornament Punch, Decorative Label Punch, Northern Flurries Strip Die, Gold Glow Smooch Sprits, Glimmer Brads, Gold Brads, Champagne Glass Glitter, Tombow Multi-Purpose Adhesive, Stampin' Dimensionals, Stampin' Sponge, Two-Way Glue Pen

The card base is Crumb Cake cardstock cut at 4 1/4" x 11" and scored at 5 1/2". A piece of Old Olive cardstock and a piece of  Cherry Cobbler cardstock were both cut 2" x 5 1/2". The piece of Old Olive was punched on one side with the Scallop Edge Border Punch. The Cherry Cobbler piece was adhered on top of the punched Old Olive cardstock so that just the scallops are showing. A piece of Jolly Holiday DSP was cut at 1 3/4" x 5 1/2" and adhered on top of the Cherry Cobbler cardstock. This was adhered to the card front.

I used some scrap Whisper White cardstock in the Northern Flurries Strip die to cut some snowflakes. I just love the large variety of snowflakes that you can get out of one cut with this die! I took one of the large snowflakes and spritzed it with some Gold Glow Smooch Spritz to give it some glimmer and glued it in the top left corner of the card with a Two-Way Glue Pen.

I stamped the ornament from Tags Till Christmas in Cherry Cobbler ink on a scrap of Whisper White cardstock and punched the ornament out with the Ornament Punch. The Needle Tool was used to pierce a hole in the middle of the ornament where a gold Glimmer Brad was added. I put two Stampin' Dimensionals on the back of the ornament and adhered it to the card front.

One of the small snowflakes was added to the card front with a Gold Brad by using the Needle Tool to pierce a hole through the card front. Had I thought about it earlier I would have added this before adhereing the Cherry Cobbler cardstock down so the prongs from the brad don't show on the inside, but oh well. I stamped the label from Tags Till Christmas in Old Olive ink on a scrap of Whisper White cardstock and punched it out with the Decorative Label punch. Then I used some Tombow Multi-Purpose Adhesive to add some Champagne Glass Glitter around the center of the label. After the glue dried a couple of Stampin' Dimensionals were added to the back of the label and it was adhered to the card front.

On a scrap of Old Olive cardstock I stamped the greeting in Chocolate Chip ink. This was then punched out with the Decorative Label punch and spritzed with Gold Glow Smooch Spritz before being adhered to the card front. I am really pleased with how this card turned out. I wouldn't normally add so much "bling" to a single card, but I really like how it works here.

I will have something to show you tomorrow, right now I don't know what, so you'll have to stop by to check it out tomorrow! Have fun stamping!

Monday, November 8, 2010

Monday Sketch Challenge!

It's Monday again! Time for another sketch challenge! Here is the sketch created by Liz:


I didn't receive the sketch from Liz until late last night so I don't have a card to show you yet this morning. I will make one tonight and it will be posted tomorrow before the regular Tuesday post.

If you are a Stampin' Up demonstrator you can find the sketch challenge here. If you are not a Stampin' Up demonstrator I would still love to see your creations. Please post a link to your card in the comments section of this post. Have fun stamping!  


Thursday, November 4, 2010

Marina Mist Style

The card I have for you today is a combination of a couple challenges that I missed while on vacation. This combines the SCCSC37 sketch challenge and the SCCOLOR35 color challenge. The color challenge is to used Pacific Point, Marina Mist, So Saffron, Pear Pizzaz, and Whisper White. And here is the sketch from Susie:

Here is my card:


Stamps: Bella Toille, Elements of Style
Cardstock: Marina Mist, Pear Pizzaz, Whisper White
DSP: So Saffron DSP (retired)
Ink: Marina Mist, Pacific Point
Accessories: Curly Label Punch, Build A Brads, 1/2" Circle Punch, Stampin' Dimensionals, Two-Way Glue Pen, Marina Mist Marker, White Gel Pen, Stampin' Sponge, Needle Tool, Mat Pack, Tombow Multipurpose Adhesive

The card base is Marina Mist cardstock cut at 4 1/4" x 11" and scored at 5 1/2". A piece of Whisper White cardstock was cut at 4" x 5 1/4" and stamped with the Bella Toille background stamp in Marina Mist ink. This panel was adhered to the card front. Four strips of Pear Pizzaz cardstock were cut 1/4" wide. Two of them were cut 4" long and the other two were cut 5 1/4" long. The long sides of the four strips were sponged with Pacific Point ink. The strips were then adhered to the card front with the Two-Way Glue Pen.

On a scrap of Marina Mist cardstock the image from Elements of Style was stamped in Pacific Point ink. Three curly labels were cut with the Curly Label Punch. The flowers were colored in with the Marina Mist marker and White Gel pen highlights were added. The edges of the labels were then sponged with Pacific Point ink and these were adhered to the card front with Stampin' Dimensionals.

The greeting from Elements of Style was stamped in the lower right hand portion of the card in Pacific Point ink. The Needle Tool and Mat Pack were used to punch three holes under each curly label for the brads. The Build A Brad bases were put into the cardfront. Three 1/2" circles were punched from a scrap of So Saffron DSP (retired) with the 1/2" Circle Punch. These were adhered into the brad bases with Tombow Multi-Purpose Adhesive. The clear top was added to each brad. That's it!

This card was pretty quick to put together and I enjoyed combining the two challenges. Thank you Susie for the wonderful and challenging sketch, and thank you Barbara for the great color challenge! If you are a Stampin' Up demonstrator and have access to Stampin' Connection you can find the sketch challenge here and the color challenge here. If you are not a demonstrator I would still love to see your creations. Please add a link to your card in the comments section of this post!

Tuesday, November 2, 2010

Simple Vintage Christmas

Today I have for you a very quick and simple vintage looking Christmas card. With the holidays quickly approaching it is getting busier and busier in my world. So many things to do before the holidays actually get here. So here is the card:


Stamps: Tags Till Christams, Bells and Boughs
Cardstock: Crumb Cake, Early Espresso, Very Vanilla
DSP: Deck the Halls
Ink: Cherry Cobbler, Crumb Cake
Accessories: Decorative Label Punch, Scallop Trim Border Punch, Paper Snips, 5/8" Old Olive Grosgrain Ribbon, Silver Glass Glitter, Tombow Multipurpose Adhesive, Stampin' Dimensionals, Two-Way Glue Pen

The card base is Crumb Cake cardstock cut at 5 1/2" x 8 1/2" and scored at 4 1/4". The card front was stamped with the holly image from Bells and Boughs in Crumb Cake ink to create the background.
The Early Espresso cardstock was cut at 4 1/4" x 3 3/8" and the bottom edge was punched with the Scallop Trim Border punch. A piece of Deck The Halls DSP was cut at 2" x 4 1/4" and adhered to the Early Espresso cardstock.

On a scrap of Very Vanilla cardstock the image from Tags Till Christmas was stamped in Cherry Cobbler ink and punched out with the Decorative Label Punch. Two more decorative labels were punched from scraps of Early Espresso cardstock and each were cut in half and adhered to the back of the stamped label with a Two-Way Glue Pen to create the mat behind the stamped label. A piece of 5/8" Old Olive Grosgrain ribbon was cut and the end was adhered to the back of the Early Espresso and DSP cardstock panel. The Early Espresso and DSP layer was then adhered to the card front. I used some snail adhesive to adhere the ribbon flat down the card front.

The greeting from Bells and Boughs was stamped in Cherry Cobbler ink in the upper left hand corner of the card. Tombow Multipurpose Adhesive was added around the inside oval and Silver Glass Glitter was pressed into the adhesive to give the label some sparkle. After the adhesive dried Stampin' Dimensionals were added to the back of the label and the label was adhered on top of the Old Olive ribbon. That's it! I hope you've enjoyed my simple Christmas card.

Come back tomorrow to see a scrapbook page!

Monday, November 1, 2010

Autumn Thank You

Today is Monday and you know what that means...Sketch Challenge time!!! Here is the sketch:


And here is my card:


Stamps: Day of Gratitude
Cardstock: Crumb Cake, Very Vanilla, Cajun Craze
DSP: Autumn Spice
Ink: Crumb Cake, Chocolate Chip
Accessories: 2 3/4" Scalloped Circle punch, 1 3/4" Circle Punch, 5/8" Chocolate Chip Grosgrain ribbon (retired), Needle Tool, Mat Pack, Stampin' Sponge, Stampin' Dimensionals

The card base is Crumb Cake cardstock cut at 5 1/2" x 8 1/2" and scored at 4 1/4". The sides were sponged with Chocolate Chip ink using a Stampin' Sponge. The next layer is a piece of Very Vanilla cardstock cut at 4 1/2" x 4 1/4". The 4 1/4" sides were sponged with Chocolate Chip ink and then this panel was adhered to the card front.

A piece of Autumn Spice DSP was cut at 4 1/8" x 4 1/4". Some 5/8" Chocolate Chip Grosgrain ribbon (retired) was added around the bottom of the DSP and tied into a bow. The DSP panel was adhered to the card front.  The 2 3/4" Scalloped Circle punch was used with some Cajun Craze cardstock to get the large scalloped circle. Then the Needle Tool and Mat Pack were used to add pierced holes in the center of each scallop. The edges of the scalloped circle were sponged with Chocolate Chip ink.

On a scrap of Very Vanilla cardstock the leaf was stamped in Crumb Cake ink and the greeting was stamped in Chocolate Chip ink on top of the leaf. This was then punched out with the 1 3/4" Circle punch. The edges were sponged with Chocolate Chip ink and adhered to the center of the Cajun Craze scalloped circle. The scalloped circle was adhered to the card front with Stampin' Dimensionals to give the card more dimension. Thats it! This is a very simple and a quick card to put together.

If you are a Stampin' Up demonstrator you can find the sketch challenge thread on Stampin' Connection here. If you are not a demonstrator I would still love to see your creations. Please post a link to your card in the comments section of this post!

Come back tomorrow to see another wonderful card!