Saturday, July 31, 2010

Elegant Concord Lines

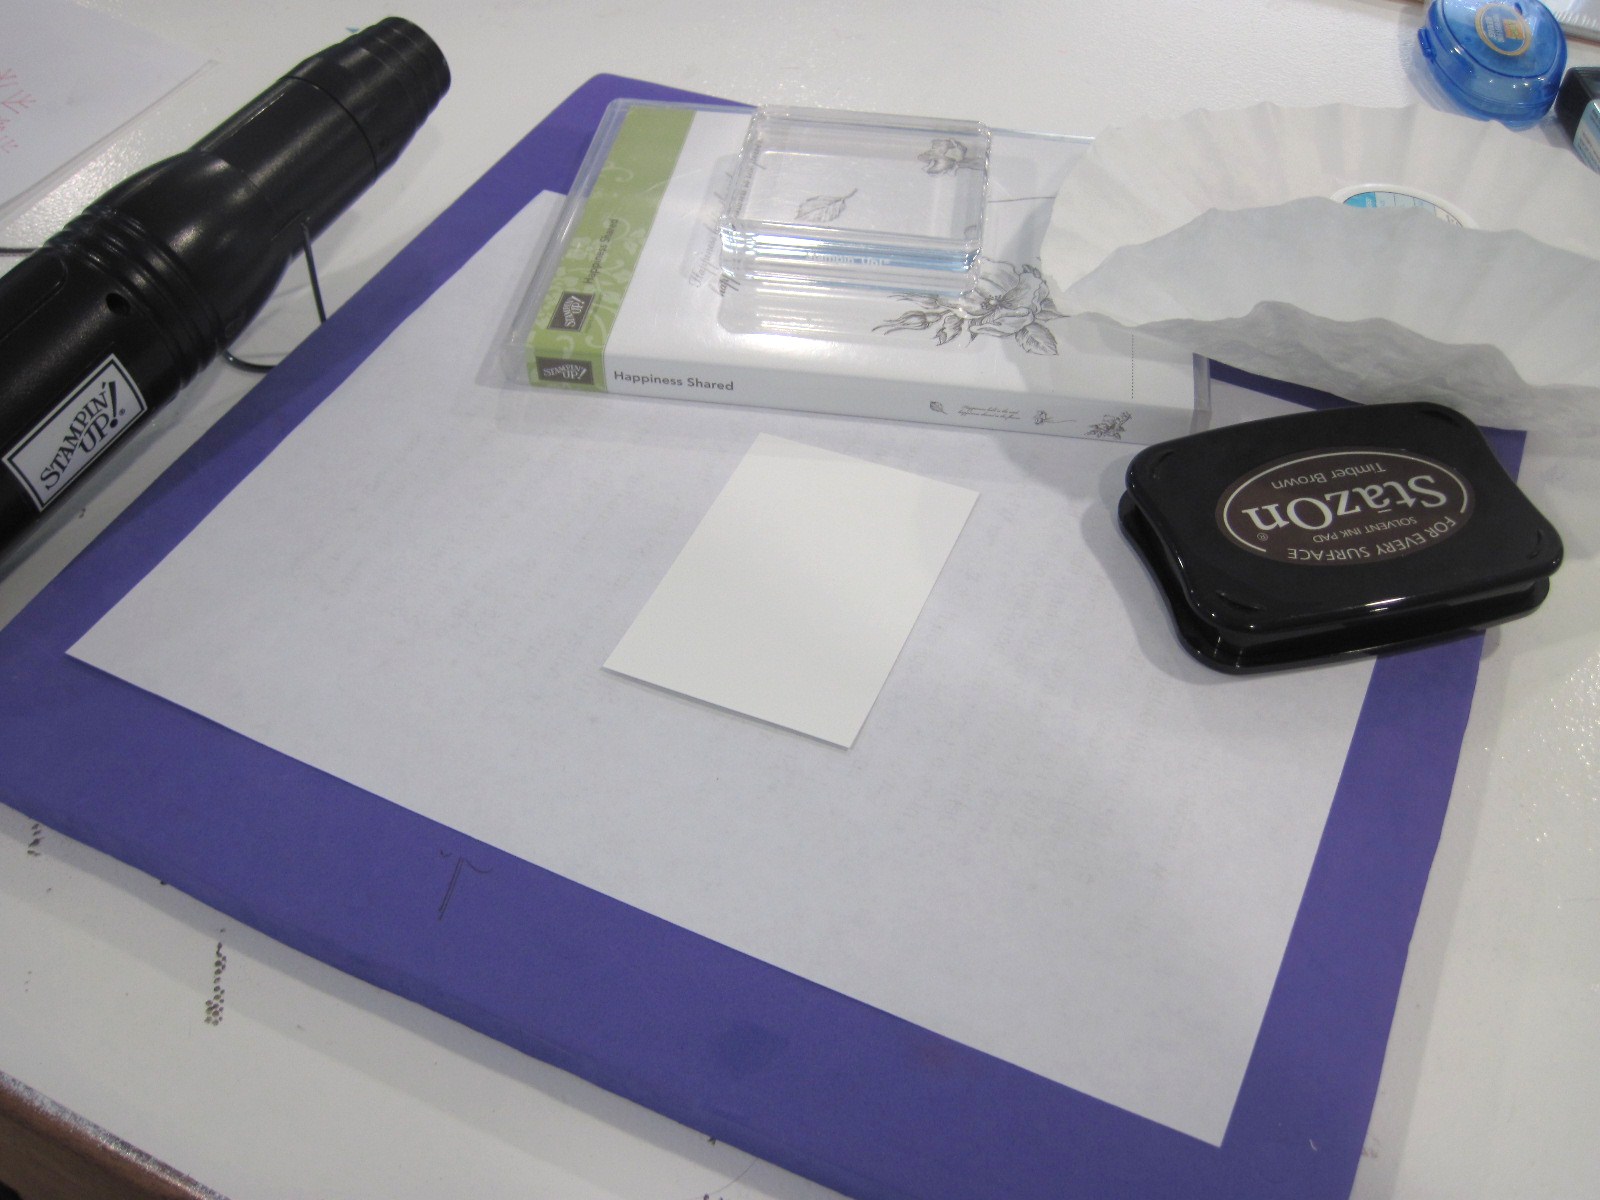
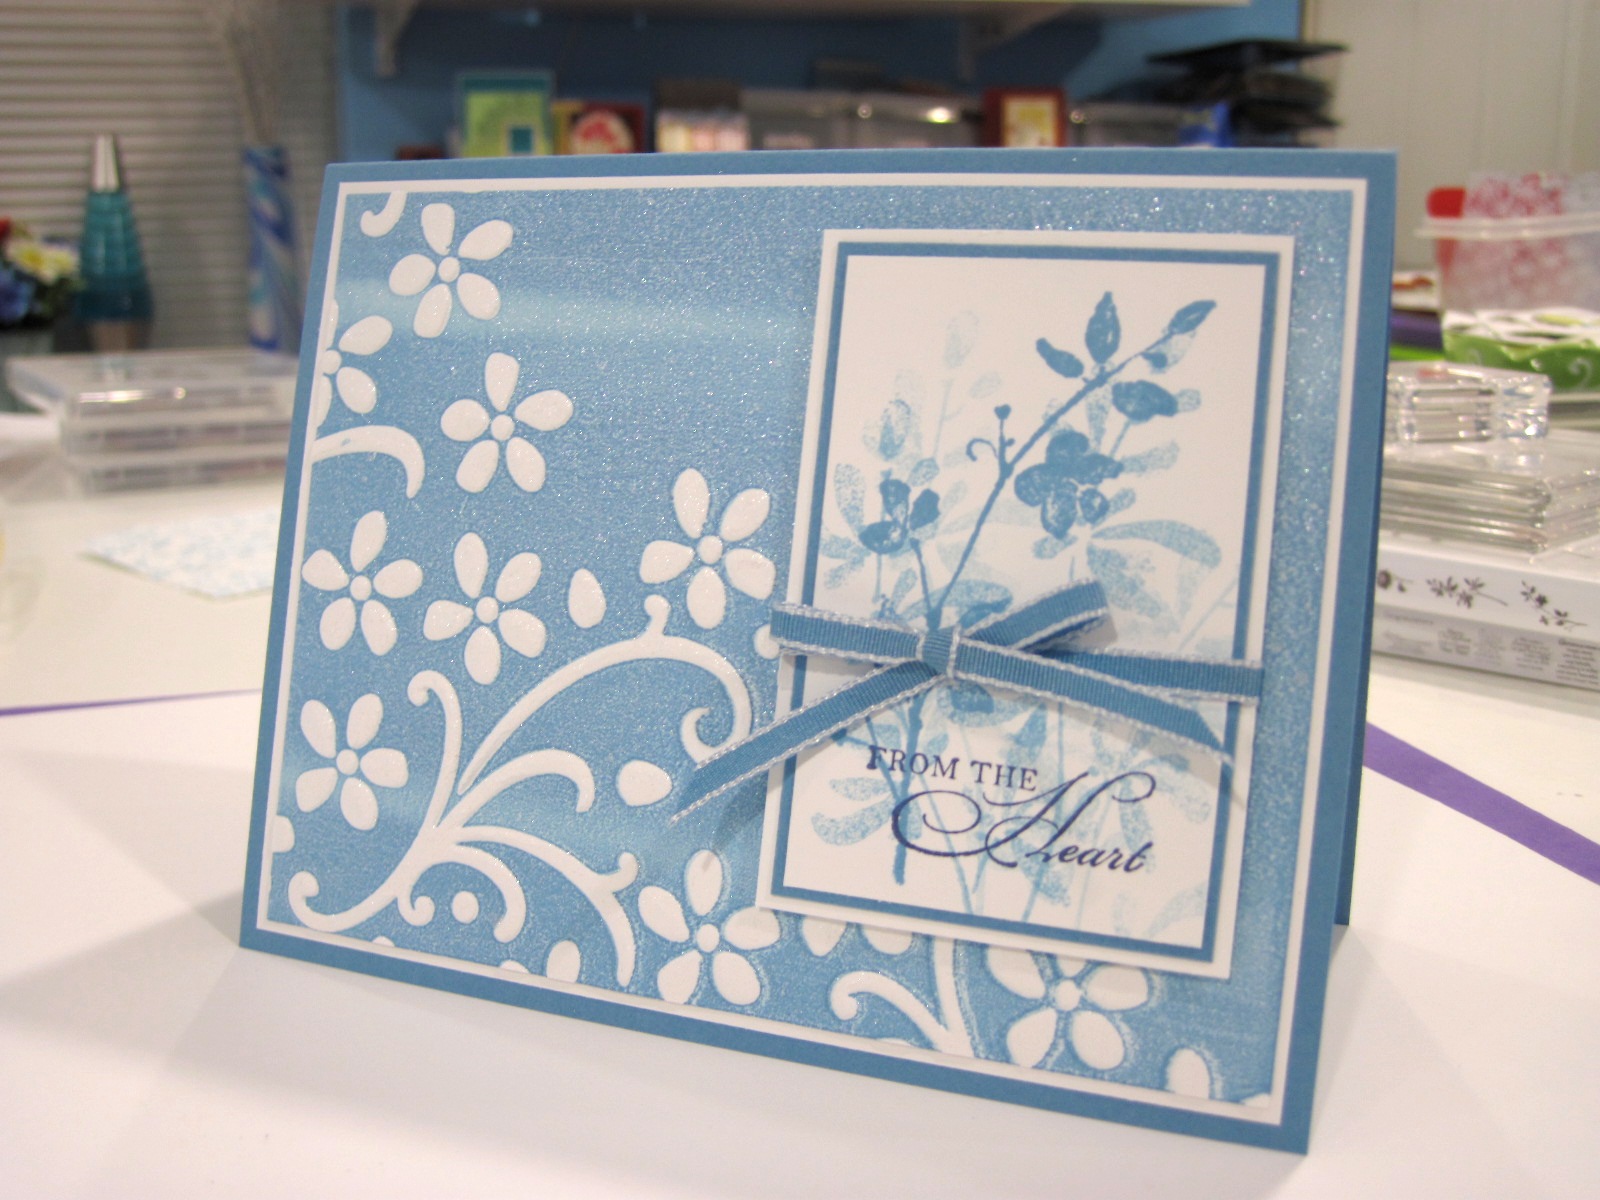
Today I have for you the card I made with the cracked glass panel I made in the tutorial yesterday. If you missed the tutorial for the Cracked Glass Technique you can find it by clicking here. Take a look at this simple card:


Stamps: Happiness Shared
Cardstock: Naturals White, Concord Crush, Pear Pizzaz, Whisper White
Ink: Timber Brown Stazon (retired), Versamrk, Early Espresso
Accessories: Elegant Lines Textured Impressions die, Whisper White Organza ribbon, clear embossing powder, Sponge Daubber, Basic Pearls Jewel Accents, Stampin' Dimensionals, Markers: Blushing Bride, Pretty In Pink, Poppy Parade, Pear Pizzaz, Old Olive

The card base is Naturals White cardstock cut at 5 1/2" x 8 1/2" and scored at 4 1/4". Then a piece of Concord Crush was cut to 4" x 5 1/4" and run through the Big Shot in the Elegant Lines Textured Impressions die. This was adhered to the card front. Concord Crush is one of the new In Colors for 2010. This is a really nice deep purple color! I absolutely LOVE this new textured impressions die. The lines are nice and crisp and deep too!

The image panel was made in the tutorial yesterday. The image from Happiness Shared was stamped in Timber Brown Stazon (retired) on a 2" x 2 5/8" piece of Whisper White cardstock and colored in with Blushing Bride, Pretty In Pink, Poppy Parade, Pear Pizzaz, and Old Olive. Blushing Bride, Poppy Parade, and Pear Pizzaz are some of the other 2010 in colors. I can really see myself using Pear Pizzaz a lot. Its such a nice shade of green. I used the cracked glass technique on the image panel and sponged Early Espresso ink into the cracks.

The finished image panel was added to a piece of Naturals White cardstock cut at 2 1/8" x 2 3/4". This was then adhered to a piece of Pear Pizzaz cardstock cut at 2 1/4" x 2 7/8". A piece of Whisper White Organza ribbon was added around the image panel and the panel was adhered to the card front using Stampin' Dimensionals. I thought the card needed a little more added to it so I put some of the new Basic Pearls Jewel Accents in the raised lines the textured impressions die created. Now it's done! I really like how this one turned out. What do you think?

Come back tomorrow to see what other fun things I have to show you!

Cracked Glass Tutorial

Since I have given you tutorials on heat embossing lately I decided to show you the cracked glass technique in this week’s tutorial. This is a wonderful technique that really gives a wonderful look to your stamped image.
If you missed the tutorial on heat embossing you can find it here.

The supplies you will need for this tutorial are: Heat Gun, Clear Embossing Powder, Versamark, cardstock, stamp, ink.


First stamp your cardstock with whatever images and colors you want for your card. In this case I used Happiness Shared.


Next you will ink the entire piece of cardstock with Versamark and cover completely with clear embossing power.


Heat emboss the embossing powder until it melts and turns shiny.


You will have a bumpy finish. Next repeat inking with Versamark, covering with clear embossing powder, and heating two-three more times.


Now you will have a smooth shiny finish.


Now put your cardstock in the freezer for a couple of minutes. Yes…I did say the freezer.
After a few minutes in the freezer your cardstock may warp a little. Don’t worry that is perfectly normal.

Now you are going to bend your cardstock until the embossing powder cracks. Keep bending it in different locations until you are happy with the cracks.


Now this looks really good as it is. But you can sponge on a dark color ink over the cracks. This will make the cracks stand out more.


Use a tissue or paper towel to remove the excess ink from the embossed surface.


Add your beautiful cracked glass panel to your card!

This creates such an elegant look and with a little patience it really isn’t hard to do. I hope you have a great time trying out the cracked glass technique! I would love to see your creations so please add the link to your photo in the comments section.

Come back tomorrow to see the finished card with the cracked glass panel I made today!

Friday, July 30, 2010

New Color Awash!

Today I have to share with you the second card I made for the New Color swap on Stampin' Connection. This one features two of my all time favorite sets Medallion and Awash With Flowers! Take a look!


Stamps: Medallion, Awash With Flowers, Friends 24-7
Cardstock: Cherry Cobbler, Daffodil Delight, Marina Mist, Whisper White
Ink: Early Espresso, Daffodil Delight, Cherry Cobbler, Cajun Craze
Accessories: Curly Label Punch, 1/8" Marina Mist Taffeta ribbon, mini glue dots

This is definitely the simpler of the two cards I made for the swap. The card base is Cherry Cobbler cardstock cut at 5 1/2" x 8 1/2" and scored at 4 1/4". I stamped the Medallion image onto the card base with Cherry Cobbler ink. This gives a nice tone-on-tone effect.

The image panel is Whisper White cardstock cut at 2 1/4" x 3". I used the clear mount Awash With Flowers set. The wonderful thing about using clear mount in this case is I was able to set the block on top of the cardstock I was going to stamp. I arraged the flowers how I wanted them and made sure that they would all fit onto the cardstock when I stamped it. Then, with all three flower images on the block, I inked the stamp and stamped the flower outlines in Early Espresso ink. This saves time and gives you a chance to strategicly line the images up where you want them. Then I came back and stamped the stem in Early Espresso ink.

The solid images for the flowers I had to stamp individually since they were in different colors which are Cherry Cobbler, Daffodil Delight, and Cajun Craze. The stems of the flowers were colored in with the Certainly Celery marker and the leaves were stamped in Certainly Celery ink. You can't see it very well in the picture but after stamping my image panel I ran the edges of the cardstock on the Early Espresso ink pad to add little dark edges all the way around the cardstock.

This was then adhered to a 2 3/8" x 3 1/8" piece of Cherry Cobbler cardstock and then to a piece of 2 5/8" x 3 3/8" piece of Daffodil Delight cardstock. I stamped the "for you" from the set Friends 24-7 in Early Espresso ink on scraps of Marina Mist cardsock and punched them out with the Curly Label punch. This was adhered half way under the Daffodil Delight cardstock. The image panel layers were adhered to the card front. I tied a small bow with 1/8" Marina Mist and adhered it to bottom of the Curly Label punch with a mini glue dot.

I really like how these cards turned out! I don't know right now what tutorial I will have for you tomorrow, but I promise I will have one! Come back to check it out!

Thursday, July 29, 2010

New Cute By The Inch!

Today's card is one that I made for a recent New Color swap on Stampin' Connection. I rules were to use the new colors which include Cherry Cobbler, Daffodil Delight, Early Espresso, Cajun Craze, and Marina Mist. You didn't have to use all of the colors together, but I just love how they all look together so I couldn't resist!

This card also uses one of the new Hostess Level 2 sets Cute By The Inch! You can earn this stamp set FREE by hosting a workshop that earns sales over $300! To find out more about hosting a workshop click on the Host a Workshop tab or contact me by clicking here. Now take a look at my new color masterpiece!


Stamps: Cute By The Inch, Perfect Punches
Cardstock: Early Espresso, Cherry Cobbler, Daffodil Delight, Cajun Craze, and Whisper White
Ink: Daffodil Delight, Cherry Cobbler, Cajun Craze, Marina Mist
Accessories: Vintage Wallpaper Textured Impressions Die, Scallop Oval Punch, Brayer, Stamp-a-ma-jig, Two-Way Glue Pen, Stampin' Dimensionals, 1/8" Marina Mist Taffeta ribbon, Silver Foil Smooch Spritz, and Color Catcher

The card base is 4 1/4" x 11" Early Espresso cardstock that was scored at 5 1/2". The top of the card was sprayed with Siver Foil Smooch Spritz to add some sparkle. A piece of Whisper White cardstock was cut to 3 1/2" x 4 1/4" and run through the Big Shot in the Vintage Wallpaper Textured Impressions Die. Then I used the brayer and the Early Espresso ink to add ink just to the raised portions of the texture. This brings the pattern out and makes it much more bold in the background.

Then 1" x 1" pieces were cut from Whisper White cardstock. To stamp the images and get them centered on such a small piece of cardstock I used the Two-Way Glue Pen and temporarily glued them to a piece of scrap paper. When you use the Two-Way Glue Pen and let the glue dry so that it is clear before adhereing it then the glue is repositionable. If you adhere it while the glue is still blue then it is a permanent bond. This is such a wonderful tool to have in your adhesive collection. I use it all the time. In this case it allowed me to use my Stamp-a-ma-jig to perfectly center the images on the small piece of cardstock. The images were stamped in Cherry Cobbler, Daffodil Delight, and Cajun Craze then removed from the scrap paper.

1 1/4" x 1 1/4" pieces were cut from Cherry Cobbler, Daffodil Delight, and Cajun Craze cardstock. The stamped images were adhered to their corresponding colored cardstock and these were adhered to the card front in the middle of the textured cardstock. A piece of 1/8" Marina Mist Taffeta ribbon was added around the top of the textured cardstock and tied into a bow. I just love this narrow ribbon. It works great for small accents and details.

The image from the stamp set Perfect Punches was stamped in Marina Mist ink on a scrap piece of Whisper White cardstock and punched out with the Scallop Oval punch. This was adhered to the card front with Stampin' Dimensionals.

It was so much fun creating with all of these wonderful new colors! You can check out all of the new colors and the new In Colors by clicking the Shop Stampin' Up button on the top of the sidebar or by clicking here.

Come back tomorrow to see the other fantastic card I created using all of the new colors!

Tuesday, July 27, 2010

Cobbler Awash

Last night I played the Featured Stamper challenge on Stampin' Connection. This week they were honoring Debbie Currier. If you have access to Stampin Connection you can view Debbie's card here. For those of you without access you can see her card below:


Now take a look at my version!


Stamps: Awash With Flowers, Occasional Quotes
Cardstock: Pink Pirouette, Cherry Cobbler, Whisper White
Ink: Early Espresso, Cherry Cobbler
Accesories: Scallop Edge Border punch, Corner Rounder punch, Whisper White Taffeta ribbon, 1/8" Early Espresso Taffeta ribbon, Button Latte button (retired), Perfect Polka Dots Textured Impressions die, Certainly Celery marker, Stampin' Dimensionals

The card base is 5 1/2" x 8 1/2" Pink Pirouette scored at 4 1/4". The card front was textured in the Big Shot with the Perfect Polka Dots textured impressions die. A strip of 1 1/2" x 4 1/2"  Cherry Cobbler was punched with the Scallop Edge Border punch.

The image panel is a piece of Whisper White cardstock cut at 3" x 4 1/2". The Corner Rounder punch was used on the top two corners. The outlines of the flower and stem from Awash With Flowers were stamped in Early Espresso ink and the solid flower image was stamped in Cherry Cobbler ink. The sentiment from Occasional Quotes was stamped in Early Espresso ink. I can always use birthday cards so many of the cards I make have a birthday sentiment on them.

The stem and leaves were colored in with a Certainly Celery marker. The Cherry Cobbler scalloped cardstock was adhered to the bottom of the image panel. Whisper White Taffeta ribbon was wrapped around the image panel and tied into a knot. I used a button from the Button Latte pack (retired) with some 1/8" Early Espresso Taffeta ribbon and tied the button around the knot in the Whisper White ribbon, then added a small bow. The panel was adhered to the card front with Stampin' Dimensionals.

It's fun to participate in these challeges and they can give you wonderful inspiration for other projects while honoring the original creator of the project you are copying. Thank you so much Debbie for inspiring me and other stampers. Congratulations for getting picked as the Featured Stamper this week!

Monday, July 26, 2010

Elegant Turqoise Medallion

Happy Monday all!!! Yesterday I showed you the Emboss Resist technique and today I am going to show you the card I made with the panel I made in the tutorial. If you missed out on the tutorial you can find it here. Take a look at this super easy and fast card!


Stamps: Medallion, Perfect Punches
Cardstock: Whisper White, Elegant Eggplant
Ink: Elegant Eggplant, Tempting Turquoise, Versamark
Accessories: 5/8" Chcolate Chip Satin ribbon (retired), heat gun, clear embossing powder, embossin buddy, silver brad, paper snips.

The card base is Elegant Eggplant cardstock cut at 5 1/2" x 8 1/2" and scored at 4 1/4". The image panel is 3 7/8" x 5 1/8" Whisper White cardstock. I used my embossing buddy on my cardstock and stamped the Medallion in Versamark and heat emossed with clear embossing powder.

By using a circular motion with a sponge to swirl on the Elegant Eggplant and then the Tempting Turqouise ink from the center outwards until the entire piece of cardstock was covered with ink. Then I wiped off the excess ink and adhered the panel to a piece of Whisper White cardstock cut at 4" x 5 1/4". I add a piece of 5/8" Chocolate Chip Satin ribbon (retired) around the panels and adhered this to the Elegant Eggplant card base.

The sentiment from Perfect Punches was stamped on a scrap piece of Whisper White cardstock in Elegant Eggplant ink ad cut out with paper snips. On a side note all of the stamps in the Perfect Punches set coordinates with a Stampin' Up punch. I just don't have the large oval punch that coordinated with this sentiment. One of these days I will fix that...anyway...back to the card. I sponged the edges of the sentiment with Tempting Turquoise ink then used my needle tool and mat pack to punch a hole right where the end of the swirl was and added a silver brad. The sentiment was adhered to the card front using Stampin' Dimensionals.

I hope you've enjoyed my card and tutorial on emboss resist. So have fun trying out this easy technique. I wouls love to see the cards that you make using this technique, so please add the web address to your card photo in the comments section. Have fun stamping everyone and enjoy the rest of your Monday!

Saturday, July 24, 2010

Emboss Resist Tutorial

Sorry for not getting this posted on Saturday when I usually post the weekly tutorial. I was busy helping my  Mom tile her backsplash in her kitchen. I will have to post a picture of what it looks like because it is gorgeous.

Now on to the tutorial. Last week I showed you embossing. Today I am going to show you a technique called Emboss Resist. For this tutorial you will need your heat gun, embossing buddy, clear embossing powder, Veramark, cardstock, stamp, sponges, and ink.


First you will use your embossing buddy on your cardstock, stamp your image with Versamark, add your clear embossing powder, and heat emboss. If you missed the tutorial on heat embossing you can find it here. Here you can see that I used the Medallin stamp on a piece of 3 7/8" x 5 1/8" Whisper White cardstock.


Now you are going to ink up your sponge with your first color of ink and sponge from the center of the medallion outwards. I like to use the sponge in a circular motion to apply the ink.


Here I am using Elegant Eggplant for the center of my Medallion.


Next ink up your sponge with the second color and sponge outwards past the ends of the Medallion.


I chose to go ahead and sponge the rest of the cardstock. Here you can see that I used Tempting Turqouise for my second color.


Now you will use a tissue or paper towel to rub the ink off of the embossed image.


The result is a beautiful white medallion surrounded by color. The embossing resists the ink which allows you to color your background while keeping your image the color of the cardstock you started out with. I really love this effect. It's so easy and looks great!


Come back tomorrow to see the card that I made with my emboss resist panel! Have fun stamping!


Friday, July 23, 2010

Purse Gift Card Holder

This is the final project that my guests made at the make and take last week. This project was inspired by a gift card holder that Heidi Tekunoff posted on Stampin Connection. These are a super cute way to give a gift card! Take a look!


Stamps: Baroque Motifs
Cardstock: Whisper White, Pretty In Pink, Rich Razzleberry
Ink: Pretty in Pink, Rich Razzleberry
Accessories: Top Note Die, Scallop Circle Punch, silver brads, velcro dots, Paper Snips, Needle Tool, Mat Pack, Mini Glue Dots

To start off I cut a piece of Whisper White cardstock 6"x6" and scored it at 3". After folding on the score line I measured in from the sides 1" on the open end and marked it with a pencil. Then I went to the paper cutter and cut from the folded side corner to the penicl mark I made. This angles the sides of the paper in so that it will fit inside the top note die.

The front of the purse was stamped with the swirls from Baroque Motifs in Pretty In Pink ink. Then I cut out two Top Notes from Rich Razzleberry ink. One of them I scored in half long-ways, and the other one I cut in half long-ways. The scored top note gets two holes punched approximately 1/2" from the end on both ends. Some Whisper White Taffeta ribbon was threaded through the holes in the folded top note to create the handle. Sticky strip was added under the fold line and along the sides of the folded top note. This will be where the purse adheres to the lid.

Remove the liner from the sticky strip and adhere your ribbon ends (from your handle) to the sticky strip. Then adhere the back of your purse to the bottom of the folded top note. By adhereing your ribbon between the two layeres you don't get a bluge from a knot and you don't have to worry about finishing off the ribbon ends.

Sticky strip was added to the sides and a small piece on the flat side of one of the top note halves. You want to make sure that your 1/4" sticky strip is as close to the top note edge as possible. This will leave a space just big enough for a gift card to slide in. You could use the other half of the top note to put a pocket on the inside of the purse front to hold a note card.

The small medallion from Baroque Motifs was stamped in Pretty In Pink ink on a scrap of Pretty In Pink cardstock and punched out with the Scallop Circle Punch. The small medallion was stamped again with Rich Razzleberry ink on a scrap piece of Whisper White cardstock and was cut out with Paper Snips. The needle tool and mat pack were used to pierce a hole in the center of both medallions. A brad was added to hold them together and the medallions were adhered to the purse front with a couple Mini Glue Dots.

Now we need to add the velcro to hold the purse flap closed. I cut the velcro circle in half since we really don't need a whole one to keep this purse closed. I put the hook and loop velcro together and stuck it to the purse flap where I wanted it. Then simply close your purse flap to adhere the other side in just the right spot. Since you had the two parts together already when you close the flap the velcro gets adhered right where you need it to.

Now your purse gift card holder is complete! This is such a cute way to present a gift card to someone.

Come back tomorrow to see a tutorial on Emboss Resist! Have fun stamping!

Thursday, July 22, 2010

Butterfly Grasses

Today I have for you the last card that my guests made at the make and take last week. This card was inspired by a card Jen Smith made. It's cute and pink! Take a look!


Stamps: Inspired By Nature, Very Vintage Wheel, Punch Potpurri
Cardstock: Whisper White, Pink Pirouette, Rose Red
Ink: Rose Red, Old Olive, Melon Mambo, Basic Black
Accessories: Perfect Polka Dots Textured Impressions die, 1/4" Pretty In Pink Grosgrain ribbon, Butterfly Punch, Scallop Edge Border Punch

The card base is Whisper White cardstock cut at 4 1/4" x 11" and scored at 5 1/2". The card front was textured using the Perfect Polka Dots Textured Impressions Die in the Big Shot. A piece of Rose Red cardstock was cut at 1 1/2" x 3 1/2" and stamped with Rose Red ink with the Very Vintage Wheel. This was adhered to the bottom of a piece of Pink Pirouette cardstock cut at 3 1/2" x 4 3/4" and punched with the Scallop Edge Border Punch on the top and bottom.

A piece of Whisper White cardstock was cut at 2 3/8" x 3 1/2". The grass from Inspired By Nature was stamped with Old Olive ink. The sentiment from Inspired By Nature was stamped in Basic Black ink. This panel was adhered to the top of the Pink Pirouette punched panel.

The butterfly from Punch Potpurri was stamped on a scrap of Whisper White cardstock and punched out with the Butterfly Punch then adhered on top of the grass with a Stampin Dimensional. Some 1/4" Pretty in Pink Grosgrain ribbon was tied into a knot around the layers. All of these top layers were adhered to the card front using Stampin Dimensionals.

I just love how cute and fun this one is! Thank you Jen for the inspiration! 

If you live in the Leavenworth, Kansas area and are interested in attending a Make and Take at my home please e-mail me at amanda.c09@hotmail.com. You can check out the calendar on my Stampin' Up website to see the Make and Take dates.

Come back tomorrow to see the 3D item that we made. It is a really cute gift card holder that I just know you'll love!

Wednesday, July 21, 2010

Watercolor Tree

What I have for you today is the masculine card that we made at the Make and Take this month. I always try to include at least one masculine card, because those are harder for some people to come up with. This card was inspired by Heather Klump on Stampin Connection. Well...take a look!


Stamps: Lovely as a Tree, Elements of Style, Wood Grain
Cardstock: Pacific Point, Cajun Craze, Very Vanilla
Ink: Versamark, Pacific Point, Always Artichoke, Chocolate Chip
Accessories: Heat Gun, Embossing Buddy, Gold Embossing Powder, water spritzer, 1/8" Early Espresso Taffeta ribbon, Watercolor Crayons: Pumpkin Pie, More Mustard, Chocolate Chip

The card base is Pacific Point cardstock cut at 5 1/2" x 8 1/2" and scored at 4 1/4". The card front was stamped with the Wood Grain background stamp in Pacific Point ink. I really love this Wood Grain background stamp because it works so great for those guy cards or for nature cards. It's one of my most frequently used background stamps!

The image panel is a piece of Very Vanilla cardstock cut at 2 7/8" x 3 7/8". To stamp the image I colored directly on the stamp with the watercolor crayons using a combination of Pumpkin Pie and More Mustard for the leaves and Chocolate Chip for the trunk. After you stamp is colored spritz it with water using your spray bottle. I just use an old travel-sized hair spray bottle because it puts out a pretty fine mist. Then simply stamp on your cardstock!

To add the color in the trunk of the tree, the grass, and the sky squeeze the center of the closed Classic Ink Pad. Always Artichoke for the grass, Pacific Point for the sky, and Chocolate Chip for the tree trunk. Open the ink pad half way so that the lid is lying on the table. Use an Aquapainter to pick up the ink off the lid and use it to color in your sky, grass, and tree trunk. Now you have a beautiful watercolored scene! At this point it may take a while for your image panel to dry completely. I'm impatient sometimes so I dried mine off with the heat gun before continuing.

The embossing buddy was rubbed all over the bottom of the image panel. This is such a great tool for heat embossing. The powder inside the little pouch prevents embossing powder from sticking with static electricity where you don't want it. The embossing powder will only stick where your ink is. If you like heat embossing then it is definitely a tool to have in your stash! The sentiment from Elements of Style was inked up with Versamark and stamped in the bottom right hand corner of the cardstock. Gold embossing powder was poured on top and the excess removed. This was heated with a heat gun and now you have a shiny gold sentiment. 

The image panel was then adhered to a piece of Cajun Craze cardstock cut at 3" x 4". A piece of 1/8" Early Espresso Taffeta ribbon was tied around these panels between the sentiment and the watercolored image. This panel was adhered to the card front and you're done!

Come back tomorrow to see a pretty pink and white card with butterflies! Have fun stamping!

Tuesday, July 20, 2010

Golden Watercolor Trio

This is the second card that my guests made at the Make and Take last week. This card was inspired by a card created by Gabrielle Whiting.


Stamps: Watercolor Trio, Perfect Punches
Cardstock: Daffodil Delight, Whisper White, Basic Black
Ink: Daffodil Delight, Basic Black
Accessories: Scallop Trim Border punch, 5/8" Basic Black Satin ribbon, Scalloped Oval punch

The card base is Daffodil Delight cut at 5 1/2" x 8 1/2" and scored at 4 1/4". A piece of Basic Black cardstock was cut at 2 3/4" x 5 1/2" and punched on both 5 1/2" sides with the Scallop Trim Border punch.
The image panel is Whisper White cardstock cut at 2 1/4"x 5 1/2".

To get the varied colors in the background you want to use a technique called Stamping Off. I inked the leaves from Watercolor Trio in Daffodil Delight ink and stamped once on scrap paper before stamping on the Whisper White cardstock, then stamp on the cardstock twice before inking again. Repeat this until it is filled in how you like it. Then stamp the flowers with leaves and the flowers like you normaly would with Daffodil Delight ink. This gives you a pretty tone-on-tone image.

The butterfly from Watercolor Trio was stamped with Basic Black in the upper left hand corner. This panel is then adhered to the punched Basic Black cardstock, and then to the card front. A piece of 5/8" Basic Black ribbon was tied around the bottom of the card and into a knot. I really like how elegant the satin ribbon looks on any card. I just can't get enough of it!

The thanks from perfect Punches was stamped in Basic Black ink on a scrap of Whisper White cardstock and punched out with the Scalloped Oval punch. This was adhered to the card with Stampin' Dimensionals. Thats it! This is a quick and fun card to make.

Come back tomorrow to see the masculine card we made this month! Have fun stamping!


Monday, July 19, 2010

Because I Care - July Make and Take 1

This is the first card that my guests made at the July Make & Take. It uses one of the new Hostess sets. To get a Hostess Set you have to hold a workshop and sell at least $150 worth of merchandise and you will earn one Level 1 Hostess Set and $15.00 of FREE merchandise! Contact me or your local demonstrator for more information on holding a workshop. Now for the card that we made. Take a look:


Stamps: Because I Care
Cardstock: Marina Mist, Whisper White, Early Espresso
Ink: Black Stazon, Early Espresso
Accessories: Vintage Wallpaper Textured Impressions Die, Stampin Dimensionals, White Gel Pen, Crystal Effects, Dazzling Diamonds Glitter, Stampin Dimensionals, Stampin Up Markers: Certainly Celery, Old Olive, Bashful Blue, Tempting Turquoise


The card base is Marina Mist cardstock cut at 5 1/2" x 8 1/2" and scored at 4 1/4". A piece of Whisper White cardstock cut at 4 " x 5 1/4" was run through the Big Shot with the Vintage Wallpaper Textured Impressions die and adhered to the card front.

The image panel is a 2 1/2" x 3 3/4" piece of Whisper White cardstock. The hydrangea image from Because I Care was stamped in Black Stazon. Since we are coloring this in you want to use Stazon because it is a permanent ink and the lines won't bleed when you go to color in your image with the markers. If you used the classic Basic Black ink you might have trouble with the lines bleeding when coloring in your image.

I used Certainly Celery, Old Olive, Bashful Blue, and Tempting Turquoise markers to color in the flower.

Note: When using Stampin Up markers start coloring with the lightest color, then add your darker shadows, and after the ink has dried go over the entire thing again with the lightest color. This helps to blend the colors on your image better. If you let the ink dry completely before repeating the lighter color you won't have any problems with the color on the image contaminating your marker.

The White Gel Pen was used to highlight the centers of the hydrangea blooms. Then little dots of Crystal Effects were placed over each of the White Gel Pen dots and Dazzling Diamonds glitter was added. I knew if I didn't put glitter on this card one of my guests would say "It needs some sparkle!". The sentiment was stamped in Early Espresso ink in the bottom right hand corner of the card.

This image panel was then adhered to a piece of Maria Mist cardstock cut at 2 3/4" x 4" and then to a panel of Early Espresso cardstock cut at 2 7/8" x 4 1/8". This was adhered to the card front using Stampin Dimensionals.

I love using this beautiful new Hostess Set and plan on making lots of cards with it. Come back tomorrow to see another Make and Take! Have fun stamping!

Sunday, July 18, 2010

Elegant Butterflies

This is the card I made using the heat embossed butterflies I made during the Heat Embossing tutorial. If you missed the tutorial you can find it here.


Stamps: All A Flutter, Oval All
Paper: Presto Patterns DSP
Cardstock: Elegant Eggplant, Basic Black, Old Olive
Ink: Elegant Eggplant, Old Olive, Basic Black, Sahara Sand, Versamark
Accessories: 5/8" Basic Black Satin ribbon, Scallop Oval punch, Black Embossing Powder, Heat Gun, Embossing Buddy

The card base is Elegant Eggplant cardstock cut at 5 1/2" x 8 1/2" and scored at 4 1/4". The Presto Patterns DSP was cut at 3 1/2" x 4 1/4" and sponged with Kraft, Old Olive, and Elegant Eggplant ink. This was layered on a piece of Old Olive cardstock cut at 3 5/8" x 4 1/4" and a piece of Basic Black cardstock cut at 3 3/4" x 4 1/4".

Some 5/8" Basic Black Satin ribbon was tied around the panel and the panel was added to the card front. A scrap of Whisper White cardstock was sponged half way with Old Olive ink and the other half with Elegant Eggplant ink. The image from Oval All was stamped in Basic Black ink and then it was punced out with the scallop oval punch, then sponged around the edge with Basic Black ink and adhered to the card front with Stampin' Dimensionals. I then used some Crystal Effects and Dazzling Diamonds glitter to add some sparkle to the flower on the sentiment and used the white gel pen to color in the center of the flower.

The butterfly from All A Flutter was stamped in Versamark and heat embossed with black embossing powder on a scrap piece of Whisper White cardstock. Then I used the Marina Mist, Pacific Point, Old Olive, Kraft, Rose Red, and Elegant Eggplant ink pads with the Aquapainter by squeezing the ink pads in the center while they are closed and opening them half way to pick up the ink off of the lid with the Aquapainter.

The butterflies were cut out with Paper Snips and adhered to the card front with Stampin Dimensionals. What do you think?

Come back tomorrow to see the first of the projects that my guests made at the Make & Take last Friday!


Saturday, July 17, 2010

Heat Embossing Tutorial

Sorry I didn't have anything for you yesterday. After working in the morning I spent the afternoon and evening preparing for the Make & Take. All of the ladies had a wonderful time making the creations that I will be showing you next week. My husband and I are currently remodeling the sun room which I usually use for my Make & Takes and we had to use it anyway. It was and interesting sight having an unfinished room set up for this class, but it was fun anyway.

Well for today I have a tutorial on heat embossing. I will try to give you a tutorial of some sort every Saturday.

For this tutorial you will need an embossing gun, stamp, versamark ink, embossing buddy, embossing powder, cardstock and two coffee filters.


First you are going to want to rub your embossing buddy on the cardsock that you are embossing. The embossing buddy is a litte linen pouch with powder inside. When on your cardstock the powder prevents the embossing powder from sticking in places where you don't want it.


Stamp your image onto the cardstock using Versamark Ink. Versamark is a clear ink dries slowly and is slightly sticky. It grabs and holds onto the embossing powder easier. For heat embossing you should either use Versamark or Craft ink because classic ink dries too quickly to hold onto the embossing powder.


Hold your cardstock over the coffee filter or if it is small enough set the cardstock in the coffee filter and pour the embossing powder over the stamped images.


Lift up your cardstock and let the excess embossing powder slide off into the coffee filter.


Give the cardstock a good flick on the back to get all of the extra little grains of embossing powder off your cardstock.


Use the top coffee filter to pour the embossing powder back into the container. By having a second coffee filter below the container it will catch the powder that you spill instead of spilling it onto your work table.


Use the heat gun to melt the embossing powder. The heat gun is not a hair dryer, do not move it around back and fourth. Hold the heat gun steady until the powder raises and turns shiny. Make sure the image is completely heated before turning off the heat gun.


Once you are finished embossing let the cardstock cool a little bit before picking it up. It will be hot.


You now have a shiny raised image. This is great for coloring to keep the watercolor or marker ink in the lines. Here I have used black embossing powder. You can also get Gold, Silver, Clear, White, or Irridescent Ice (this is like clear embossing powder with glitter in it).

Heat embossing is lots of fun and gives you a really nice shiny image. Come back tomorrow to see the card that I used these embossed butterflies on. Have fun stamping!

Thursday, July 15, 2010

With All My Heart

Last night after preparting for the Make & Take this Friday I had a chance to just play around. No birthday cards that need made, no swaps that need made, so what do I do? Well I decided I wanted to make something bright and fun that uses Melon Mambo. Now this is a color that I really haven't used that much. I have a bad habit of sticking to a few color combos. So instead I pulled out my wonderful new Color Coach and went to the Melon Mambo tab. One of the suggested color combinations on the back of the card was Melon Mambo, Tempting Turquoise, and Daffodil Delight. So here is what I made with those colors.


Stamps: With All My Heart
Cardstock: Whisper White, Tempting Turquoise, Melon Mambo, Daffodil Delight
Ink: Tempting Turquoise, Melon Mambo, Daffodil Delight, Basic Black
Accessories: Scallop Trim punch, Certainly Celery 1/4" Grosgrain ribbon, Beautiful Wings Embosslit, White Gel Pen, Basic Black brads, Needle Tool, Mini Glue Dots

The card base is Tempting Turquoise cardstock cut at 5 1/2" x 8 1/2" and scored at 4 1/4". I used the sentiment from With All My Heart and stamped it in the bottom right corner of the card front in Basic Black ink.

The image panel is Whisper White cardstock cut at 2 1/4" x 5 1/2". This was stamped with the various flowers from With All My Heart in Melon Mambo, Tempting Turquoise, and Daffodil Delight. This panel was then layered on a piece of Melon Mambo cardstock cut at 2 3/8" x 5 1/2". Then another Whisper White panel cut at 2 1/2" x 5 1/2" was added. A piece of Certainly Celery 1/4" Grosgrain ribbon was added around the panel and tied into a bow. I just couldn't resist adding some sort of ribbon and I didn't have any ribbon in the colors used. I will have to fix that....anyway back to the card.

A piece of Daffodil Delight cardstock was cut at 2" x 5 1/2" and punched with the Scallop Trim border punch. This was adhered behind the image panel layeres leaving just the scallops showing. The stack of layeres was adhered to the card front. It could have been done here but I just kept looking at it and thinking that something was missing. Then I spotted by Beautiful Butterfly Embosslit on the table. A butterfly! Perfect!

So I used my Big Shot and the Beautiful Butterfly Embosslit and cut a Melon Mambo butterfly. The white gel pen was used to color in the embossed swirls on the butterfly and the needle tool was used to add holes for two Basic Black brads. Mini Glue Dots were used to adhere the butterfly to the card front.

That's it! This fun and bright card is done! I will have to try using more bright colors in my crafting and the new Color Coach will help me find wonderful new color combinations. If you haven't seen the new Color Coach you can check it out here.
Come back tomorrow to see what else I have created! Also, don't miss the new tutorial this Saturday!

Wednesday, July 14, 2010

Fancy Favor Boxes

These boxes were so much fun and so easy to make! And so fast too! I can just image these filled with candy as wonderful party favors or even wedding favors.


Stamps: Baroque Motifs, Elements of Style

Cardstock: Bashful Blue, Old Olive, Whisper White
Ink: Night of Navy, Bashful Blue, Old Olive, Early Espresso
Accessories: Big Shot, Fancy Favors Die, Whisper White Organza ribbon

I stamped the cardstock with coordinating ink using the swirls from Baroque Motifs several times across the center of the cardstock. One box was made with Bashful Blue cardstock and Bashful Blue ink. The other box was made with textured Old Olive cardstock and Old Olive ink.

Then the Big Shot was used with the Fancy Favors die. This wonderful die cuts and scores at the same time! So all you have to do is fold on the score lines and adhere the bottom together with some sticky strip.

I used the Crop-A-Dile to punch two 3/16" holes in the center of the front and back of the box. I stamped the "For You" from Elements of Style in Night of Navy for the blue box and Early Espresso for the green box on a scrap piece of Whipser White cardstock. Then the Curly Label punch was used to punch out the sentiment and the Crop-A-Dile was used to punch a hole in the top of the label.

Whisper White Organza ribbon was threaded through the holes in the box and on the label and then the ribbon was tied into a bow. That was really it! So super quick and fun! You could easily mass produce boxes like these!

Come back tomorrow to see a pretty Elegant Eggplant card!

Carryover Products Flier

These are all products from previous catalogs that are still available. Get them while they last!
Click here to view the full PDF.


Sunday, July 11, 2010

Marina Mist Boquet

Yesterday I showed you a short tutorial on how to do what I call inked dry embossing. For those of you who missed it you can view the post here. Today I am going to show you what I have done with the inked an embossed piece of Whisper White cardstock that I made during the tutorial. So here it is....


Stamps: Watercolor Trio
Cardstock: Marina Mist, Whisper White
Ink: Marina Mist, Night of Navy
Accessories: Elegant Bouquet Textured Impressions die, Brayer, 1/8" Marina Mist Taffeta ribbon, Vanilla Shimmer Smooch Spritz, Stampin Dimensionals

I really wanted the inked and embossed background to be the major part of the card. After inking and embossing I spritzed the entire piece of Whisper White cardstock with Vanilla Shimmer Smooch Spritz. I cropped it down to 3 7/8" x 5 1/8" and layered it on a piece of 4" x 5 1/4" Whisper White cardstock. This was then adhered to the Marina Mist card base that was cut at 5 1/2" x 8 1/2" and scored at 4 1/4".

For the image panel I cut a piece of Whisper White cardstock 1 7/8" x 2 7/8". I stamped the images from Watercolor Trio using Marina Mist ink. The leaves in the back were done by stamping off on scrap paper once and stamping on the image panel twice. This was repeated once more. Then I stamped the leaves and flowers in Marina Mist and the sentiment in Night of Navy ink .

The image panel was layered on a 2" x 3" piece of Marina Mist cardstock and then on a 2 1/8" x 3 1/8" piece of Whisper White cardstock. A piece of 1/8" Marina Mist Taffeta ribbon was added around the image panel and tied into a bow. The image panel was adhered to the card front using Stampin Dimensionals. That's it! I really love this simple monochromatic card. It really lets the textured background stand out.

Come back tomorrow to see what I have to show you!

Saturday, July 10, 2010

Inked Dry Embossing

Today I have a quick and fun tutorial for you. We will be using a Stampin' Up Textured Impressions die with a brayer and ink to ink the background around an embossed image.


For this tutorial you will need the following items: cardstock, classic ink, brayer, Big Shot, Big Shot platform and standard cutting pads.


Have your cardstock cut and ready to go. I am using Whisper White cardstock cut at 4" x 5 1/4". Use your classic ink pad to ink up your brayer by rolling the brayer across the ink pad several times.


Add ink to the debossed or back of the embossing folder. Make sure to cover the folder with ink where your cardstock is going to go. From here on you will want to work pretty fast so your ink is still really wet.


Place your cardstock inside your embossing folder, close the folder and run it through the big shot with the two standard cutting pads and Tab 2 on the platform. I ran the folder through twice to be sure I got a really good image with the ink.


Remove your cardstock from your embossing folder and oooh and aaah over the wonderful result.

To clean your embossing folder simply rinse the folder under running water and set aside to air dry.


Thats all there is too it! Now you have a beautiful textured and inked image that can be used to decorate a card. Come back tomorrow to see the card I make with the inked and dry embossed cardstock I made in this tutorial!