
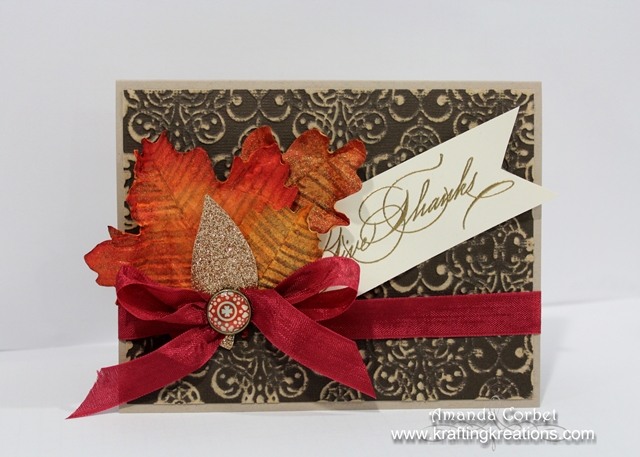
I was playing away in my craft room one evening last fall when my Mom came over
and she wanted to learn how to make the leaves that I showed you in THIS
tutorial. So we made this lovely fall card!
- Stamps: Hand Penned Holidays
- Card Stock: Early Espresso Core’Dinations, Crumb Cake, Very Vanilla
- Ink: Versamark
- Accessories: Lacy Brocade embossing folder, Gold embossing powder, Embossing Buddy, Heat Tool, Cherry Cobbler Seam Binding Ribbon, Autumn Accents Die, Crop-A-Dile, Bronze Builder Brads (retired), Sanding Block, Comfort Café DSP, 1/2” Circle Punch
I started off by cutting a piece of Crumb Cake card stock 5-1/2” x
8-1/2” and scored it at 4-1/4”. Next I cut a piece of Early Espresso
Core’Dinations card stock 4”x 5-1/4”. I ran this through the Big Shot in the
Lacy Brocade embossing folder then took the sanding block to it to reveal the
texture. I adhered this onto the card front.

I made the leaves just like I did in the tutorial and used some
Stampin’ Dimensionals to adhere them onto the card front. I used the small hole
of my Crop a Dile to punch through the card front where the stem of the glimmer
leaf is. Then I wrapped a piece of Cherry Cobbler Seam Binding ribbon around
the card front and tied it into a knot.
I took a Bronze Build-A-Brad and spread the prongs and placed the
prongs on either side of the knot in the bow, then through the hole in the card
front and spread the prongs on the inside of the card. I used my 1/2” Circle
punch on a piece of Comfort Café DSP and used that for the patterned portion of
my brad.

Finally I stamped my greeting onto a 1-1/2” x 3-1/2” piece of Very
Vanilla card stock in Versamark ink. I poured Gold embossing powder over the
stamped image and tapped off the excess before heating it with my Heat Tool. I
used Paper Snips to cut the dove-tail shape in one end and adhered the greeting
strip behind the leaves.
This one was a little labor intensive, but well worth the effort!
