
It’s
Friday Mashup time again! This week it’s my turn to give you a challenge! I
want you to take that clear block and use it in a new way.
Most
of my card designs usually lean towards the simple side. Not too many layers.
Not too much going on. But I tried specifically to kick this one up a notch and
make it more over the top. This is definitely over the top for me. I think I
like it a lot, but it’s still too simple. It’s always hard stepping out of your
comfort zone and I just feel like this one was only a baby step. What do you
think?
- Stamps: Chevron background
- Card Stock: Basic Gray, Soft Sky, Whisper White, Rich Razzleberry
- Ink: Basic Gray, Rich Razzleberry, Tempting Turquoise, Soft Sky
- Accessories: Pretty Print embossing folder, Chevron border punch, Rich Razzleberry Stitched Grosgrain ribbon, Circles Thinlits, Stampin’ Dimensionals, Silver Glimmer Paper, Two-Way Glue Pen

Here's your Mashup Challenge:
- Create a project using "Clear Block Stamping (use your clear block as a stamp)."
- Create a project using "Color-blocking."
- Or Mash it Up and create a project using "Clear Block Stamping & Color-blocking."
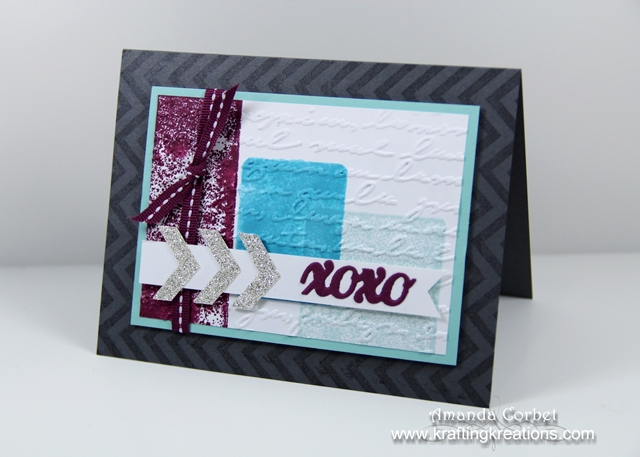
So
to make this card start out with a piece of Basic Gray card stock cut at 5-1/2”
x 8-1/2” and score at 4-1/4”. Use the Chevron background stamp with Basic Gray
ink to stamp the card front. Now cut a piece of Whisper White card stock 3” x
4”. Use three different sized clear blocks to stamp in Rich Razzleberry,
Tempting Turquoise, and Soft Sky using the Clear Block Stamping technique.
Next
run this card stock through the Big Shot in the Pretty Print embossing folder.
Adhere this onto a 3-1/4” x 4-1/4” piece of Soft Sky card stock. Cut a banner
from a 1/2” wide strip of Whisper White card stock. Wrap a piece of Rich
Razzleberry Stitched Grosgrain ribbon around the panel and tie it into a knot.

Use
the “xoxo” die from the Circle Thinlits set on a scrap of Rich Razzelberry card
stock and adhere this onto the banner with Two-Way Glue Pen.
When
I first saw the Chevron border punch in the catalog I though “eh, I don’t
really think I could use that one much” so I waited to order it. But now that I
have it I love it! I haven’t used it to make a border yet (you know, like it
was meant to be used… lol) but I love using it just to punch out the chevron
pieces to add on top of a card! So use the Chevron border punch with some
Silver Glimmer Paper and adhere your three glimmery chevrons onto the left side
of your banner then adhere the banner onto the image panel with Stampin’
Dimensionals.

Finally
adhere the panel onto the card front with some Stampin’ Dimensionals. That’s
it! You’re done!
