
Good morning! Today I am going to share with you the final project from the August Make & Take. This is the three dimensional project that we created!

Stamps: None
Cardstock: Pear Pizzaz, Old Olive, Whisper White
DSP: Pocket Full of Posies Designer Series Paper
Ink: So Saffron


Stamps: None
Cardstock: Pear Pizzaz, Old Olive, Whisper White
DSP: Pocket Full of Posies Designer Series Paper
Ink: So Saffron
Accessories: Large Scallop Circle Die, Simply Score, Bird Punch, Scallop Oval Punch, Stampin' Sponge, Two-Way Glue Pen, Basic Pearls Jewel Accents, Stampin' Dimensionals

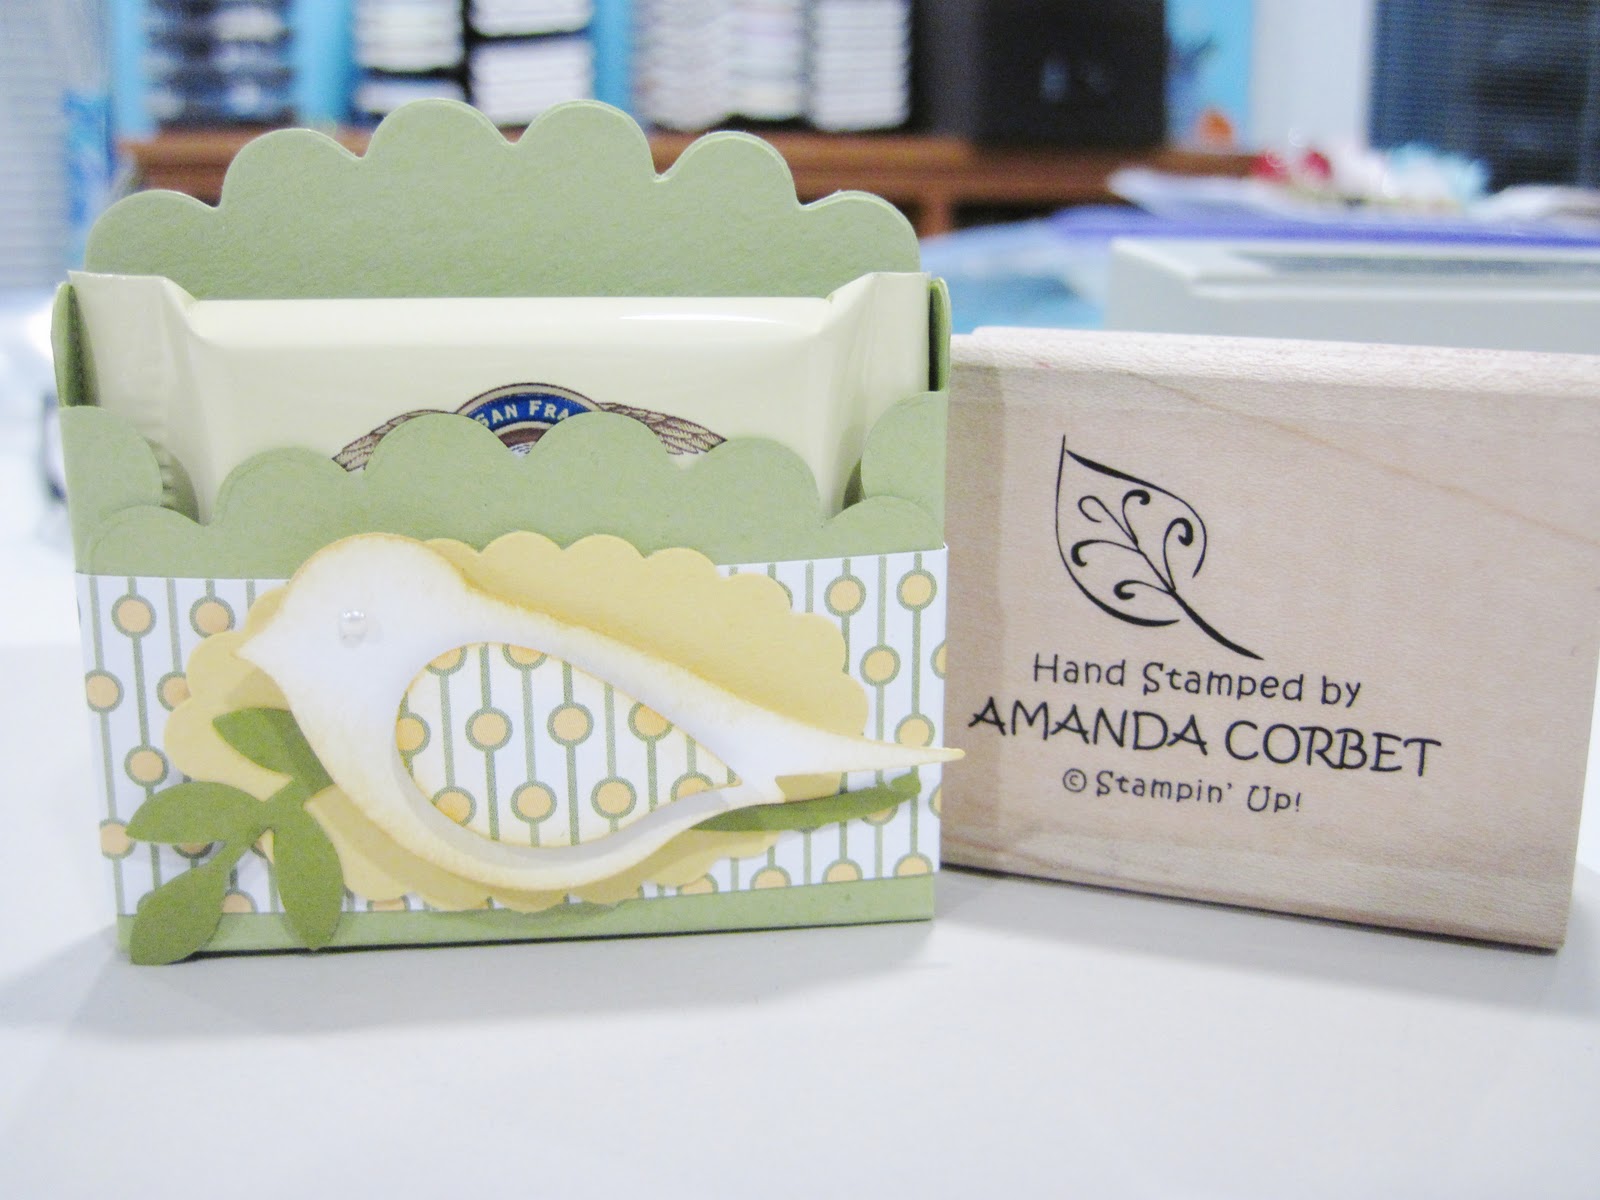
I started off with a piece of Pear Pizzaz cardstock that was cut at 4 3/4" x 4 3/4" and ran it through the Big Shot with the Large Scallop Circle Die. For the tutorial on how to create the chocolate holder take a look at Frenchie's wonderful video tutorial that you can find HERE.
The designer series paper band was a piece of Pocket Full of Posies DSP that was cut at 1" x 6" and was scored at 1 1/4", 1 5/8", 4 1/8", and 4 1/2". This was adhered around the box. The scallop oval punch was used on a scrap of So Saffron cardstock. The branch was punched with the Bird Punch from a scrap of Old Olive cardstock. The branch was adhered to the scalloped oval with Two-Way Glue Pen.
The bird was punched from Whisper White cardstock and the edges were sponged with So Saffron ink. The wind was punched from a scrap of the DSP and the edges were sponged with So Saffron ink. The bird wing was adhered to the bird with a Stampin' Dimensional. A basic pearl was added for the eye of the bird and the bird was adhered to the scalloped oval with a Stampin' Dimensional. Finally the scalloped oval was adhered to the chocolate holder with a couple of Stampin' Dimensionals.
Add a wonderfully delicious Ghirardelli chocolate inside and you're done. The hard part was convincing the ladies to put the chocolate into the holder and not eat it! So much fun! I hope you give these little cuties a try! There are several steps, but if you take your time and carefully cut you will have it made in no time!
Thanks for stopping by!
