Tuesday, February 8, 2011

Accordion Ornament - December Make and Take 5

I knew for the 3D item for this Make and Take that I wanted to do an ornament. Then I saw this one createdby Debbie Henderson and thought it was perfect! Thanks for the wonderful instructions and idea Debbie.
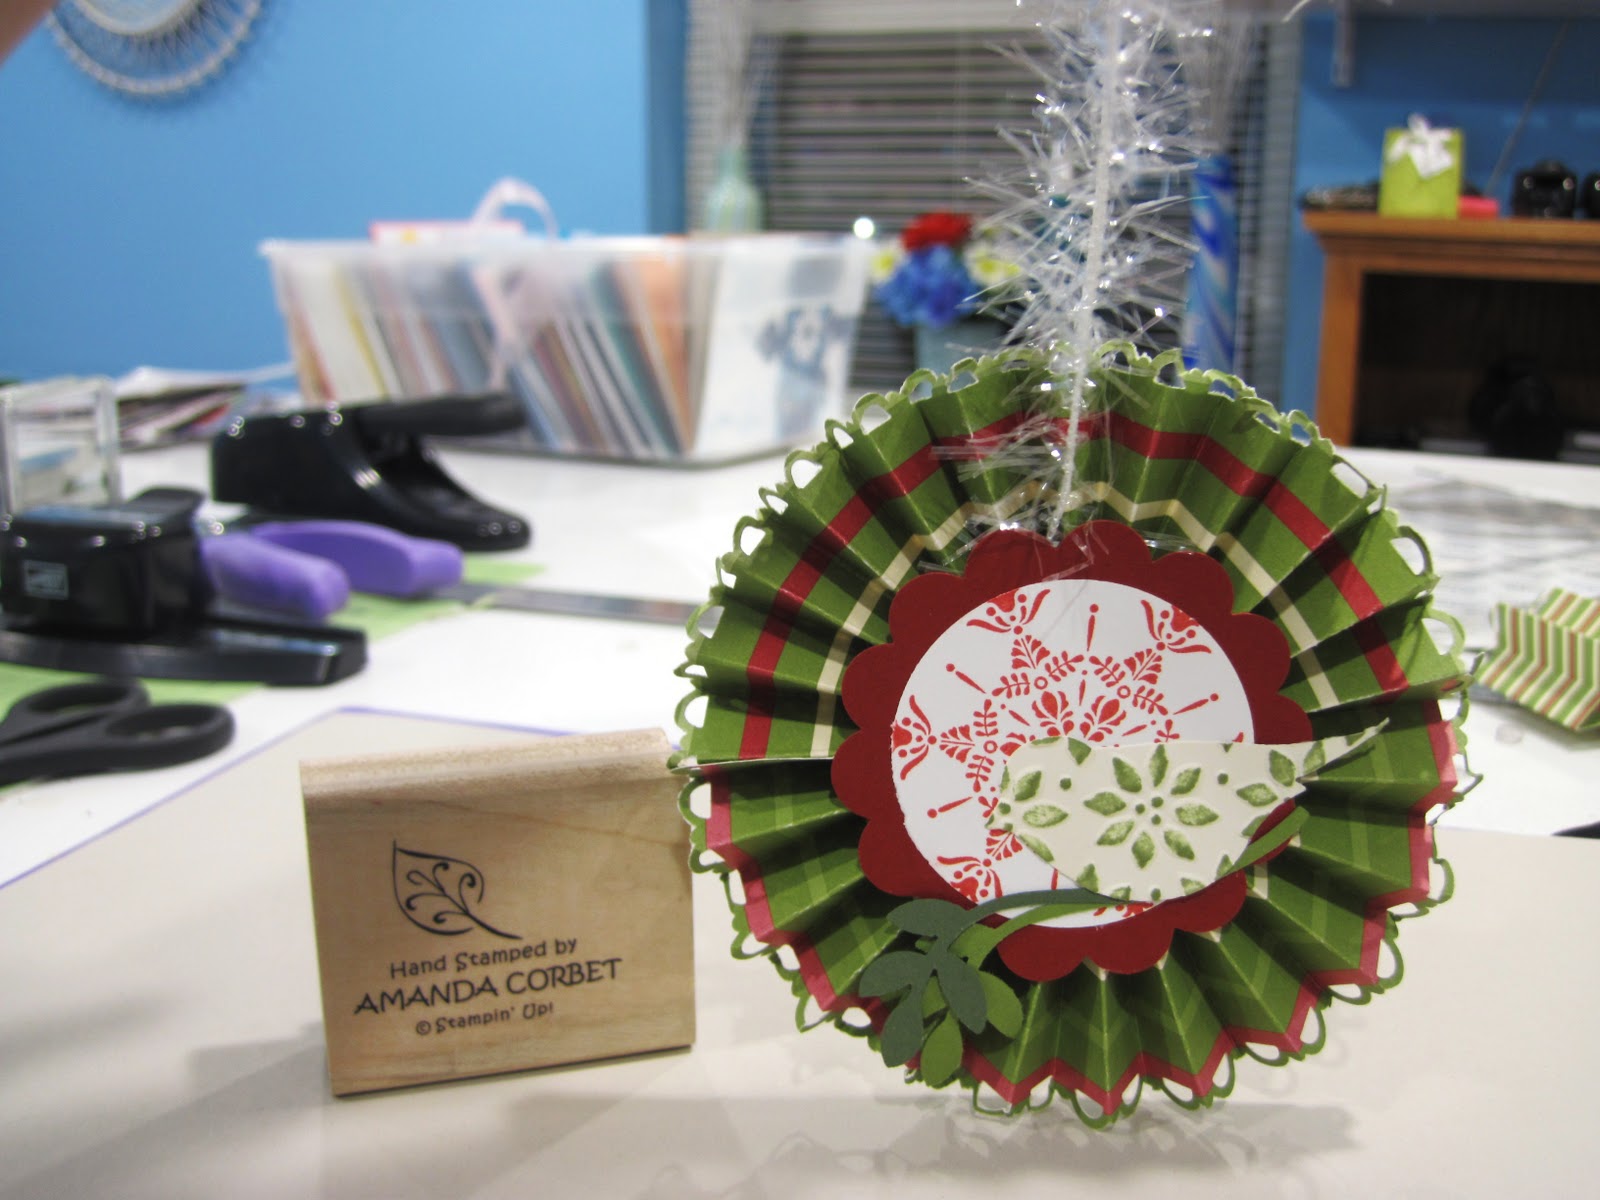

Stamps: Northern Hearts
Cardstock: Cherry Cobbler, Whisper White, Very Vanilla, Old Olive, Always Artichoke
Ink: Real Red, Old Olive
DSP: Jolly Holiday
Accessories: 2 3/8” Scalloped Circle punch, 1 3/4” Circle punch, Scallop Trim Border punch, Two-Step Bird Punch, Sticky Strip, Clear Tinsel Trim.

You can find really great step-by-step instructions on Debbie’s blog HERE.

To finish off my ornament I punched a scalloped circle from Cherry Cobbler cardstock with the 2 3/8” Scalloped Circle punch. Then I stamped a snowflake from Northern Hearts in Real Red ink on a scrap of Whisper White cardstock and punched it out with the 1 3/4” Circle punch. This was adhered to the Cherry Cobbler scalloped circle.


Then I punched a bird from Very Vanilla cardstock with the Two-Step Bird Punch, ran it through the Big Shot in the Petals A Plenty Textured Impressions die. Then I used an Old Olive ink pad directly on the paper to ink the raised portions of the texture. A branch was punched from a scrap of Old Olive and Always Artichoke with the bird punch. The branches and bird were adhered to the ornament. That’s it!

Monday, February 7, 2011

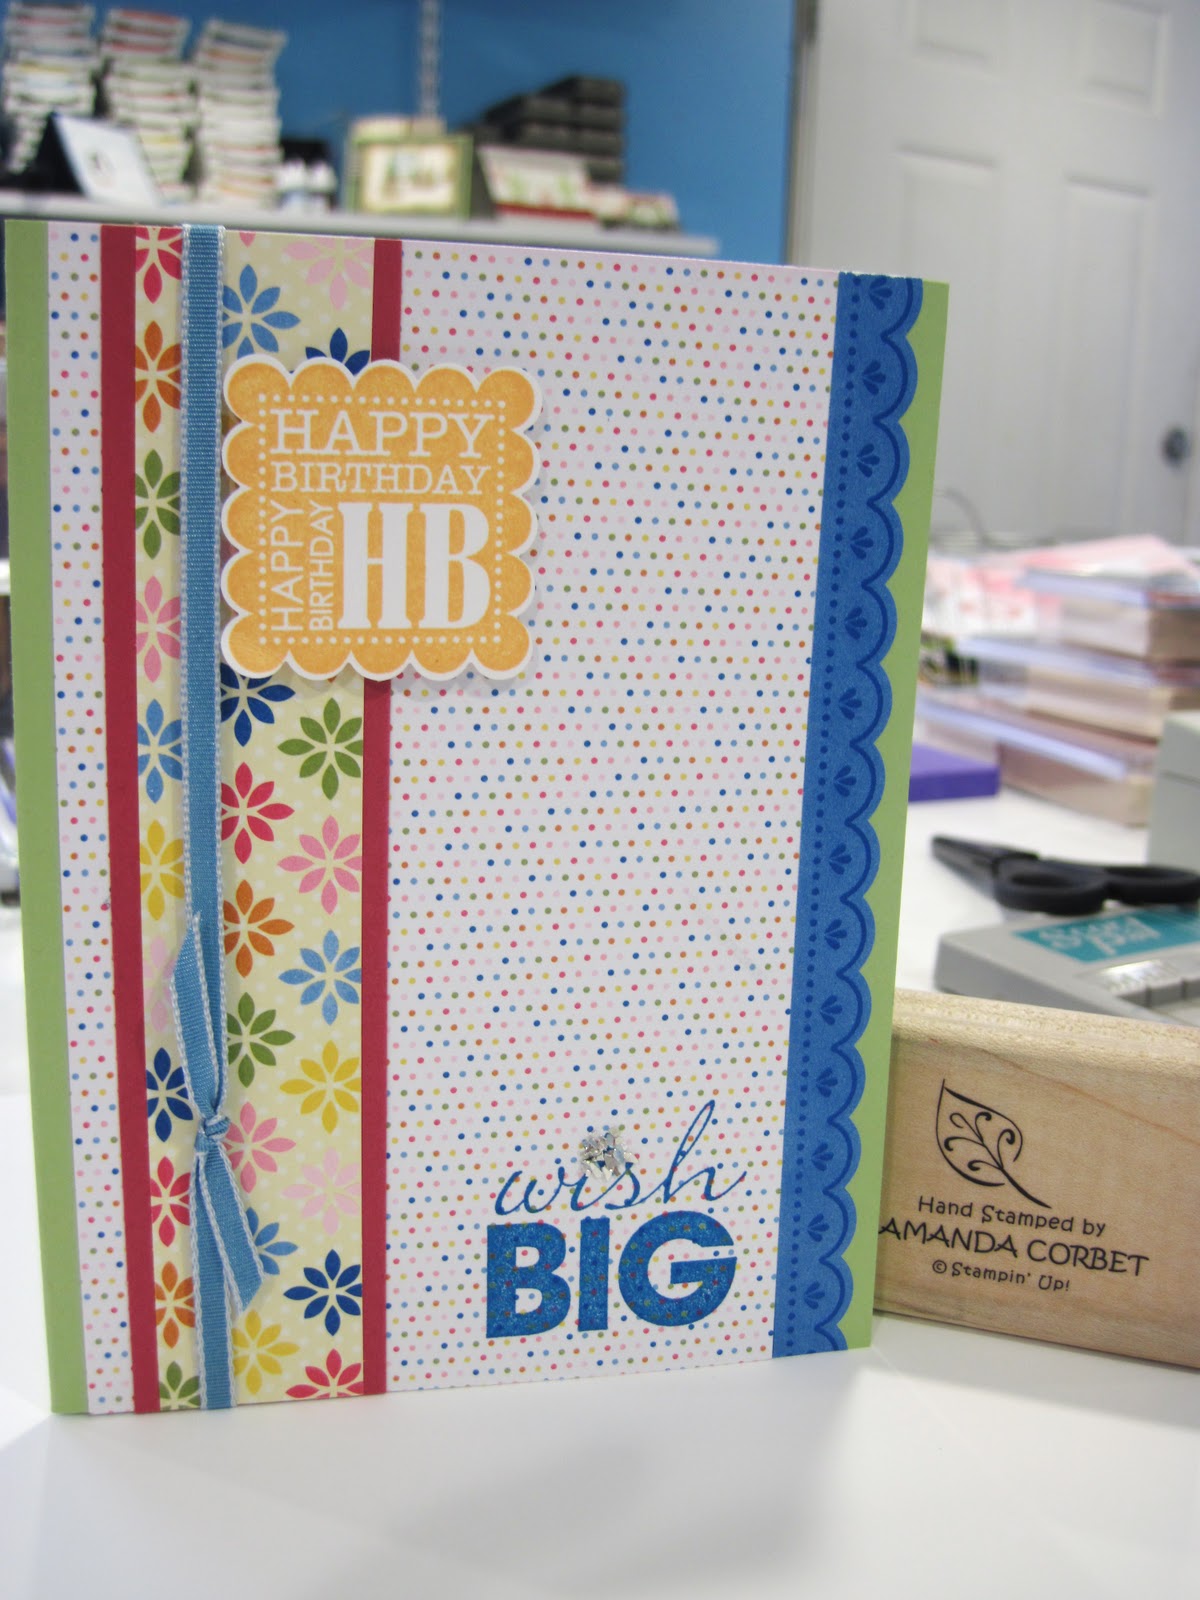
Bright Birthday - Sketch Challenge 2

Here is the fun and bright birthday card that I created with this week’s sketch challenge. I hope you like it!

Stamps: Word Play, Punch Bunch
Cardstock: Pear Pizzaz, Melon Mambo, Whisper White
DSP: Ice Cream Parlor
Ink: Pacific Point, Peach Parfait
Accessories: Scallop Square punch, Tombow Multi-Purpose Adhesive, 1/8” Marina Mist Taffeta ribbon, Silver Glass Glitter, Stampin’ Dimensionals.

The card base is 5 ½” x 8 ½” Pear Pizzaz cardstock scored at 4 ¼”. A piece of Ice Cream Parlor DSP (Free with a $50 order through Sale-A-Bration) was cut at 3 ½” x 5 ½” and adhered to the card front. A piece of 1” x 5 ½” DSP was adhered to a 1 ¼” x 5 ½” of Melon Mambo cardstock. This was adhered to the card front.

The greeting from Word Play was stamped in Pacific Point ink on the bottom right hand corner of the DSP. Some Tombow Multi-Purpose adhesive was added to the star on the word “wish” and some Silver Glass Glitter was added. I cut the decorative strips off the embellishment sheet and trimmed off 5 ½”. Then I peeled up the blue scalloped edge and adhered it to the card front. This comes with the Ice Cream Parlor DSP and the embellishments are self adhesive, so you just have to stick it down. That’s it!

The happy birthday image from Punch Punch (Free with $50 order during SAB) was stamped in Peach Parfait ink on a scrap of Whisper White cardstock and punched out with the Scallop Square punch. This was adhered to the card front with Stampin’ Dimensionals. Some 1/8” Marina Mist Taffeta ribbon was tied around the card front and into a knot to finish off the card. This was a super quick card to make and the colors are so bright and fun. Thanks for stopping by! Come back tomorrow to see the ornament that we made at the December Make and Take! Have fun stamping!

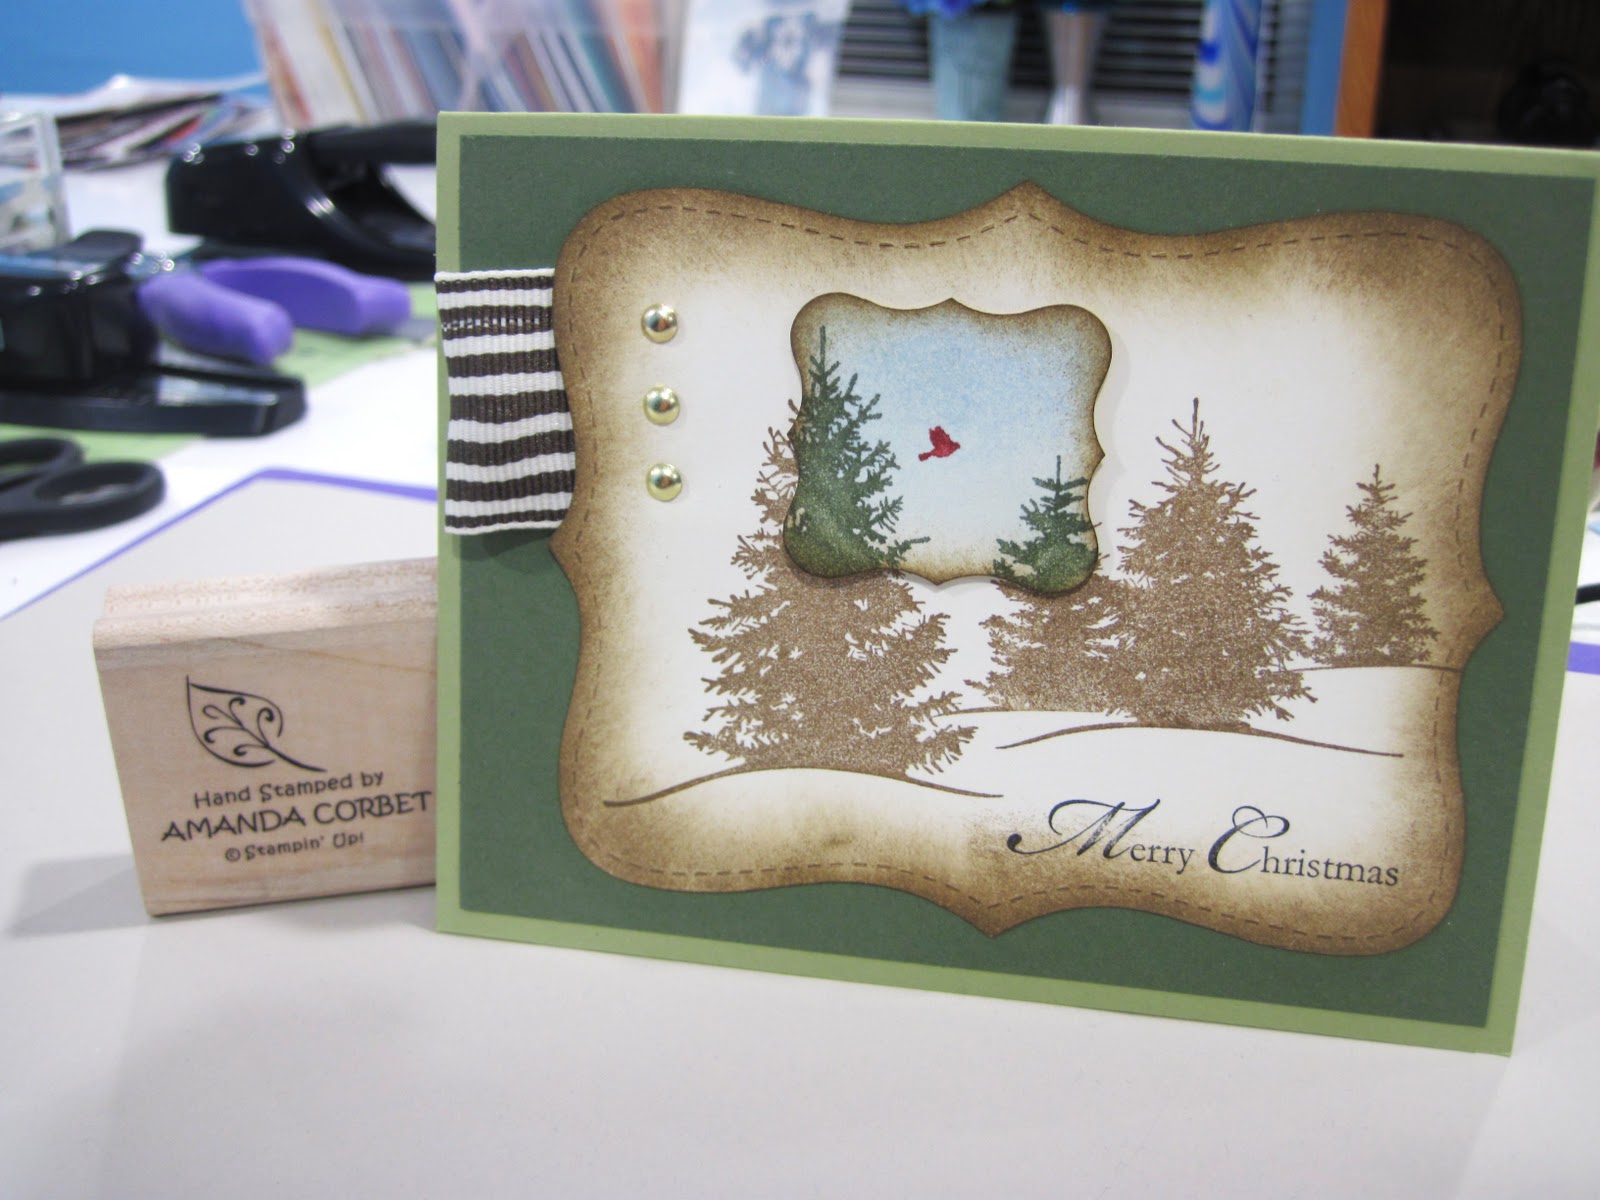
Scenic Christmas - December Make and Take 4

Here is the final card from the December Make and Take. This card was CASED from Michelle Zindorf’s card that you can find here.

Stamps: Scenic Season, A Cardinal Christmas
Cardstock: Pear Pizzaz, Always Artichoke, Very Vanilla
Ink: Soft Suede, Bashful Blue, Basic Black
Accessories: Stampin’ Sponge, Gold Brads, Needle Tool, Mat Pack, Always Artichoke and Cherry Cobbler markers, Top Note Die, Curly Label Punch
The card base is Pear Pizzaz cardstock cut at 5 ½” x 8 ½” and scored at 4 ¼”. A piece of Always Artichoke cardstock was cut at 4 ¼” x 5 ½” and adhered to the card front. A piece of Very Vanilla cardstock was cut at 4 ¼” x 5 ½” and ran through the Big Shot with the Top Note die.
The trees from Scenic Season were inked with Soft Suede ink carefully avoiding the greeting (it is too long to fit on the top note). The trees were stamped onto the Very Vanilla top note. The edges of the stamped top note were sponged heavily with Soft Suede ink. The greeting from A Cardinal Christmas was stamped in Basic Black ink in the bottom right hand corner of the top note. A piece of 1 ¼” Striped Early Espresso Grosgrain ribbon was folded in half and the ends adhered together with Snail adhesive. This was placed under the top left corner of the top note and the Needle Tool and Mat Pack were used to pierce three holes in the top note and ribbon. Three gold brads were added through the top note and ribbon. This holds the ribbon on and adds something shiny to the card front. The top note was adhered to the card front.
On a scrap of Very Vanilla cardstock Bashful Blue ink was sponged on the top half. A portion of the Scenic Season tree stamp was colored in with Always Artichoke and Cherry Cobbler markers. Make sure when coloring the trees color down much further than you would think they need to be colored. I made the mistake of not coloring down far enough on my first try. I breathed on the stamp to re-moisten the ink and stamped the tree tops and cardinal onto my sponged Very Vanilla scrap. The tree tops and cardinal were then punched out with the Curly Label punch. The edges of the curly label were sponged with Soft Suede ink. The curly label was adhered to the card front with Stampin’ Dimensionals.
Thanks Michelle for the great card to case! The ladies at the Make and Take really loved it! Thanks for stopping by my blog! Come back later to see another card created with the sketch I posted earlier!

Monday Sketch Challenge

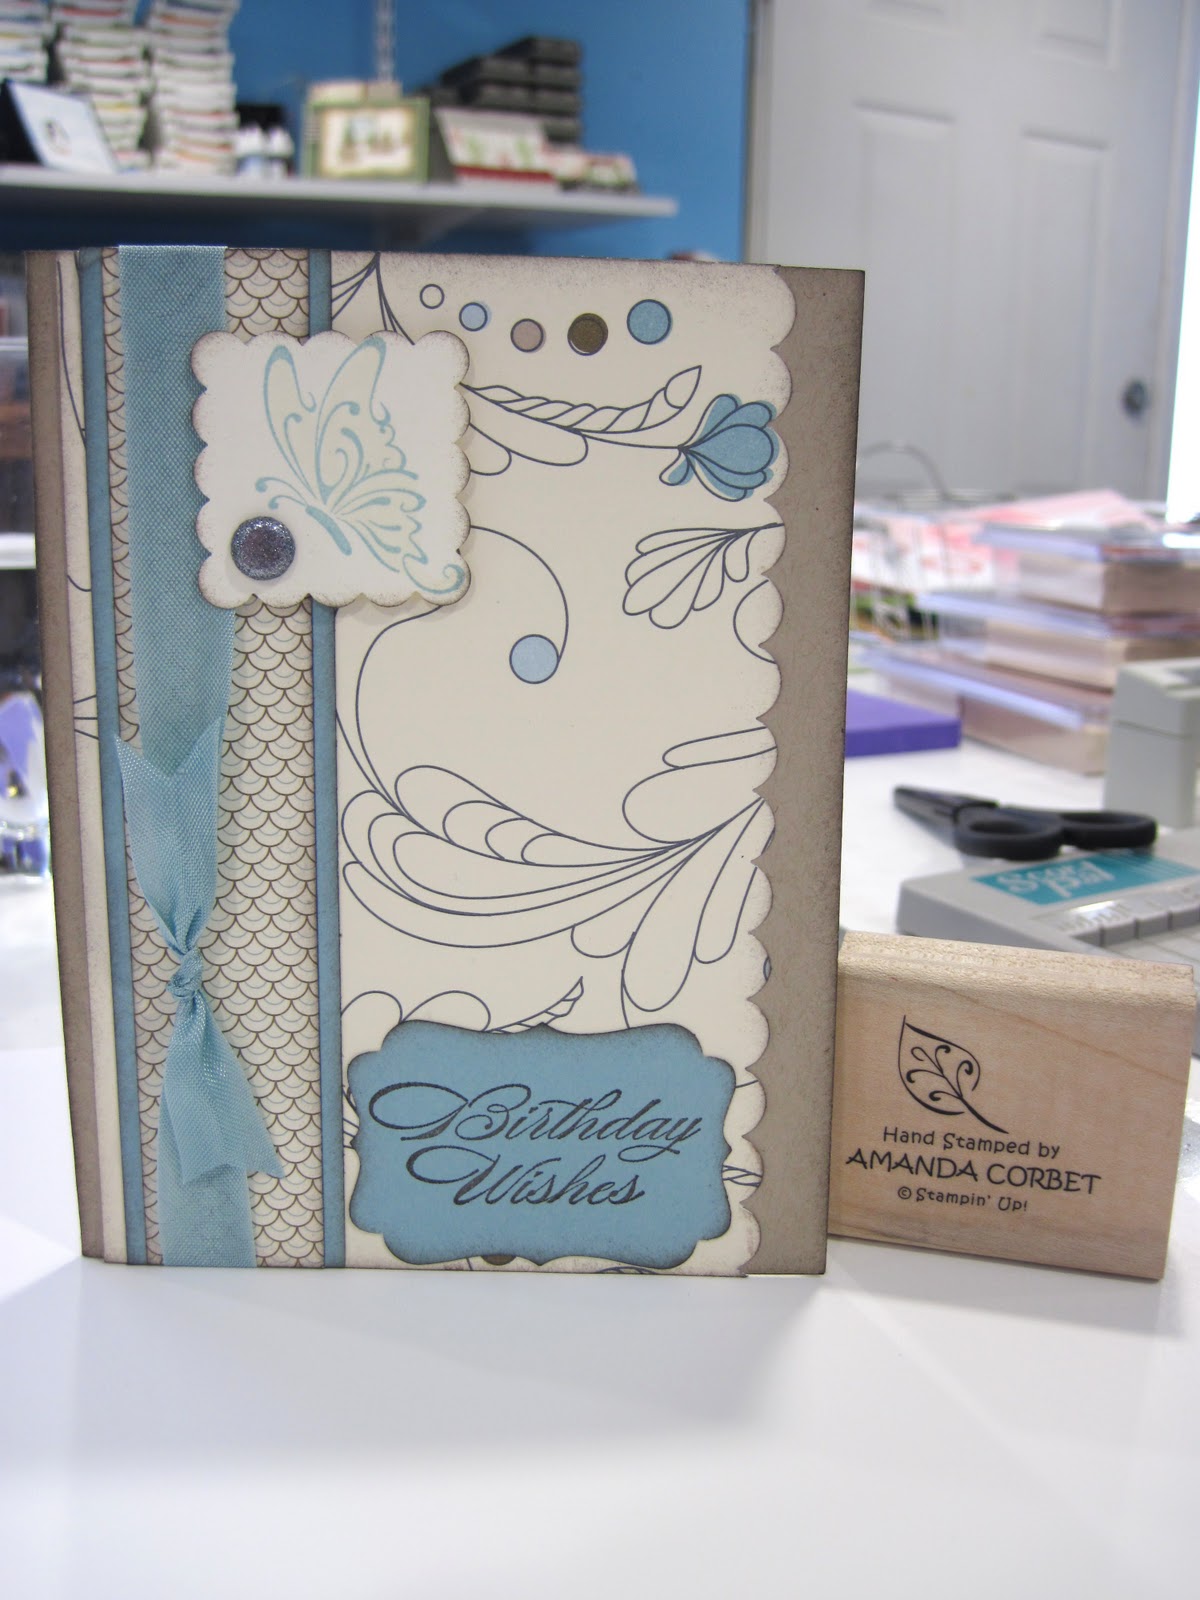
Happy Monday everyone! Today I have for you the weekly sketch challenge from Stampin’ Connection. When I went to my craft room to create a card for this sketch I couldn’t decide if I wanted to do a pretty and elegant card, or something bright and fun… so I did both! This morning I will share with you the more elegant card and this afternoon you can come back to see the fun and bright card.


Here is my card:

Stamps: Bring on the Cake, Thanks for Caring

Cardstock: Crumb Cake, Baja Breeze, Very Vanilla
DSP: Elegant Soiree
Ink: Early Espresso, Baja Breeze
Accessories: Scallop Edge Border punch, Scallop Square punch, Decorative Label punch, Stampin’ Dimensionals, Glimmer Brad, Versamarker, Needle Tool, Mat Pack, Baja Breeze Seam Binding ribbon

The card base is 5 ½” x 8 ½” Crumb Cake cardstock scored at 4 ¼” and the edges of the card front were sponged with Early Espresso ink. The large DSP panel was cut at 4” x 5 ½”. One side was punched with the Scallop Edge Border punch. The edges were sponged with Early Espresso ink and the DSP was adhered to the card front. Another piece of DSP was cut 1” x 5 ½”, edges sponged, and adhered to a piece of Baja Breeze cardstock cut at 1 ¼” x 5 ½” that was also sponged around the edges. This was adhered to the card front.

On a scrap of Baja Breeze cardstock the greeting from Bring on the Cake was stamped in Early Espresso ink. The greeting was punched out with the Decorative Label punch, the edges sponged, and adhered to the card front in the lower right corner.

The beautiful butterfly from Thanks for Caring was stamped in Baja Breeze ink on a scrap of Very Vanilla cardstock. The Versamarker was used to color in the butterfly wings. This just gives the wings a slightly darker color than the cardstock that it was stamped on. The butterfly was punched out with the Scallop Square punch and the edges were sponged with Early Espresso ink. The Needle Tool and Mat Pack were used to pierce a hole in the corner of the punched out butterfly and a Glimmer Brad was added for a little bit of sparkle. Stampin’ Dimensionals were used to adhere the punched out butterfly to the card front. Then a piece of Baja Breeze Seam Binding ribbon was added around the card front and tied into a knot. If you haven't seen this ribbon it is absolutely gorgeous!

If you are a Stampin’ Up Demonstrator you can find the sketch challenge thread here. If you are not a Stampin’ Up Demonstrator I would still love to see your creations. Please post a link to your card in the comments section of this post. Later today I will post the final card from the December Make and Take and the fun and bright sketch challenge card. So come back later to see more stamped craftiness!

Wednesday, February 2, 2011

Sparkly Santa - December Make and Take 3

For the third Make and Take card for December I knew I wanted to use Holiday Hoopla (item # 120450) becuase the Santa in it was just adorable! I love how you can mix and match all the little pieces though.

Here is the card we made!

Stamps: Holiday Hoopla, Tags Til Christmas, Simple Snowflake
Cardstock: Baja Breeze, Whisper White, Real Red
DSP: Candy Cane Christmas (retired)
Ink: Real Red, Baja Breeze, Black Stazon
Accessories: Blushing Bride and Sahara Sand Markers, Stampin' Dimensionals, Tombow Multi-Purpose Adhesive, Dazzling Diamonds Glitter

The card base is Baja Breeze cardstock cut at 5 1/2" x 8 1/2" and scored at 4 1/4". A piece of Whisper White cardstock was cut at 4" x 5 1/4". The Whisper White cardstock was stamped all over with the Simple Snowflake stamp in Baja Breeze ink to create a background. This was adhered to the card front. A piece of Candy Cane Christmas DSP (retired) was cut at 2" x 5 1/4" and adhered to the card front.

The Santa face from Holiday Hoopla was stamped in Black Stazon towards the bottom of a 2" x 3" piece of Whisper White cardstock. The triangle, for the hat, was stamped in Baja Breeze ink just above Santa's face. Some color was added to Santa's face with the Blushing Bride marker and shadows were added to his beard with the Sahara Sand marker. This panel was adhered to a piece of Cherry Cobbler cardstock cut at 2 1/8" x 3 1/8".

Some Tombow Multi-Purpose Adhesive was added all over the Baja Breeze hat and Dazzling Dimaonds glitter was added. After the glue dried for a few minutes the Santa panel was added to the card front with Stampin' Dimensionals. The greeting from Tags Till' Christmas (Holiday Mini) was stamped in Real Red ink in the upper right hand corner of the stamped Whisper White background.

I really LOVE how this card turned out and all of the ladies thought it was just adorble and fun! Thanks for stopping by! Come back tomorrow to see the last card from the December Make and Take! Have fun stamping!

Tuesday, February 1, 2011

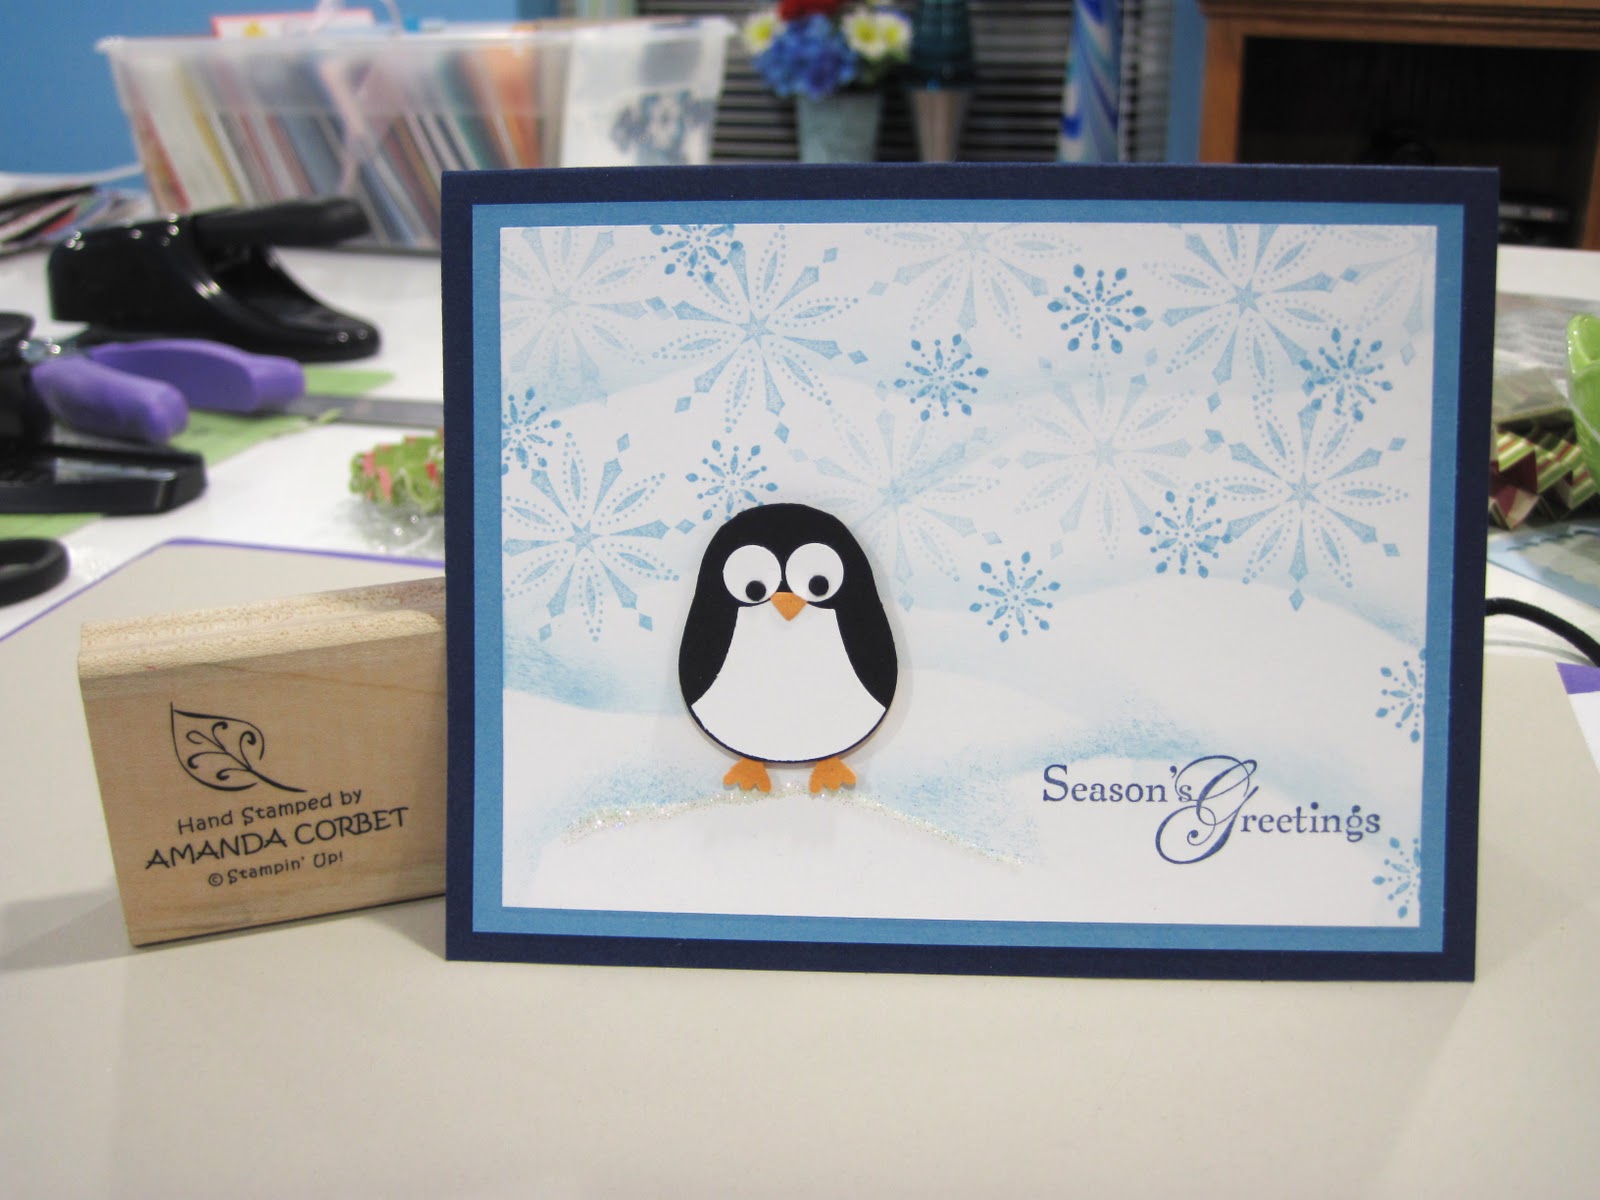
Cute Penguin Card- December Make and Take 2

Here is the second card from the December Make and Take. This one is a little more cute! This card was inspired by this card created by Julie Davison.


Stamps: Snow Swirled
Cardstock: Night of Navy, Marina Mist, Whisper White
Ink: Marina Mist, Night of Navy,
Accessories: Two-Step Owl Punch, Needle Tool, Paper Snips, Two-Way Glue Pen, Tombow Multi-Purpose Adhesive, Dazzling Diamonds glitter, Stampin’ Dimensionals, Scraps of Basic Black, Peach Parfait, Whisper White.

The card base is Night of Navy cardstock cut at 5 ½” x 8 ½” and scored at 4 ¼”. The next panel is Marina Mist cardstock cut at 3 7/8” x 5 1/8”. A piece of Whisper White cardstock was cut at 3 5/8” x 4 7/8”. On the Whisper White cardstock I placed a post it note that was cut in a curvy line on the sticky part of the post it note. I sponged Marina Mist ink at the edge of the post it note with a Stampin’ Sponge and then moved the post it note to another area and sponged another snow mound. I kept moving and sponging until I had six or seven snow mounds in different positions all the way up the Whisper White cardstock.

The large snowflakes from Snow Swirled were stamped in Marina Mist ink by first stamping off on a scrap piece of paper before stamping onto the Whisper White cardstock. This gives a lighter image in the same color. The smaller snowflakes were stamped with Marina Mist ink by stamping normally. This way the smaller snowflakes stand out a little more on the card front than the lighter ones.

Then some Tombow Multi-Purpose adhesive was added across the top of the snow mound where I wanted the penguin to stand and some Dazzling Diamonds Glitter was added and this panel was set aside to dry. I like using the Tombow glue for adding glitter like this because it dries within a few minutes and you can continue working on your card.

Anyway… to make the penguin an owl body was stamped out of both Basic Black and Peach Parfait cardstock. The Basic Black owl body had the ears and feet cut off with paper snips. The Peach Parfait owl body was cut in half. You really only need the feet and a little cardstock to be able to glue it behind the black body. The penguin body was glued to the feet portion. The belly was punched from Whisper White cardstock and adhered to the penguin body.

A heart was punched from Peach Parfait cardstock and the top half snipped off with Paper Snips so all you have is the point. This is glued on for the beak of the penguin. The medium circles in the owl punch were punched from Whisper White cardstock for the large part of the eyes. The pupils were punched from Basic Black cardstock. All of the penguin pieces were adhered with the Two-Way Glue Pen and the Needle Tool was used to help position and adhere the eyes and the beak.

This adorable little penguin was adhered to the card front with a Stampin’ Dimensional. The greeting from Snow Swirled was stamped in Night of Navy ink and the card is done! This was such a fun and cute card to make!