Wednesday, January 2, 2013

Winter Snowflakes Friday Mashup 90!

Okay, I’m really late posting this. It should have gone up last Friday. But since I had the last week off from work I was in complete vacation mode and didn’t think about the blog at all. Sorry!  It was nice to get to relax though. So…better late than never here is the card that I made for the FM20 challenge!

 
  • Stamps: Snowflake Soiree, Sincere Salutations, Bold Snowflake
  • Card Stock: Midnight Muse, Basic Black, Whisper White
  • Ink: Pool Party, Midnight Muse, Illuminate Versamark
  • Accessories: Snow Flurry Die, Silver Glimmer paper, In Color Designer Brads, Paper Piercer, Stampin’ Pierce Mat, 5/8” Basic Black Satin Ribbon (retired), Stampin’ Dimensionals, SNAIL Adhesive

photo source 

So here is the "Mashup" Challenge:
  1. Make a project using "Snowflakes".
  2. Or Make a project with the colors "Whisper White, Pool Party, Midnight Muse, and Basic Black".
  3. Or "Mash it Up" and create a "Snowflake Project with the colors Whisper White, Pool Party, Midnight Muse, and Basic Black".


This one was fast and easy to put together! I started off with a piece of Midnight Muse card stock cut at 5-1/2” x 8-1/2” and scored at 5-1/2”. I stamped the Bold Snowflake image all over the card front in Illuminate Versamark. This gives a nice shimmery snowflake background. Next I cut a piece of Whisper White card stock 2-7/8” x 3-7/8”. I stamped the snowflake from Snowflake Soiree onto the card stock in Pool Party ink several times. Then I stamped the greeting from Sincere Salutations in Midnight Muse ink in the lower right hand corner of the card stock.


Next I adhered the stamped Whisper White panel onto a 3” x 4” piece of Basic Black card stock. I used some SNAIL Adhesive to adhere a piece of 5/8” Basic Black Satin Ribbon (retired) around the panel. Next I took a piece of Silver Glimmer Paper and cut out the medium snowflake on the Snow Flurry Die in the Big Shot. I placed the snowflake on top of my Whisper White/Basic Black panel then used my Paper Piercer and Stampin’ Pierce Mat to pierce a hole in the snowflake and the panel. I used a Pool Party In Color Designer Brad to attach the snowflake to the panel. Then I simply adhered the panel onto the card front with Stampin’ Dimensionals.


Now I have a wintry card to send out to someone special! If you have a chance head on over to the Friday Mashup to see what the rest of the design team has created! 



Saturday, December 29, 2012

Craft Project Central!

Best of Everything Box: 
Have you noticed how so many things look cuter when they are little? Here’s a quick and easy box and three different fun fold cards scaled down to 3” x 3”!  


This fabulous project was designed by Sharon

If you would like to subscribe to the December edition of Craft Project central and get 10 fabulous tutorials for just $10 then click HERE


Wednesday, December 26, 2012

Craft Project Central!

Bird House Box & Card: 

Christmas is over, but there are always special occasions when you have a little gift you want to give.  Make this simple, but elegant birdhouse style box for any type of small gift.  Fill it with sweets, or just put a gift card inside.  It will be a great little box that can be used over and over again.  The matching greeting card finishes off the set and is a great addition to the gift.  Great as a favor for parties or as a fun class project!


This fabulous project was created by Monika

If you would like to subscribe to the December edition of Craft Project central and get 10 fabulous tutorials for just $10 then click HERE


Sunday, December 23, 2012

Craft Project Central!

Desk Organization Set: 
This set is the kick-off to organizing your desk for the New Year! The acrylic calendar, pen and post-it set is a compact, but mighty little set-up for your desktop. And the set of twelve note cards and envelopes, with it’s coordinating stand-up box will be handy when you need to send off a quick thank you! The complete set will not only get you organized, but also be a great gift to give someone for the start of their New Year too!


This wonderful project was designed by Julie

If you would like to subscribe to the December edition of Craft Project central and get 10 fabulous tutorials for just $10 then click HERE


Saturday, December 22, 2012

Greetings of the Season

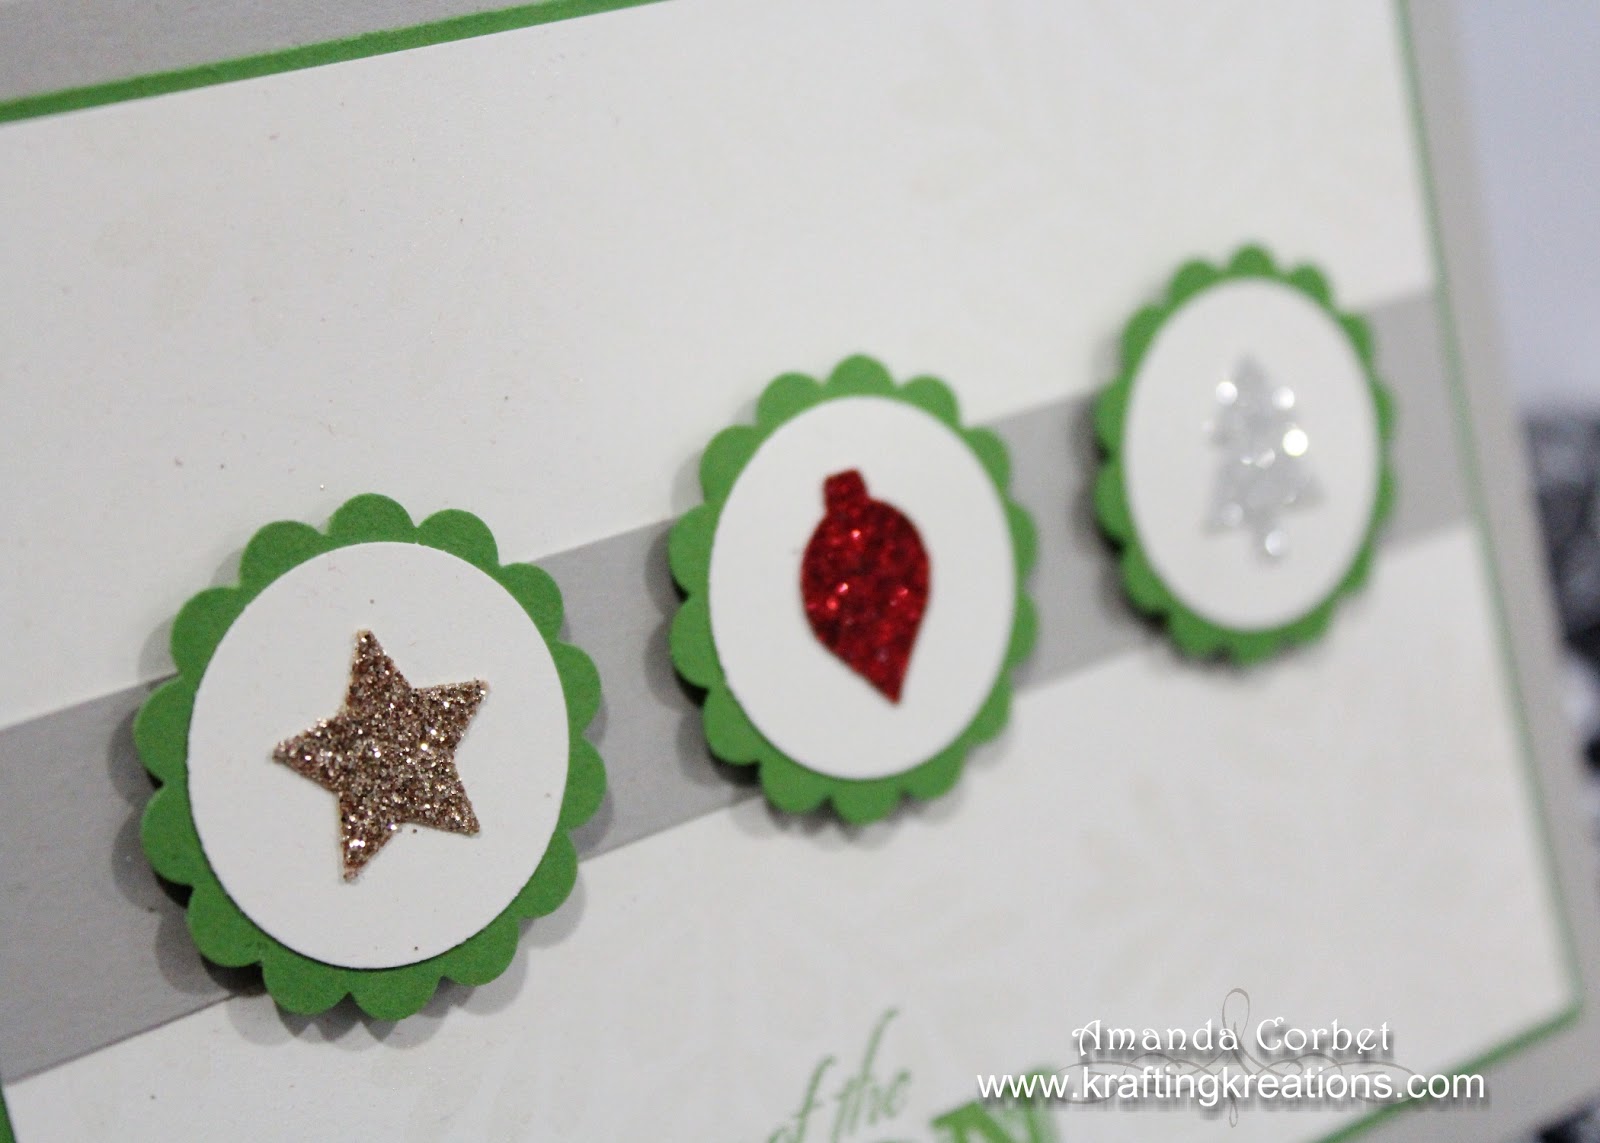
This is a fun and simple card with a few pops of color and sparkle! It’s a lot of punching, but the end result is really fun!


  • Stamps: Greetings of the Season, Bold Snowflake
  • Card Stock: Sahara Sand, Very Vanilla, Gumball Green
  • Ink: Illuminate Versamark, Gumball Green
  • Accessories: 1-1/4” Scalloped Circle Punch, 1” Circle Punch, Merry Minis Punch Pack, Stampin’ Dimensionals, Champagne Glimmer Paper, Red Glimmer Paper, Silver Glimmer Paper, 2-Way Glue Pen


I started on this card by cutting a piece of Sahara Sand card stock 5-1/2” x 8-1/2” and scored it at 4-1/4”. Next I cut a piece of Very Vanilla card stock 3-5/8” x 4-7/8”. First I stamped the greeting from Greetings of the Season onto the bottom left hand corner of the card stock in Gumball Green ink. Then I stamped the Bold Snowflake onto the card stock in Illuminate Versamark ink. The Illuminate ink adds a nice subtle sparkly image to the background. I adhered this piece onto a 3-3/4” x 5” piece of Gumball Green card stock then adhered it onto the card front.


I cut a piece of Sahara Sand card stock 3/4” x 4-7/8” and adhered it into the center of the Very Vanilla panel.  Next I used the 1-1/4” Scalloped Circle punch three times on a scrap of Gumball Green card stock. I used the 1” Circle punch three times on a scrap of Very Vanilla card stock. I adhered the Very Vanilla circles onto the Gumball Green Scalloped Circles with 2-Way Glue Pen. I used the Merry Minis Punch Pack to put one image from each of the colors of Glimmer Paper and adhered the punched image in the center of the vanilla circle with 2-Way Glue Pen. I adhered each of the circles onto the strip in the center of the card front with a Stampin’ Dimensionals.


What do you think? Sparkly enough? 


Friday, December 21, 2012

Wonky Christmas Tree

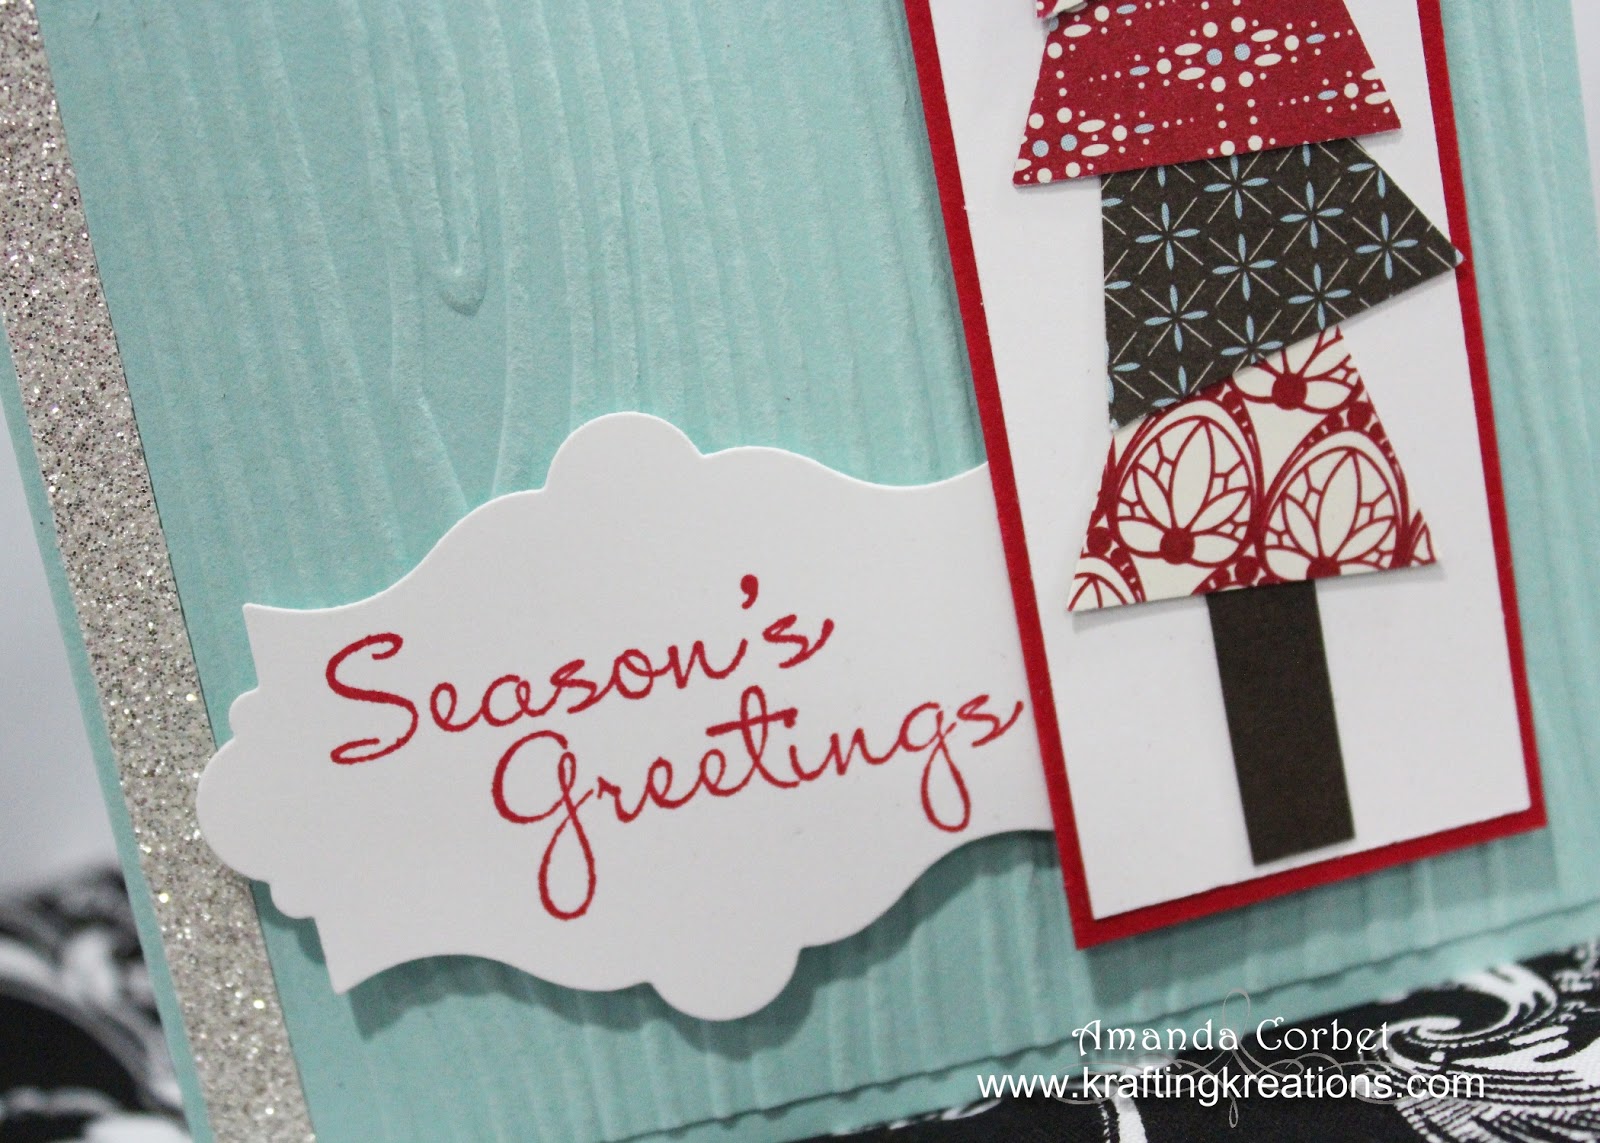
I wanted to do a fun and whimsical Christmas card too. I was inspired by THIS card created by Helene at Stamp 2 LeNotte. Take a look at my version.


  • Stamps: More Merry Messages
  • DSP: Festival of Prints DSP Stack, Silver Glimmer Paper
  • Card Stock: Pool Party, Real Red, Whisper White, Early Espresso
  • Ink: Real Red
  • Accessories: Wood Grain embossing folder, Merry Minis Punch Pack, Pennant Builder Punch, Stampin’ Dimensionals, Apothecary Accents Framelits, 2-Way Glue Pen


For this one I started off with a 5-1/2” x 8-1/2” piece of Pool Party card stock and scored it at 4-1/4”. Next I cut a piece of 3-3/4” x 5-1/4” and ran it through the Big Shot in the Woodgrain embossing folder. I adhered this onto the card front. Then I cut a piece of Silver Glimmer Paper 1/4” x 5-1/4” and adhered it right next to the textured Pool party card stock.


Now for the panel with the tree… I started off by adhereing a 1-1/4” x 4-1/2” piece of Whisper White card stock onto a 1-3/8” x 4-5/8” piece of Real Red card stock. Then I cut a piece of Early Espresso card stock 1/4” x 1” and adhered it onto the very bottom of the Whisper White panel. I used the Pennant Builder punch to punch out five straight triangles from five different patterns of Festival of Prints DSP and used 2-Way Glue Pen to adhere one on top of another with each one at a slightly different angle. Then I used the star punch from the Merry Minis Punch Pack to punch a star out of Silver Glimmer Paper. I adhered the star onto the top of the three. I adhered this panel onto the card front with a couple Stampin’ Dimensionals.


Next I stamped the greeting from More Merry Messages onto a scrap of Whisper White card stock in Real Red ink. I cut out the greeting with the Apothecary Accents label and adhered the label onto the card front with a couple Stampin’ Dimensionals.

That’s it! It’s pretty simple and I just love how cute it is! What do you think?