Thursday, August 5, 2010

Another Birthday Card

Last night I couldn't decide what to make. I knew I wanted to make a card to post today, but was stumped as to what to do. So I went to some challenges on Stampin' Connection for inspiration. Challenges are a great way to get your creativity going when you're blocked. So what I have for you today is a combination of two challenges. The first was the sketch challenge for this week created by Liz Goldhawk. Here is the sketch:


The second challege was the color challege for this week, which was to use Peach Parfait, Poppy Parade, Pear Pizzaz, and Daffodil Delight. Wow that is a lot of P's. Lol!
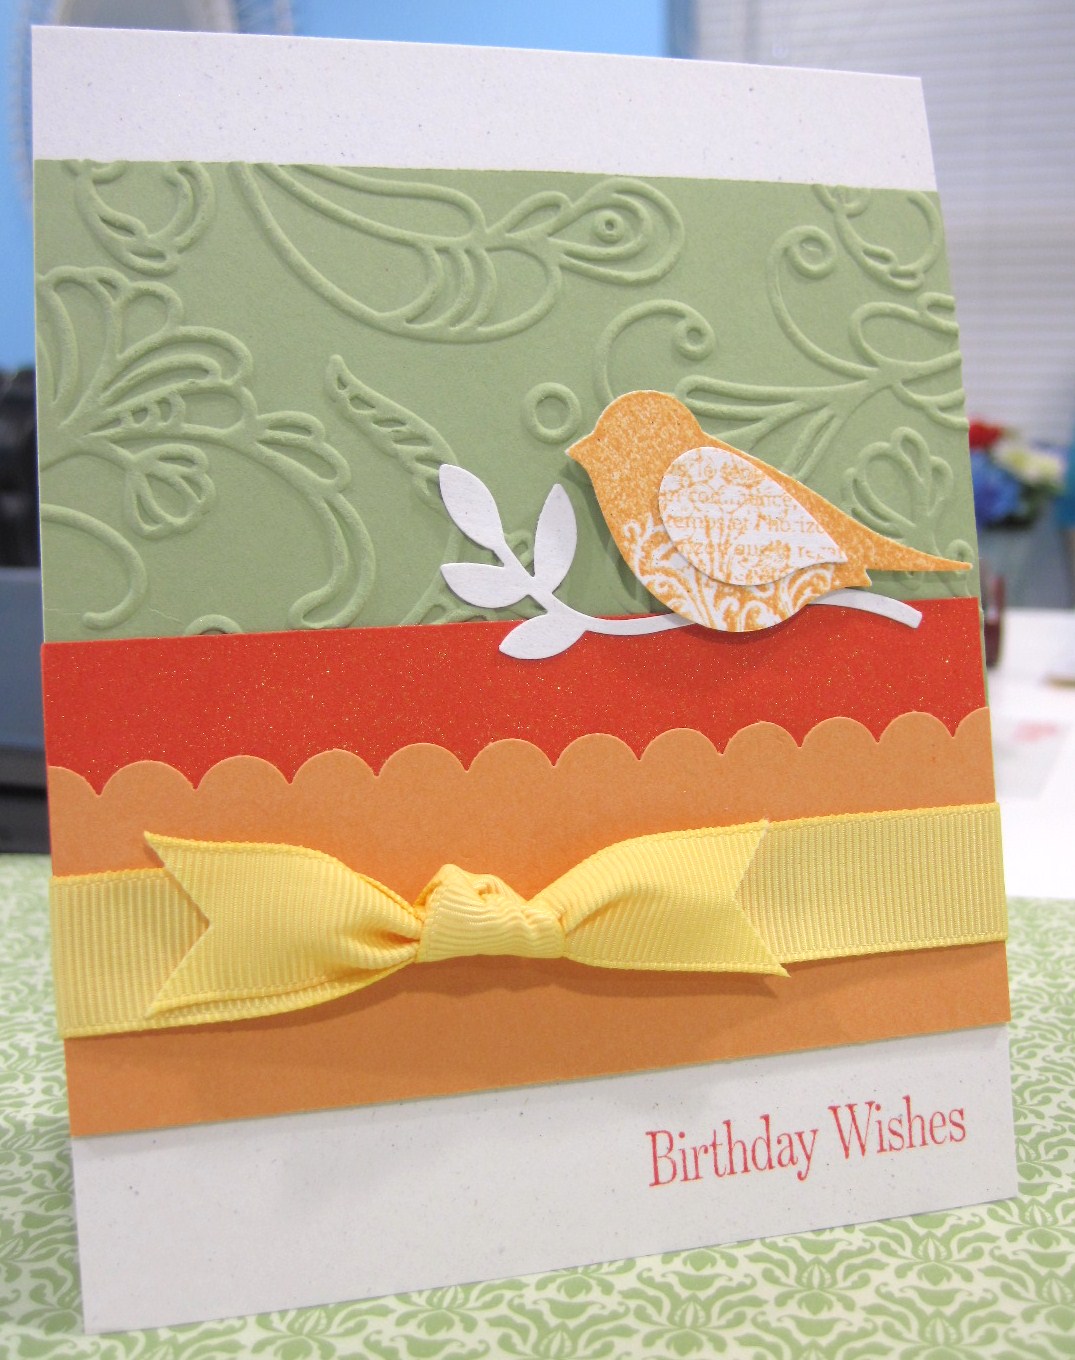

Stamps: Punch Potpouri, Occasional Quotes
Cardstock: Naturals White, Peach Parfait, Poppy Parade, Pear Pizzaz
Ink: Poppy Parade, Peach Parfait
Accessories: 5/8" Daffodil Delight Grograin Ribbon, Two Step Bird Punch, Gold Glow Smooch Spritz, Two Way Glue Pen, Stampin' Dimensionals, Elegant Lines Textured Impressions Die, Scallop Edge Border Punch

The card base is Naturals White cardstock cut at 4 1/4" x 11" and scored at 5 1/2". A piece of Pear Pizzaz cardstock was cut at 3 1/2" x 4 1/4" and embossed with the Elegant Lines Textured Impressions die in the Big Shot and adhered to the card front. A piece of Poppy Parade was cut at 2" x 4 1/4" and sprayed with Gold Glow Smooch Spritz and was adhered to the card front. You can't see it in the picture very well, but the Poppy Parade is very pretty with the gold sparkles.

A piece of Peach Parfait was cut at 1 3/4" x 4 1/4" and punched with the Scallop Edge Border Punch and adhered to the card front. A piece of 5/8" Daffodil Delight Grosgrain Ribbon was tied around the card and into a knot. The "Happy Birthday" from Occasional Quotes (Level 3 hostess set) was stamped in Poppy Parade ink in the bottom right hand corner. I keep making birthday cards because I'm going to need like 5 of them this month.

I stamped the bird and the heart from Punch Potpouri (Level 1 hostess set) in Peach Parfait ink on scraps of Naturals White cardstock. I used the Two Step Bird Punch to punch out the stamped bird. The wing of the bird was punched from the stamped heart. The branch was punched from another scrap of Naturals White cardstock.

The branch was adhered to the card with the Two Way Glue Pen. The wing was adhered to the bird with the Two Way Glue Pen and then the bird was adhered to the card front with a Stampin' Dimensional.

This was definitely an interesting color combo to try and a fun sketch. Sometimes these challenges really  make you think about how you're going to put it all together, but they are always fun. I think I will begin posting the color challenges from Stampin' Connection on here on Thursdays so you can play along too!

Come back tomorrow to see what crafty fun I have to show you! Have fun stamping!

Wednesday, August 4, 2010

Owl Birthday Card

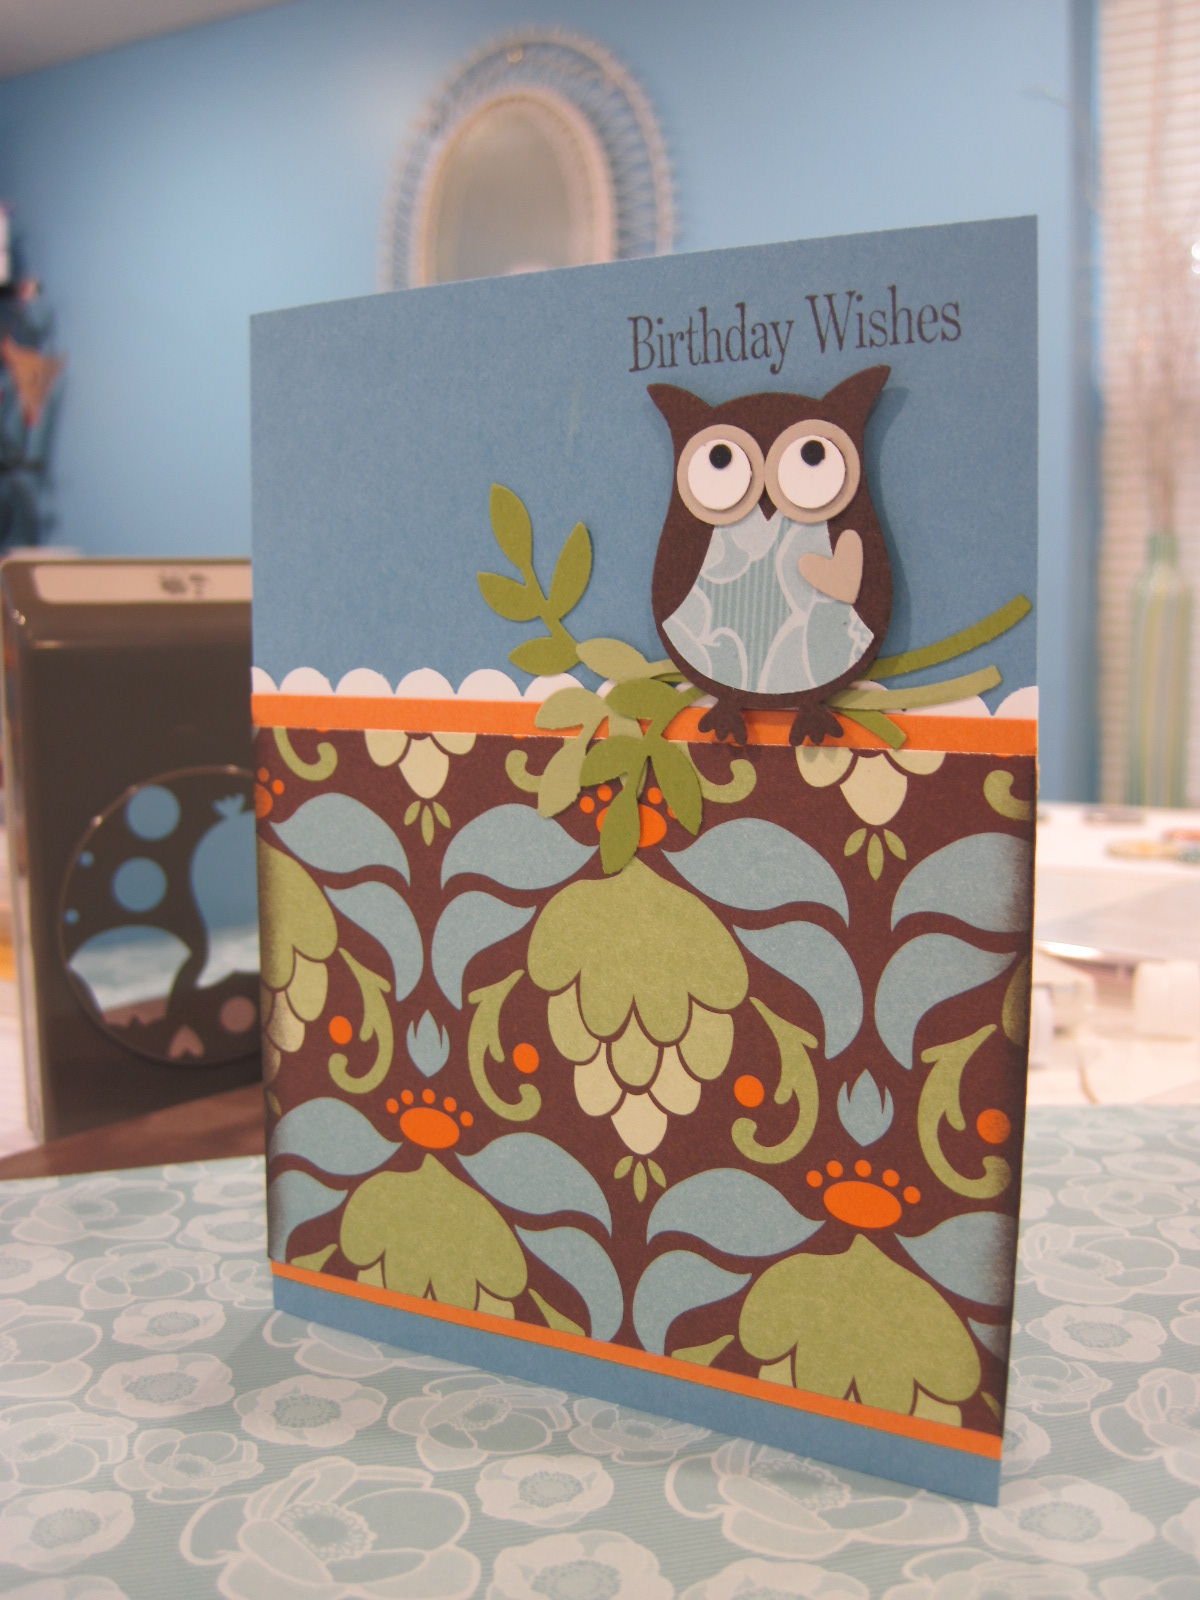
Today I have for you a card using the adorable new Owl Punch. Don't you just love this cute little owl? I certainly do! Take a look:


Stamps: Occasional Quotes
Ink: Early Espresso
Cardstock: Marina Mist, Early Espresso, Peach Parfait, Old Olive, Pear Pizzaz, Sahara Sand, Whisper White, Basic Black
Paper: Greenhouse Gala DSP
Accessories: Scallop Edge Border Punch, Two-Step Owl Punch, Two-Step Bird Punch, Sponge Daubber, Two-Way Glue Pen, Stampin' Dimensionals

The card base is Marina Mist cardstock cut at 5 1/2" x 8 1/2" and scored at 4 1/4". A piece of Greenhouse Gala DSP was cut to 3" x 4 1/4". I sponged the sides of the DSP with Early Espresso ink on a Sponge Daubber. This was adhered to a piece of Peach Parfait cardstock that was cut to 3 1/4" x 4 1/4". A scrap of Whisper White cardstock was cut to 4 1/4" and punched with the Scallop Edge Border Punch and was adhered to the back of the Peach Parfait cardstock. These panels were then adhered to the card front. The sentiment from Occasional Quotes (a Level 3 hostess set) in Early Espresso ink.

I used the Two-Step Bird Punch to punch out two branches from Old Olive cardstock and one branch from Pear Pizzaz cardstock. The body of the owl was punched in Early Espresso cardstock, the belly was punched from the same sheet of DSP that was used on the card. The eyes were punched from Sahara Sand, Whisper White, and Basic Black cardstock. The heart was punched from Sahara Sand cardstock.

The branches were adhered to the card with the Two-Way Glue Pen. The owl was adhered together with the Two-Way Glue Pen and then adhered to the card front with Stampin' Dimensionals.

I just love how adorably cute this card is! You will definitely be seeing more of this wonderful owl punch! Come back tomorrow to see what I have to show you!

Tuesday, August 3, 2010

Summer Fun Scrapbook Page

Yay! I did it! I finished a scrapbook page layout! Okay, no big deal right? Well I haven't actually scrapbooked in a very long time. There are loads of pictures that I want to scrapbook, but I haven't gotten up the guts to start cutting papaer and putting them together on a scrapbook page.

Scrapbooking is something I really have to work hard at. For some reason I always have difficulty coming up with a layout that I like. Some of the page maps help if I have that number of pictures and my pictures are close to the sizes shown. I guess I'm just a little scrapbook challenged.

A customer has requested a scrapbook themed workshop which is what really got me starting on this layout. I have to have at least a couple samples to show everyone. So I think from now on I will try to show you at least one scrapbook page a week. Maybe that will keep me scrapbooking instead of letting my picture box collect dust. Well...take a look!


Stamps: With All My Heart
Cardstock: Bashful Blue, Pacific Point, Whisper White, Pear Pizzaz
Paper: Greenhouse Gala DSP
Ink: Bashful Blue, Marina Mist, Pacific Point
Accessories: Scallop Edge Border Punch, 2 3/8" Scallop Circle Punch, 1 3/4" Scallop Circle Punch, Fancy Flower Punch, Basic Pearls Jewel Accents, Perfect Polka Dots Textured Impressions die, Silver Hodgepodge Hardware, Pacific Point marker

I stamped the Bashful Blue background with two of the images from With All My Heart in Bashful Blue and Marina Mist ink. A 3" x 12" piece of Greenhouse Gala DSP was adhered to a 3 1/2" x 12" piece of Pacific Point that was punched with the Scallop Edge Border punch. This was adhered to the Bashful Blue cardstock.

I have two mats under my photos. The first is Whisper White cardstock cut 1/8" larger than the photo. The second is Pear Pizzaz cardstock cut 1/4" larger than the Whisper White piece. These are adhered together with the photo on top and then adhered to the Bashful Blue cardstock.

I stamped the "with all my" and the heart on a scrap piece of Whisper White cardstock by coloring the "with all my" portion of the stamp with the Pacific Point marker, breathing on it to re-moisten the ink, and stamping. I then cleaned the stamp and repeated the same steps to stamp the heart. This was punched out with the 1 3/4" Scallop Circle punch and adhered to a piece of Pacific Point cardstock that was punched with the 2 3/8" Scallop Circle punch. This was adhered to the right layout in the bottom corner. Three Basic Pearl Jewel Accents were added to give it a little bit of bling.

The flower on the left layout was made by punching 6 Fancy Flowers, inking the edges, texturing, and distressing before holding them all together with a large brad from the Silver Hodgepodge Hardware kit. I think this flower will be the tutorial for this week. So make sure you come back Saturday to see how it is made. To finish it off I just wrote the journaling in by hand with the Pacific Point marker. I'm really pleased with how this layout turnout it. It's really simple, but still looks nice. What do you think?

Come back tomorrow to see a card made with the adorable new Owl Punch!

Monday, August 2, 2010

New Products to Love!

I didn't have a chance to finish anything crafty last night. I've been fighting with a scrapbook layout that I will have as a sample at my scrapbook themed workshop this month. I will try to finish it and post it tonight. But for today I wanted to show you some wonderful products that are brand new to Stampin' Up this year. Basic Rhinestones Jewel Accents and Basic Pearl Jewel Accents.

These wonderful self adhesive pearls and rhinestones will add some bling to your cards and other creations! They come with 150 pieces in a package. Thats 50 in three different sizes and three strips that can be used as borders. Or if you cut the glue strip with a hobby knife you have even smaller individual jewels to use.
Shop Stampin' Up online to get your bling for all of your projects!

Come back tomorrow to see what I have to share with you! Have fun stamping!

Saturday, July 31, 2010

Elegant Concord Lines

Today I have for you the card I made with the cracked glass panel I made in the tutorial yesterday. If you missed the tutorial for the Cracked Glass Technique you can find it by clicking here. Take a look at this simple card:


Stamps: Happiness Shared
Cardstock: Naturals White, Concord Crush, Pear Pizzaz, Whisper White
Ink: Timber Brown Stazon (retired), Versamrk, Early Espresso
Accessories: Elegant Lines Textured Impressions die, Whisper White Organza ribbon, clear embossing powder, Sponge Daubber, Basic Pearls Jewel Accents, Stampin' Dimensionals, Markers: Blushing Bride, Pretty In Pink, Poppy Parade, Pear Pizzaz, Old Olive

The card base is Naturals White cardstock cut at 5 1/2" x 8 1/2" and scored at 4 1/4". Then a piece of Concord Crush was cut to 4" x 5 1/4" and run through the Big Shot in the Elegant Lines Textured Impressions die. This was adhered to the card front. Concord Crush is one of the new In Colors for 2010. This is a really nice deep purple color! I absolutely LOVE this new textured impressions die. The lines are nice and crisp and deep too!

The image panel was made in the tutorial yesterday. The image from Happiness Shared was stamped in Timber Brown Stazon (retired) on a 2" x 2 5/8" piece of Whisper White cardstock and colored in with Blushing Bride, Pretty In Pink, Poppy Parade, Pear Pizzaz, and Old Olive. Blushing Bride, Poppy Parade, and Pear Pizzaz are some of the other 2010 in colors. I can really see myself using Pear Pizzaz a lot. Its such a nice shade of green. I used the cracked glass technique on the image panel and sponged Early Espresso ink into the cracks.

The finished image panel was added to a piece of Naturals White cardstock cut at 2 1/8" x 2 3/4". This was then adhered to a piece of Pear Pizzaz cardstock cut at 2 1/4" x 2 7/8". A piece of Whisper White Organza ribbon was added around the image panel and the panel was adhered to the card front using Stampin' Dimensionals. I thought the card needed a little more added to it so I put some of the new Basic Pearls Jewel Accents in the raised lines the textured impressions die created. Now it's done! I really like how this one turned out. What do you think?

Come back tomorrow to see what other fun things I have to show you!

Cracked Glass Tutorial

Since I have given you tutorials on heat embossing lately I decided to show you the cracked glass technique in this week’s tutorial. This is a wonderful technique that really gives a wonderful look to your stamped image.
If you missed the tutorial on heat embossing you can find it here.

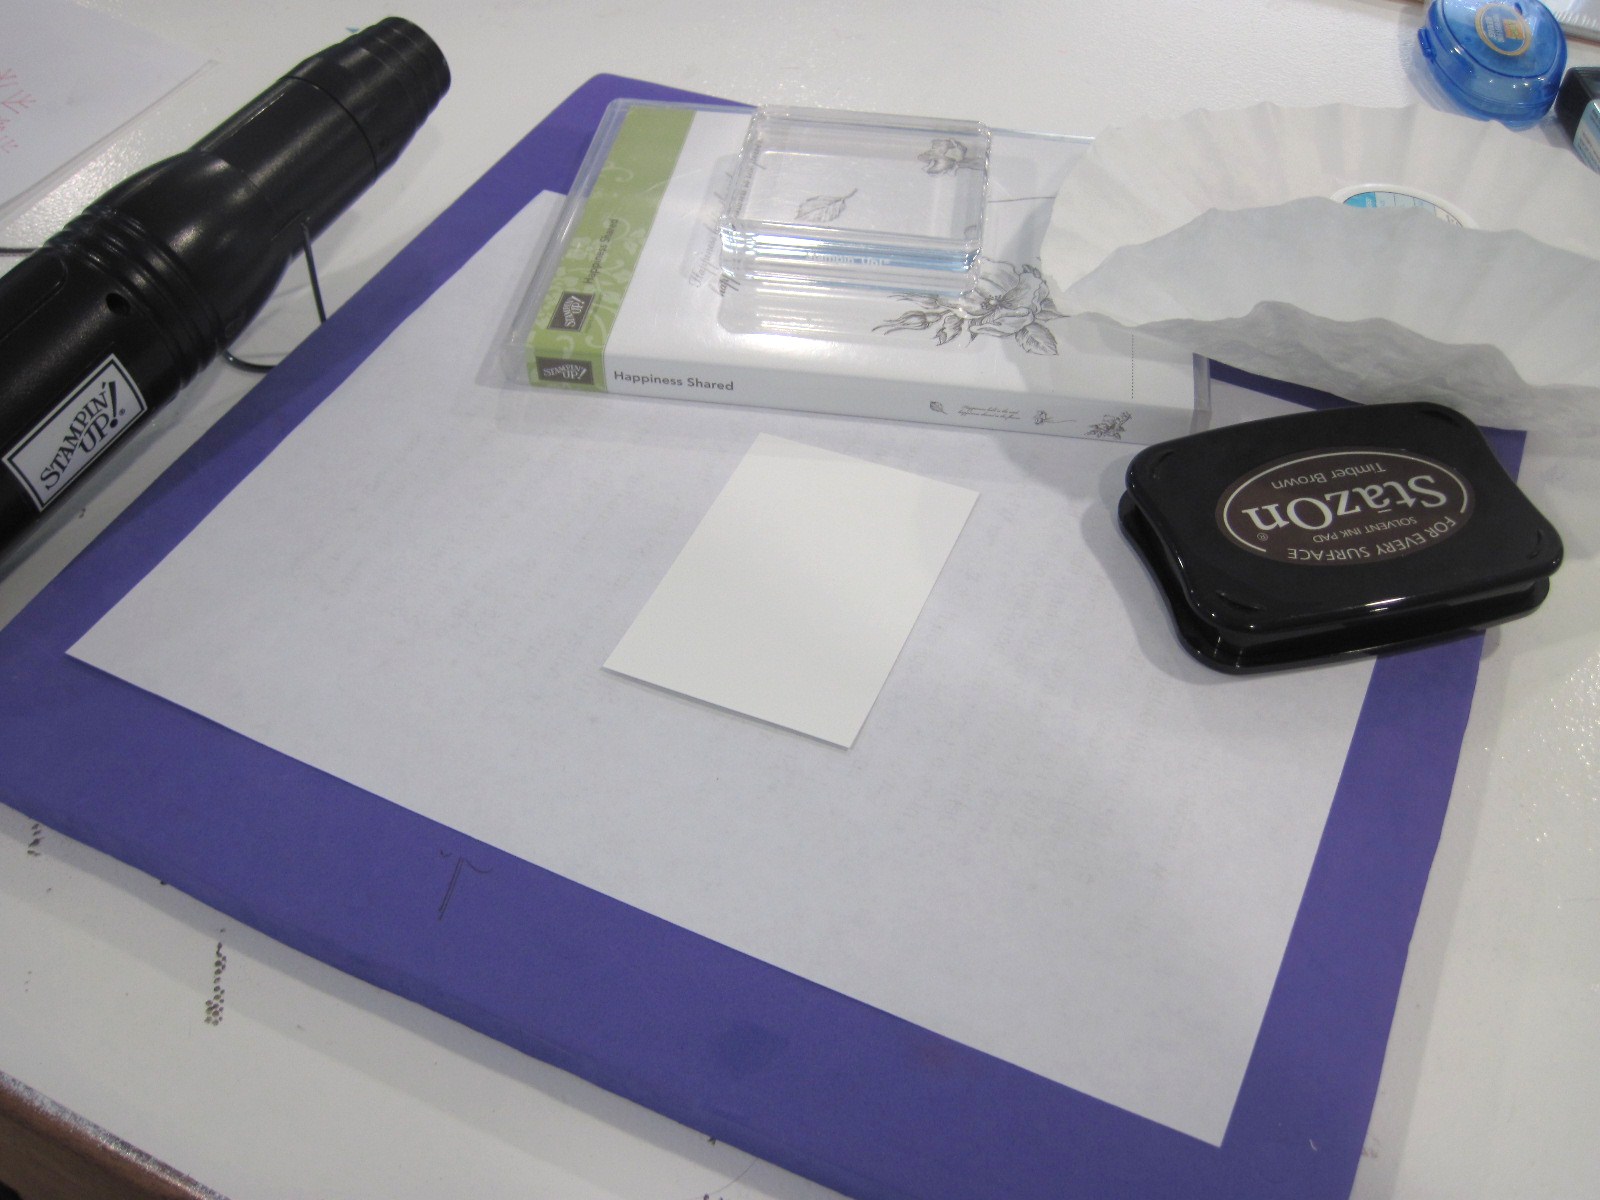
The supplies you will need for this tutorial are: Heat Gun, Clear Embossing Powder, Versamark, cardstock, stamp, ink.


First stamp your cardstock with whatever images and colors you want for your card. In this case I used Happiness Shared.


Next you will ink the entire piece of cardstock with Versamark and cover completely with clear embossing power.


Heat emboss the embossing powder until it melts and turns shiny.


You will have a bumpy finish. Next repeat inking with Versamark, covering with clear embossing powder, and heating two-three more times.


Now you will have a smooth shiny finish.


Now put your cardstock in the freezer for a couple of minutes. Yes…I did say the freezer.
After a few minutes in the freezer your cardstock may warp a little. Don’t worry that is perfectly normal.

Now you are going to bend your cardstock until the embossing powder cracks. Keep bending it in different locations until you are happy with the cracks.


Now this looks really good as it is. But you can sponge on a dark color ink over the cracks. This will make the cracks stand out more.


Use a tissue or paper towel to remove the excess ink from the embossed surface.


Add your beautiful cracked glass panel to your card!

This creates such an elegant look and with a little patience it really isn’t hard to do. I hope you have a great time trying out the cracked glass technique! I would love to see your creations so please add the link to your photo in the comments section.

Come back tomorrow to see the finished card with the cracked glass panel I made today!