Wednesday, July 14, 2010

Carryover Products Flier

These are all products from previous catalogs that are still available. Get them while they last!
Click here to view the full PDF.


Sunday, July 11, 2010

Marina Mist Boquet

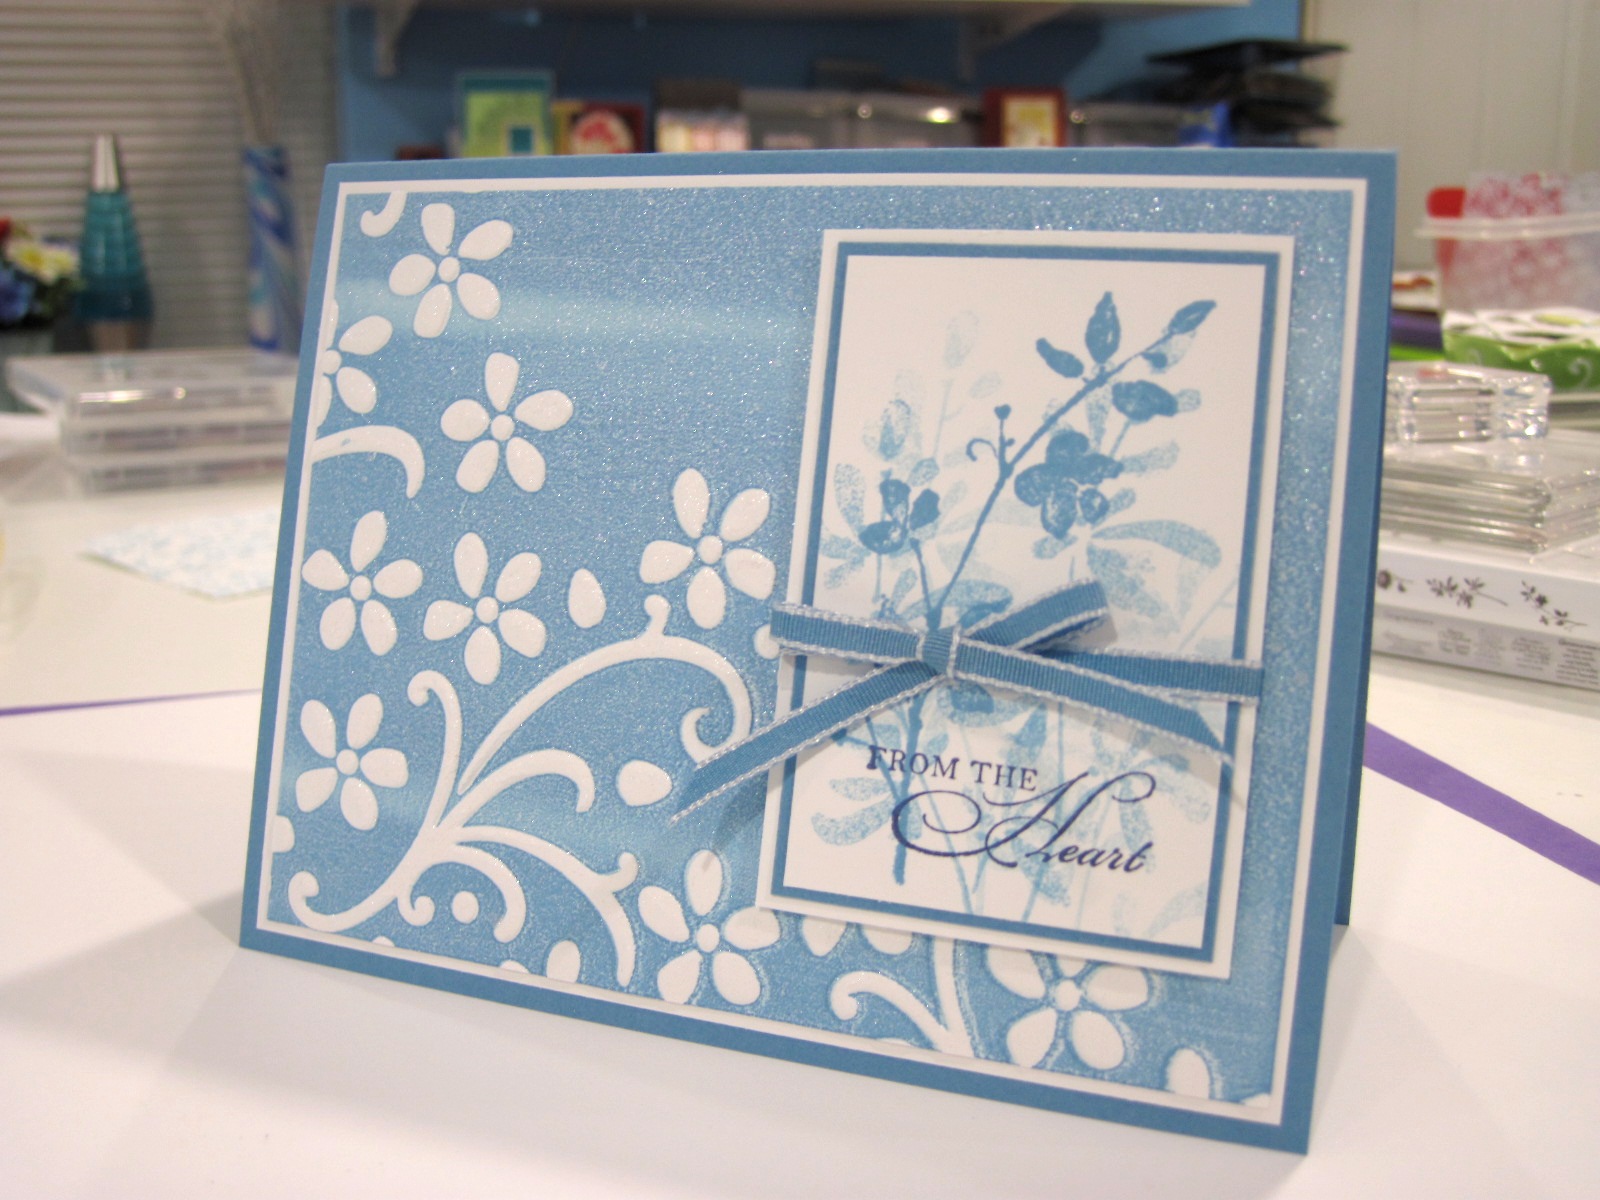
Yesterday I showed you a short tutorial on how to do what I call inked dry embossing. For those of you who missed it you can view the post here. Today I am going to show you what I have done with the inked an embossed piece of Whisper White cardstock that I made during the tutorial. So here it is....


Stamps: Watercolor Trio
Cardstock: Marina Mist, Whisper White
Ink: Marina Mist, Night of Navy
Accessories: Elegant Bouquet Textured Impressions die, Brayer, 1/8" Marina Mist Taffeta ribbon, Vanilla Shimmer Smooch Spritz, Stampin Dimensionals

I really wanted the inked and embossed background to be the major part of the card. After inking and embossing I spritzed the entire piece of Whisper White cardstock with Vanilla Shimmer Smooch Spritz. I cropped it down to 3 7/8" x 5 1/8" and layered it on a piece of 4" x 5 1/4" Whisper White cardstock. This was then adhered to the Marina Mist card base that was cut at 5 1/2" x 8 1/2" and scored at 4 1/4".

For the image panel I cut a piece of Whisper White cardstock 1 7/8" x 2 7/8". I stamped the images from Watercolor Trio using Marina Mist ink. The leaves in the back were done by stamping off on scrap paper once and stamping on the image panel twice. This was repeated once more. Then I stamped the leaves and flowers in Marina Mist and the sentiment in Night of Navy ink .

The image panel was layered on a 2" x 3" piece of Marina Mist cardstock and then on a 2 1/8" x 3 1/8" piece of Whisper White cardstock. A piece of 1/8" Marina Mist Taffeta ribbon was added around the image panel and tied into a bow. The image panel was adhered to the card front using Stampin Dimensionals. That's it! I really love this simple monochromatic card. It really lets the textured background stand out.

Come back tomorrow to see what I have to show you!

Saturday, July 10, 2010

Inked Dry Embossing

Today I have a quick and fun tutorial for you. We will be using a Stampin' Up Textured Impressions die with a brayer and ink to ink the background around an embossed image.


For this tutorial you will need the following items: cardstock, classic ink, brayer, Big Shot, Big Shot platform and standard cutting pads.


Have your cardstock cut and ready to go. I am using Whisper White cardstock cut at 4" x 5 1/4". Use your classic ink pad to ink up your brayer by rolling the brayer across the ink pad several times.


Add ink to the debossed or back of the embossing folder. Make sure to cover the folder with ink where your cardstock is going to go. From here on you will want to work pretty fast so your ink is still really wet.


Place your cardstock inside your embossing folder, close the folder and run it through the big shot with the two standard cutting pads and Tab 2 on the platform. I ran the folder through twice to be sure I got a really good image with the ink.


Remove your cardstock from your embossing folder and oooh and aaah over the wonderful result.

To clean your embossing folder simply rinse the folder under running water and set aside to air dry.


Thats all there is too it! Now you have a beautiful textured and inked image that can be used to decorate a card. Come back tomorrow to see the card I make with the inked and dry embossed cardstock I made in this tutorial!

Friday, July 9, 2010

Trendy Masculine Birthday

Today I have another Birthday card for you to enjoy! This one is a more masculine card that will go to my wonderful husband for his Birthday on Saturday. It's always harder to come up with masculine cards for some reason. Take a look!


Stamps: Trendy Trees, Solid Stripes, Perfect Punches
Cardstock: Basic Grey, Sahara Sand, Whisper White, Cajun Craze
Ink: Early Espresso, Sahara Sand, Always Artichoke, Old Olive, Basic Black
Accessories: Square Lattice Textured Impressions ie, 5/8" Basic Black Satin ribbon

The card base is Basic Grey cardstock cut at 5 1/2" x 8 1/2" and scored at 4 1/4". Then a piece of Sahara Sand cardstock is cut at 4" x 5 1/4" and run through the Big Shot with the Square Lattice Textured Impressions die. The brayer is used with Early Espresso ink to add ink to the raised texture. A piece of 5/8" Basic Black Satin ribbon is added around the textured cardstock and this is adhered to the card base.


The image panel is a piece of Whisper White cardstock cut at 2 7/8" x 4 1/8". I used the Solid Stripes stamp with the Stamp-A-Ma-Jig to stamp across the bottom of the cardstock in Sahara Sand ink. Then I stamped the stripes again with Always Artichoke ink with the darker stripes slightly offset from the other. The trees from Trendy Trees were stamped above the stripes in Old Olive ink for the tree tops and Early Espresso for the tree trunks.


To complete the panel I used the direct to paper technique with Old Olive and Always Artichoke ink by swiping across the center of the panel. This creates the ground under the trees. The sentiment from Perfect Punches was stamped in Basic Black ink right on top of the image panel. This panel was adhered to a piece of 3" x 4 1/4" Cajun Craze cardstock and then adhered to the card front using Stampin Dimensionals to pop it up.


I will try to have a fun tutorial for you tomorrow! Have fun stamping!

Thursday, July 8, 2010

New Color Birthday Card

Hello all my blog-world friends. I said yesterday that I didn't know what I would have for you today. So after thinking about it for a while I decided to do a couple of Birthday cards since I will be needing some this weekend anyway. Besides...I don't always have to wait until the day of to make the Birthday cards. It's nice to have things done ahead of time once and a while...

Anyway here is the first Birthday card I created and it uses the New Colors: Early Espresso, Cajun Craze, Cherry Cobbler, Marina Mist, and Daffodil Delight!


Stamps: Cute By The Inch, Occasional Quotes, Because I care
Cardstock: Whisper White, Early Espresso, Cajun Craze, Cherry Cobbler, Marina Mist, Daffodil Delight
Inks: Whisper White Craft, Cherry Cobbler, Marina Mist, Daffodil Delight
Accessories: Vintage Wallpaper Textured Impressions die, 1/8" Marina Mist Taffeta ribbon, Gold Glow Smooch Spritz, Stampin Dimensionals, Curly Label Punch.

The stamp sets I used for this card are all Hostess sets in the new catalog. Check out the bar to the right if you haven't seen the wonderful new catalog with all the new products and stamp sets! You can earn these stamp sets for FREE by hosting a workshop. What could be better than getting free stamps and free SU products right? Now back to the card.

The card base is Whisper White cardstock cut at 5 1/2" x 8 1/2" and scored at 4 1/4". I cut a piece of Early Expresso cardstock 2 1/2" x 5 1/2" and used the Big Shot and the new Vintage Wallpaper Textured Impressions die to give the cardstock some texture. Then I used the direct to paper technique on the debossed side of the cardstock with Whisper White Craft ink. This takes a while to dry but I just love the way it looks. This was then layered on a piece of Cajun Craze cardstock cut at 2 5/8" x 5 1/2".

I stamped the three images from Cute By The Inch in Cherry Cobbler, Marina Mist, and Daffodil Delight ink on a scrap piece of Whisper White cardstock and used Paper Snips to cut around them. I just love these little scissors because they cut through cardstock so easy and they are small so they work great for cutting out detailed images. I then glued these on a scrap piece of Early Espresso cardstock and cut around it with the Paper Snips leaving a small border.

I used the Curly Label Punch to punch a label from Cherry Cobbler, Marina Mist, and Daffodil Delight cardstock. 1/8" Marina Mist Taffeta ribbon was wrapped around this panel and tied into a knot in between where the Marina Mist and Daffodil Delight labels were going. The stamped images were glued to their corresponding color curly label and then glued to the textured Early Espresso piece. For the Daffodil Delight label I really wanted to make it stand out from the other two. So I sprayed it with Gold Glow Smooch Spritz before adding the image to the center then adhered this to the card with Stampin Dimensionals to make it pop up off the card.


This panel was added to the Whisper White card base. The sentiment from Occasional Quotes was stamped in Daffodil Delight ink on the card base. Underneath the sentiment I stamped the border from Because I Care in Marina Mist. What do you think?

Come back tomorrow to see a masculine birthday card! Its gonna be great!

Wednesday, July 7, 2010

Candlelight Rose

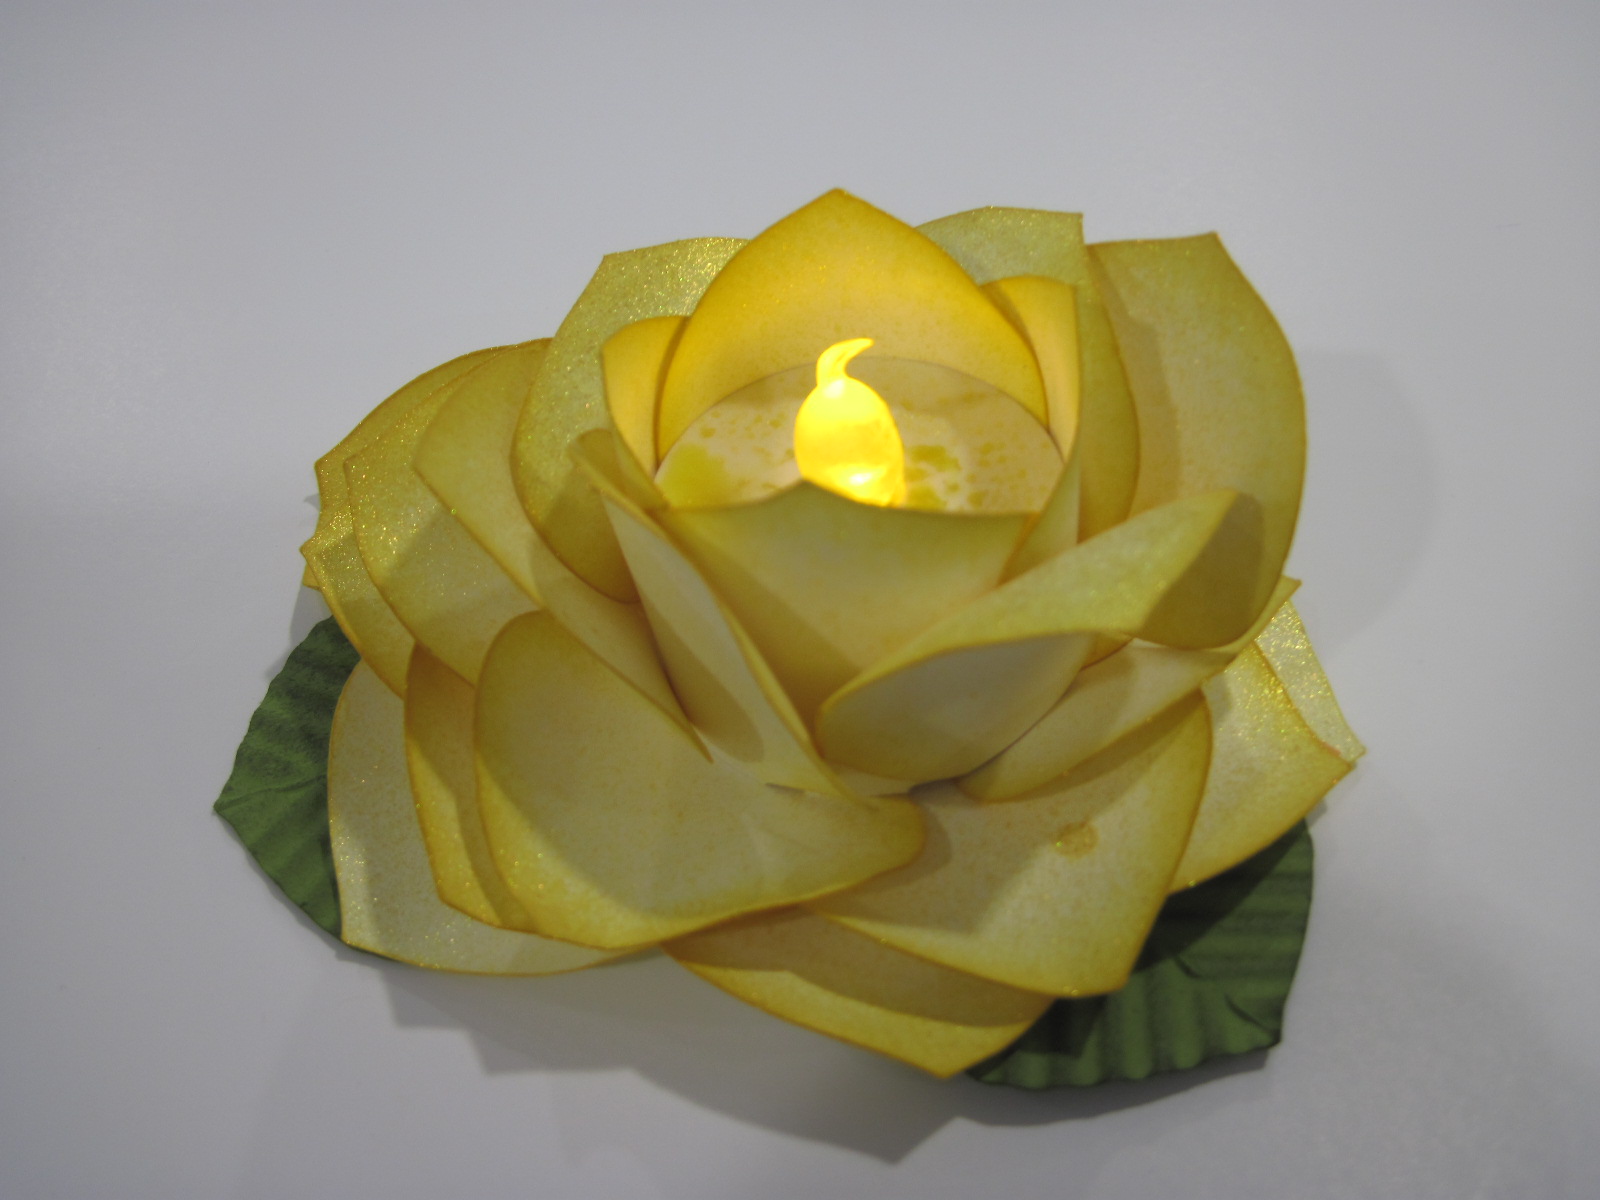
I have seen several of these roses made with the Ornament Punch. They are all absolutely beautiful! But when I saw the one that Kathy Braun posted on her blog. Here you will find a fantastic video tutuorial showing you how to make your own Candlelight rose.

Here is the first one I made and I just absolutely LOVE how this turned out! I will definitely be making more of these!

Cardstock: Very Vanilla, Old Olive
Ink: Daffodil Delight, Always Artichoke
Accessories: Ornament Punch, 2 3/8" Scalloped Circle Punch, Gold Glow Smooch Spritz, Sticky Strip, Crimper


Now I did a couple of things differently than Kathy did. I punched 25 ornaments from Very Vanilla cardstock using the Ornament Punch. Then I sponge both sides of the ornaments with Daffodil Delght ink. I just love this new yellow! I used the 2 3/8" Scalloped Circle Punch to punch a piece of Old Olive cardstock fo the base to adhere all the petals and leaves onto.

The leaves are made by punching Old Olive cardstock with the Ornament Punch. Then score right down the center of your ornaent from the point to the center of the top of the ornament.

Fold the ornament in half and run through the Crimper at approximately a 45 degree angle starting with the fold touching the crimper. Then unfold your leaf and sponge lightly across the ridges with Always Artichoke ink. This will give you very nice leaves.

Instead of keeping the center "bud" of the rose seperate from the base I used my Crop-A-Dile to punch the larger hole in the bottom approximately where the switch would go with the candle centered. Then I glued the center down with Sticky Strip making sure that the switch lines up with the hole.  After I assembled the rose completely I covered the leaves with post-it notes and sprayed the entire rose with Gold Glow Smooch Spritz to give it a nice gold sparkle.

You have to use a needle tool or a pen to turn on the tea-light, but at least you don't have to worry about the center of the rose falling out.

I'm not sure what I'll have for you tomorrow, but come back to check out whatever crafty thing I come up with tonight!