
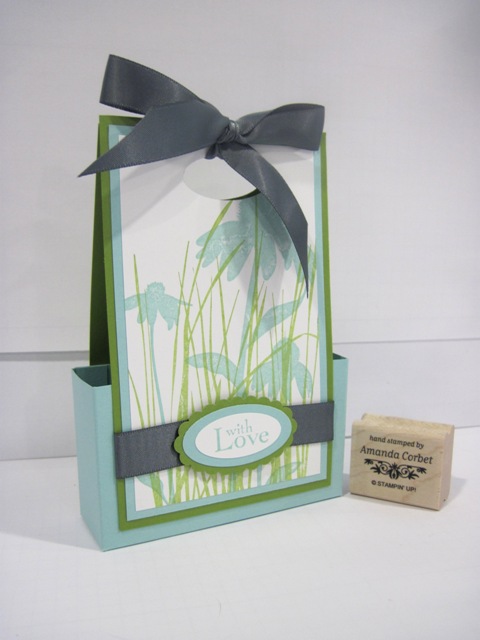
As promised, here is the tutorial for the With Love Bag. I changed up the colors on this one, but other than that it is the same as the one I posted last week. So here we go!
For this project you will need:
- Stamps: Inspired By Nature, Field Flowers
- Card Stock: Pool Party, Lucky Limeade, Whisper White
- Ink: Pool Party, Lucky Limeade
- Accessories: 5/8" Basic Grey Satin ribbon, Sticky Strip, Paper Snips, Stampin' Dimensionals, Scallop Oval punch, 1-3/8" x 5/8" Oval punch, 1-3/4" x 7/8" Oval punch
1. Cut a piece of Pool Party card stock 3-1/4" x 11". With the 11" side at the top of your scoring tool score at 4", 5-1/4", 9-1/4", and 10-1/2". Rotate the card stock 90 degrees so that the 3-1/4" side is at the top of your scoring tool and score at 1". Trim the card stock so it looks like the picture below.

2. Cut a piece of Whisper White card stock 3" x 5". Stamp the grass from Inspired By Nature in Lucky Limeade ink. To make the color lighter I inked up the stamped, stamped the image onto a piece of copy paper once before stamping the image onto my card stock.

3. Stamp the flowers from Inspired By Nature in Pool Party ink.

4. Adhere the stamped Whisper White card stock onto a 3-1/4" x 5-1/4" piece of Pool Party card stock. Then adhere this layer onto a 3-1/2" x 5-1/2" piece of Lucky Limeade card stock. Cut a second 3-1/2" x 5-1/2" piece of Lucky Limeade card stock.

5. Flip over the Lucky Limeade panel with the stamped image. Place a piece of Sticky Strip along the bottom of both pieces of Lucky Limeade card stock.

6. Fold on all of the score lines on your Pool Party card stock. Place Sticky Strip in the locations shown in the picture below. Then flip it over and place a piece of Sticky Strip on just one of the longer bottom tabs.

7. Cut a piece of 5/8" Basic Grey Satin ribbon approximately 5" long. Use SNAIL Adhesive to adhere the ribbon onto the front of the stamped panel and adhere the ends of the ribbon onto the back of the panel.

8. Remove the Sticky Strip liner from the top of the Pool Party card stock and from the bottom of the Lucky Limeade card stock. Adhere the panels onto the box sides as shown below.

9. To form the box start by removing the Sticky Strip liner from the side tab and adhere the tab onto the inside of the other end of the card stock. Fold in the long bottom flap without the Sticky Strip, then the two side flaps. Remove the Sticky Strip liner from the bottom flap and adhere this down last.

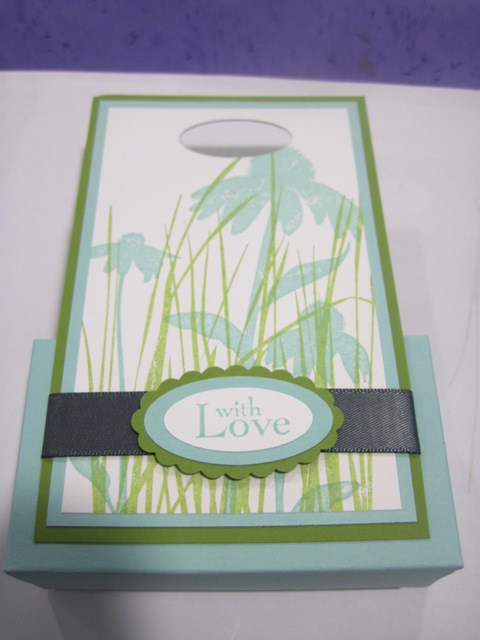
10. Stamp the greeting from Field Flowers onto a scrap of Whisper White card stock in Pool Party ink. Punch out the greeting with the 1-3/8" x 5/8" Oval punch. Use the 1-3/4" x 7/8" Oval punch on a scrap of Pool Party card stock. Use the Scalloped Oval punch on a scrap of Lucky Limeade card stock.

11. Adhere the label layers on top of one another.

12. Use the 1-3/8" x 5/8" Oval punch to punch the oval in the top of the bag. To do this pinch the front and back panels together, slide the punch over all four layers of card stock to the location where you want your oval, and punch. You will have to squeeze hard, but this allows you to get your oval on the front and back panel closely lined up.

14. Cut a piece of Basic Grey Satin ribbon approximately 13" long. Wrap the ribbon through the handle ovals and tie it into a bow. Trim the ends of the ribbon with Paper Snips.
That's it! Now you have a cute little bag to give a gift to someone special!

I hope you'll give this cute little bag a try!
Thanks for stopping by!
