Showing posts with label Jewelry. Show all posts

Friday, January 16, 2015

Winter Gift Exchange

Last fall I once again participated in the Craftaholics Anonymous Gift Exchange. Basically you sign up, you are assigned an exchange partner, then you both make something and send it to the other person. Here is what I sent my exchange partner.


Here is a nice view of everything. 


 I made this lovely "JOY" banner for the holidays with some thin cardboard, DSP, a variety of dies, some Champagne Glimmer Paper, Gold Satin ribbon, and some gold baker's twine.


Each letter was accented with some Crumb Cake holly leaves and Cherry Cobbler Dazzling Details for the berries.  The sparkly gold baker's twine was a score from Pick Your Plum and looked really nice holding each letter of the banner together.


Next up I water colored this pretty picture. Not too bad if I do say so myself. After the water color paint was dry I doodled around the edges of the flowers and leaves. Then I spritzed the whole thing with some Vanilla Smooch Spritz to give it some sparkle.


The words "life doesn't have to be perfect to be wonderful" was stamped onto the water color paper and embossed in silver. The frame was another Pick Your Plum score and was gorgeous!


Next up, some earrings that are just like the Glam Earrings I made for my sister-in-law for Christmas. I really loved these and wish I would have kept them for myself...


Finally a wood slice ornament with a wood burned snowflake on one side and a stamped greeting on the other. 


All in all I think it was a pretty generous gift and were things that I would have like to receive myself. Unfortunately I did not get a gift in return from my exchange partner. But I had fun making these! Click HERE if you want to sign up to be notified when the next gift exchange party is. Click HERE to see a lot of the other gifts that were given and received. 


Thursday, January 8, 2015

Glam Earrings

Today I have another Christmas gift to share with you! This time it's jewelry related. I wanted to make my sister-in-law a pair of pretty high end looking earrings. I should have taken some pictures of the process, but I didn't. Anyway, I used some nickel wire and formed the tear drop shape then hammered it to give the hoops a bit of texture. Then I used head pins to add some crystal pearls, cracked glass beads, and those lovely dark blue glass beads that look like crystals.


To package it up nicely I quickly whipped up a little tag with a scrap of ribbon, a punch, and stamp. Then I just pierced holes through the card stock for the ear wires to go through and added one of the little backs onto the ear wires.


My sister-in-law loved them. Heck I love them. I may decide to do a tutorial when I make a similar pair for myself! I think I succeeded in getting the high end look I was after. What do you think?


Friday, July 18, 2014

Green Necklace Set

This beautiful silver chain and green bead necklace and earring set was the second gift I made to send to my exchange partner for the Craftaholics Anonymous Summer Gift Exchange. All the beads and chain were form my stash so I have no idea who made them.


I even made a cute little tag with a bow to hold the necklace and earrings together.


I packaged the necklace and earrings in this lovely box that was a convention make and take from last year. It worked perfectly to give the necklace set with a bit of candy!


Have you been making any jewelry lately?

Linking up to these parties. 


Tuesday, January 14, 2014

Christmas Jewelry

Jewelry is always a relatively quick gift to make and it always goes over well. Here are the jewelry sets that I made for Christmas Gifts this year. 

A butterfly necklace and earrings for my best friend. 


Turquoise rose necklace and earrings for my niece Megan. The roses on these were made with polymer clay, mica powder, and the Stampin' Up Blossoms mold.


Pink rose jewelry set for my niece Lauren.


A purple rose set for by best friend's daughter.


This one I made to give, but then decided to give something else instead, so it is still looking for a home.


Then finally this lovely purple set for my niece Gabrielle.


I just love making sparkly things and everyone seemed to enjoy their gift. 


Monday, December 30, 2013

Craftaholics Anonymous Winter Gift Exchange 2013 Part 1

It's always so much fun participating in the gift exchanges over at Craftaholics Anonymous! Basically you get paired up with someone else somewhere in the country. You get to ask them questions to figure out what to make. Then make a handmade item or a few and mail them to your exchange buddy. You also get some crafty goodness sent to you from your buddy. So I would like to start out with sharing what I made for Lindsey. 


Her favorite colors were pink and green. So I made her a necklace and earrings with pink crystals, pearls, and silver chain all packaged up in the cute little glass jar with a pink bow. 


Next is a personalized pincushion with a shiny clear button in the center. 


Then finally the lovely "create" banner for her work space that has been sprayed with Strawberry Slush and Lucky Limeade inks that were mixed with rubbing alcohol. The pink banners were also sprayed with Blushing Bride Smooch Spritz to make it sparkly. Then I added the pink and turquoise buttons with baker's twine bows and some pink and green ribbon between the banners. This was so simple and fast to make! I actually made one almost identical for my sister for Christmas. 


I hope you like your gifts Lindsey! 

If you want to see some of the other gifts that were given or received take a look at the link party HERE

Now I'm sure you're wanting to know how you can join in on the fun right? Well the next exchange probably won't be until the summer but you can sign up to receive an email when Linda sends out the invite by clicking HERE

Come back tomorrow to see what wonderful goodies Lindsey sent me! 


Thursday, October 13, 2011

Pink Flowers and Polka Dots

Today I'm going to share with you another project from earlier this year. This is Neila's birthday present. Neila is the exchange student from Germany that my parents hosted last school year. It was a ton of fun getting to know her and showing her the American way of life in the midwest. Her birthday was in June, just a couple weeks before she was heading home. So her gift had to be small so it would fit in her already full suit-cases. I made her these two necklaces and purchased a pretty britght pink scarf. Here are the necklaces:


I found this gift bag a Wal-Mart. Neila LOVES pink so I knew it was perfect, but the card had to match! So I spent some time digging through my stamp collection to find just the right one, and this is what I came up with!


Stamps: Friendly Flowers, Bring on the Cake
Cardstock: Melon Mambo, Pretty in Pink, Whisper White
Ink: Pink Pirouette, Basic Black
Markers: Basic Black, Lucky Limeade, Peach Parfait, Melon Mambo, Pretty in Pink, Regal Rose
Accessories: Paper Piercer, Mat Pack, Glimmer Brads, 5/8" Basic Black Satin ribbon, non-SU ribbon

The card base is Melon Mambo cardstock cut at 5 1/2" x 8 1/2" and scored at 4 1/4". A piece of Whisper White cardstock was cut at 3 3/4" x 5". The images from Friendly Flowers (retired) were inked up with markers to get the variety of colors in the flowers. After completely coloring the stamp I breathed on the stamp to re-moisten the ink and stamped it onto the cardstock. The smaller flower was stamped several times in the background with Pink Pirouette ink just to fill in some white space. The greeting from Bring on the Cake was stamped in Basic Black ink in the lower right hand corner of the cardstock. This panel was adhered to a 3 7/8" x 5 1/8" piece of Pretty in Pink cardstock.


The Paper Piercer and Mat Pack were used to pierce a hole in the two colorful flower centers and two green Glimmer brads were added. Some 5/8" Basic Black ribbon was wrapped around the panel and adhered to the back using Snail Adhesive. Then I dug out the black organza polka dot ribbon from my non-SU stash (SU didn't sell the polka dot ribbon at the time I made this card or I just would have used that instead). I managed to find two pieces of this ribbon that were just long enough. So the first was wrapped around and adhered to the back with Snail Adhesive. The second was into a bow. The Paper Piercer and Mat Pack were used again to pierce a hole for another brad. The brad was pushed through the knot in the bow and through the hole in the cardstock and the tabs were flattened on the back. This panel was adhered to the card front.

Thanks for stopping by !


Tuesday, October 4, 2011

Kelly's Birthday Present

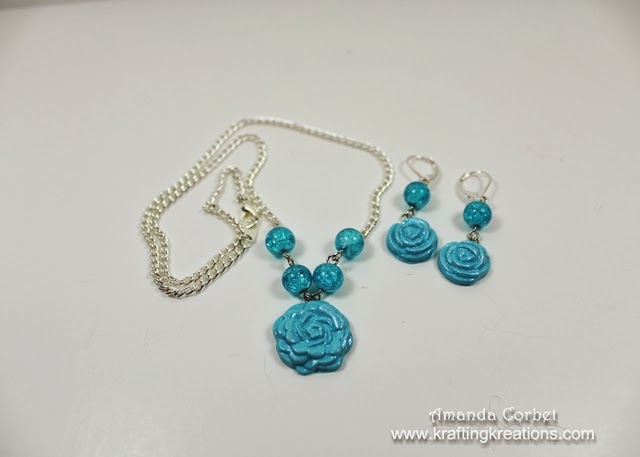
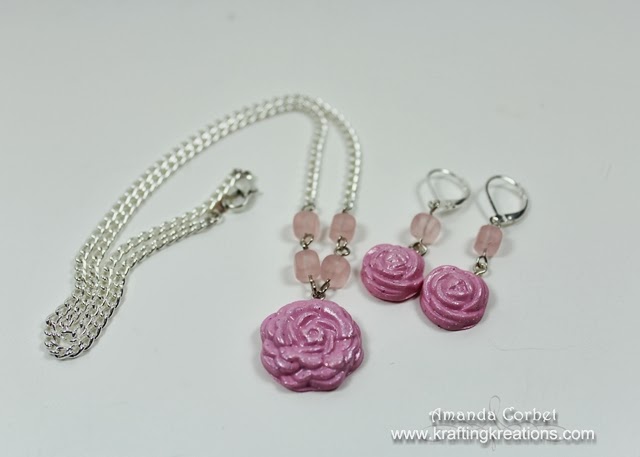
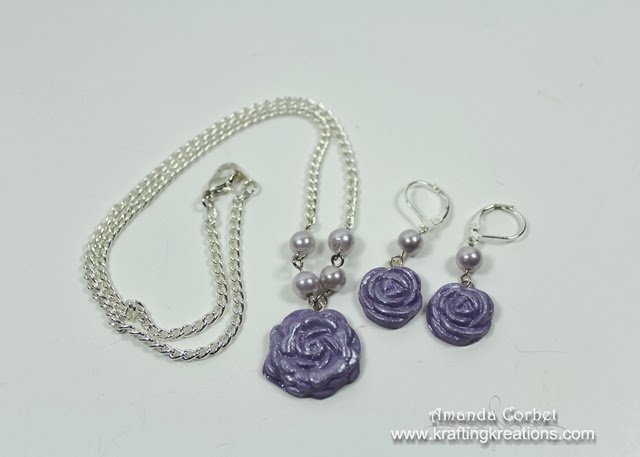
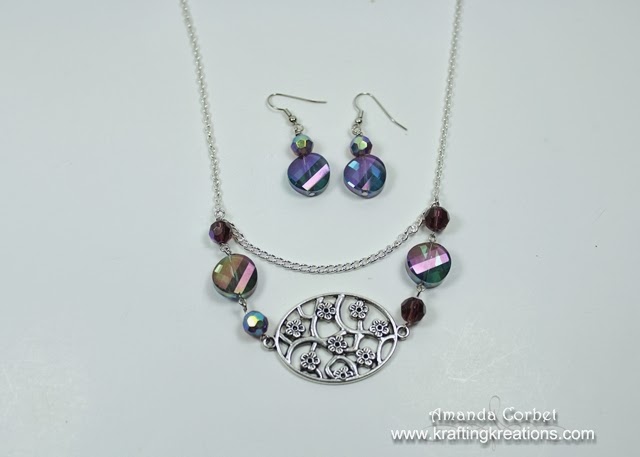
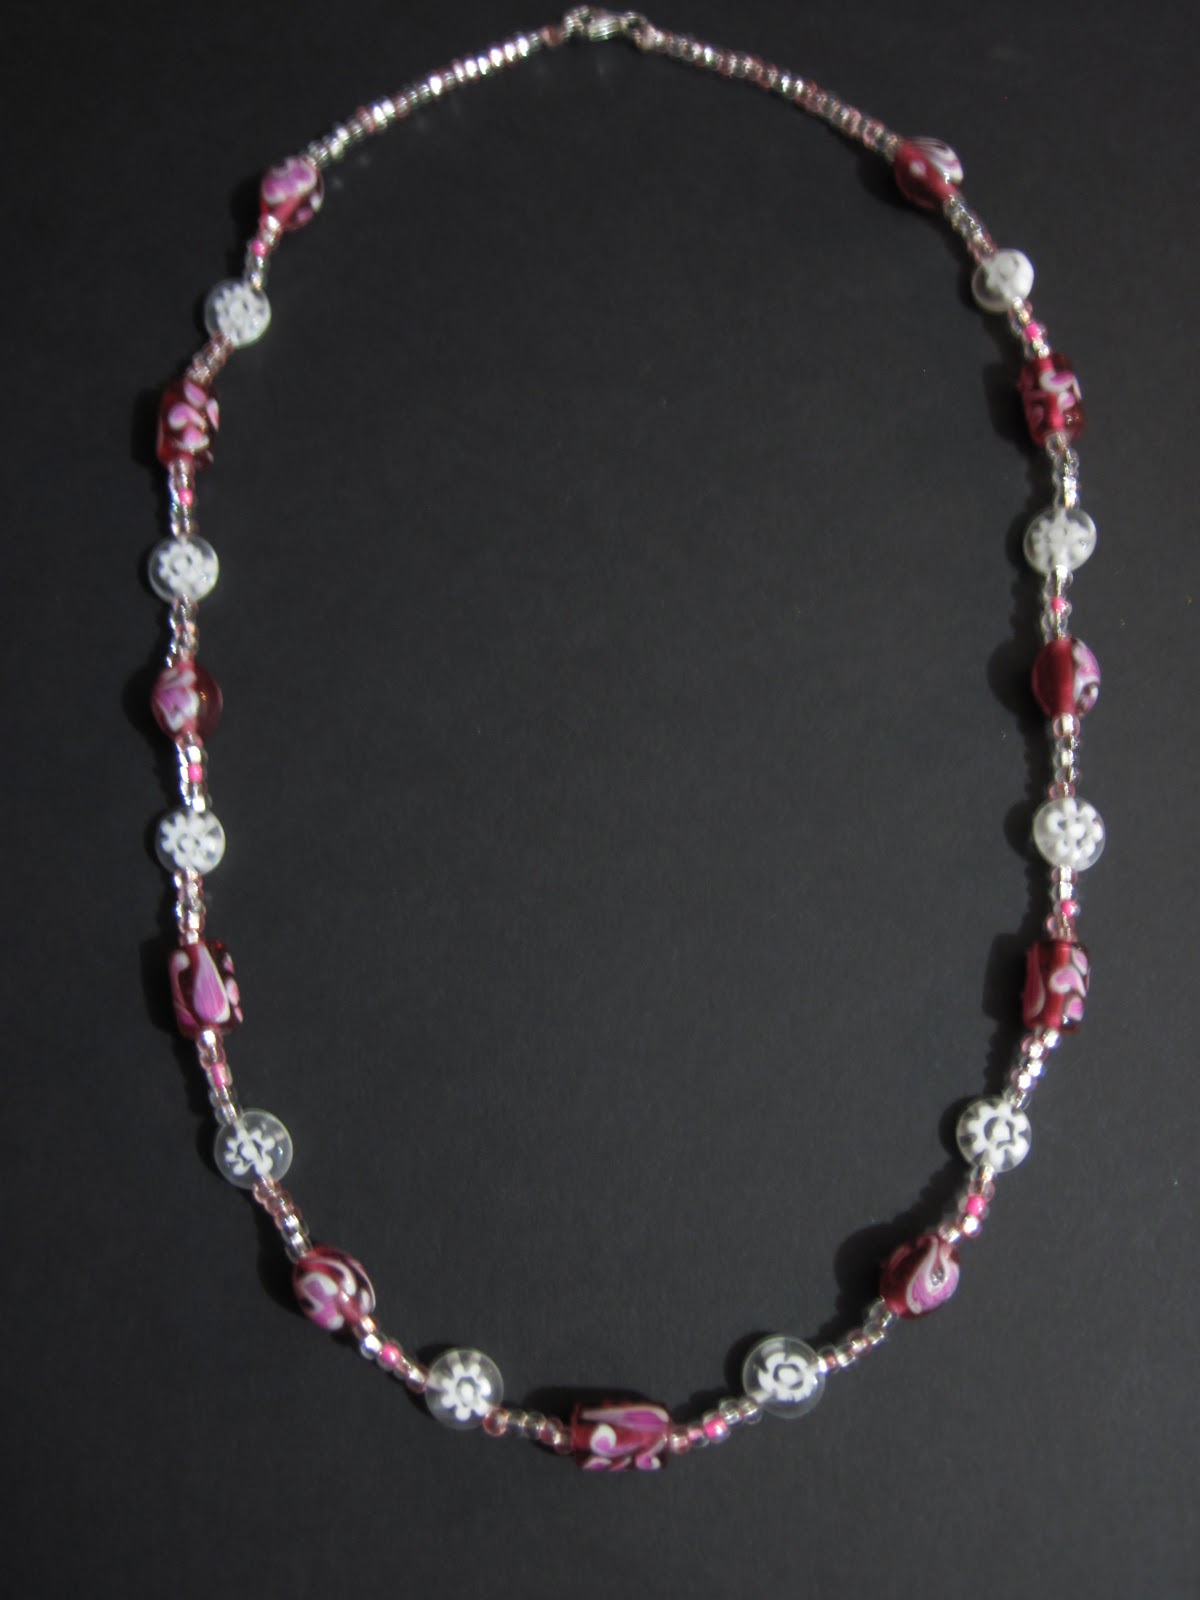
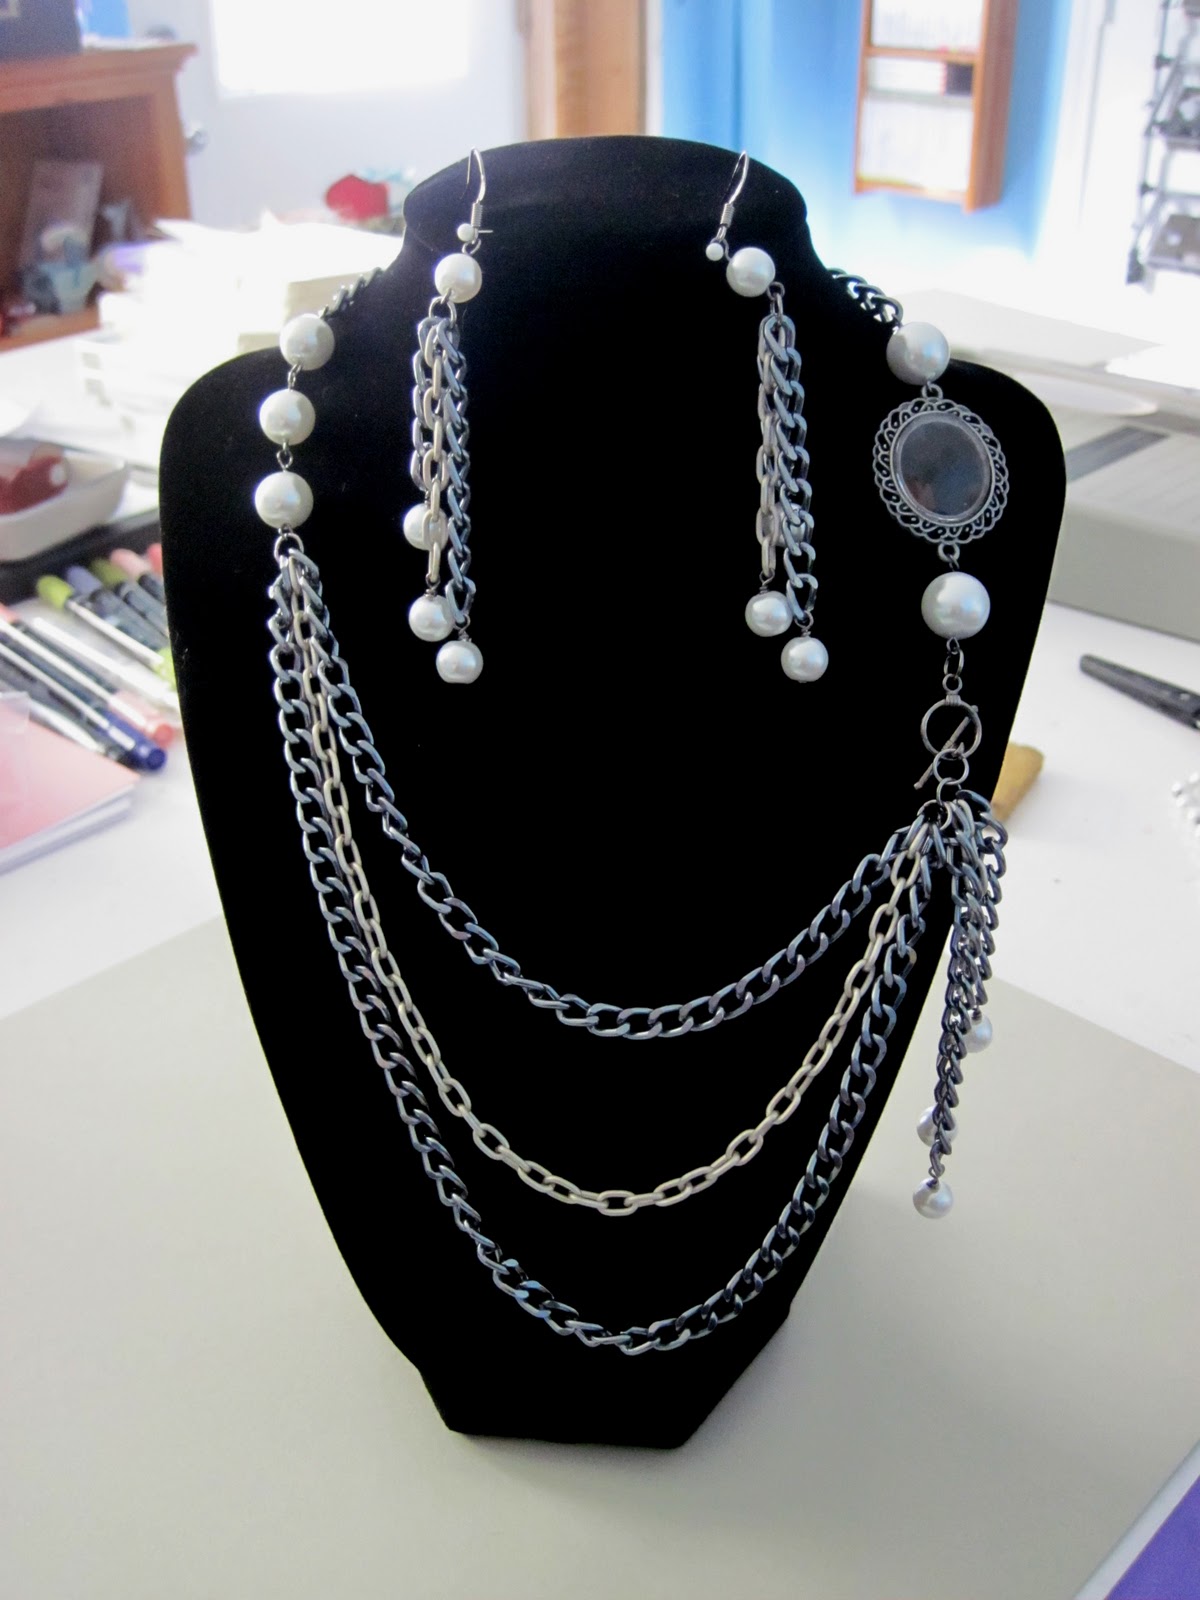
Today I'm going to share with you the gift I made for my sister Kelly for her birthday. For her gift I gave her a handmade necklace, earrings, and bracelet set. I couldn't get a good picture of the bracelet, but here is the necklace and earrings. The jewelry was from a kit and I just put it together.

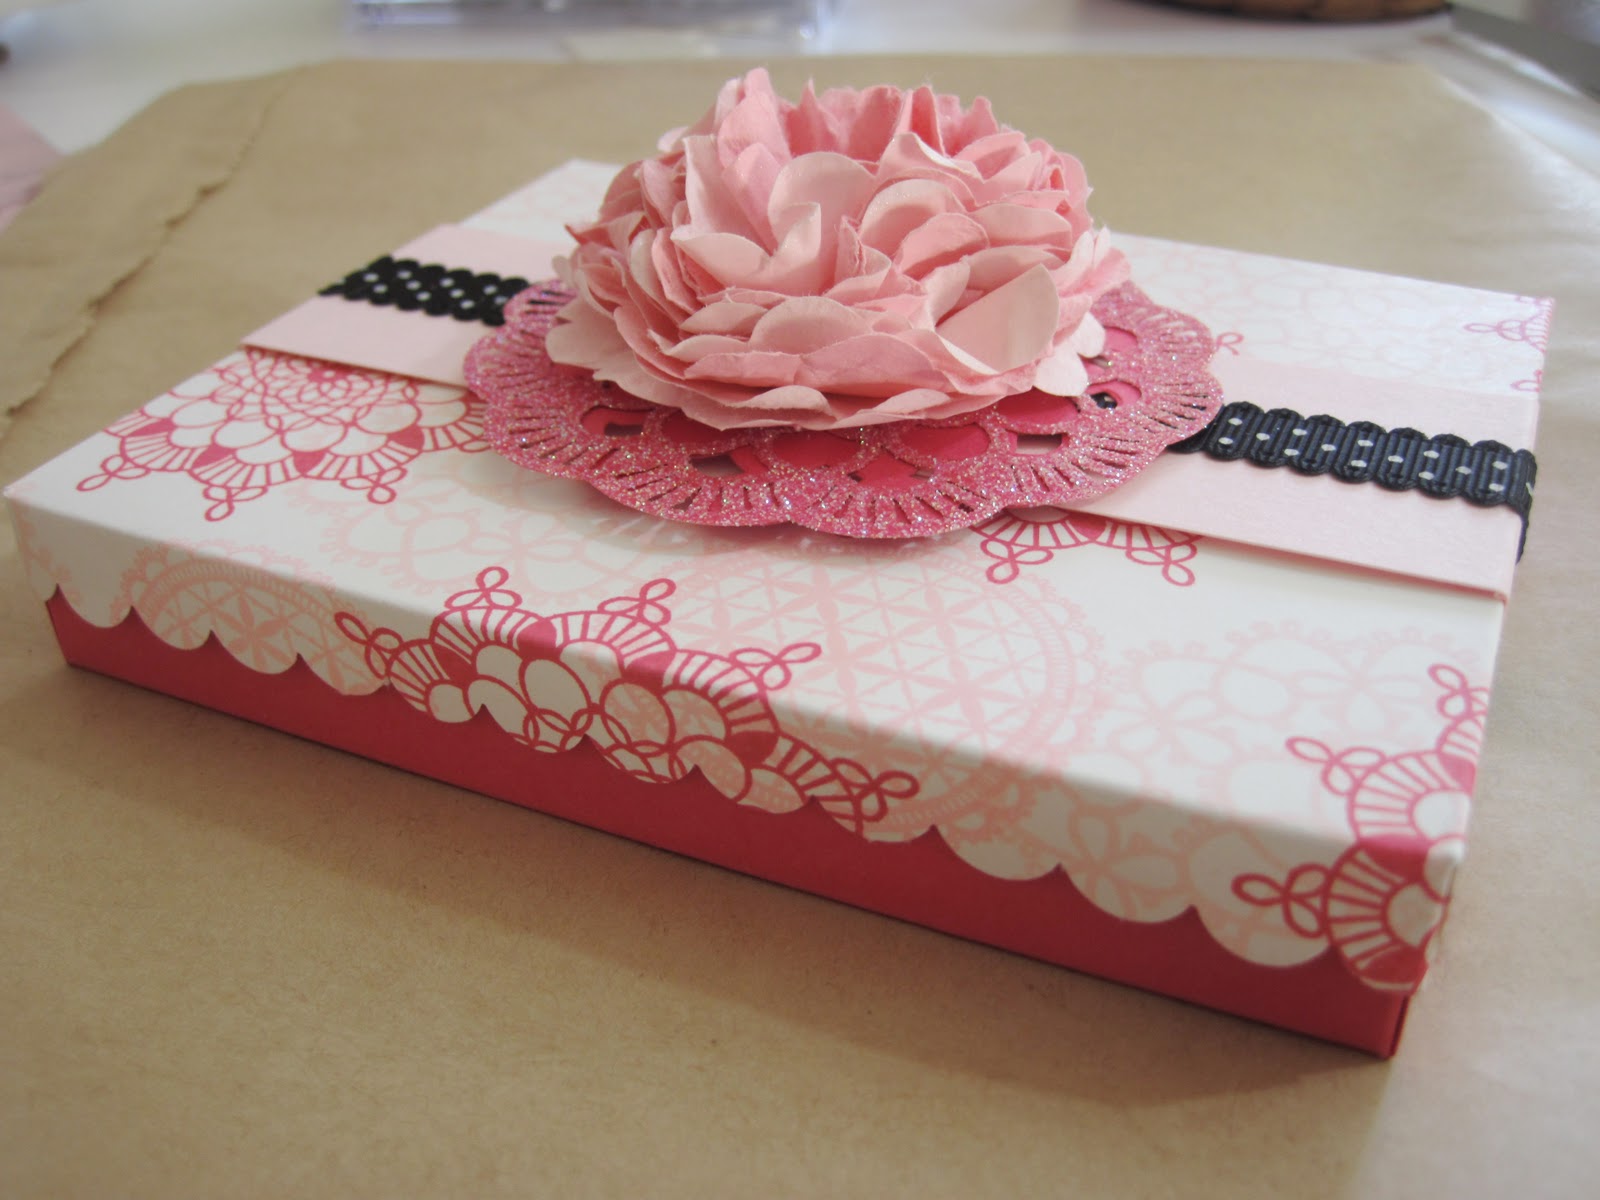
There are three things that my sister absolutely loves! Pink, glitter, and polka dots! She comes to my Make and Takes regularly and is always saying that this needs sparkle, or that needs some bling. So I wanted to make sure that her card and gift box had lots and lots of sparkle and bling! I think I succeeded.


Here is the box that I made for her jewelry to go in.


I will do a tutorial on the box later this week so you can see how it went together. Here are the supplies I used.

Stamps: Delicate Doilies
Cardstock: Whisper White, Pink Pirouette, Melon Mambo, Pretty in Pink
DSP: Flirtatious
Ink: Pink Pirouette, Pretty in Pink, Melon Mambo, Versamark
Accessories: Heat & Stick Powder, Dazzling Dimaonds glitter, 2 3/8" Scalloped Circle Punch, Paper Piercer, Brad, Crimper, Basic Black Dotted Scalloped Ribbon, Simply Score, Scallop Edge Border Punch, Paper Snips, Sticky Strip, Vanilla Smooch Spritz, Pennant Die

I have to share a funny story about this box. I was running out of time Friday and needed to finish the flower for the top of the box. I had everything else done but that flower. So I had everything punched and crimped and put the rest of the tools in a stamp box and took it with me to finish in the truck on the way to the party. Talk about last minute right?

Well they were having a shrimp boil for dinner (which was absolutely fabulous!) but my husband doesn't eat seafood so he was going by Burger King to get him something for dinner. I get the flower assembled and wanted to add some Vanilla Smooch to make the flower glittery too. It had to have lots of bling remember? So here we are in the drive through while he is waiting for his food. I open the door and have the flower in my hand holding it out so I can spray the smooch spritz on. I wonder what the people behind us were thinking.... Oh well.

So we arrive at the party and the box is JUST finished, I have glitter all over my hand from spraying the flower while holding it and I still need to get pictures of everything to share with you! So I rush into Kelly's craft room and quickly snap the shots of the gift box and the card. Phew! But I got it done in time!
Kelly got a kick out of the story that involved the flower and the Burger King drive through. Maybe I'm just crazy, but I really wanted that flower on that box and it HAD to be sparkly. Yep.....I'm crazy. Oh well.
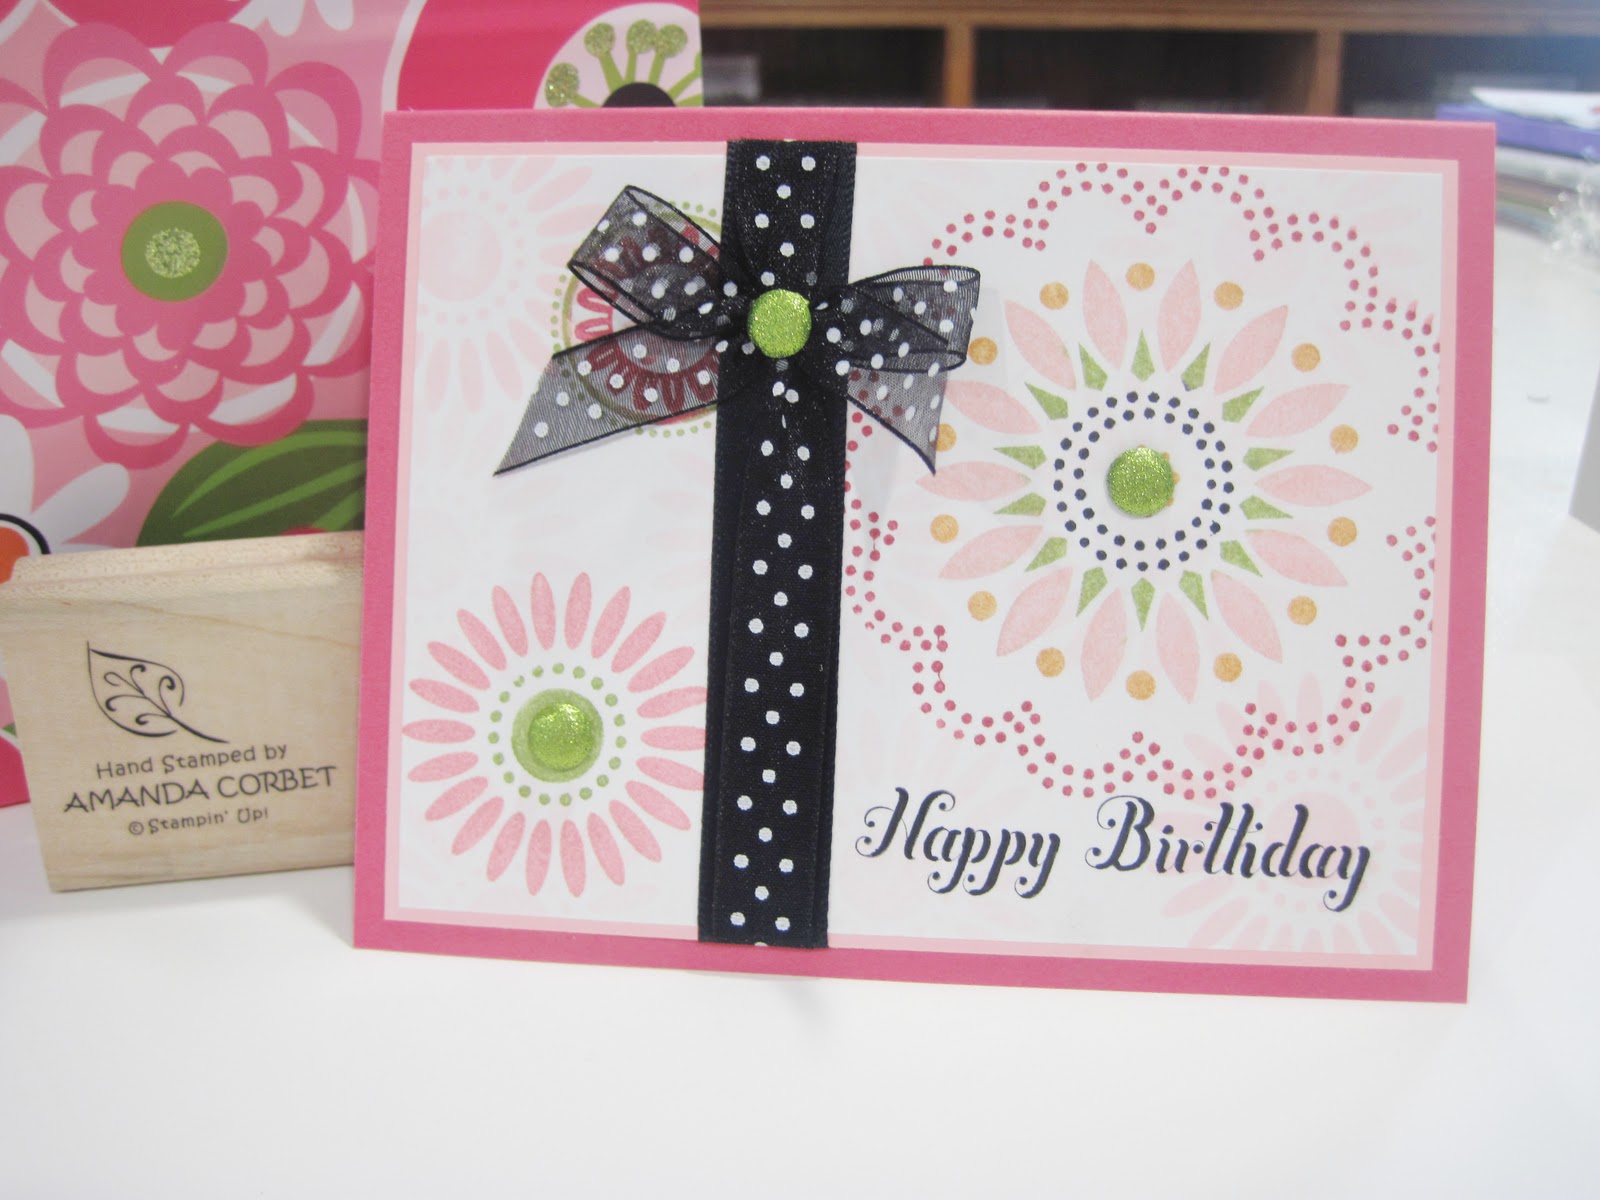
Here is the card:

Of course the card just HAD to match the box! Oh! Did I mention that she likes owls too? She is also a paper crafter so I wanted to make sure her card was over the top!


Stamps: Delicate Doilies, Happiest Birthday Wishes
Cardstock: Melon Mambo, Whisper White, Pink Pirouette
DSP: Flirtatious
Ink: Pink Pirouette, Pretty in Pink, Melon Mambo, Versamark
Accessories: Owl Punch, Pennant Die, Bitty Flower Punch, Basic Rhinestones Jewel Accents, Embossing Buddy, Silver Embossing Powder, Heat Tool, Heat & Stick Powder, Dazzling Diamonds, Stampin' Dimensionals, Silver Glimmer Paper, Stampin' Sponge, Basic Black Dotted Scallop Ribbon, Hobby Blade, Mini Glue Dots

The card base is Melon Mambo cardstock cut at 5 1/2" x 8 1/2" and scored at 4 1/4". Next a piece of Whisper White cardstock was cut at 3 3/4" x 5". The images from Delicate Doilies were stamped in Pink Pirouette, Pretty in Pink, and Melon Mambo to create the pattern. The Embossing Buddy was rubbed over the bottom portion of the stamped Whisper White cardstock. The greeting from Happiest Birthday Wishes was stamped in Versamark ink and Silver Embossing Powder was poured over the stamped image. After the excess powder was tapped off the embossing powder was heated with the Heat Tool.

The stamped Whisper White cardstock was adhered to a 4" x 5 1/4" piece of Pink Pirouette cardstock. Then this panel was adhered to the card front. The Hobby Blade was used to cut a slit in the fold of the card where I wanted the ribbon. Then a piece of Basic Black Dotted Scallop Ribbon was inserted through the slit, wrapped around the card front, and tied into a knot. The back of the knot was then glued to the card front with a couple Mini Glue Dots.


Now for the doily. A piece of Melon Mambo cardstock was run through the Big Shot on the Perfect Pennants die to get one of the scalloped circles. This was set aside. Next I got out my piece of Flirtatious DSP that has the laser cut doilies on it and cut out one of the doilies with Paper Snips. I applied Versamark by patting the ink pad directly onto the paper doily several times until it was covered with ink. Then I poured some Heat & Stick powder over the inked paper doily. The Heat & Stick powder was melted with the Heat Tool and Dazzling Dimonds glitter was quickly poured over the warm Heat & Stick. The excess glitter is tapped off and the image is heated again with the heat tool quickly just to set the glitter in the adhesive powder. Now you have a really glitter doily! I adhered the glittery doily on top of the Melon Mambo die cut scalloped circle doily from the pennant die. Stampin' Dimensionals were added to the back and this was adhered to card front.  


The owl body was punched from Whisper White cardstock. The Eyes are Very Vanilla, Whisper White, and Basic Grey. The belly is Silver Glimmer Paper that was sponged with Pink Pirouette and heated with the Heat Tool to set the ink. Then the belly was punched out and adhered to the owl body. The flower was created by punching two Pink Pirouette flowers using the flower punch from the Punch Pack. The edges of the flowers were sponged with Melon Mambo ink and were adhered together. The basic rhinestones strip was added to the owl's head and the flower was adhered on top of the owls ear. A single basic rhinestone was added in the center of the flower. The owl was adhered to the center of the glittery doily with Stampin' Dimensionals.