Today I have for you the card I created for the SCCSC38 sketch challenge. I'm just now getting around to completing some of the challenges I missed while I was on vacation. So here is the sketch provided by Susie:


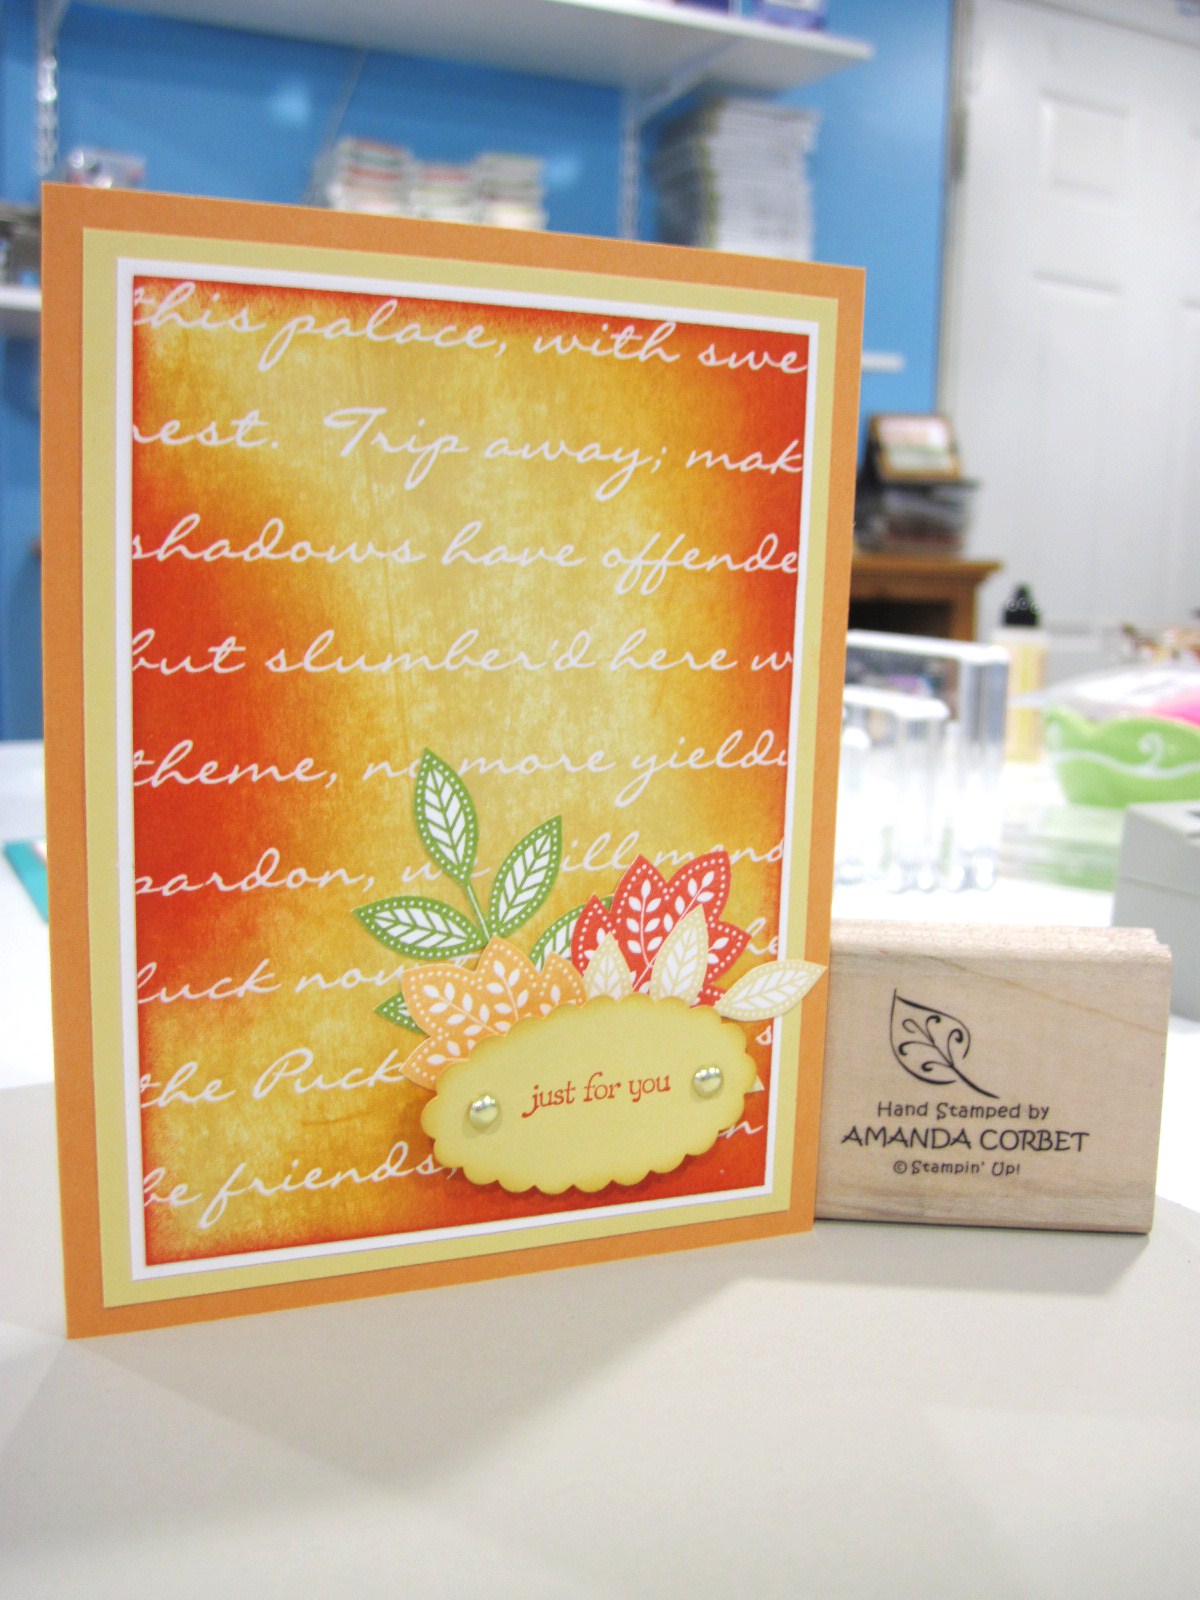
And here is my card:
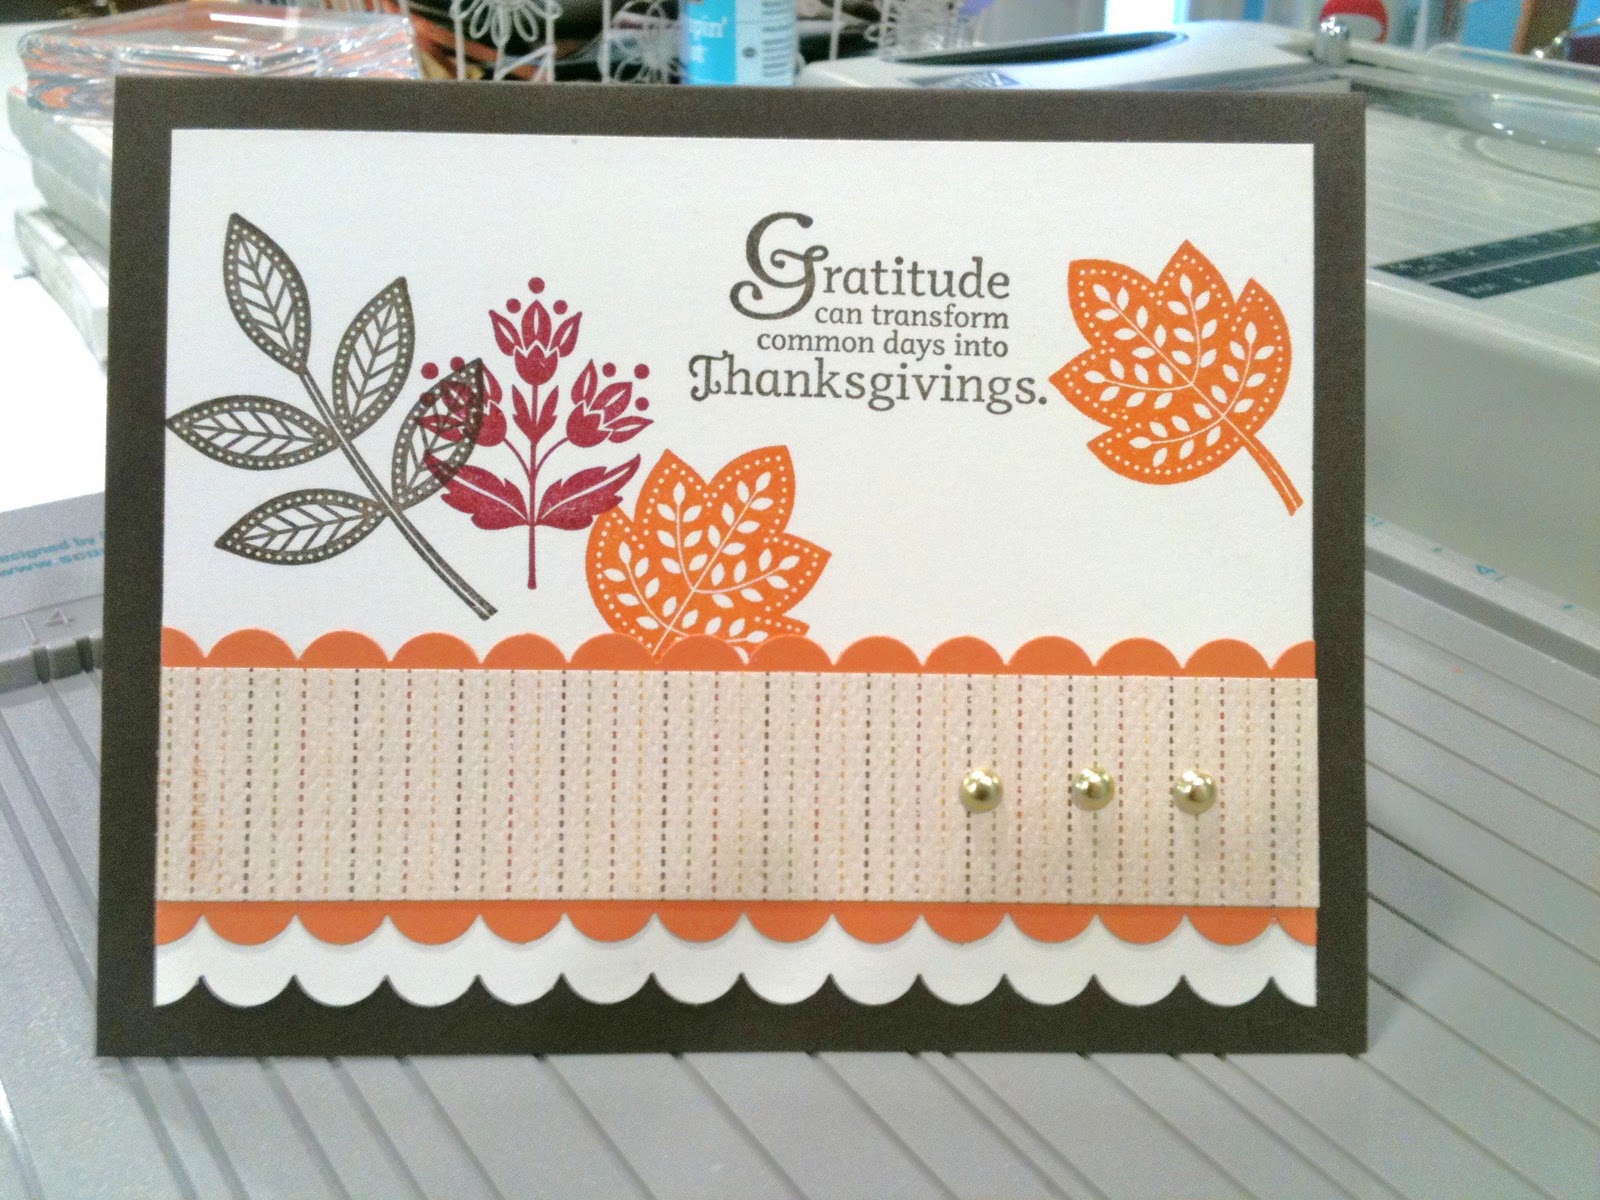
Stamps: Day of Gratitude
Cardstock: Very Vanilla, Peach Parfait, Early Espresso
DSP: Autumn Spice
Ink: Peach Parfait, Early Espresso, Cherry Cobbler
Accesories: Scallop Edge Border Punch, Gold Brads, Needle Tool, Mat Pack
The card base is Early Espresso cardstock cut at 5 1/2" x 8 1/2" and scored at 4 1/4". The next layer is a piece of Very Vanilla cardstock that was cut at 5" x 4". The bottom edge was punched with the Scallop Edge Border punch. The leaves from Day of Gratitdue were stamped in Early Espresso, Peach Parfait, and Cherry Cobbler inks. The sentiment was stamped in Early Espresso ink. This panel was then adhered to the card front.
A piece of Peach Parfait cardstock was cut at 1 7/8" x 5". Both long sides were punched with the Scallop Edge Border punch. A piece of Autumn Spice DSP cut at 1" x 5" was adhered to the center of the punch Peach Parfait strip. The Needle Tool and Mat Pack were used to punch three holes on the left side of the cardstock strip and three Gold Brads were added. The cardstock strip was then adhered to the card front. That completes this quick and easy fall card. Thanks for the great sketch Susie! For those of you with access to Stampin' Connection you can find the challenge here. For those of you without access I would love to see your creations. Please add the link to your card in the comments section of this post.
Come back tommorrow to see the sketch that I created and the card that this sketch inspired!