
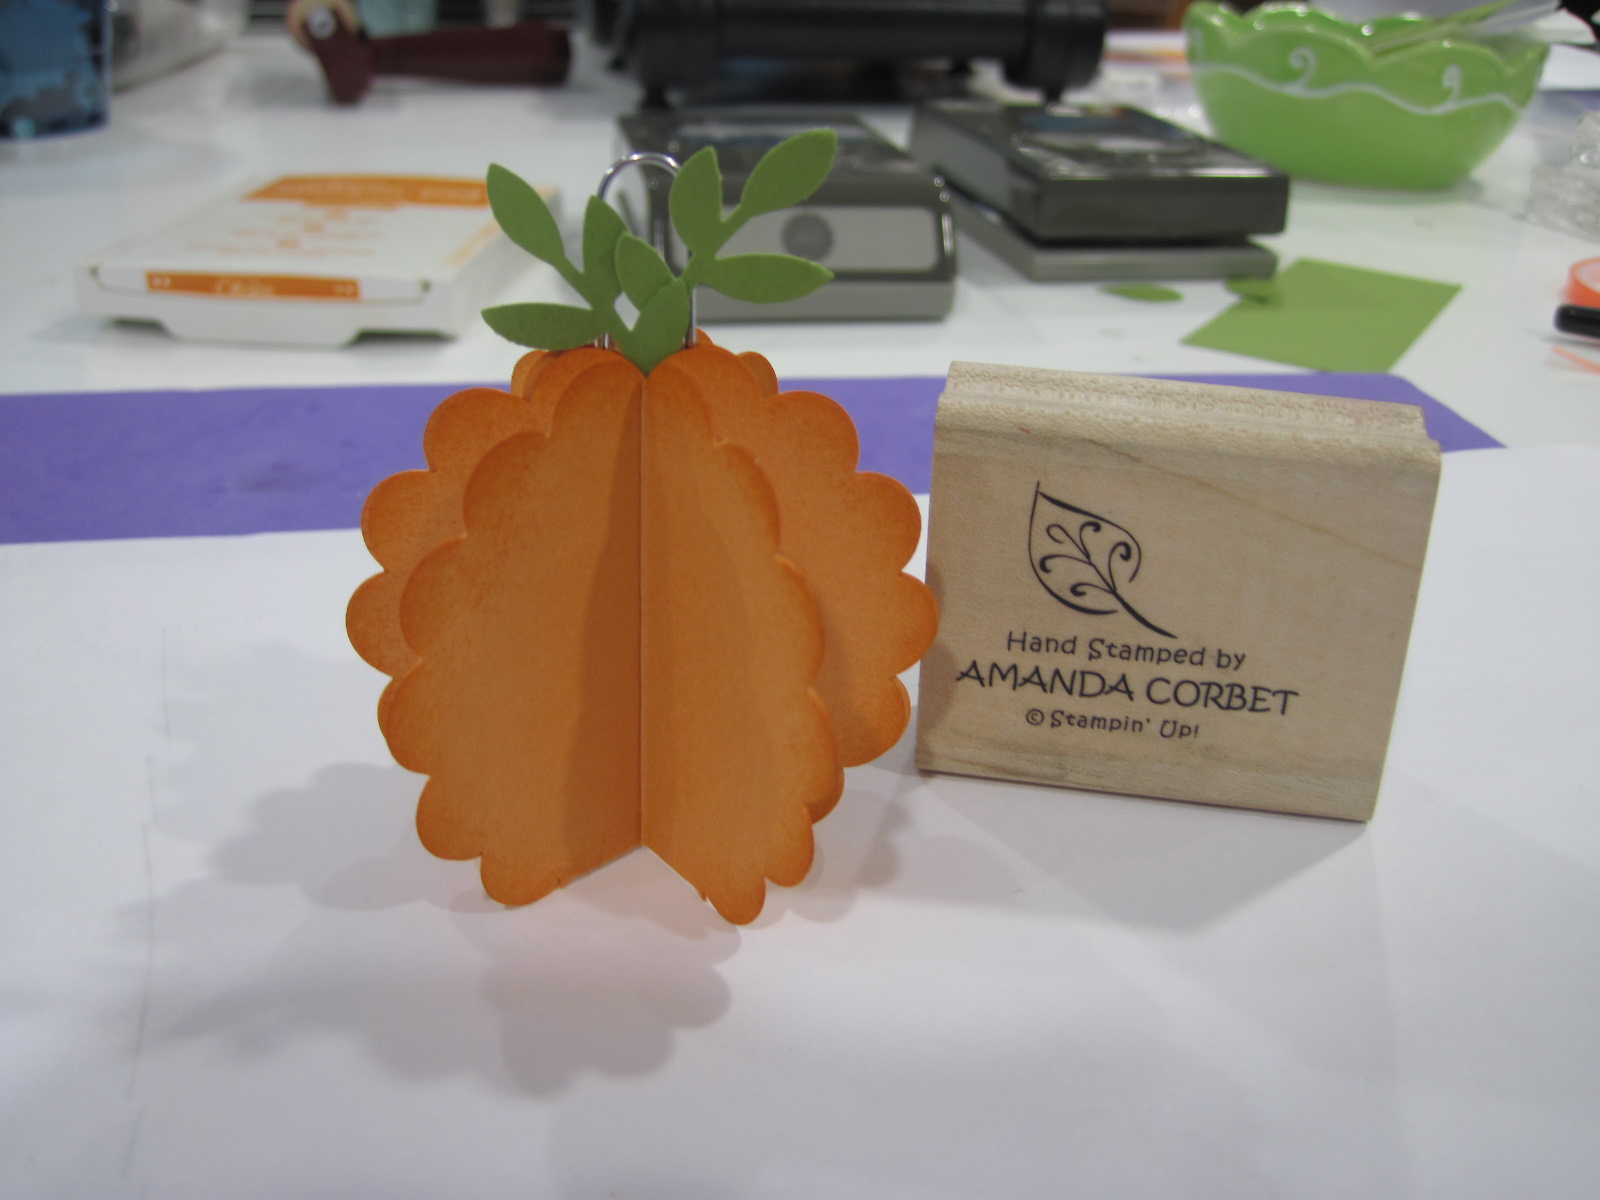
Today's tutorial is on how to make a cute little Pumpkin Placecard/Photo Holder.

For this project you will need: Peach Parfait cardstock, Old Olive cardstock scraps, 2 3/4" Scalloped Circle Punch, Two-Step Bird Punch, Craft and Rubber scissors, Paper Snips, Sticky Strips, Pumpkin Pie ink, Stampin Sponge, paper clip, and a penny.

Punch six 2 3/4" scalloped circles with teh 2 3/4" Scalloped Circle punch and score the scalloped circle in the middle. Make sure that your score is in-between the scallops that way your scallops on the bottom will act as "feet".

Sponge the edges of the scalloped circles on one side with Pumpkin Pie ink and a Stampin' Sponge.

Fold your scalloped circles in half on your score line. Make sure that the sponged side is on the inside of the fold.

Add and adhesive of your choice to the side of the first scallop. Here I am using a Stampin' Up Glue Stick (the wrapper kept sliding off when I pulled the cap off so I just got rid of it).

Place one half of a second scalloped circle onto the adhesive of the first scalloped circle. Make sure to line up your scallops before pressing down and adhering it completely. Repeat this step to adhere three scalloped circles together to make half of the pumpkin. Repeat with the remaining scalloped circles to make the other pumpkin half. See photo below:


Fold up your pumpkin half and use paper snips to trim off the bottom scallop on both halves. This will create a larger base for the pumpkin and prevent it from falling over if you are using it to hold a picture.

Use the Two-Step Bird Punch to punch out two branches from Old Olive cardstock scraps.

Add three strips of sticky strip on the bottom, middle, and top of the inside of both pumpkin halves.

Remove the sticky strip liner from one pumpkin half and adhere a paper clip so that the bottom of the paper clip is in the middle of the pumpkin. Adhere a penny on the bottom. The penny adds weight to the bottom of the pumpkin to prevent it from tipping over when holding a photo.

Place your branch on the first half. Remove the sticky strip liner from the other half and place your branch. Adhere the two halves together and be careful to line up the scallops before pressing the halves together. The sticky strip is super sticky and super strong. Once it is stuck, it is there forever!
Now you're finished and you can add your place card or photo! Wouldn't this be cute to have as place card holders for Thanksgiving if you have a large group? I will use mine to hold a photo on my desk at work. I hope you've enjoyed this tutorial. Please let me know in the comments section if there are any specific tutorials you would like me to feature and I will make sure it gets done! Thanks for stopping by!