
As promised here is the tutorial for the card that I made my Hubby for his birthday. You can find the original post HERE.

1. You will need:
Stamps: Plant Hope, Teeny Tiny Wishes
Cardstock: Island Indigo, Pool Party, Basic Grey, Whisper White
Ink: Pool Party, Tempting Turquoise, Island Indigo, Night of Navy, Basic Black.
Markers: Basic Black, Pool Party, Not Quite Navy
Accessories: White Gel Pen, 1 3/4" Circle Punch, Post-It Notes, Brayer, Stampin' Sponge

2. Cut one piece of Island Indigo cardstock 5 1/2" x 8 1/2". Score and fold at 4 1/4". Cut one piece of Pool Party cardstock 4" x 5 1/4". Cut one piece of Basic Grey cardstock 3 3/4" x 5". Cut one piece of Whisper White cardstock 3 5/8" x 4 7/8". Set aside all but the Whisper White cardstock.

3. When using your brayer make sure to run it over the ink pad length-wise so that you get the most ink pad in contact with the brayer at once. You will have to roll the brayer across the ink pad 4 - 5 times each time you ink up the brayer. For instructions on how to use a brayer click HERE for a video tutorial.

4. Brayer the top of the cardstock with Pool Party ink. Make sure to start off the edge of the cardstock and slowly work your way down the cardstock. You will have to re-ink the roller and roll again several times to get the color as far down the cardstock as you want.

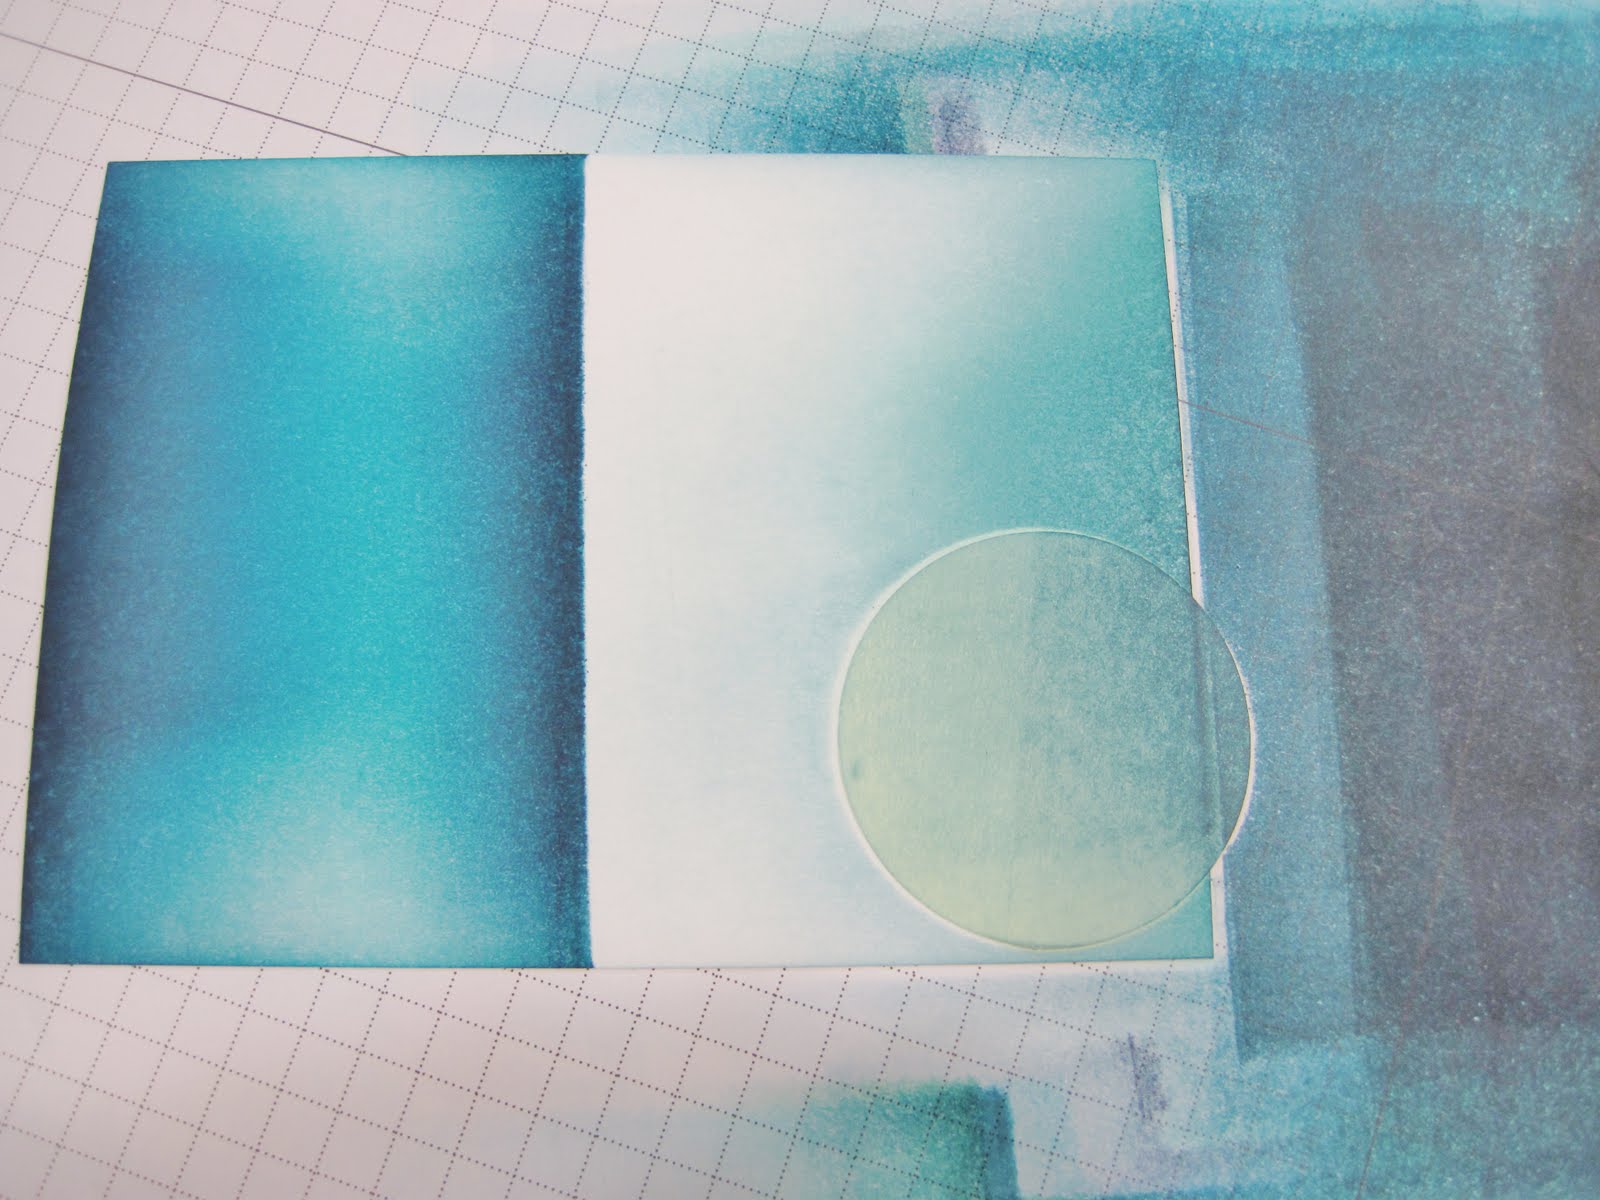
5. Place a Post-It Note onto a piece of copy paper. Hold another piece of copy paper underneath, and punch out a circle from the Post-It note with the 1 3/4" Circle Punch. Make sure that part of your circle is in the sticky section of the post it note. If you do not use the copy paper to punch the Post-It note you will not get a clean edge!

6. Place the Post-It circle onto your card where you want your moon to be.

7. Place a Post-It note across the cardstock covering about half of the length. This will be your horizon line.

8. Brayer Pool Party ink from the horizon line down towards the bottom of the cardstock.

8. Turn the cardstock around and brayer Pool Party ink from the bottom of the cardstock up to the horizon line.

9. Brayer the top and bottom of this section again using Tempting Turquoise ink.

9. Brayer the top and bottom of this section using Island Indigo ink, don't cover all of the tempting turquoise.

10. Brayer the top and bottom of this section with Night of Navy ink. Don't cover all of the Island Indigo ink. This layering of color will create the gradient affect in the color of the water.

11. Remove the Post-It Note covering the top half of your cardstock. Make sure to leave the circle Post-It in place. Take time to ooohhh and ahhh over your beautiful water!

12. Brayer Island Indigo ink across the top of the cardstock. Don't cover all of the Pool Party ink. Then brayer just a little bit of Night of Navy ink across the top of the cardstock.
13. Remove the circle Post-It note mask. Ooooh and ahhh again. It's always like magic when you remove the mask and see what the scene looks like!

14. Get another Post-It Note and tear just a little bit off the edge on the sticky side. You want to have as much sticky part right next to your torn edge as possible. This prevents your mask from moving while your sponging.

15. Place the mask where you want your right hill.

16. Sponge Pool Party ink from the Post-It Note down to the water. I like to start on the Post-It Note and use a swirling motion to apply the ink. This gives a more gradient affect where you sponge. Sponge just a little bit of Island Indigo ink right at the post it note edge.

17. Remove the Post-It Note. Oooh and ahhh again...Notice that I didn't sponge all the way along the Post-It to the water line... I knew I wanted to put another hill there. To prevent seeing the hard line of the sponging across the top of the smaller hill I just didn't sponge much there. It really helps to picture in your mind what you want your project to look like when it's completed.

18. Using the same Post-It Note with the torn edge place it where you want your left hill to go.

19. Sponge more Pool Party and then Island Indigo ink along this hill edge, but sponge a little bit heavier so this hill is darker than the first one. Remove the Post-It note. Oooooo....pretty......

20. Using the same Post-It Note again flip it over so that the sticky side is up and line it up with the hill that you just created so you have a mirrored image. You will have to hold the Post-It down with your hand here while you sponge. Sponge Island Indigo and Night of Navy ink along the edge. It's okay to make it look really dark.

21. Ink up the tree stamp from Plant Hope. Be careful to just ink up the trees and trunks, NOT the ground. You can do this by carefully using a Classic Ink Pad or by using a Stampin' Spot.

22. Stamp the trees onto your hill. If you use wood mount stamps you may want to use your Stamp-A-Ma-Jig so that you can make sure your trees are close to being straight and where you want them.

23. To create the reflection ink up the stamp like above really well. Stamp the image onto the smooth side of your Stamp-A-Ma-Jig plastic. Quickly take the plastic, flip it over, and rub on the textured side to transfer the image to the cardstock. You have to move quick at this step or your ink will get too dry.

24. Remove the plastic and look at your beautiful reflection! Don't worry if the trees didn't transfer perfectly. Since when is a reflection in water absolutely perfectly matching the tree anyway????.

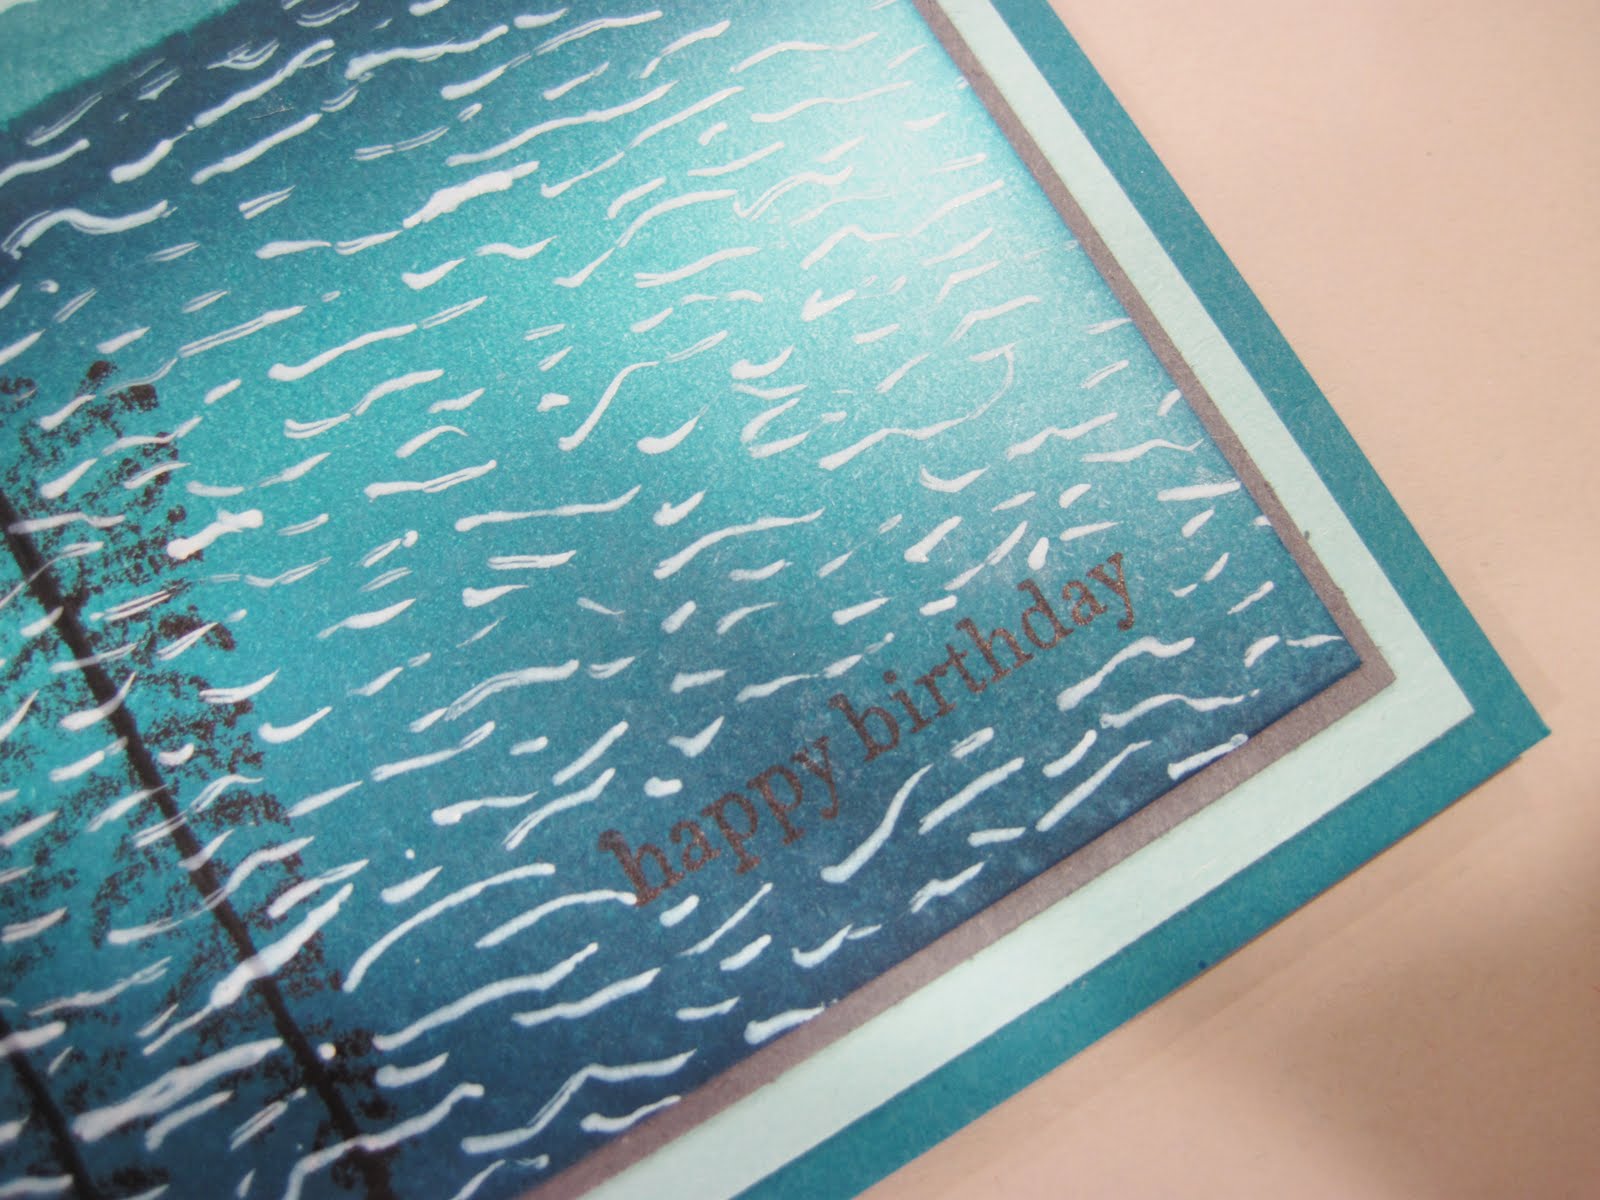
25. Ink up your greeting stamp and stamp it in the lower right hand corner of your cardstock.

26. Using the Pool Party marker draw shadow lines at the base of the trees. Use the Not Quite Navy marker to add shadows to the reflection of the hill. Color in the tree trunks with the Basic Black marker, make sure to do the reflection too.

27. Using the White Gel Pen lightly draw little squiggles to look like the sparkling water. These do not have to be perfectly spaced or perfectly shaped. Just little squiggles all over the water.

28. Make sure you dont put the squiggles around your greeting, you want to be able to read it clearly and easily. Stop and oooohhhh and ahhhh again at the beautiful scene you've created. Now do a little happy dance that the hard part is done and it looks fantastic!

29. Adhere your beautiful panel to the Basic Grey cardstock, then to the Pool Party cardstock, and finally to the Island Indigo card base. You are finally done! You've created a masterpiece! Do another happy dance and admire your work!

30. Now if you can bear to part with it give it to someone who will REALLY apreciate the work you've put into it!
If you use this tutorial to create your own masterpiece pretty, pretty, please post a link to your creation in the comments section of this post. I would LOVE LOVE LOVE to see what you do with it!
