
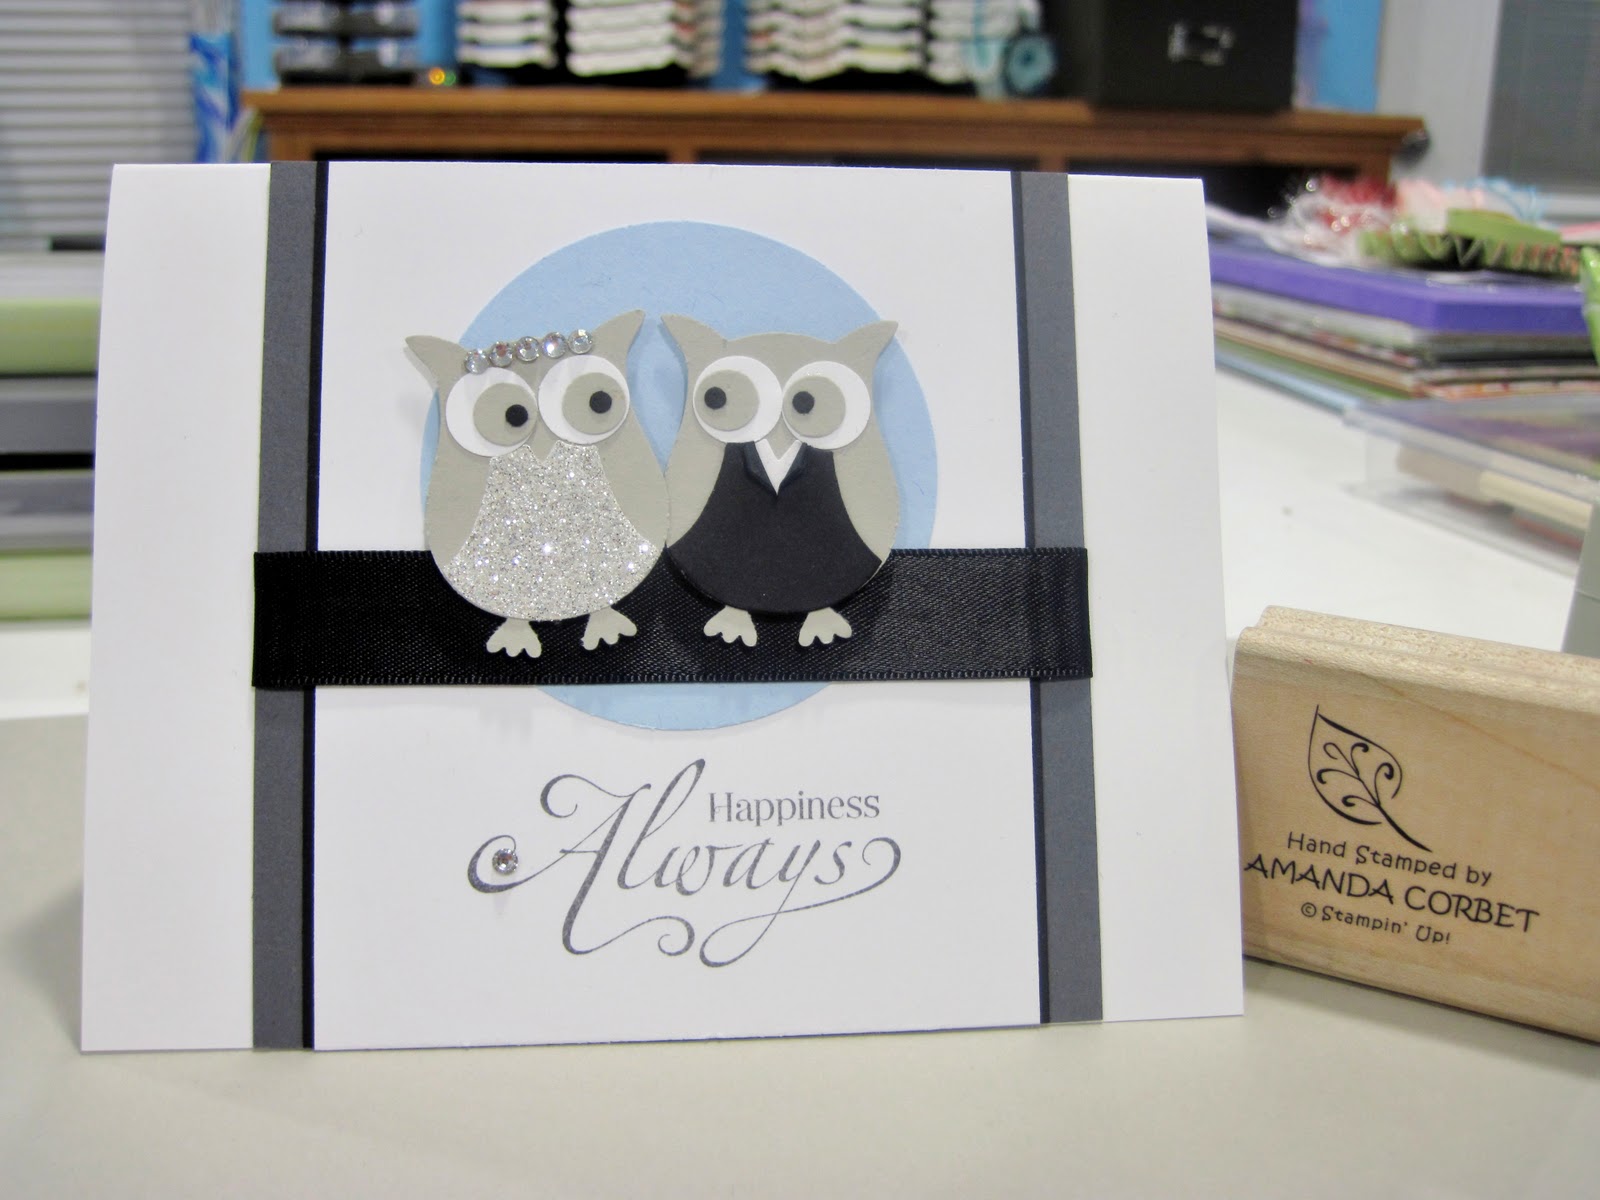
This is the fifth and final card from the Owl Card Class! This one features a very bedazzled bride and handsome groom. This card would be fantastic for a wedding or an anniversary.

Stamps: Happy Greetings (retired)
Cardstock: Whisper White, Basic Grey, Basic Black, Bashful Blue
DSP: Silver Glimmer Paper
Ink: Basic Grey
Accessories: Owl Punch, 2 ½” Circle Punch, 5/8” Basic Black Satin Ribbon, Basic Rhinestones Jewel Accents, Stampin’ Dimensionals

The owl pieces were adhered together with Two-Way Glue pen. Five rhinestones from the strip of rhinestones in the package were adhered to the bride’s head to create a tiara. The owls were adhered to the card front with Stampin’ Dimensionals. Also, just for a little more sparkle a rhinestone was added to the curly cue on the A in the greeting.
Simple, fast, and so much fun! I really love how it turned out. It was a favorite at the class too!
Come back later to see the 3D project that we created during the Owl Class! I'll give you a hint....we used the owl punch to make a rose.
Thanks for stopping by!

Stamps: Happy Greetings (retired)
Cardstock: Whisper White, Basic Grey, Basic Black, Bashful Blue
DSP: Silver Glimmer Paper
Ink: Basic Grey
Accessories: Owl Punch, 2 ½” Circle Punch, 5/8” Basic Black Satin Ribbon, Basic Rhinestones Jewel Accents, Stampin’ Dimensionals
The card base is Whisper White cardstock cut at 5 ½” x 8 ½”, and scored at 4 ¼”. Next a piece of Whisper White cardstock was cut at 3 3/8” x 4 1/8”. The greeting from Happy greetings was stamped in Basic Grey ink at the bottom of the cardstock. The 2 ½” Circle punch was used on a scrap of Bashful Blue cardstock. This Bashful Blue circle was adhered to the top section of the stamped Whisper White cardstock. This cardstock was adhered to a 2 ½” x 4 ¼” piece of Basic Black cardstock. This panel was then adhered to a 4” x 4 ¼” piece of Basic Grey cardstock. 5/8” Basic Black Satin Ribbon was wrapped around the panel and glued onto the back with Snail adhesive. This panel was adhered to the card front.

The owls were punched from Sahara Sand cardstock, Whisper White cardstock, Basic Black cardstock, and Silver Glimmer Paper. To create the tuxedo for the groom punch one belly from Whisper White and one belly from Basic Black. Take the black belly and use paper snips to cut the center of the V in the neck down about ¼”. Fold the flaps back to create a larger V. Adhere the Basic Black belly on top of the Whisper White belly. Voila! You have a tuxedo, or something that at least looks close to it.
Simple, fast, and so much fun! I really love how it turned out. It was a favorite at the class too!
Come back later to see the 3D project that we created during the Owl Class! I'll give you a hint....we used the owl punch to make a rose.
Thanks for stopping by!
