
This weeks tutorial is on making the flower that I used on my Summer Fun scrapbook page a few days ago. This flower is pretty easy to make and very pretty.
The supplies you will need are: Fancy Flower Punch, Whisper White cardstock, Pear Pizzaz Cardstock, Daffodil Delight cardstock, Daffodil Delight ink, Peach Parfait ink, Stampin' Sponges, large brad, Basic Pearls Jewel Accents, Perfect Polka Dots Textured Impressions die, Big Shot, Needle tool.

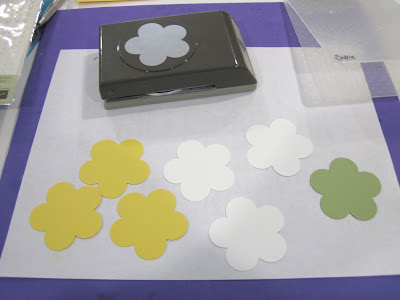
Place three of the flowers inside the Perfect Polka Dots Textured Impressions die and run it through the big shot. This will give some of the petals a very nice texture.


The supplies you will need are: Fancy Flower Punch, Whisper White cardstock, Pear Pizzaz Cardstock, Daffodil Delight cardstock, Daffodil Delight ink, Peach Parfait ink, Stampin' Sponges, large brad, Basic Pearls Jewel Accents, Perfect Polka Dots Textured Impressions die, Big Shot, Needle tool.

Punch one flower from Pear Pizzaz Cardstock, three flowers from Whisper White cardstock, and three flowers from Daffodil Delight cardstock.

Place three of the flowers inside the Perfect Polka Dots Textured Impressions die and run it through the big shot. This will give some of the petals a very nice texture.

Now you are ready to add some color to your flowers.

Sponge the top of the texture and the edges of the flowers with Daffodil Delight ink. You will also want to sponge around the edges on the back side. These will be visible when you shape your flower.


I did not sponge on the green flower. You can also see that I sponged the textured Daffodil Delight flower with Peach Parfait just to make one of them stand out a little more.

Now use your bone folder to distress the paper. You really want to soften it up by using your bone folder to "curl" the flower. You will want to rotate the flower to make sure you get the entire thing. Then flip the flower over and repeat on the other side. This will be done on all of your punched flowers to make them softer.

You want to keep distressing the Daffodil Delight and Pear Pizzaz cardstock until you can see the layers of the cardstock splitting.

Once the cardstock starts splitting on the edge you can carefully tear the two layers apart. See the lovely soft texture you get by doing this?

Now you have all of your flowers ready to go.

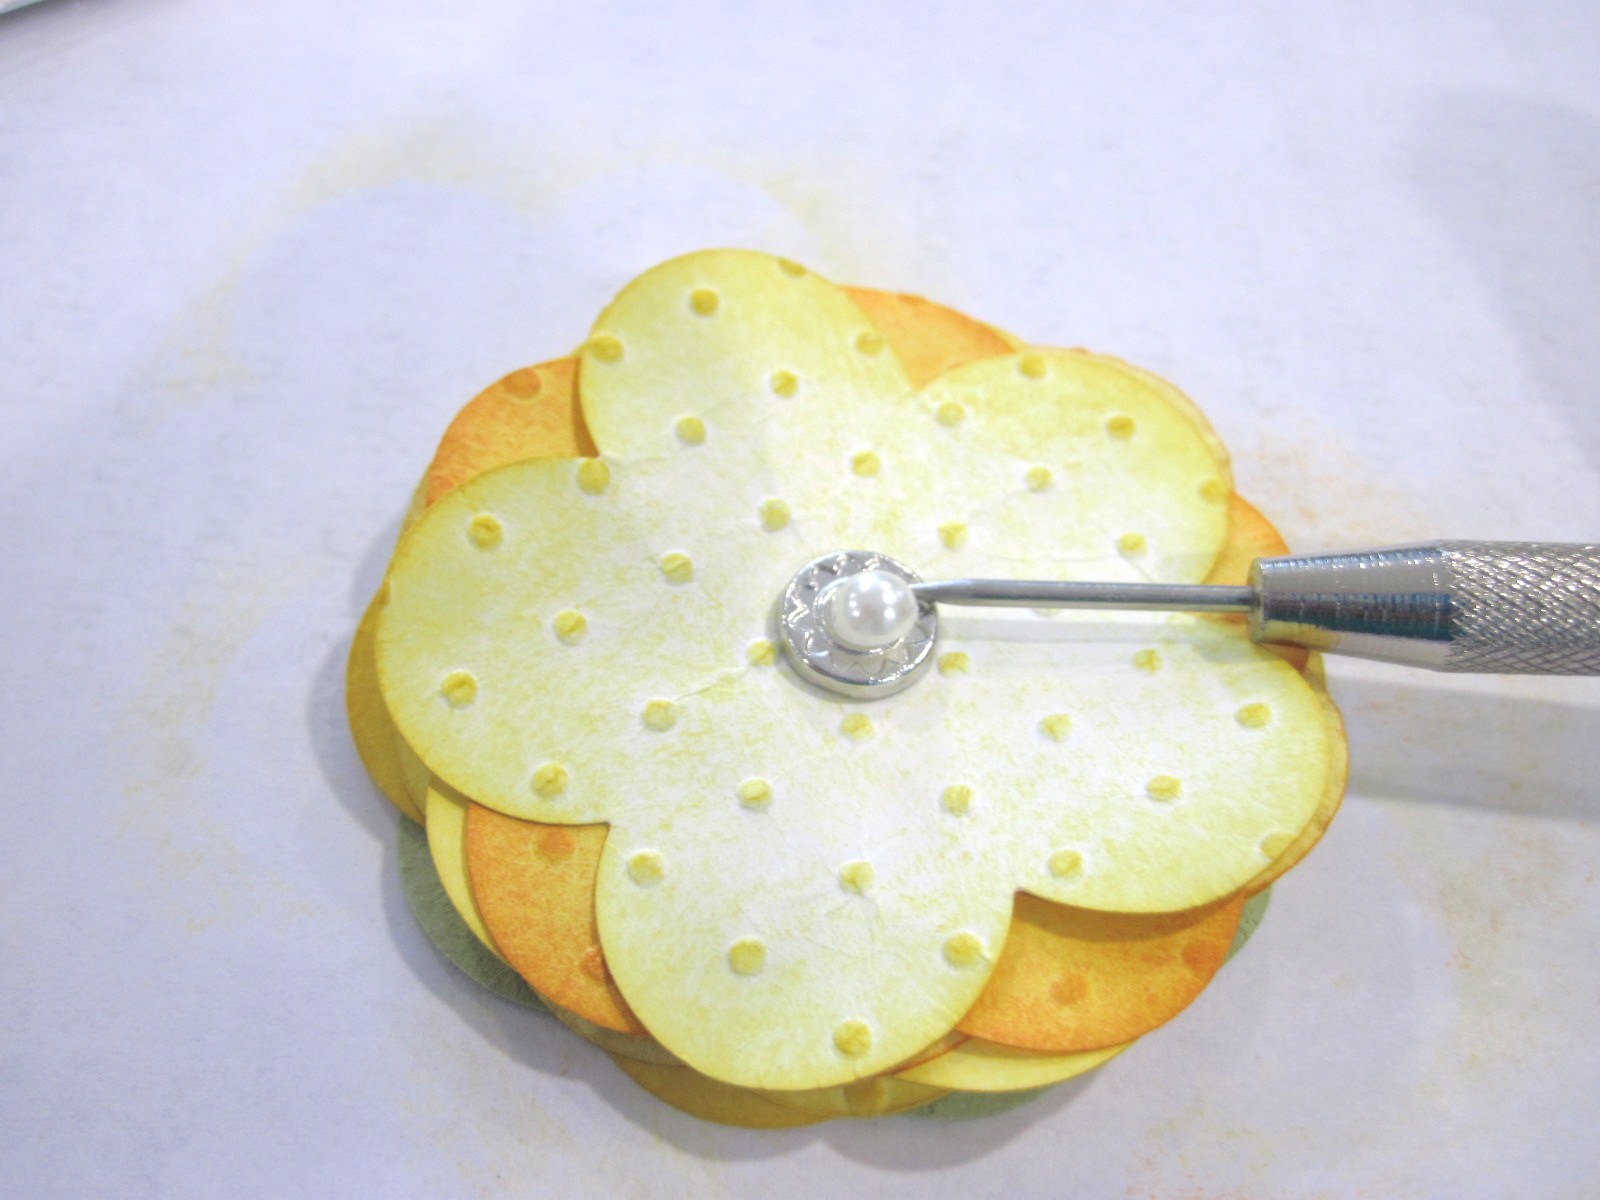
Stack them up however you choose. I put some of the flowers with the "inside" of the cardstock facing up and some of them with the "inside" of the cardstock facing down. It really gives a nice variety to the layers of cardstock.

Use your needle tool to punch a hole through all of the layers. You may have to use a drilling motion to get all the way through.

Insert a large brad into the hole that you created with the needle tool. Flatten out the back of the brad. This is what will hold your flower together.

Use your needle tool to position a Basic Pearl Jewel Accent into the center of the brad.
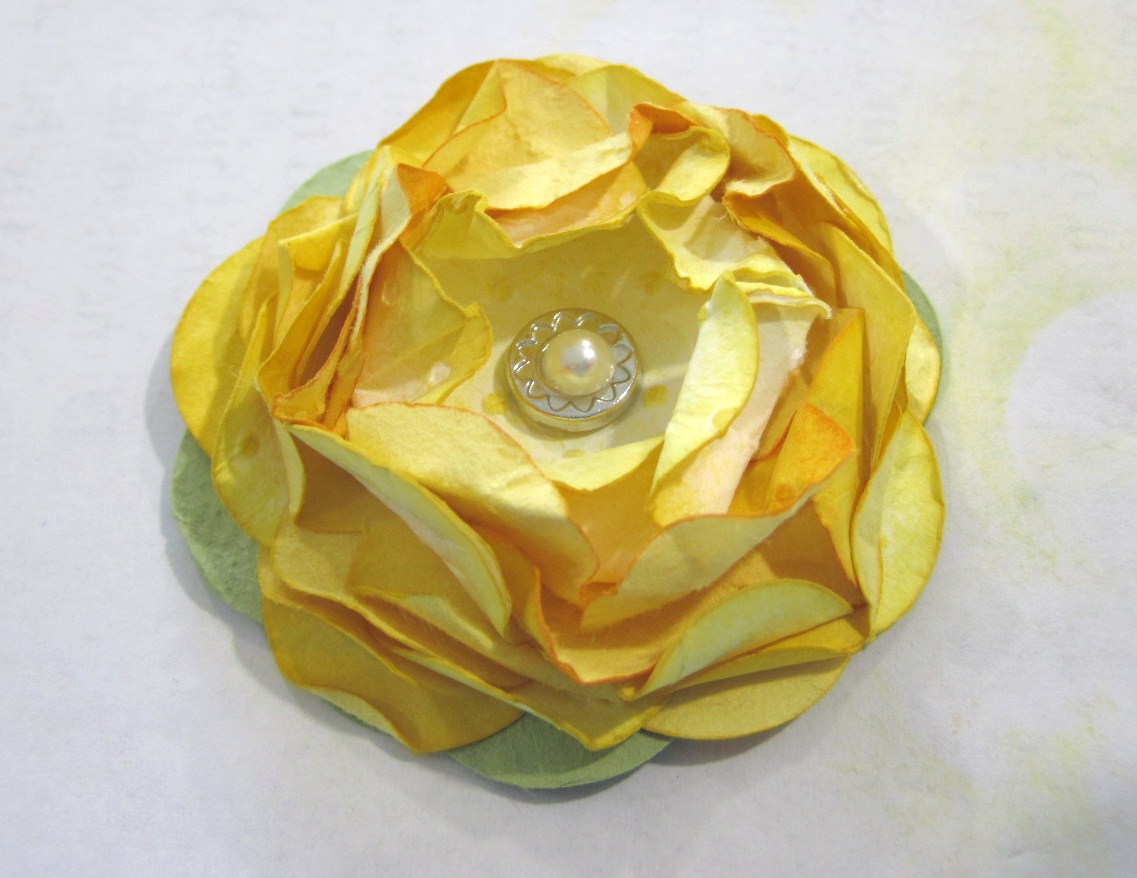
Use your fingers to curl, scrunch, and shape the flower until you are happy with it.

Now your 3D fancy flower is ready to be used on a project.
I hope you enjoyed today's tutorial. I would love to see the flowers you make. Please post a link to your blog or photo in the comments section.
Come back tomorrow to see what I do with this lovely flower. Have fun stamping!