Since I did two groups of projects for the 12 Days of Christmas Swap I wanted to give two different pictures for the 12th gift. Yesterday I posted the first one which you can find HERE. Here is the second picture from day 12 of the 12 Days of Christmas swap. This one is a cold winter lake.

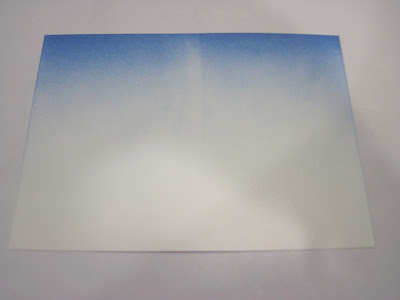
1. Cut a piece of Whisper White card stock 5" x 7". Brayer to top of the card stock with Bashful Blue ink.


Thanks for stopping by!


Stamps: Lovely as a Tree
Cardstock: Whisper White
Ink: Bashful Blue, Pacific Point, Not Quite Navy, Night of Navy, Basic Black, Black Stazon
Markers: Always Artichoke, Basic Black
Accessories: 5/8" Bashful Blue Satin Ribbon, Northern Flurries Die, Glimmer Brad, Mini Glue Dots, Tombow Multi-Purpose Adhesive, Dazzling Diamonds glitter, Post-It Notes, Brayer, Paper Snips, Paper Piercer, Mat Pack, White Gel Pen, Stampin' Sponge
1. Cut a piece of Whisper White card stock 5" x 7". Brayer to top of the card stock with Bashful Blue ink.

2. Place two post it notes where you want your horizon line to be.

3. Brayer across the top of the card stock with Pacific Point ink not covering the Bashful Blue ink entirely.

4. Brayer across the top of the card stock with Not Quite Navy ink not covering the Pacific Point ink entirely.

5. Brayer across the top of the card stock with Night of Navy ink not covering the Pacfic Point ink entirely.

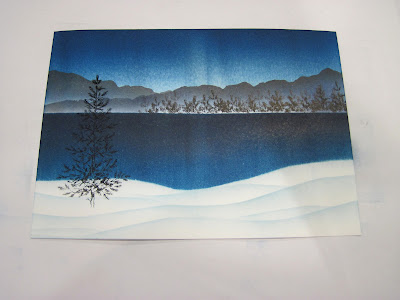
6. Tear the sticky portion of two more Post-It notes and position them where you want your first row of mountains to be.

7. Sponge Night of Navy ink in the entire exposed area. Sponge Basic Black ink right at the torn Post-It note edge.

8. Remove the moutain mask.

9. Re-position one of the Post-It notes to create a seond mountain. Sponge the entire area with Night of Navy ink and then sponge along the Post-It note edge with Basic Black ink.

10. Remove the Post-It note mask.

11. Remove the Post-It notes from the bottom and re-position them to cover the top portion of the card stock. Cut the sticky part of two Post-It notes with Paper Snips in a curvy line. Place these over the bottom of the card stock. This will be the snowy bank of the lake.

12. Brayer the entire area with Pacific Point ink.

13. Brayer the top portion of the water with Not Quite Navy ink not covering the Pacific Point ink entirely.

14. Brayer the top portion of the water with Night of Navy ink not covering the Not Quite Navy ink entirely.

15. Remove all of the Post-It note masks.

16. Place two more Post-It notes along the horizon line covering the bottom portion of the card stock.

17. Ink up the top of the pine tree from Lovely as a tree with Basic Black ink. Stamp just the top portion of the tree several times across the edge of the Post-It note. Remove the mask. This creates a forest on the far side of the lake.

18. Take one of the curvy Post-It notes and position it in the remaining white portion of the card stock.

19. Sponge Bashful Blue ink just at the Post-It note edge to create a snow mound.

20. Remove the mask, re-position it, and sponge another snow mound. Repeat until you have the desired look.

21. Stamp the pine tree from Lovely as a Tree in Black Stazon ink onto the card stock.

22. Color in the trunk of the tree with Basic Black Marker. Color in the pine needles with Always Artichoke, add snow onto the pine branches with the White Gel Pen. Add lines to the water with the White Gel Pen. Apply Tombow Multi-Purpose Adhesive onto the snow mounds and the snow on the tree and cover with Dazzling Diamonds glitter. Allow the adhesive to dry completely. Insert the card stock into the picture frame.
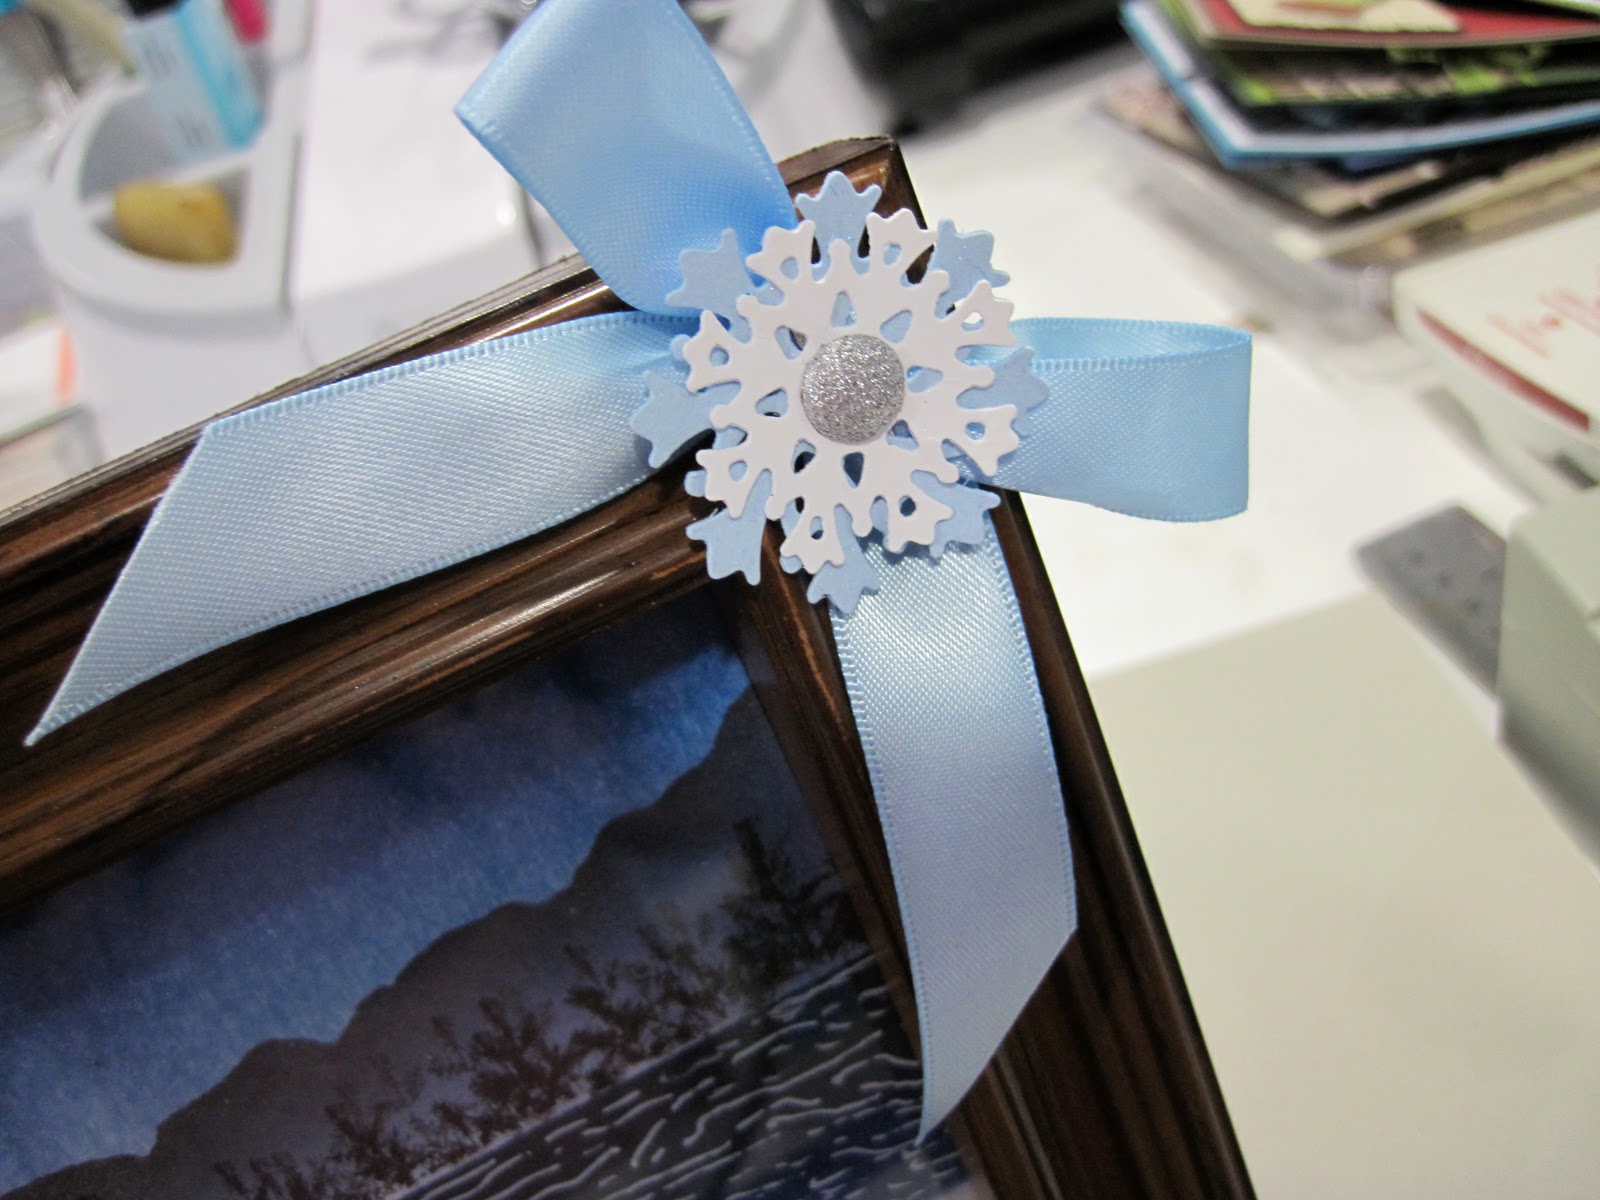
Tie a bow with 5/8" Bashful Blue Satin ribbon. Adhere to the frame with Mini Glue Dots. Cut one snowflake from Bashful Blue card stock and one from Whisper White card stock using the Northern Flurries Die in the Big Shot. Spray the snowflakes with shimmer mist. Use the Paper Piercer and Mat Pack to pierce a hole in the center of the snowflakes. Insert a silver Glimmer Brad into the hole. Adhere the snowflakes onto the bow with Mini Glue Dots.