
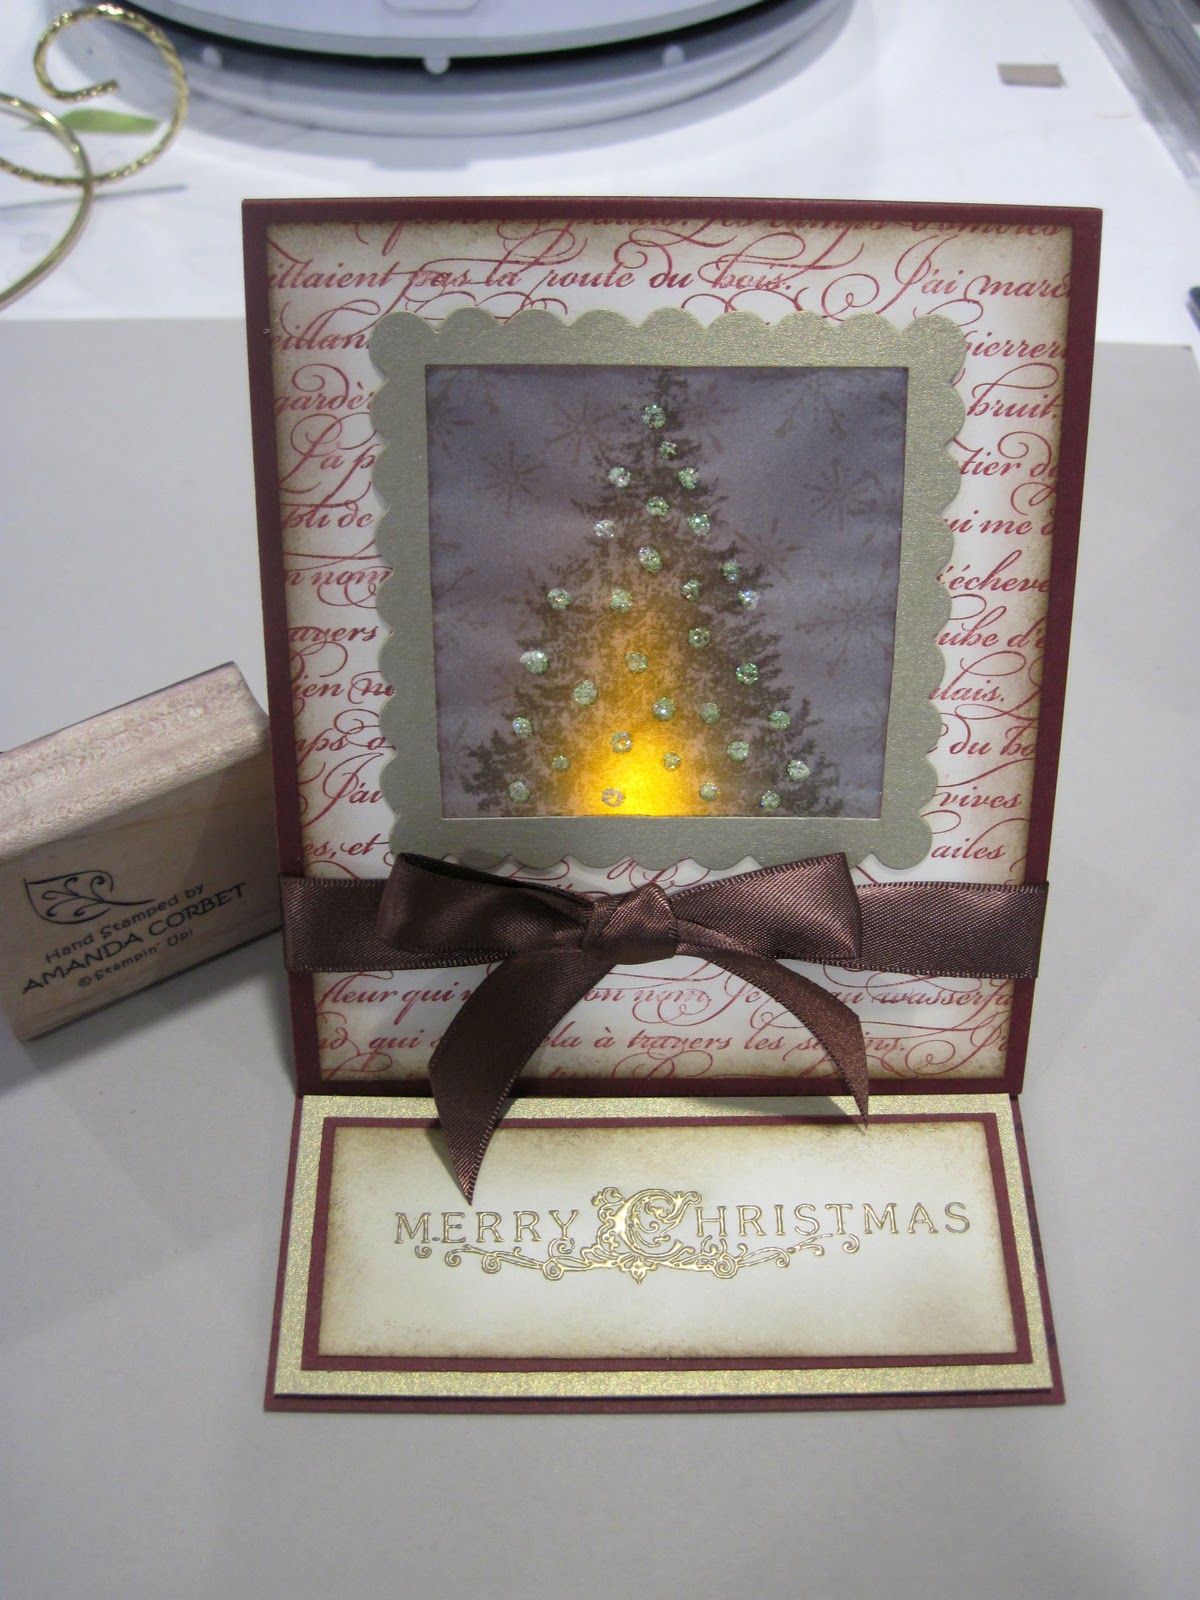
This project was gift 9 for the 12 Days of Christmas Swap! This easel card turns into a beautiful luminary when you set it up and place an electric tea light candle inside.
Stamps: Christmas Lodge, Serene Snowflakes, En Francais
Card Stock: Bravo Burgundy, Very Vanilla, Brushed Gold, Vellum Paper
Ink: Bravo Burgundy, Crumb Cake, Soft Suede, Versamark, Always Artichoke
Accessories: 5/8" Chocoalte Chip Satin Ribbon, Gold embossing powder, Stampin' Sponge, Dazzling Details, Sticky Strip, Paper Snips, Paper Cutter (item # 104152), Scallop Square Duo die, Tombow Multi-Purpose Adhesive, Stampin' Dimensionals, Mini Glue Dots
1. Cut one piece of Bravo Burgundy card stock 4-1/4" x 5-1/2". Score parallel to the 4-1/4" side at 1/2".

2.Cut one piece of Bravo Burgundy card stock 4-1/4" x 8-1/2". Score parallel to the 4-1/4" side at 4-1/4". Adhere the 1/2" wide section of the card front onto the other piece of Bravo Burgundy card stock with Sticky Strip.

3. Now your Bravo Burgundy card stock should look like this. The 4-1/4" x 5" section will be the card front.

4. Cut a piece of Brushed Gold card stock 3-1/2" x 3-1/2". Run this through the Big Shot on the Scallop Square Duo die to cut out the larger of the two squares. Cut a piece of scrap paper at 2-3/8" x 2-3/8" to use as a template. Place the template on top of the gold scalloped square and draw around it with a pencil. This will be where you cut.

5. Use the Paper Cutter (item #104152) to cut on the lines. Or you could use a craft knife and a ruler to cut out the square.

6. Cut a piece of Vellum Paper 2-3/4" x 2-3/4". I used Vellum Paper because that is what I had. This works, but I think Vellum Card Stock would work better and would prevent the wrinkles you see later. Stamp the tree image from Christmas Lodge onto the vellum in Always Artichoke ink. Stamp the small snowflakes from Serene Snowflakes onto the background in Crumb Cake ink.

7. Apply a thin line of Tombow Multi-Purpose Adhesvie around the inside edge of the frame.

8. Adhere the Vellum onto the frame and set it aside to dry. I also flipped the panel over and added dots of Dazzling Details onto the tree to look like sparkly little ornaments (not shown in this photo).

9. Cut a piece of Very Vanilla card stock 4" x 4-3/4". Use the same template you used before to draw the square onto your Very Vanilla card stock. Cut out the square as you did in step 7.

10. Stamp the front of the Very Vanilla card stock with En Francais in Bravo Burgundy ink.

11. Sponge around all of the edges with Crumb Cake ink.

12. Sponge around the outside edges with Soft Suede ink.

13. Adhere the Very Vanilla card stock onto the card front. Use a craft knife and a ruler to cut out the window in the Bravo Burgundy card stock.

14. Apply a thin line of glue onto the backside of the scalloped frame.

15. Adhere the frame onto the card front over the window you cut out. I also cut a piece of Very Vanilla card stock at 4" x 4" and adhered it onto the bottom of the card flap so you can clearly see the stamped tree when the card is closed. A piece of 5/8" Chocoalte Chip Satin Ribbon was wrapped around the card front and tied into a bow.

16. Here you can see a better view of the sparkly "ornaments" on the tree.

17. For the "ledge" that hold the card front in place I stamped the greeting from Christmas Lodge in Versamark onto a 1-3/8" x 3-3/4" piece of Very Vanilla card stock. Gold embossing powder was poured over the stamped image, the excess tapped off, and heated with the heat tool. The edges of the panel were sponged with Crumb Cake and Soft Suede ink. This was adhered to a 1-1/2" x 3-7/8" piece of Bravo Burgundy card stock. This panel was adhered to a 1-3/4" x 4-1/8" piece of Brushed Gold card stock. Then the panel was adhered to the bottom of the card with Stampin' Dimensionals.

18. I even used some Sticky Strip with some 5/8" Chocoalte Chip ribbon to wrap around the candle and create a bow. The 5/8" brad had the prongs cut off and was adhered to the bow with several Mini Glue Dots.

Here is the finished easel card in all it's glory!


I truly hope that those who recieved it enjoy it. Coming up with it and putting it together was really a labor of love and resulted in several pieces of scrap card stock trying to get the size just right.
Thanks for stopping by!
