
I had so much fun creating the first card for this sketch that I decided to make a second one. I noticed lately that almost every card I make I seem to reach for some form of blue. Well…blue is my favorite color. But I have decided to make an effort to reach out of my comfort zone some more and not use a bit of blue on this next card. You can find the sketch that inspired this card in THIS post.

Stamps: Baroque Motifs
Cardstock: Early Espresso, Whisper White, Blushing Bride, Pear Pizzaz
Ink: Blushing Bride, Pear Pizzaz, Early Espresso
Accessories: Beautiful Wings Sizzlit, Silver Brads, Acetate, Pear Pizzaz Seam Binding ribbon, Basic Pearls Jewel Accents, 2 ½” Circle punch, Modern Label punch, Glue Dots
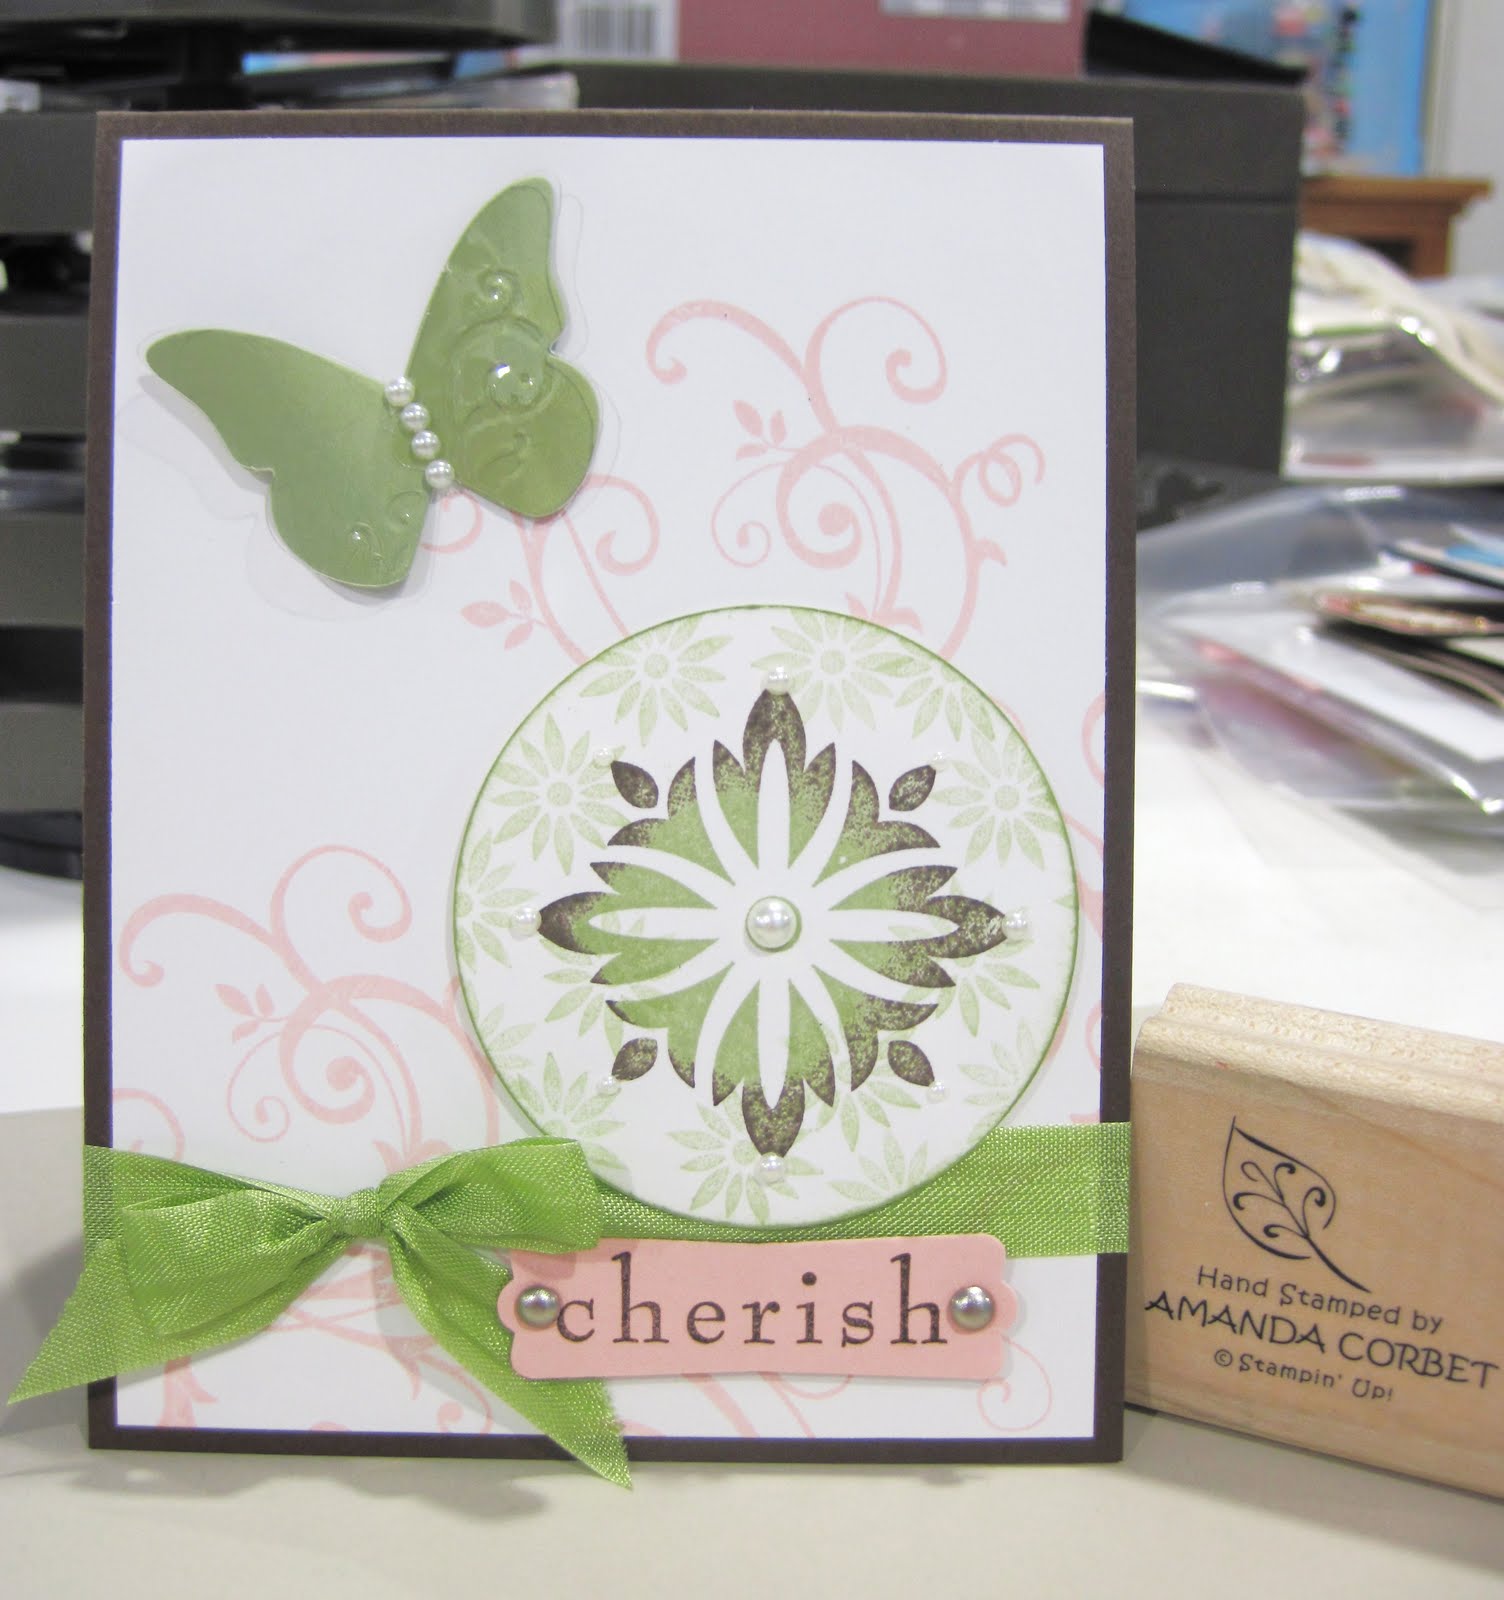
The next step was to cut out two butterflies using the Beautiful Wings Sizzlit in the Big Shot. One butterfly was cut from Pear Pizzaz cardstock and the second was cut from Acetate. I used a glue dot to adhere the acetate to the Pear Pizzaz butterfly then added four pearls for the butterfly’s body. The butterfly was adhered to the card front with a couple glue dots.

Stamps: Baroque Motifs
Cardstock: Early Espresso, Whisper White, Blushing Bride, Pear Pizzaz
Ink: Blushing Bride, Pear Pizzaz, Early Espresso
Accessories: Beautiful Wings Sizzlit, Silver Brads, Acetate, Pear Pizzaz Seam Binding ribbon, Basic Pearls Jewel Accents, 2 ½” Circle punch, Modern Label punch, Glue Dots
The card base is Early Espresso cardstock cut at 4 ¼” x 11” and scored at 5 ½”. Next a piece of Whisper White was cut at 4” x 5 ¼”. The swirls from Baroque Motifs were stamped twice onto the Whisper White cardstock in Blushing Bride ink and then this stamped cardstock was adhered to the card front. A piece of Pear Pizzaz Seam Binding ribbon was tied around the card front and into a bow.
The 2 ½” Circle punch was used to punch a circle from a scrap of Whisper White cardstock. The small flower was stamped all over the background of the circle by stamping off onto a scrap piece of paper before stamping onto my circle. Next I inked up the square image from Baroque Motifs first in Pear Pizzaz ink and then used the Rock-N-Roll technique with some Early Espresso ink and stamped it into the center of the circle. The edges of the circle were sponged with Early Espresso ink to make it stand out more on the card front. Pearls were added to decorate the square stamped image on all of the points (you can’t really see them well in the photo).The stamped circle was adhered to the card front with Stampin’ Dimensionals.
Next the greeting was stamped in Early Espresso ink on a scrap of Blushing Bride cardstock. The greeting was punched out with the Modern Label punch and the Needle tool and Mat pack were used to pierce holes for the brads. Two silver brads were added and the label was adhered to the card front with Stampin’ Dimensionals. The next step was to cut out two butterflies using the Beautiful Wings Sizzlit in the Big Shot. One butterfly was cut from Pear Pizzaz cardstock and the second was cut from Acetate. I used a glue dot to adhere the acetate to the Pear Pizzaz butterfly then added four pearls for the butterfly’s body. The butterfly was adhered to the card front with a couple glue dots.

Even though this isn’t the most current sketch there is no time limit on the sketch challenges. Feel free to participate whenever you get a chance! If you are a Stampin’ Up Demonstrator you can find the SCCSC63 sketch challenge thread HERE. If you are not a Stampin’ Up Demonstrator I would still love to see your creation. Please post a link to your project in the comments section of this post! Have fun stamping!