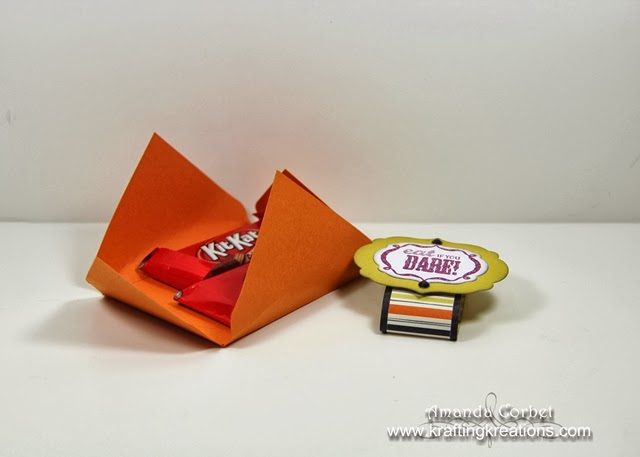
I wanted to make a fun candy pouch for Halloween. My Envelope Punch Board happened to be on the table and a light bulb went off. Why not use an envelope with just a belly band! So I started putting it together and in no time I was done! The Envelope Punch Board really did all the hard work.
- Stamps: Halloween Bash
- DSP: Witches' Brew
- Card Stock: Pumpkin Pie, Whisper White, Summer Starfruit
- Ink: Rich Razzleberry, Basic Gray
- Accessories: Envelope Punch Board, Rhinestones, Stampin' Dimensionals, Labels Framelits, Sticky Strip, Stampin' Sponge, black permanent marker
For the envelope I just cut a piece of Pumpkin Pie card stock 5-1/2" x 5-1/2" and followed the directions on the Envelope Punch Board for a 2-1/2" x 3-1/2" envelope.
To make the Belly Band I cut a two pieces of DSP. The striped DSP was 1" x 7" and the black DSP was 1-1/4" x 7". I adhered the DSP together, then added a piece of Sticky Strip on one end. I put two small Kit Kat bars inside my envelope and folded it closed then wrapped the DSP around the middle of the envelope and adhered the Sticky Strip end onto the other end of the DSP. This makes the belly band.
To decorate the Belly Band I stamped the greeting from Halloween Bash onto a scrap of Whisper White card stock in Rich Razzleberry ink. This was cut out with the smallest Labels Framelit. I used the second from smallest Labels Framelit on a scrap of Summer Starfruit card stock to cut out the larger label. I sponged both with Basic Gray ink and a Stampin' Sponge then adhered them together. I added the label onto the belly band with a couple Stampin' Dimensionals. Next I took a permanent marker and colored two large Rhinestones and added them onto the label.
This was a super fast and really fun little pouch for some spooky treats!


