
I know it's been a long time since I've posted and I apologize. Life has been very busy lately. I have so many wonderful projects to show you from some of the swaps I've made to the June Make and Take projects, and a tutorial! I just have to get the posts typed up. Well here is the tutorial I promised so long ago for the All A Flutter 2-5-7-10 box that my guests made at the May Make and Take.
All A Flutter Box:

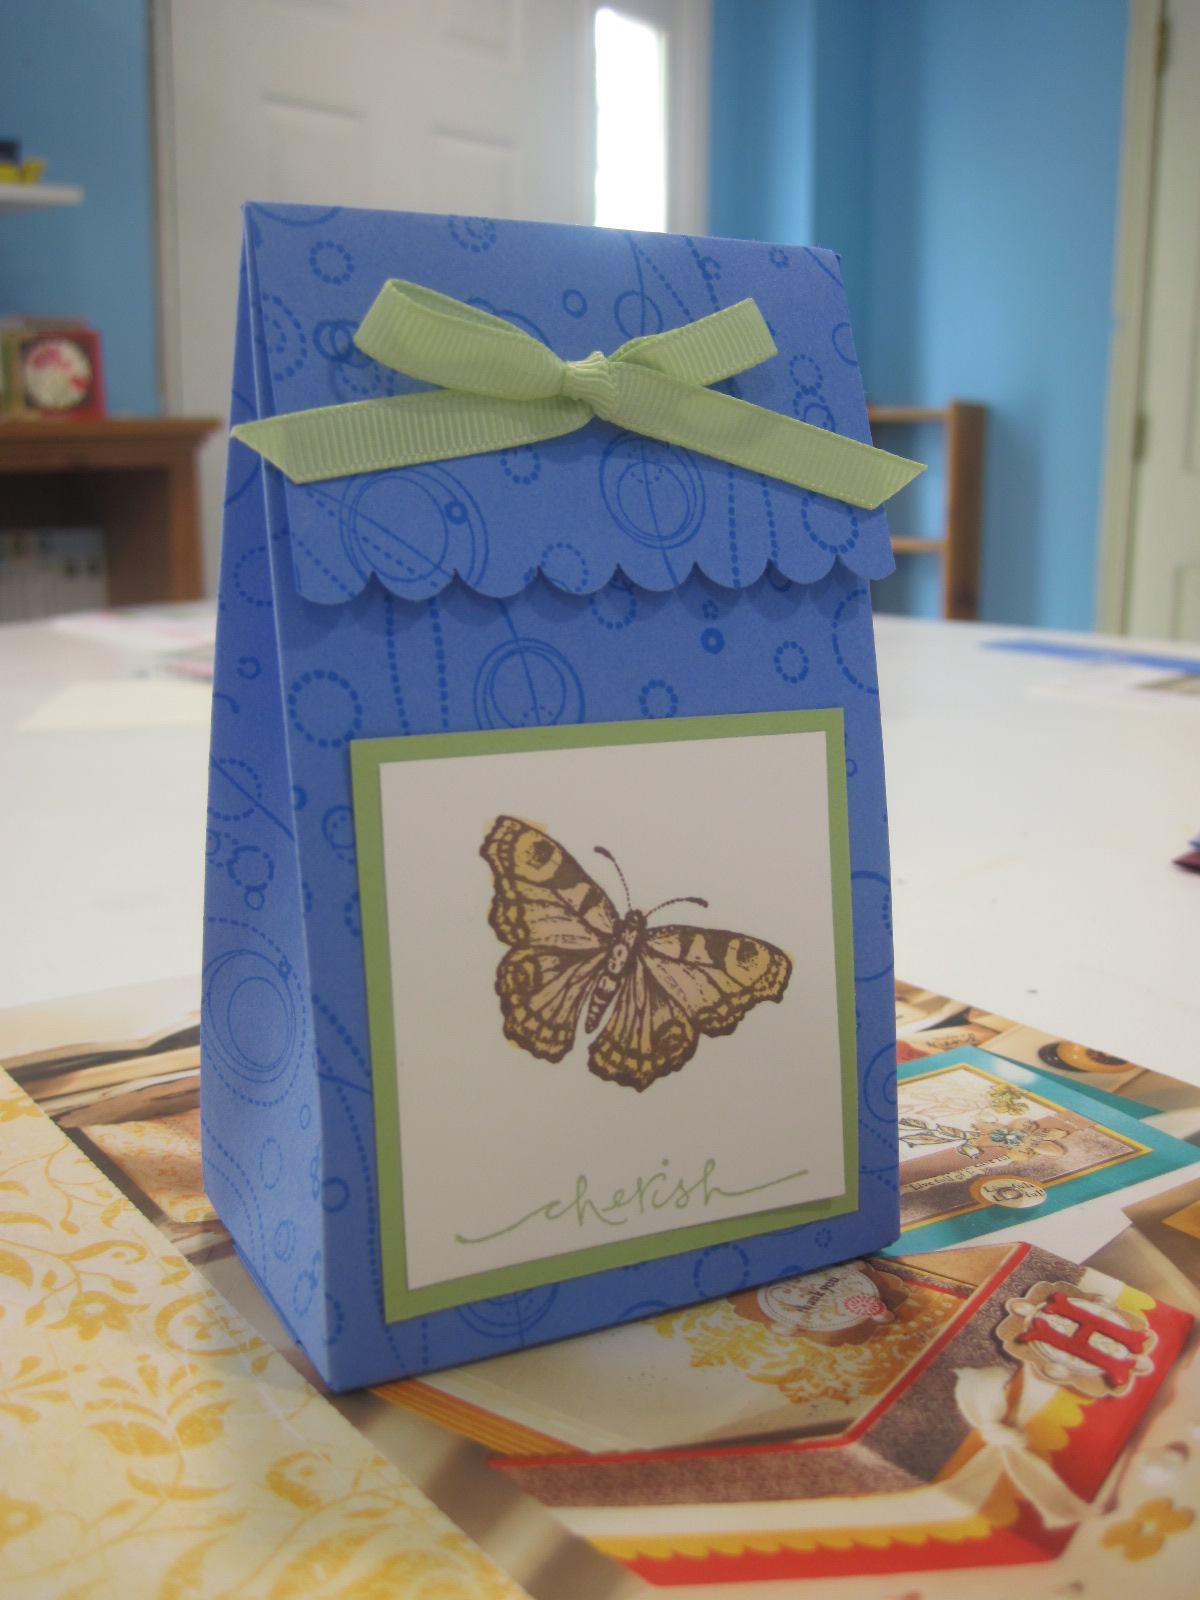
This is the final project that my guests made at the May Make & Take. It is a cute little box that would be great to put some candy in or jewelry or any other small gift and it’s easy to make!
Stamps: All A Flutter, Warm Words, Whimsy Jumbo Wheel
Cardstock: Ballet Blue (retiring June 30), Certainly Celery, Whisper White
Ink: Ballet Blue (retiring June 30), Timber Brown Stazon, Certainly Celery
Accessories: ¼” Certainly Celery Grosgrain Ribbon, Blush Blossom and Apricot Appeal markers, Hobby Blade, Jumbo Wheel Handle, Sticky Strip, Scor-Pal, Paper Snips, Scallop Edge Border Punch
I started off with an 8 ½” x 11” piece of Ballet Blue cardstock. With the 11” side of the cardstock along the top of the Scor-Pal score at 2”, 5”, 7”, and 10”. Turn the cardstock so that the 8 ½” side is along the top of the Scor-Pal and score at 2” and 7”. Use the Whimsy Jumbo Wheel with a large Ballet Blue ink cartridge to stamp the cardstock making your own patterned paper. Use the Paper Snips to cut the cardstock along the score lines in the locations shown in the picture below.

Add Sticky Strip to the 1” wide flap along the side on the stamped side of the cardstock as shown in the photo above.

Add Sticky Strip to the edge of one of the flaps on the bottom edge on the side of the cardstock that is not stamped as shown in the photo above.
Use the Scallop Edge Border Punch to punch the edge of the remaining tab at the top.
This is optional. I forgot to do this when taking the pictures for this tutorial, but the sample at the top shows what it looks like with the scallop edge on the flap of the box.
Fold the cardstock on all the score lines. Remove the liner from the sticky strip on the 1” side flap and adhere the sides together with the 1” flap on the inside.


On the bottom of the box fold in the small flap and the large flap without the adhesive, remove the liner from the Sticky Strip and adhere to the box bottom.


At the top of the box use your fingers to pinch in the sides while squeezing the front of the box to the back of the box.


While holding the box closed, use a hobby blade to cut two slits through both the lid of the box and the front of the box. Set aside.

The image panel is Whisper White cardstock cut at 2 1/4" x 2 1/4". Stamp the butterfly from All A Flutter in Timber Brown Stazon on the cardstock leaving room at the bottom for your sentiment. Stamp the sentiment from Warm Words in Certainly Celery ink at the bottom of the panel. Color in the butterfly using the Blush Blossom and Apricot Appeal markers. This image panel is then adhered to a piece of Certainly Celery cardstock cut at 2 1/2" x 2 1/2". This is then adhered to the front of the box.
Thread your ¼” Certainly Celery Grosgrain ribbon through the slits on the inside of the box and then through the slits in the lid. Tie in a bow to keep the box closed and trim the ends. You’re done!
You now have a cute box to use to give someone special a small gift. These would also work great as party favors! Thanks for stopping by! Come back tomorrow to see a card that I made for the Summer Mini Swap on Stampin Connection!
All A Flutter Box:
This is the final project that my guests made at the May Make & Take. It is a cute little box that would be great to put some candy in or jewelry or any other small gift and it’s easy to make!
Stamps: All A Flutter, Warm Words, Whimsy Jumbo Wheel
Cardstock: Ballet Blue (retiring June 30), Certainly Celery, Whisper White
Ink: Ballet Blue (retiring June 30), Timber Brown Stazon, Certainly Celery
Accessories: ¼” Certainly Celery Grosgrain Ribbon, Blush Blossom and Apricot Appeal markers, Hobby Blade, Jumbo Wheel Handle, Sticky Strip, Scor-Pal, Paper Snips, Scallop Edge Border Punch
I started off with an 8 ½” x 11” piece of Ballet Blue cardstock. With the 11” side of the cardstock along the top of the Scor-Pal score at 2”, 5”, 7”, and 10”. Turn the cardstock so that the 8 ½” side is along the top of the Scor-Pal and score at 2” and 7”. Use the Whimsy Jumbo Wheel with a large Ballet Blue ink cartridge to stamp the cardstock making your own patterned paper. Use the Paper Snips to cut the cardstock along the score lines in the locations shown in the picture below.

Add Sticky Strip to the 1” wide flap along the side on the stamped side of the cardstock as shown in the photo above.

Add Sticky Strip to the edge of one of the flaps on the bottom edge on the side of the cardstock that is not stamped as shown in the photo above.
Use the Scallop Edge Border Punch to punch the edge of the remaining tab at the top.
This is optional. I forgot to do this when taking the pictures for this tutorial, but the sample at the top shows what it looks like with the scallop edge on the flap of the box.
Fold the cardstock on all the score lines. Remove the liner from the sticky strip on the 1” side flap and adhere the sides together with the 1” flap on the inside.


On the bottom of the box fold in the small flap and the large flap without the adhesive, remove the liner from the Sticky Strip and adhere to the box bottom.


At the top of the box use your fingers to pinch in the sides while squeezing the front of the box to the back of the box.


While holding the box closed, use a hobby blade to cut two slits through both the lid of the box and the front of the box. Set aside.

The image panel is Whisper White cardstock cut at 2 1/4" x 2 1/4". Stamp the butterfly from All A Flutter in Timber Brown Stazon on the cardstock leaving room at the bottom for your sentiment. Stamp the sentiment from Warm Words in Certainly Celery ink at the bottom of the panel. Color in the butterfly using the Blush Blossom and Apricot Appeal markers. This image panel is then adhered to a piece of Certainly Celery cardstock cut at 2 1/2" x 2 1/2". This is then adhered to the front of the box.
Thread your ¼” Certainly Celery Grosgrain ribbon through the slits on the inside of the box and then through the slits in the lid. Tie in a bow to keep the box closed and trim the ends. You’re done!
You now have a cute box to use to give someone special a small gift. These would also work great as party favors! Thanks for stopping by! Come back tomorrow to see a card that I made for the Summer Mini Swap on Stampin Connection!