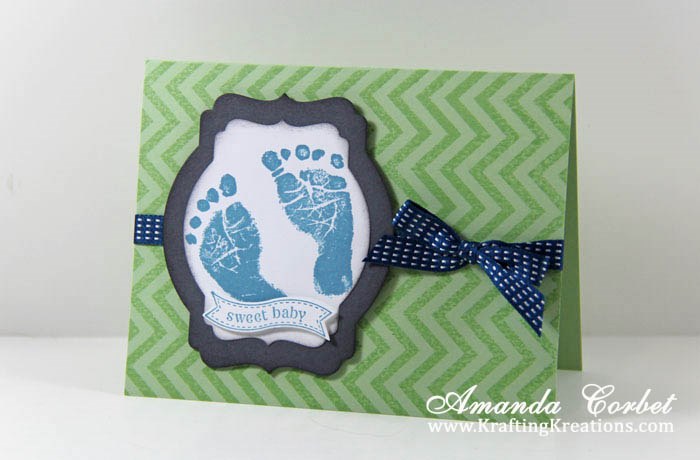
Every spring I usually have just one baby card for those that need one. I make the design simple enough that it could easily be changed out to work for both a boy or a girl. I only made the boy version as a sample since I know someone who is having a little boy, but the girl version with Regal Rose ink and Primrose Petals ribbon was equally as cute. The green chevron background and Basic Gray made a great gender neutral background. So here are the instructions so you can make your own version!
Fold the Pistachio Pudding card stock on the score line. Stamp the Positively Chevron background image onto the card front in Pistachio Pudding ink for a nice tone-on-tone effect. Wrap the ribbon of choice around the card front and tie it into a bow.
Next stamp the feet from Baby Prints onto the Whisper White card stock in Marina Mist (or Regal Rose) ink. Cut out the image with the 2nd from smallest Deco Labels Framelit so it looks like the feet are at an angle. Use the 3rd from smallest Deco Labels Framelit on the piece of Basic Gray card stock. Use a Stamping Sponge and sponge Basic Gray ink around the edge of both labels. Use some glue stick to glue the labels together, then stick the labels onto the card front with a couple Stampin' Dimensionals.
Next stamp the greeting from Itty Bitty Banners onto a scrap of Whisper White card stock in Marina Mist (or Regal Rose) ink. Use the coordinating Bitty Banner Framelit to cut out the greeting in the Big Shot then stick it onto the label just under the feet with a dimensional that was cut in half.
To add some pattern to the inside I stamped the feet again in Marina Mist ink in one of the bottom corners.
That's it! A cute baby card ready for giving congratulations!
- Pistachio Pudding card stock 5-1/2" x 8-1/2", scored at 4-1/4"
- Basic Gray card stock 3-1/4" x 3-3/4"
- Whisper White card stock 3-1/4" x 3-3/4"
- 22" Midnight Muse Stitched Satin Ribbon
- Stamps: Baby Prints, Itty Bitty Banners, Positively Chevron
- Ink: Pistachio Pudding, Marina Mist
- Accessories" Stamping Sponges, Stampin' Dimensionals, Deco Labels Framelits, Bitty Banners Framelits
Fold the Pistachio Pudding card stock on the score line. Stamp the Positively Chevron background image onto the card front in Pistachio Pudding ink for a nice tone-on-tone effect. Wrap the ribbon of choice around the card front and tie it into a bow.
Next stamp the feet from Baby Prints onto the Whisper White card stock in Marina Mist (or Regal Rose) ink. Cut out the image with the 2nd from smallest Deco Labels Framelit so it looks like the feet are at an angle. Use the 3rd from smallest Deco Labels Framelit on the piece of Basic Gray card stock. Use a Stamping Sponge and sponge Basic Gray ink around the edge of both labels. Use some glue stick to glue the labels together, then stick the labels onto the card front with a couple Stampin' Dimensionals.
Next stamp the greeting from Itty Bitty Banners onto a scrap of Whisper White card stock in Marina Mist (or Regal Rose) ink. Use the coordinating Bitty Banner Framelit to cut out the greeting in the Big Shot then stick it onto the label just under the feet with a dimensional that was cut in half.
To add some pattern to the inside I stamped the feet again in Marina Mist ink in one of the bottom corners.
That's it! A cute baby card ready for giving congratulations!


