
Here is the Monday sketch challenge…on Saturday. I’ve had these cards completed for a while, but I didn’t get a chance to post them. I’ve been very busy keeping up with work, chores, and school so please forgive me for my irregular posting. I have a bunch of wonderful projects to show you, if only I could find the time to post them all. The sketch challenge this week was created by Susie Nelson. Here is the sketch:

And here is my card:
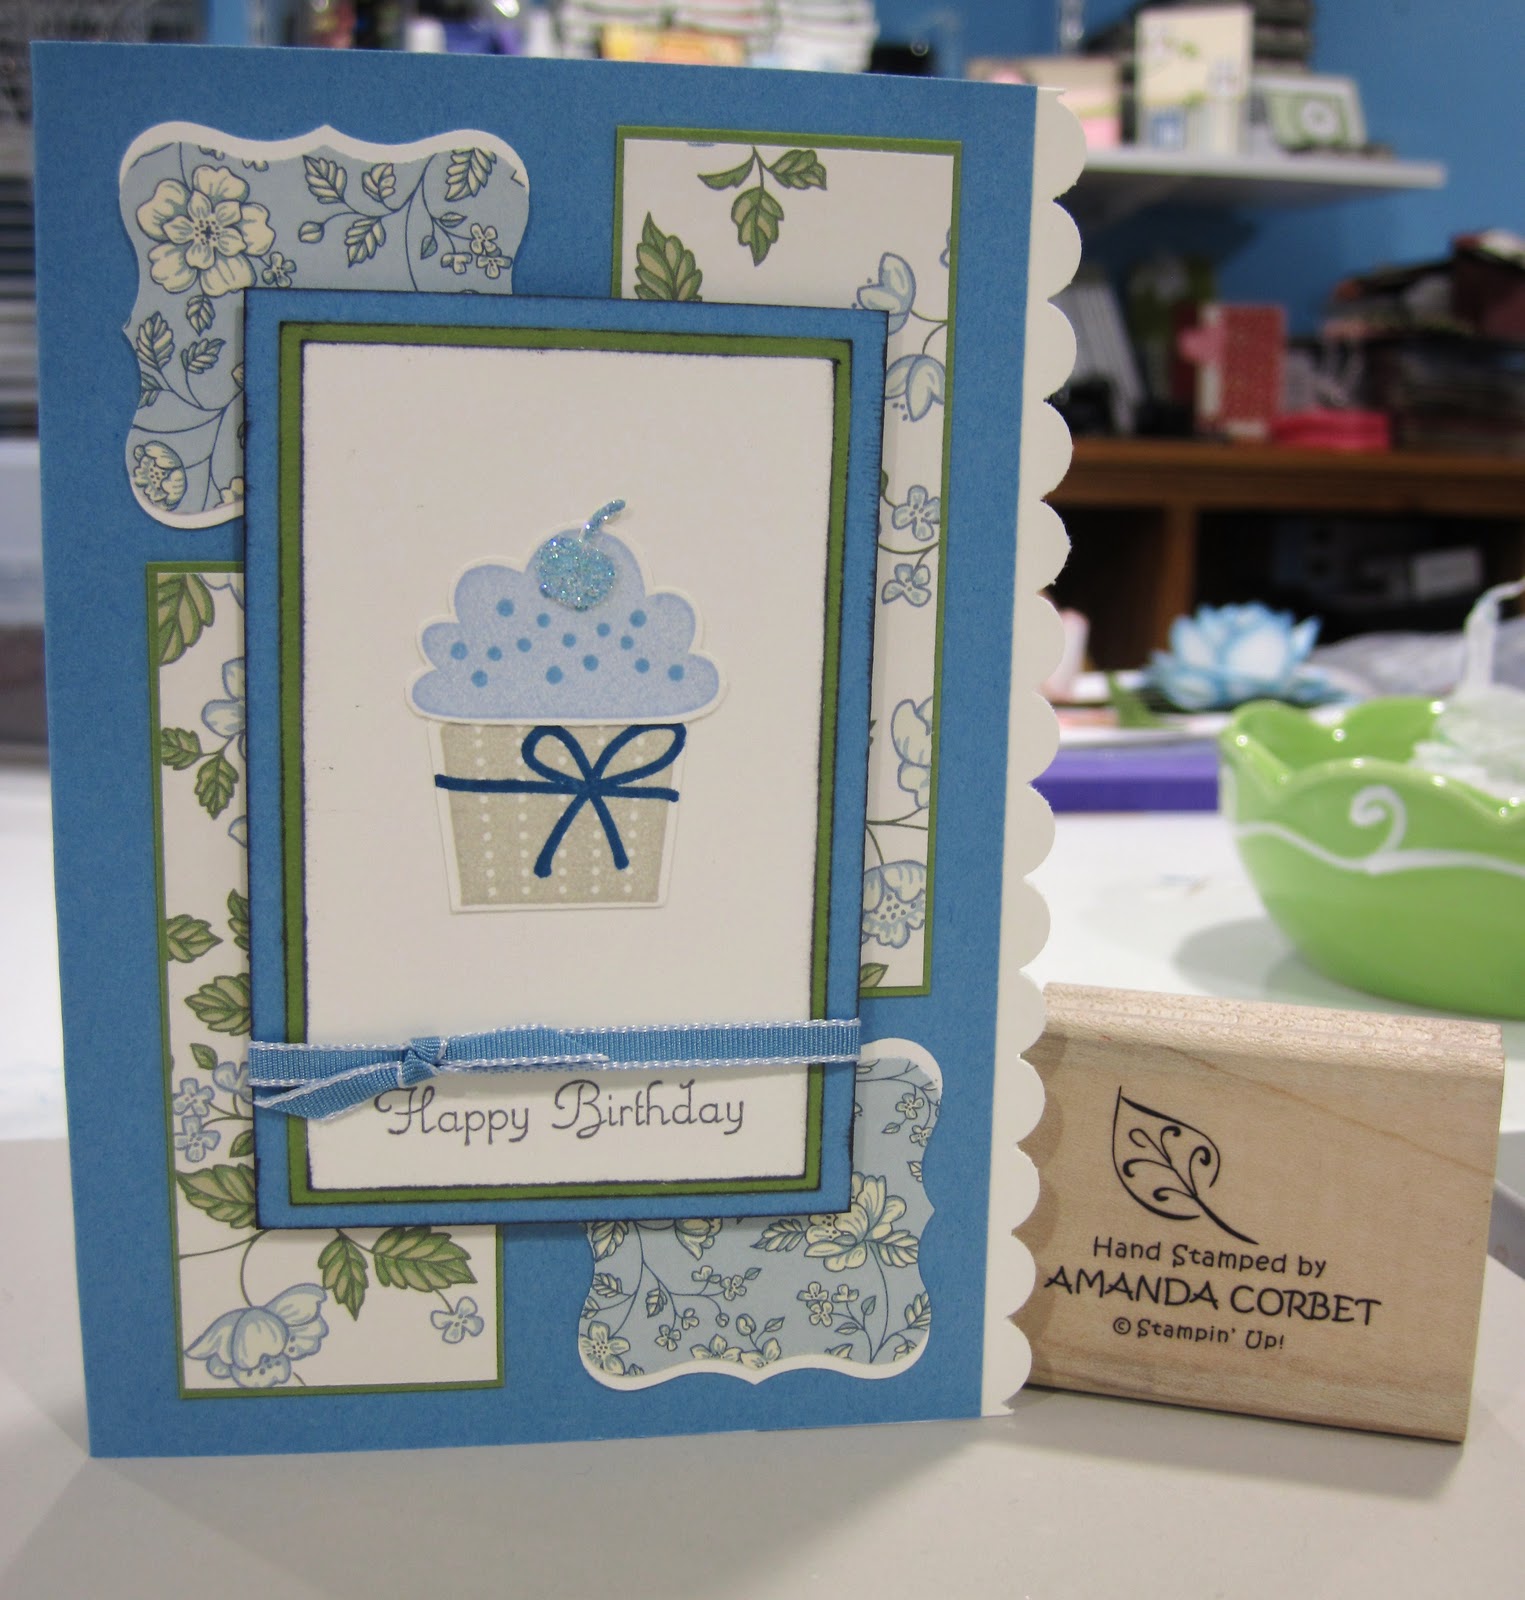
Stamps: Create A Cupcake
Cardstock: Marina Mist, Whisper White, Old Olive
DSP: Springtime Designer Series Paper
Ink: Marina Mist, Not Quite Navy, Bashful Blue, Crumb Cake, Basic Grey
Accessories: Build A Cupcake Punch, Dazzling Diamonds glitter, Tombow Multi-Purpose Adhesive, 1/8” Marina Mist Taffeta ribbon, Stampin’ Dimensionals, Curly Label Punch, Paper Snips, Scallop Edge Border Punch.
The card base is Marina Mist cardstock cut at 5 ½” x 8” and scored at 4 ¼”. The 4” portion of the cardstock will be your card front. I cut two pieces of Springtime DSP to 1 1/4" x 3 1/4" and adhered them each to a piece of Old Olive cardstock cut at 1 3/8" x 3 3/8". These two panels were adhered to the card front in the bottom left and upper right corners of the card front. A piece of Whisper White cardstock was cut at 1 1/2" x 5 1/2" and punched on one long side with the Scallop Edge Border Punch. This was adhered behind the card front along the opening edge so all you can see are the white scallops on the left side of the card front.
Another pattern of Springtime DSP was cut with the Curly Label punch twice to get two patterned curly labels. Also two curly labels were punched from Whisper White cardstock. The Whisper White curly labels were cut in half length-wise. The points that were in the middle of the side are snipped off and the two halves of the curly label are adhered behind the DSP curly label to create a mat. This was done on both DSP curly labels. The layered curly labels were adhered to the card front in the upper left and lower right hand corners.
A piece of Whisper White cardstock was cut at 2" x 3 1/4", a piece of Old Olive cardstock was cut at 2 1/8" x 3 3/8", a piece of Marina Mist cardstock was cut at 2 3/8" x 3 5/8", and the edges were run across the Basic Grey ink pad to add a little color to the edges. The three layers were adhered together. The greeting was stamped in Basic Grey ink on the bottom portion of the Whisper White cardstock and a piece of 1/8” Marina Mist Taffeta ribbon was tied around the layered panel and into a knot.
The cupcake bottom was stamped in Crumb Cake ink on a scrap of Whisper White cardstock then the bow was stamped in Not Quite Navy ink on top of the cupcake bottom. The cupcake top was stamped in Bashful Blue and the sprinkles were stamped in Marina Mist on the same Whisper White scrap. The two cupcake pieces were punched out with the Build A Cupcake punch and adhered to the Whisper White panel.
A cherry was stamped in Marina Mist ink on a scrap of Whisper White cardstock and punched out. Tombow Multi-Purpose Adhesive was spread across the entire cherry and Dazzling Diamonds glitter was added to make the blue cherry sparkly. After the adhesive dried the cherry was adhered to the top of the cupcake. Then the cupcake layered panel was adhered to the card front with Stampin’ Dimensionals.
This sketch was a little difficult to start out with, but I had a lot of fun deciding what things to use. I had so much fun making this card that I made a second card with this sketch. That one I will post later, so come back to see it!
If you are a Stampin’ Up Demonstrator you can find the sketch challenge thread here. If you are not a Stampin’ Up Demonstrator I would still love to see your creations. Please post a link to your card in the comments section of this post! Have fun stamping!