Monday, August 8, 2011

So Little Cake

 This card was created for the SCCSC79 sketch challenge on Stampin’ Connection.
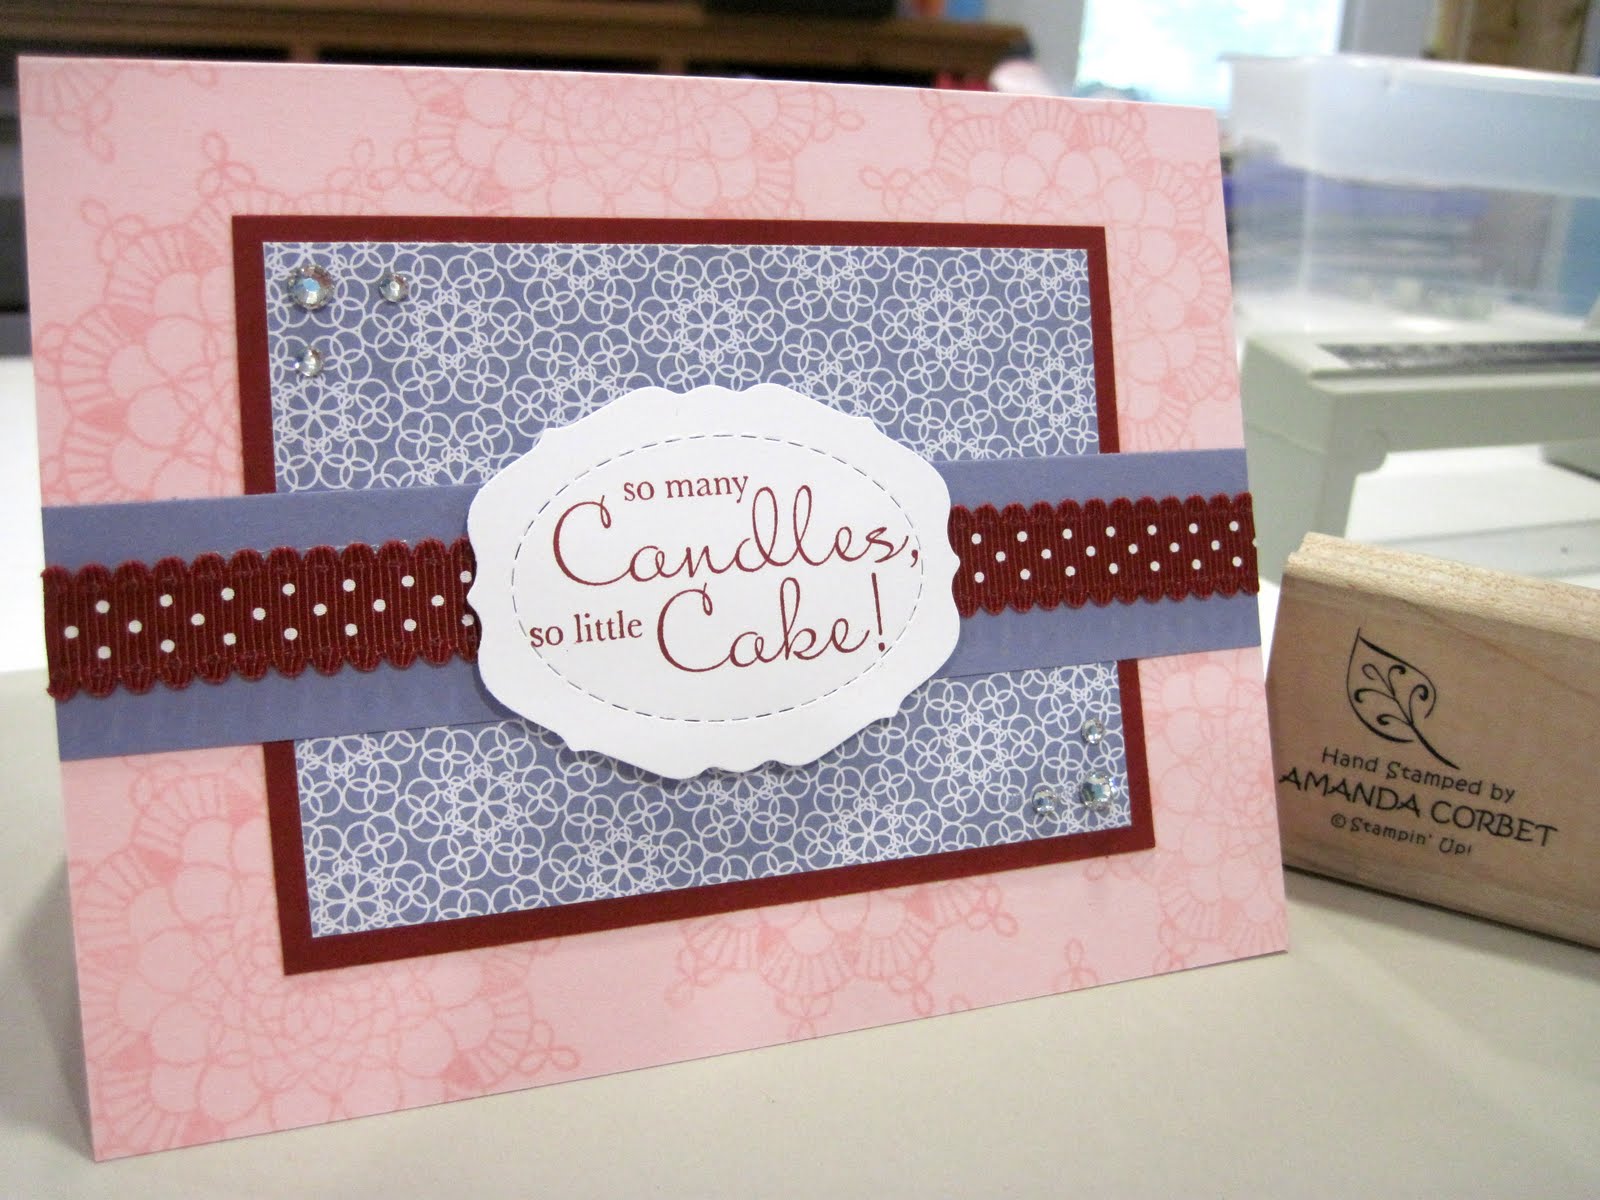

Stamps: Bring on the Cake, Delicate Doilies
Cardstock: Pink Pirouette, Cherry Cobbler, Whisper White, Wisteria Wonder
DSP: Flirtatious
Ink: Pink Pirouette, Cherry Cobbler
Accessories: Cherry Cobbler ½ Inch Scallop Polka Ribbon, Basic Rhinestones Jewel Accents, Lots of Tags Label 2, Stampin’ Dimensionals.

Here is the sketch that was created by Liz Goldhawk:

The card base is 5 ½” x 8 ½” Pink Pirouette cardstock that was scored at 4 ¼”. The card front was stamped with the Delicate Doilies stamp set in Pink Pirouette ink. This gives the card base a nice, yet simple pattern. Next a piece of Flirtatious DSP was cut at 2 ¾” x 3 ¾”. This was adhered to a 3” x 4” piece of Cherry Cobbler cardstock, and the panel was adhered to the card front.

A piece of Wisteria Wonder cardstock was cut at 1” x 5 ½” and was adhered to the card front. A piece of Cherry Cobbler ½ Inch Scallop Polka Ribbon was cut at 11”. Using Snail adhesive I adhered the end of the ribbon in the center of the Wisteria Wonder cardstock strip right where I want my label to go. The ribbon was wrapped around the card front and the other end was adhered to the Wisteria Wonder cardstock.

The label was cut in the Big Shot using Whisper White cardstock and the Lots of Tags Label 2 die. The greeting from Bring on the Cake was stamped in Cherry Cobbler cardstock and the label was adhered to the card front with Stampin’ Dimensionals. Three rhinestones were added to two of the corners of the DSP to add a little bling. Gotta love that bling!

That’s it. The color combo came from the Color Coach. It’s not one I would have come up with on my own, but it works.

If you are a Stampin’ Up Demonstrator you can find the sketch challenge thread HERE. If you are not a Stampin’ Up Demonstrator I would still LOVE to see your creations. Please post a link to your project in the comments section of this post!

Friday, August 5, 2011

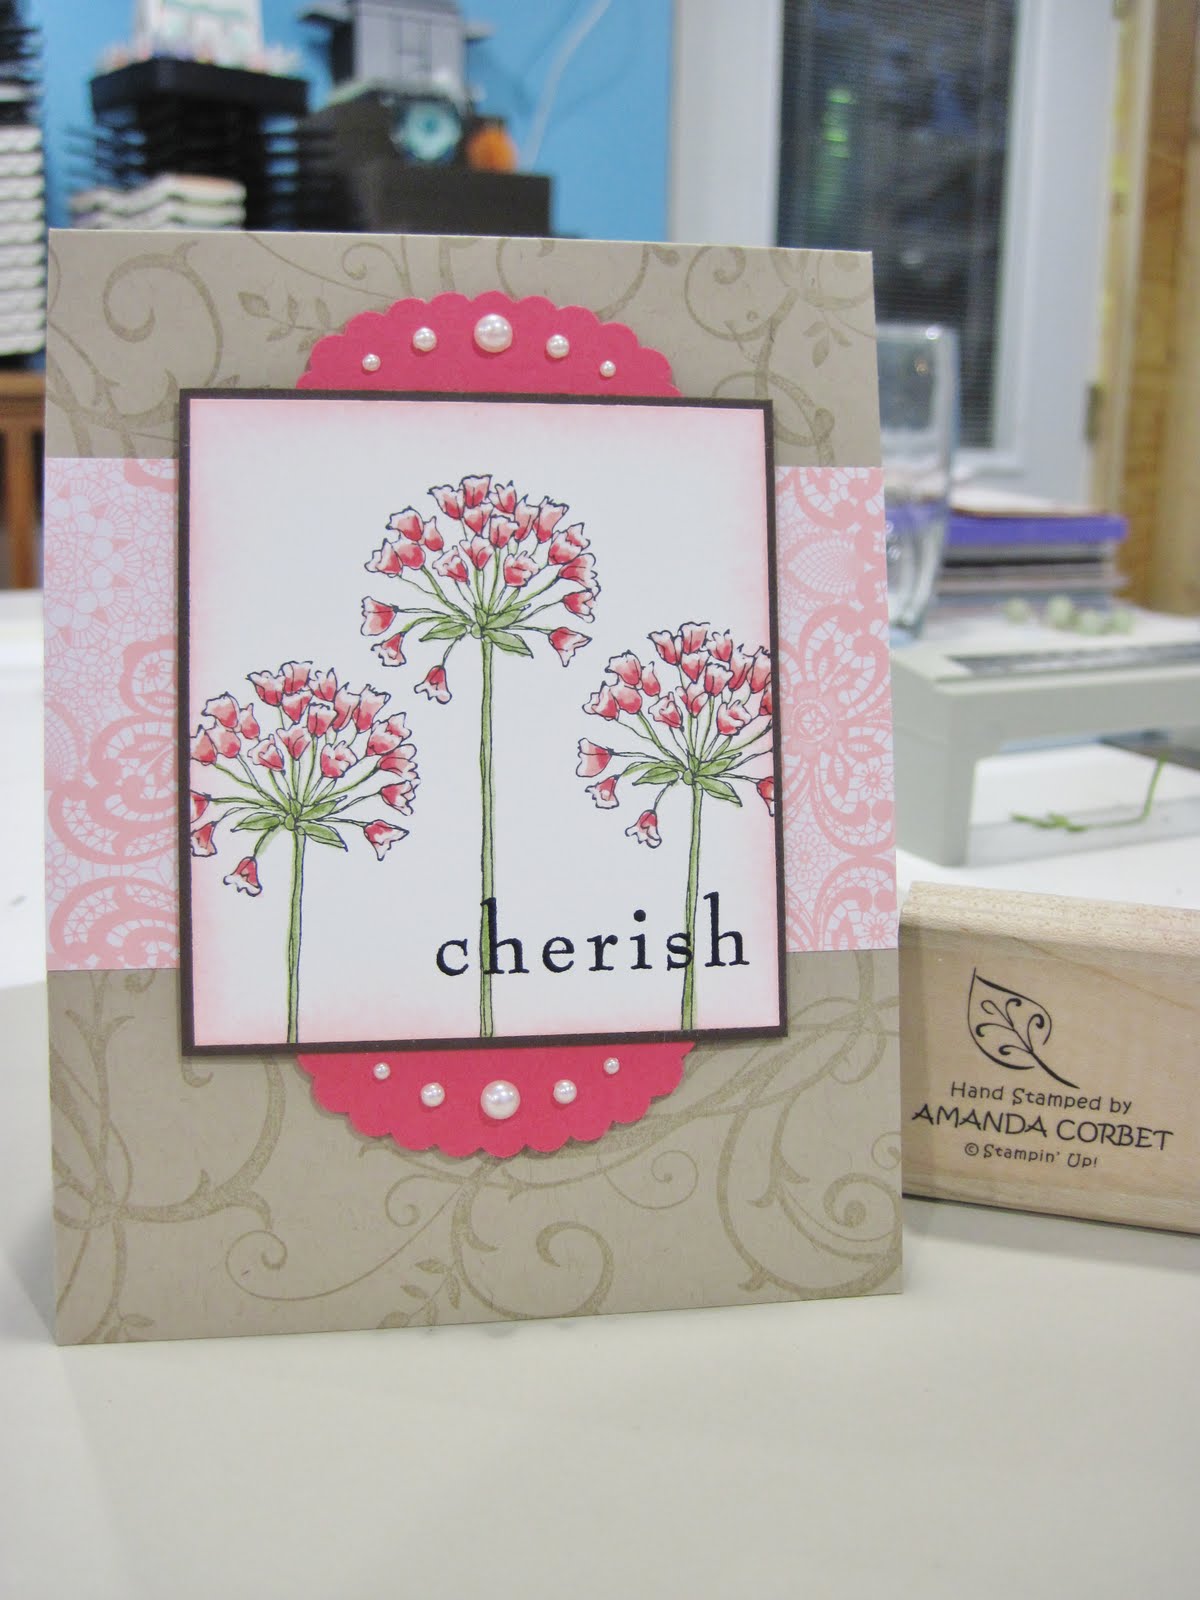
Simply Cherish

Today I have for you a sketch challenge! You know I just love sketch challenges! Well this one is over at Craft Project Central. They just started hosting a monthly sketch challenge. You can find the Creating Pretty Cards Sketch Challenge 2 HERE. Please take a look at the wonderful sketch!

Each week the designers for the month will pick their top two favorites. At the end of the month a winner is randomly chosen from those 8 favorites. The winner of the sketch challenge will win a $50 Stampin' Up shopping spree!!!! YAY! Free stuff!

The challenge closes at midnight August 30th, so hurry on over and take a look at the sketch...right after you see my card.


Stamps: Simply Soft (Hostess), Baroque Motifs
Cardstock: Crumb Cake, Whisper White, Early Espresso, Melon Mambo
DSP: Flirtatious Designer Series Paper
Ink: Crumb Cake, Pink Pirouette, Basic Black Craft, Black Stazon
Markers: Pink Pirouette, Blushing Bride, Melon Mambo, Pear Pizzaz, Lucky Limeade
Accessories: Scalloped Oval Punch, Black Embossing Powder, Embossing Buddy, Heat Gun, Stampin’ Dimensionals, Basic Pearls Jewel Accents, White Gel Pen, Stampin’ Sponge

The card base is Crumb Cake cardstock cut at 4 ¼” x 11” and scored at 5 ½”. The card front was stamped with the flourishes from Baroque Motifs in Crumb Cake ink to give the card a subtle background pattern. A piece of Flirtatious DSP was cut at 2 ½” x 4 ¼” and was then adhered to the card front.

A piece of Whisper White cardstock was cut at 2 7/8” x 3 1/8”. The flower from Simply Soft (Hostess) was stamped three times across the cardstock in Black Stazon ink. Next I colored in the flowers with the Pink Pirouette marker, colored the flowers again with the Blushing Bride marker without covering the Pink Pirouette completely. I repeated the last step with the Melon Mambo marker. The leaves and stems were colored in first with the Pear Pizzaz marker and shadows were added with the Lucky Limeade marker. Some White Gel Pen was used to add highlights to the very tops of the flowers.


After all that marker ink dries completely the edges of the cardstock were sponged with Pink Pirouette ink. The Embossing Buddy was used over the panel. Then the greeting from Baroque Motifs was stamped in Black Craft ink and Black Embossing Powder was added over the stamped image. The excess Embossing Powder was tapped off and the image was heated with the Heat Gun. This stamped cardstock panel was adhered to a piece of Early Espresso cardstock that was cut at 3” x 3 ¼”.

Two scalloped ovals were punched from Melon Mambo cardstock using the Scalloped Oval Punch. Each label was adhered behind the image panel with just half of the oval showing above and below the panel. Five Basic Pearls Jewel Accents were added to each of the scalloped circles to give the card a little bling. This panel was adhered to the card front with Stampin’ Dimensionals.

I hope you like my take on the sketch! Now go try it yourself and enter for a chance to win free Stampin’ Up goodies!

You can find the sketch challenge HERE.

Wednesday, August 3, 2011

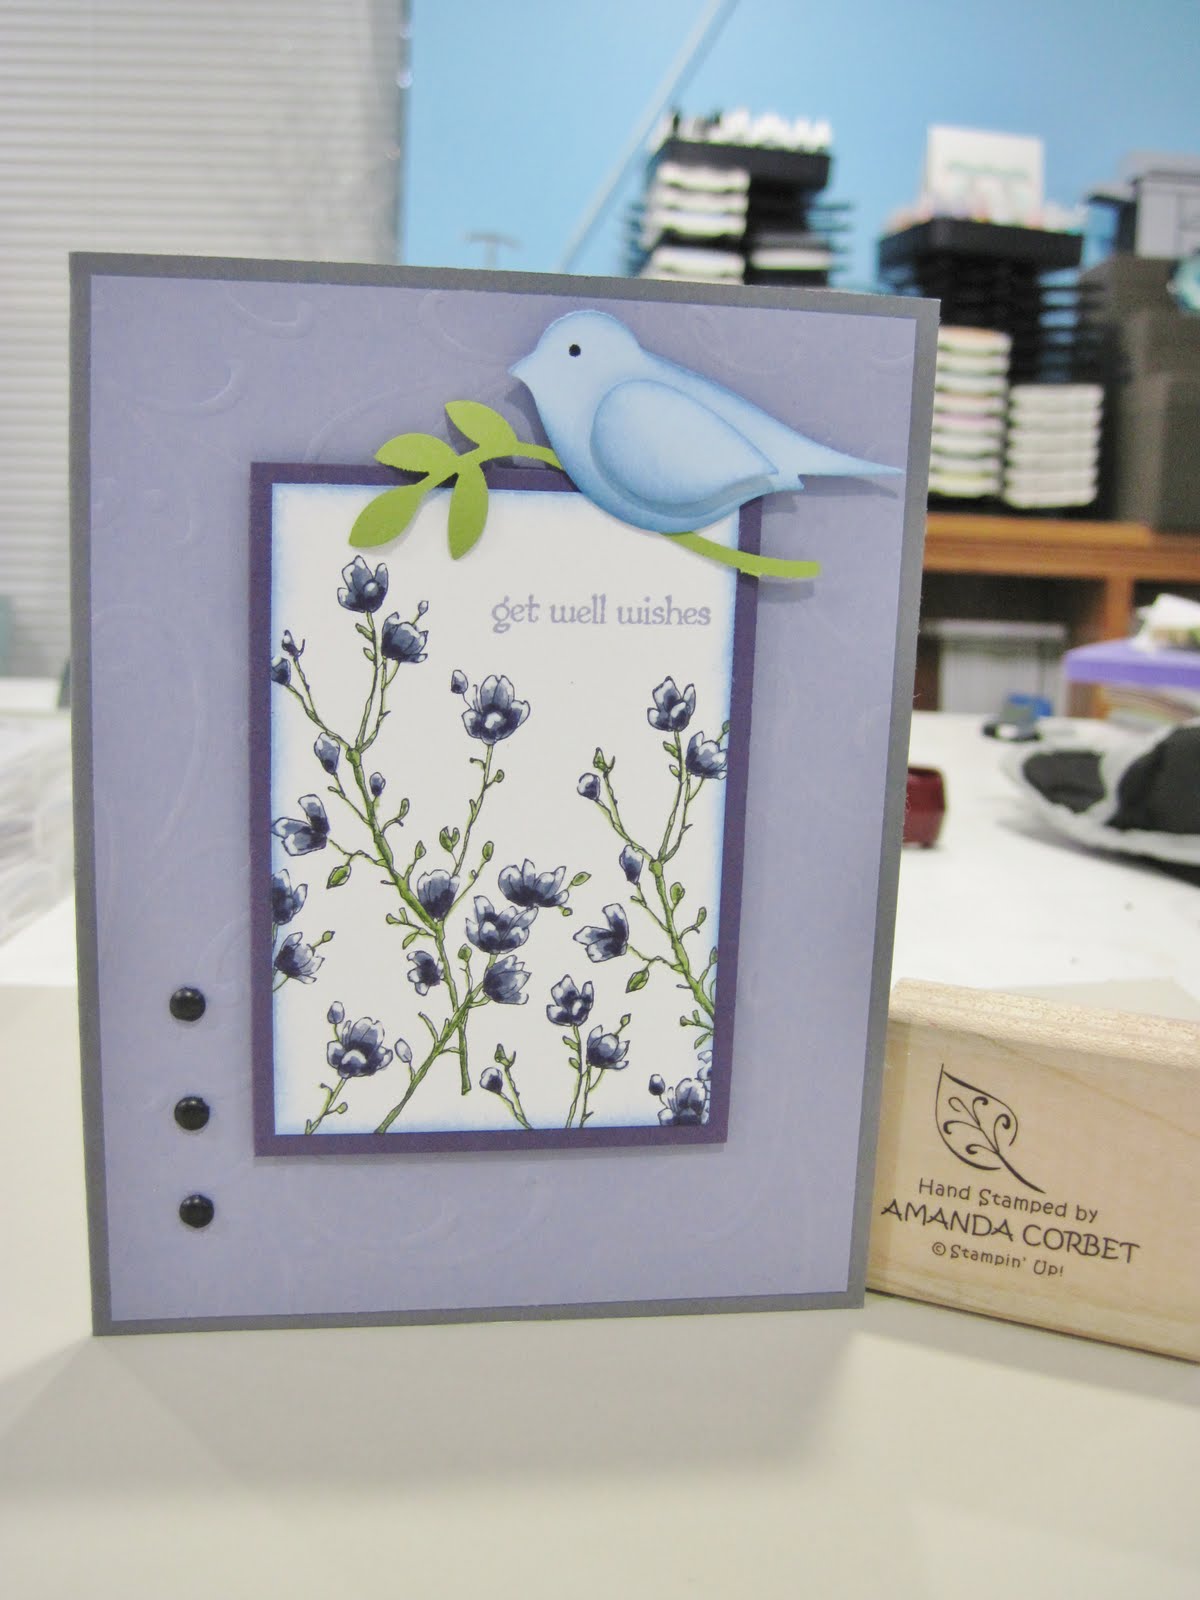
Wisteria Wishes

This card I created for the SCCSC78 sketch challenge on Stampin’ Connection. I just had to play with my new Hostess set Simply Soft.


Stamps: Simply Soft (Hostess), Teeny Tiny Wishes
Cardstock: Basic Grey, Wisteria Wonder, Elegant Eggplant, Whisper White
Ink: Black Stazon, Wisteria Wonder, Bashful Blue
Markers: Wisteria Wonder, Elegant Eggplant, Basic Black, Lucky Limeade, Always Artichoke
Accessories: Bird Punch, Sponge Dauber, Stampin’ Dimensionals, White Gel Pen, Perfect Details Texturz Plate, Needle Tool, Mat Pack, Black Brads

The sketch created by yours truly is here:


The card base is 5 ½” x 8 ½” Basic Grey cardstock that was scored at 4 ¼”. The next layer is a piece of Wisteria Wonder cardstock that was cut at 4” x 5 ¼” and run through the Big Shot on the Perfect Details Texturz Plate. This was adhered to the card front.

A piece of Whisper White cardstock was cut at 2 ¼” x 3 ¼”. The image from Simply Soft (Hostess) was stamped several times in Black Stazon ink. Stazon ink works perfectly for anything that you will be coloring in. It is a permanent ink that dries quickly and doesn’t bleed when you use the markers.

For the coloring I used Karen Barber's tutorial on Marker Layering just with two less colors. You can find Karen's fabulous tutorial HERE.

Next I colored in the flowers with the Wisteria Wonder marker, added shadows with the Elegant Eggplant marker, colored over the flowers again with the Wisteria Wonder marker to blend the colors, and finally added highlights with the White Gel Pen. The stems were colored in with the Lucky Limeade marker and shadows were added with the Always Artichoke marker. The greeting from Teeny Tiny wishes was stamped in the upper right hand corner of the panel in Wisteria Wonder ink. Then the edges of the panel were sponged with Bashful Blue ink.


The colored panel was adhered to a 2 ½” x 3 ½” piece of Elegant Eggplant cardstock and then the panel was adhered to the card front with Stampin’ Dimensionals. The Needle Tool and Mat Pack were used to pierce three holes in the lower left hand corner of the card front and three Black Brads were added.

Next I used the Bird Punch to punch out a bird and wing from Bashful Blue cardstock scraps and a branch from Lucky Limeade cardstock. The edges of the bird and wing were sponged with Bashful Blue ink and the bird’s eye was added with the Basic Black marker. The wing was adhered to the bird with a Stampin’ Dimensional. The branch was adhered to the back of the bird with the Two-Way Glue Pen, and then the bird was adhered to the card front with a Stampin’ Dimensional.

Now the card is done!

If you are a Stampin’ Up Demonstrator you can find the sketch challenge thread HERE. If you are not a Stampin’ Up Demonstrator I would still love to see what you create using this sketch! Please post a link to your creation in the comments section of this post!

Tuesday, August 2, 2011

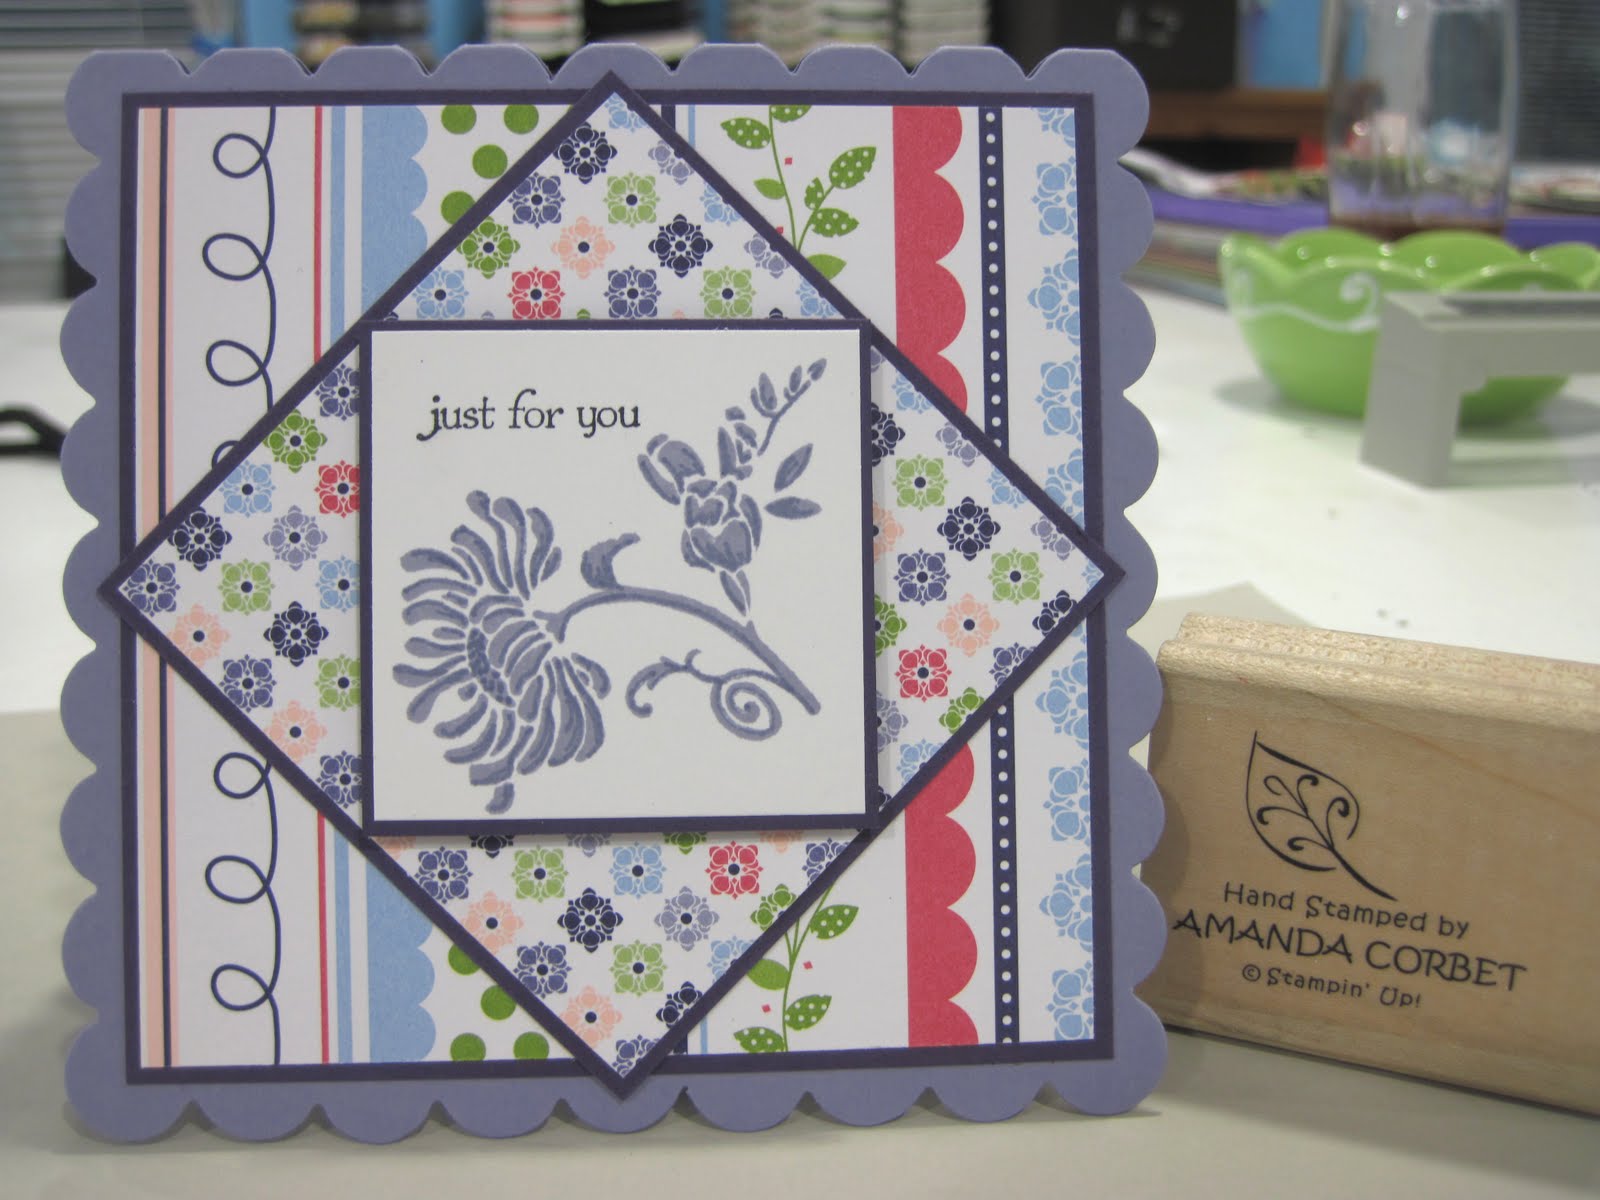
Cheerful Wonder

Today I have to share with you another sketch challenge! Yay! Ok here is the card that I created for the SCCSC77 Sketch Challenge on Stampin’ Connection:


Stamps: Friends Never Fade
Cardstock: Wisteria Wonder, Elegant Eggplant, Whisper White
DSP: Cheerful Treat (hostess)
Ink: Wisteria Wonder, Basic Black
Accessories: Scalloped Square Die, Wisteria Wonder Marker, Stampin’ Dimensionals

Here is the sketch created by Susie Nelson:


The card base is Wisteria Wonder cardstock cut at 4 ¾” x 9 ½”, scored at 4 ¾”. Place the folded cardstock on the Scalloped Square die very carefully. You want to make sure that on the fold side you don’t cut the entire scallop. This will leave just enough fold on the scallops to hold the card together. Run the Scallop Square die through the Big Shot to cut your card base.

A piece of Cheerful Treat DSP was cut at 3 ¾” x 3 ¾”. This was adhered to a 3 7/8” x 3 7/8” piece of Elegant Eggplant cardstock and was then adhered to the card front. Next another pattern from the Cheerful Treat DSP package was cut at 2 ¾” x 2 ¾” and was adhered to a 2 7/8” x 2 7/8” piece of Elegant Eggplant cardstock. This was adhered to the card front.

The Whisper White cardstock was cut at 1 7/8” x 1 7/8”. The image from Friends Never Fade was stamped in Wisteria Wonder ink. The Wisteria Wonder marker was used with the fine point to add some shadow lines to the stamped image. The greeting from Teeny Tiny Wishes was stamped onto the panel in Basic Black ink. This stamped Whisper White cardstock was adhered to a 2” x 2” piece of Elegant Eggplant cardstock. This layer was adhered to the card front with Stampin’ Dimensionals.


That’s it! This really was simple once I figured out the dimensions of the cardstock and DSP. Something like this would be super cute for invitations!

If you are a Stampin’ Up Demonstrator you can find the sketch challenge thread HERE. If you are not a Stampin’ Up Demonstrator I would still love to see what you create using this sketch! Please post a link to your creation in the comments section of this post!
Thanks for stopping by!


Monday, August 1, 2011

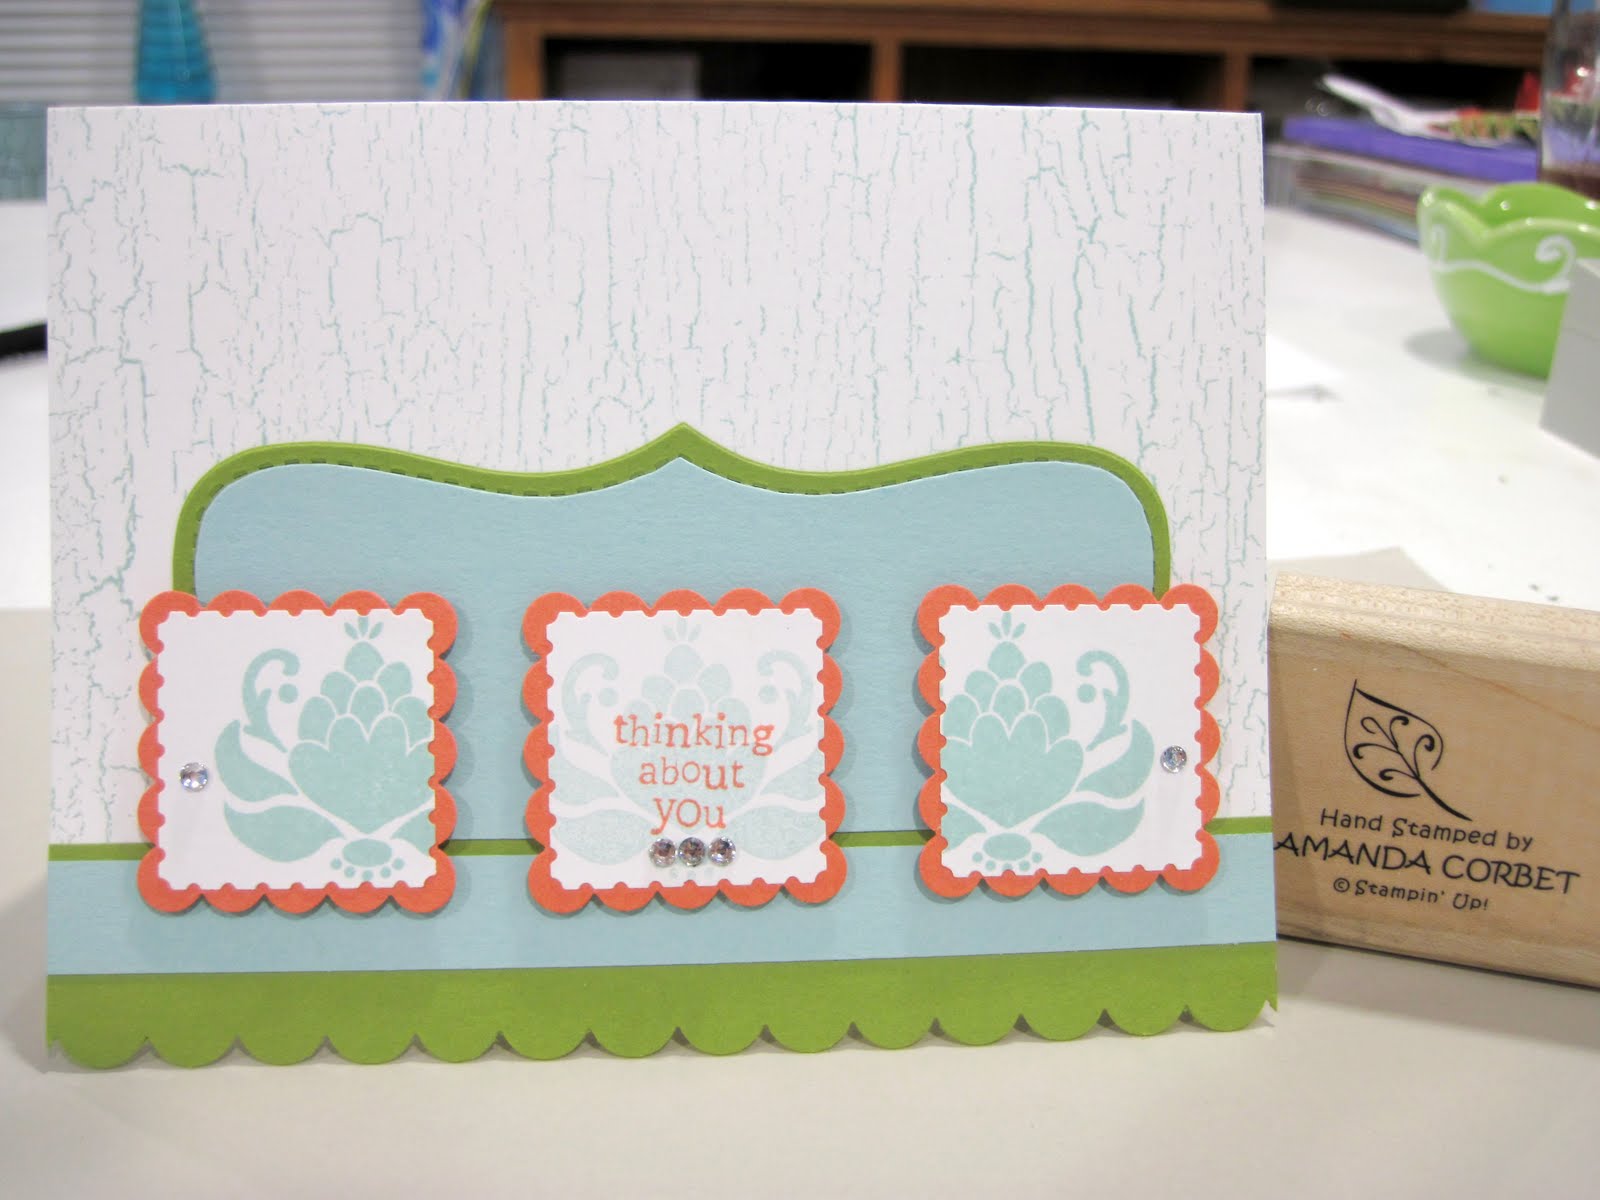
Weathered Ornate

I have another sketch challenge for you! It’s not that I haven’t done any challenges in a while, it’s just that I haven’t had time to type up the posts to share them with you. I’m hoping to get caught up with my posting soon. But anyway…here is the card that I created for the SCCSC76 Sketch Challenge on Stampin’ Connection:


Stamps: Friends Never Fade, Touch of Kindness, Weathered (retired)
Cardstock: Whisper White, Pool Party, Lucky Limeade, Calypso Coral
Ink: Pool Party, Calypso Coral
Accessories: Top Note Die, Scallop Square Punch, Postage Stamp Punch, Basic Rhinestones Jewel Accents, Stampin’ Dimensionals, Scallop Edge Border Punch

Here is the sketch that was created by Liz Goldhawk:


The card base is Whisper White cardstock cut at 5 ¼” x 8 ½” and scored at 4 ¼”. The card front will be the 4” wide side and the card back will be the 4 ¼” side. The card front was stamped with the Weathered (retired) background stamp in Pool Party ink. Next I cut a piece of Lucky Limeade cardstock 1 ¼” x 5 ½” long and used the Scallop Edge Border punch along one side. This was adhered to the bottom of the card front to line up with the edge of the back of the card. A piece of Pool Party cardstock was cut at ½” x 5 ½” and was adhered on top of the scallop edged Lucky Limeade cardstock.

Next a piece of Lucky Limeade and a piece of Pool Party cardstock were cut at 4” x 5” and run through the Big Shot on the Top Note die. I absolutely love this die! It is so versatile! I cut the two top notes in half length-wise on my paper trimmer. We only need on half of each of the top notes so the other half went into my scrap pile to be used on something else later. The Pool Party top note was trimmed along the dashed line with Paper Snips and was adhered to the Lucky Limeade top note. The top note panel was adhered to the card front just above the scallop edged Lucky Limeade edge.

The ornate blossom image from Friends Never Fade was stamped three times in Pool Party ink on a scrap of Whisper White cardstock. However, the third time the image was stamped I didn’t re-ink the image. This gives a much lighter stamped image and will allow the greeting to show up better. The greeting from Touch of Kindness was stamped in Calypso Coral ink on top of the lighter blossom.

All three blossoms were punched out with the Postage Stamp Punch. The Scalloped Square punch was used on a scrap of Calypso Coral cardstock to punch three scalloped squares. The postage punch images were adhered to the Calypso Coral scalloped squares. The squares were then adhered to the card front with Stampin’ Dimensionals. Then finally some Basic Rhinestones Jewel Accents were added to the squares to give the card a little sparkle.


I hope you’ve enjoyed my take on the sketch. I love the interesting layout that Liz provided us with. If you are a Stampin’ Up Demonstrator you can find the sketch challenge thread HERE. If you are not a Stampin’ Up Demonstrator I would still love to see what you create using this sketch! Please post a link to your creation in the comments section of this post!

Thanks for stopping by!


Blog Candy Winner!!!!!

This post is a little later than intended, but it was a busy weekend. Anyway....The winner of the blog candy that was posted HERE. Is............drum roll..........

Kelly

Congratulations Kelly! You won a FREE August subscription to Craft Project Central! I will contact you later today with all the details.


Thanks to everyone who played!