Friday, March 8, 2013

Ribbons and Pearls Friday Mashup 100

It’s Friday again! This week at the Friday Mashup we’re having a celebration! It’s the 100th challenge this week! So not only do we have a fabulous challenge, but you can even win a $25 Stampin’ Up Gift Certificate for playing along with the challenge. This week we get to pick our favorite past Mashup challenge to feature. There are so many choices it’s really hard to pick one. I decided to go with Mashup #7 Which mashes up creating a feminine card with ribbons and pearls. I am truly a girly girl at heart and I love bling and ribbon! So this challenge was right up my alley. 
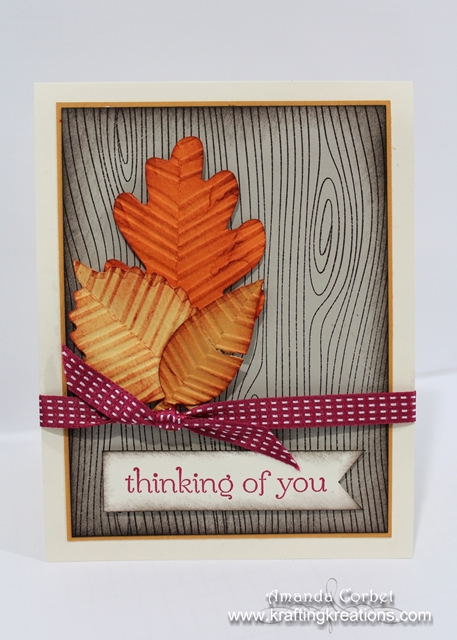
Take a look at the card I made.


  • Stamps: Everyday Elegance (retired), Papillion Potpourri
  • DSP: Tea For Two
  • Card Stock: Very Vanilla, Calypso Coral, Chocolate Chip
  • Ink: Calypso Coral, Chocolate Chip, Versamark
  • Accessories: Heat Tool, Pewter Embossing Powder, Delicate Doilies Sizzlit, Pearls, 7/8” Flower Trim, 5/8” Very Vanilla Satin Ribbon (retired), Stampin’ Dimensionals, Bird Punch, Finishing Touches Edgelits, Blushing Bride Smooch Spritz, Stampin’ Sponge, Paper Snips, Glue Dots, Multipurpose Liquid Adhesive, Apothecary Accents Framelits, 2-Way Glue Pen


So here is the "Mashup" Challenge:

1. Make a project using "Your Favorite Challenge 1-99".
2. or Tell us what you like about the Challenge You picked!
3. or Link up for a Chance to win a "$25 Stampin' Up! Gift Certificate". 

I started off by cutting a piece of Very Vanilla card stock 4-1/4” x 11” and scored it at 5-1/2”. Next I cut a piece of Calypso Coral card stock 3-1/2" x 5-1/2" and ran it through the Big Shot twice to cut both long edges with the Finishing Touches Edgelit. Next I cut a piece of Tea for Two DSP 2-7/8" x 5-1/2" and adhered it onto the Calypso Coral card stock. This was adhered to the card front then I sprayed the card front with some Blushing Bride Smooch Spritz to add some shimmer. This color of smooch is retired, but you can still get it on the Clearance Rack if you hurry!

Next I cut a piece of Chocolate Chip card stock 3-1/2" x 3-1/2" and ran it through the Big Shot on my Delicate Doilies Sizzlit. I adhered this onto the right side of the card front with Stampin’ Dimensionals. I stamped the greeting from Everyday Elegance onto a scrap of Very Vanilla card stock in Chocolate Chip ink, then added the butterfly in Calypso Coral ink. I cut out the greeting with my Apothecary Accents framelit and bejeweled it with several Pearls before adhering the label onto the doily with Stampin’ Dimensionals.


The leaves punched from the bird punch and the embossed butterfly with the pearls were sitting in my scrap bowl. If I make an element or have extra punched pieces I toss them into a bowl that I leave on my table so I can use them on other projects. This keeps me from wasting perfectly good pieces.

I use a 2-Way Glue Pen to adhere the two branches on the bottom of the doily. Then I cut three flowers from the fabulous new 7/8” Flower Trim in the Spring Catalog. I took a sponge with some Calypso Coral ink and dabbed it on the Very Vanilla flowers to give them some color then I adhered the blossoms onto the doily with some Multipurpose Liquid Adhesive. Finally I wrapped a piece of 5/8” Very Vanilla ribbon around the card front and tied it into a bow then used a Glue Dot to adhere the butterfly onto the card front.


I am so happy with how this card came out! Lots of lovely little details that add up to one truly girly birthday card!

Head on over to the Friday Mashup to see what the rest of the design team has created, and don’t forget to enter your project for a chance to win that $25 gift certificate! 


Thursday, March 7, 2013

Fall Thinking of You

This is a card from the November Make and Take. I just HAD to make one with leaves! It was a requirement! Take a look.


  • Stamps: Sweet Essentials, Woodgrain
  • Card Stock: Very Vanilla, More Mustard, Sahara Sand, Pumpkin Pie, So Saffron
  • Ink: Early Espresso, Raspberry Ripple, Cajun Craze
  • Accessories: Paper Snips, Autumn Accents Die, Woodgrain embossing folder, Stampin’ Sponge, Raspberry Ripple Stitched Satin ribbon, Stampin’ Dimensionals, Multipurpose Liquid Adhesive


I started by cutting a piece of Very Vanilla card stock 4-1/4” x 11” and scored it at 5-1/2”. Next I cut a piece of Sahara Sand card stock 3-5/8” x 4-7/8”. I stamped the Woodgrain background image onto the Sahara Sand card stock in Early Espresso ink. Then I used a Stampin’ Sponge to sponge Early Espresso ink around the edges of the card stock. I adhered this onto a 3-3/4” x 5” piece of More Mustard card stock then adhered it onto the card front.


I cut a piece of Pumpkin Pie card stock 2-1/4” x 2-1/4”, a piece of So Saffron card stock 1-3/4” x 2-1/4”, and a piece of More Mustard card stock 1-1/2” x 2”. I ran these through the Big Shot on the Autumn Accents die the folded the leaves in half and ran them through the Big Shot again in the Woodgrain embossing folder. Then I simply opened up the leaves and lightly sponged on some Cajun Craze ink. I adhered the leaves together in a cluster with Mulitpurpose Liquid Adhesive then adhered the cluster of leaves onto the card front with Stampin’ Dimensionals.


Next I cut a piece of Very Vanilla card stock 3/4” x 3” and stamped the greeting from Sweet Essentials onto the card stock in Raspberry Ripple ink. I used Paper Snips to cut a dove-tail in one end of the strip and sponged around the edges with Early Espresso ink. I used Stampin’ Dimensionals to adhere this piece onto the card front. Finally I wrapped the card front in a piece of Raspberry Ripple Stitched Satin ribbon and tied it into a knot. 


Wednesday, March 6, 2013

Give Thanks!

This is a post I typed up last October, but never got around to posting. So, even though it's not current, I though I would still share it with you.

When fall rolls around and the leaves start falling from the trees you know the holidays are soon to come. During the holidays you spend time with family and friends, enjoying each other’s company and the season. Not to mention good food to. But it also makes me think more about the things I’m thankful for like my wonderful husband, our home, our family, our puppies, and the list could go on.  It’s a nice time to stop and be thankful for the little things that life has to offer. Like seeing the bright colors of leaves on the trees… 


and time just playing with the dogs. 


So when coming up with the projects for the October Make and Take I thought it was important to include a fall inspired thank you card. So my guests and I would have the perfect card to show someone you are thankful for them and what they do.  I found THIS fabulous card by Cheryl at Love to Stamp and Scrap and cased it almost exactly.


  • Stamps: Gently Falling, Seasonal Sayings
  • Card Stock: Very Vanilla, Early Espresso, Old Olive, Cajun Craze, More Mustard
  • Ink: Old Olive, Cajun Craze, More Mustard, Early Espresso
  • Accessories: Summer Starfruit Stitched Satin Ribbon, Stampin’ Sponge

For the card base I cut a piece of Very Vanilla card stock 5-1/2” x 8-1/2” and scored it at 4-1/4”. Next I cut a piece of Early Espresso card stock 4” x 5-1/4”. Then I cut one piece of each Old Olive, Cajun Craze, and More Mustard 1-1/8” x 3-1/2”. I stamped the leaves onto each panel in the coordinating color ink. For the solid images I inked up the stamped and stamped it off on a piece of scrap paper before stamping onto the card stock. This gives a lighter image in the same color. The leaf outlines were stamped on top of the solid images. Then I sponged around the edges of each panel in the same ink color.

Next I adhered the strips onto the top of the Early Espresso card stock. To get the strips spaced evenly adhere the outside strips first, then you can center the middle strip between the two.

For the greeting I cut a piece of Very Vanilla card stock 1-1/2” x 3-3/4”. I stamped the greeting from Seasonal Sayings onto the card stock in Early Espresso ink and then adhered this onto the bottom of the Early Espresso card stock.

 
Then I cut a piece of Summer Starfruit Stitched Satin ribbon, wrapped it around the Early Espresso card stock and tied it into a knot. I adhered this panel onto the card front and that’s it! It takes a little time to stamp and sponge the three different colored panels, but the finished product is so worth the effort!

What are you thankful for this fall? 


Tuesday, March 5, 2013

Candy Cane Holder

I’ve made these cute candy cane holders before at my upline’s make and take several years ago, but I had a specific request to do these again. They are so easy and fun. They would look really cute tied onto a gift and could even double as a gift tag!

  • Stamps: Mixed Medley
  • Card Stock: Early Espresso, Gumball Green
  • DSP: Be of Good Cheer
  • Ink: Cherry Cobbler, Garden Green
  • Accessories: Two Tags die, Sticky Strip, 3/16” Corner Punch, Real Red Stitched Grosgrain ribbon, 1/8” Real Red Taffeta ribbon, candy cane, 1-1/4” Scalloped Circle punch, 3/4” Circle punch, Stampin’ Dimensionals

I started off by cutting a piece of Early Espresso card stock 3” x 4-3/4”. I ran this through the Big Shot on the Two Tags die to cut out the larger tag. Next I cut a piece of Gumball Green card stock 1-5/8” x 2-1/2” and a piece of Be of Good Cheer DSP 1-3/8” x 2-1/4”. I used the 3/16” Corner punch on the top two corners of the Gumball Green card stock and DSP pieces. I adhered the DSP onto the Gumball Green card stock. Then I applied Sticky Strip onto the top and bottom on the back of the Gumball Green layer. Now simply remove the Sticky Strip liner and adhere it onto the shorter section of the tag. Fold the tag on the score line.

Now place your candy cane in the fold of the card stock and tuck the end of the short tab inside the slit at the top of the tag. Now take a piece of Real Red Stitched Grosgrain ribbon. Wrap it around the tag tightly and tie it into a knot. This will help hold the tag close if the card stock slips out of the slot.


I stamped the medallion image onto a scrap of Gumball Green card stock in Garden Green ink and punched it out with the 1-1/4” Scalloped Circle Punch. Next I stamped the greeting circle onto a scrap of Very Vanilla card stock in Cherry Cobbler ink. I punched this out with the 3/4” Circle punch and adhered it onto the center of the Gumball Green scalloped circle. I adhered this onto the tag with a Stampin’ Dimensional. Finally I added a length of 1/8” Real Red Taffeta Ribbon through the hole in the top of the tag and tied it into a knot. This makes a great ornament or gift tag.

The candy canes I chose were Mint Chocolate flavored. I chose them because I loved the color combo and knew it would look great with Early Espresso, Cherry Cobbler, and Gumball Green. Is that crazy? Maybe…


Monday, March 4, 2013

Oh Whale!

Good morning! I've been wanting to use this absolutely adorable stamp set and coordinating Clearlit from the Spring Catalog for a while now and this week’s Friday Mashup challenge was just perfect for it! Take a look!

 
  • Stamps: Oh Whale,  Sweet Essentials
  • DSP: Polka Dot Parade
  • Card Stock: Pool Party, So Saffron, Whisper White
  • Ink: Pool Party, So Saffron
  • Accessories: Happy Whale Clearlit Die, Sycamore Street Ribbon, Stampin’ Dimensionals, Rhinestones, Paper Snips, Scallop Trim Border Punch.


So here is the "Mashup" Challenge:

1. Make a project for a "Baby Shower or a Baby".
2Or Make a project using the Colors "Pool Party, Real Red, So Saffron & a Neutral".
3. Or "Mash it Up" and create a project for a "Baby/Shower using the Colors listed above".


I started off by cutting a piece of Pool Party card stock 4-1/4” x 11” and scored it at 5-1/2”. Next I cut a piece of So Saffron card stock 3-1/4" x 4". I punched one 4" long edge with the Scallop Trim Border Punch. Next I cut a piece of Real Red Polka Dot Parade DSP 2-3/4" x 4" and adhered it onto the So Saffron card stock. I adhered this layer onto the bottom of the card front with some Stampin’ Dimensionals. Then I wrapped a piece of Pool Party ribbon from the Sycamore Street Ribbon and Button pack (that you can still get for FREE during Sale-A-Bration) around the card front and tied it into a knot.


I stamped the whale from Oh Whale onto a scrap of Whisper White card stock in So Saffron ink. Then I used the Clearlit die to cut out the whale. There are some other fun shapes that the die cuts at the same time, but the clear window in the die lets you perfectly center your stamped whale before cutting it out. So easy! I stamped the alphabet spray in Pool Party ink on the top of the card front where I wanted my whale to go. Then I adhered the whale onto the card with a Stampin’ Dimensional and added a small Rhinestone for the whale’s eye.


I stamped the greeting from Sweet Essentials onto a 1/2” x 3" piece of Whisper White card stock in Pool Party ink. I cut the left side of the strip into a dove-tail shape and adhered the banner onto the top of the card front.

I love these bright fun colors together! Thanks Liliana for the fun color challenge!  Stop by the Friday Mashup to see what the rest of the design team has created! 


Friday, March 1, 2013

Rustic Christmas Card

Well, this is the last Christmas card that my Make and Take ladies made in 2012. I wanted to squeeze in several products from the Holiday catalog that I had not used yet. This rustic Christmas card is what I ended up with. I was also inspired by THIS card created by Leena at A La Cards.  


  • Stamps: Evergreen, Seasonal Sayings
  • Card Stock: Crumb Cake, Old Olive, Very Vanilla, Cherry Cobbler, Early Espresso Core’Dinations
  • Ink: Versamark, Crumb Cake, Early Espresso
  • Accessories: Sanding Block, Apothecary Accents Framelits, Snow Flurry die, Lacy Brocade embossing folder, Stampin’ Dimensionals, Gold embossing powder, Embossing Buddy, Heat Tool, Paper Piercer, Stampin’ Pierce Mat, Gold brads

I started off with a piece of Crumb Cake card stock cut at 5-1/2” x 8-1/2” and scored it at 4-1/4”. Next I cut a piece of Early Espresso Core’Dinations card stock 4” x 5-1/4”. I ran the Early Espresso card stock through the Lacy Brocade embossing folder then used the Sanding Block to sand the raised texture and reveal the lighter inside core of the card stock. I adhered this piece onto the card front.

Now for the greeting panel. I cut a piece of Very Vanilla and a piece of Old Olive 3-1/2” x 5-1/2” and ran them both through the Big Shot with the Apothecary Accents Framelit. I stamped the solid tree image from Evergreen onto the right side of the Very Vanilla label in Crumb Cake ink. Then I stamped the line tree image in Early Espresso ink on top of the solid image. I stamped the greeting from Seasonal Sayings onto the left side of the label in Versamark ink. I covered the stamped image with Gold embossing powder, tapped off the excess, and heated it with the Heat Tool.


Next I took Paper Snips and cut the Old Olive in half length-wise from point to point. I adhered each half of the label behind the Very Vanilla label and then used the Paper Snips to trim off the points of the Old Olive card stock that extended past the edge of the Very Vanilla card stock.

I wanted to add some snowflakes onto the card and give it a pop of red so I cut a piece of Cherry Cobbler and Crumb Cake I ran these through the Big Shot on the Snow Flurry die to cut the medium snowflake from Cherry Cobbler and the smallest snowflake from Crumb Cake card stock. I layered the snowflakes on top of each other and on the corner of the label and used the Paper Piercer and Stampin’ Pierce mat to pierce a hole in the center of the snowflake. I added a Gold brad into the hole and spread the prongs on the backside of the label. I adhered the label onto the card front with Stampin’ Dimensionals.

A lot of layers and Big Shot cutting, but overall not too difficult to make. What do you think?